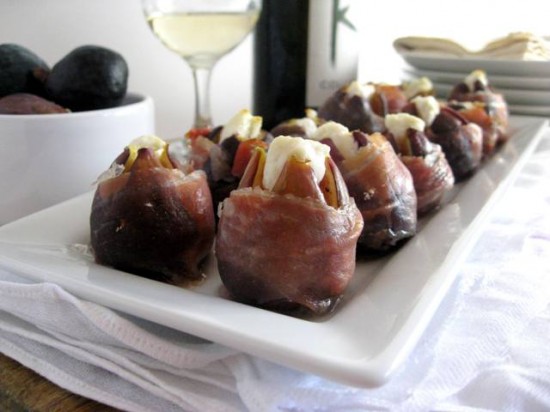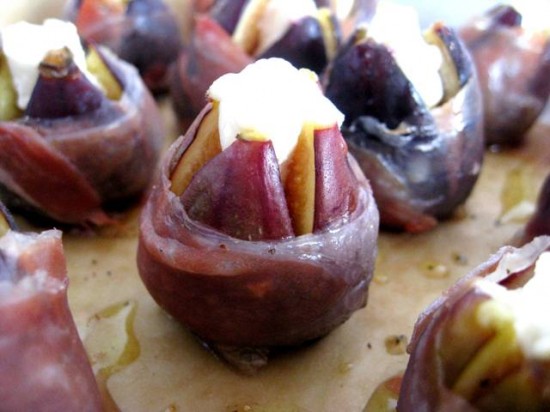
Figs with Proscuitto & Goats CheesePrint Recipe


You would know by now I am fig obsessed, just like I am anchovy obsessed – but I tend to hide my anchovies and use them for their salty flavour. With figs it is different – they are very much the hero of whatever ‘fig’ dish I seem to make, whether it be a salad or a cheesecake – there is beauty in their sensual little forms.

And where do I begin with this gorgeous combination of flavours? It’s an obvious one and a much loved one. With figs resplendid in their sweet earthiness, paired with a creamy goats cheese and a crisped, salty proscuitto – a true taste sensation.

I tend to make these when we have people over for ‘drinks’. Drinks can mean a number of things in our household – from a quick beer through to a night long event of good wine and conversation (and maybe a little dancing if the mood is right). So it’s always nice to have some substantial nibbles prepared. Consider them a light tapas.

Ingredients
16 small – medium sized figs(ripe but not overly)
4 ounces parma proscuitto, sliced thinly (around 8 slices)
4 ounces goats cheese
1 tablespoon olive oil
freshly ground black pepper

Preheat your oven to 180/350.

Cut the figs crosswise from the top, two thirds of the way down the fruit and gently separate the quarters to create an opening.

Divide the goats cheese into 16 peices and place into the opening in the fig, then halve the prosciutto lengthwise and wrap each stuffed fig with slice of prosciutto.

Arrange figs in a baking pan and drizzle lightly with olive oil. Bake in oven until prosciutto begins to crisp and cheese is slightly coloured, about 20 – 25 minutes. Remove from the oven, grind a little black pepper over and serve.

Notes: there are many variations on this little number – some of the better ones include a drizzle of honey and few sprigs of rosemary. I like mine as is – I think the flavours of the ingredients compliment each other beautifully and don’t need any further enhancement.

Posted in Fruit, Nibbles & hors d'oeuvres, Sides, Starters | Leave a comment

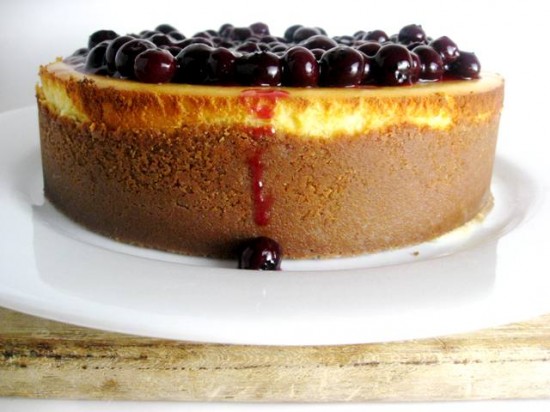
New York Cheese CakePrint Recipe

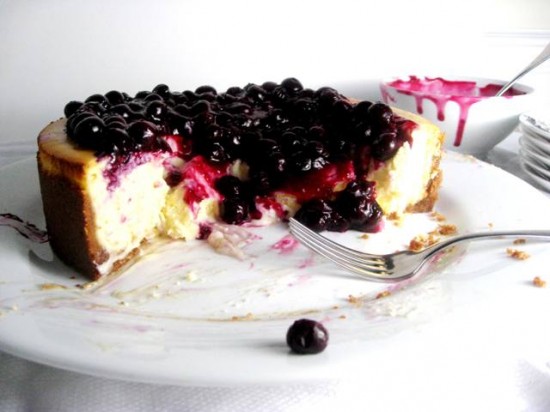
It was Mr Man’s birthday yesterday and we intended to have a big celebration – we had just arrived home from vacation and were not counting on the hurricane that whipped the wind and rain around us, keeping us housebound for the entire day. With no markets open, we rustled up what we could and marinated/cooked/baked and flambeed to celebrate his young 34 years.

The chocolate extravaganza I planned fell by the wayside and I had to make do with the large amount of cream cheese I purchased at Costco a couple of weeks ago -hence this cheesecake.

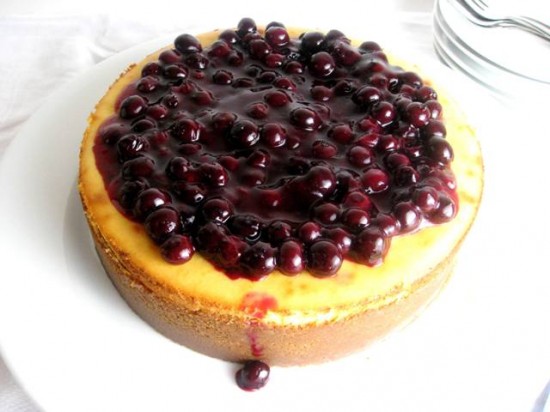
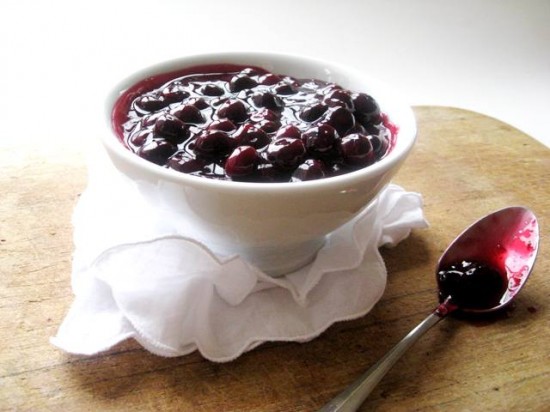
In true New York style, it is big and bold and spectacular. I covered it in a blueberry compote which added a nice touch and cut through the thickness/richness of the cream cheese.

In my rush to move it to the serving platter (enroute to the birthday boy) I cracked it – so we didn’t bother with pieces and just ate it straight off the plate. Happy Birthday Mr Man!

Base
226 grams/8 ounces Graham Crackers (or a similar plain biscuit), finely ground
113 grams/4 ounces unsalted butter, melted
1/3 cup sugar
1/4 teaspoon salt

Filling
5 x 226 grams/8 ounce packages cream cheese, softened
1 3/4 cups sugar
3 tablespoons all-purpose flour
1 teaspoon finely grated lemon zest (approx 1 large lemon)
1 teaspoon finely grated orange zest (approx 1 large orange)
5 large eggs
2 large egg yolks
1 teaspoon vanilla

Topping
10 ounces blueberries
2 tablespoons lemon juice
1/4 cup sugar
1 teaspoon cornstarch
1/2 cup water

Base
Stir together crust ingredients and press onto bottom and up the sides of a 9″ springform pan. Refrigerate until filling is ready.

Filling
Preheat oven to 500c. Beat together cream cheese, sugar, flour and zest until smooth. Add vanilla, then eggs and yolks, one at a time, beating on low speed until all ingredients are fully combined.

Pour filling into crust (your pan will be completely full) and bake in the middle of the oven for 12 minutes or until puffed. Then reduce the temperature to 200c and continue baking until cake is mostly firm (center will still jiggle when pan is gently shaken), for about one hour more.

Run a knife around the top edge of the cake to loosen it and cool the cake completely in springform on a rack, then chill it, loosely covered, at least 6 hours. Cover with topping if you desire.

Topping
Place all ingredients together in a medium saucepan. Bring to a boil. Once it is boiling, cook it for an additional 3 to 5 minutes to thicken, then remove from heat. Cool completely before spreading over the top of your cheesecake.

Source: Adapted from Gourmet

Posted in Cakes, Desserts, Fruit, Morning Teas/High Teas | Leave a comment

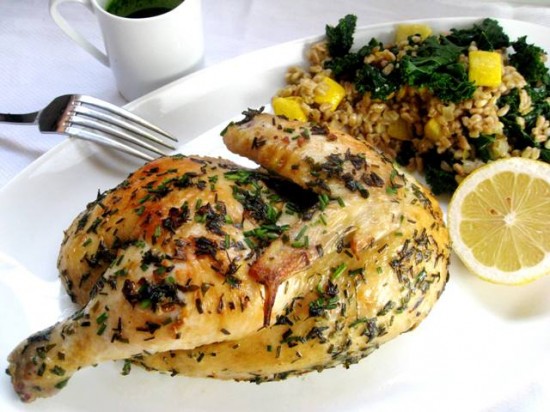
Skillet-Roasted Chicken with Farro and Herb PistouPrint Recipe


I was meant to be packing for our vacation last night but instead I cooked this. You think I might have chosen something alot less time consuming but no! I had to sweat it out over an oven and a stove for several hours. Just because…

Actually, there may be a reason – I am on a bit of a roast chicken roll, and when I see a recipe that involves a new way of seasoning and baking the bird, I feel the need to try it right away.

In addition to the roast there is also a recipe for farro with kale and squash (cooked very much like a risotto) and a herb pistou – both very nice additons, however not essential to this meltingly succulent and tasty chicken.

The roasting of the chicken involves several processes including marinating, poaching, browning and finally roasting – it is more time consuming than your standard roast chicken but I assure you, totally worth it.

*you must begin this recipe a day ahead*

Ingredients
1/3 cup extra-virgin olive oil plus more for drizzling
4 tablespoons chopped fresh chives, divided
2 tablespoons chopped fresh thyme
1 tablespoon chopped fresh chervil
1 tablespoon chopped flat-leaf parsley
1 tablespoon chopped fresh tarragon
2 garlic cloves, finely chopped
1 teaspoon finely grated lemon zest
1/2 teaspoon freshly ground black pepper
1 x 2 1/2-3 pound chicken, halved, backbone removed
2 1/2 teaspoons sea salt
2 tablespoons vegetable oil
to serve: 1 halved lemon
to serve (optional): Farro with Acorn Squash and Kale (recipe below) & Herb Pistou (recipe below)

Whisk 1/3 cup olive oil, 2 tablespoon of chives, and next 7 ingredients in a medium bowl. Divide marinade between 2 (gallon-size) resealable plastic freezer bags. Season chicken with 2 1/2 teaspoons of salt and place 1 chicken half in each bag. Seal bags, releasing excess air (see notes) and chill overnight.

Place bags side by side in a large pot. Add cold water to cover by 2″. Heat water over medium heat until an instant-read thermometer registers 150°. Turn off heat, cover, and poach chicken for 50 minutes. Transfer bags to a large bowl of ice water to cool, about 15 minutes. Remove chicken from bags and pat dry.

Preheat oven to 450°. Heat vegetable oil in a large cast-iron skillet over high heat. Add chicken halves, skin side down, so chicken sits against sides of pan. Cook, moving chicken occasionally for even cooking, until skin is browned all over. Flip chicken and transfer skillet to oven. Roast until cooked through and let rest for 10 minutes.

To serve, divide Farro with Acorn Squash and Kale among plates. Place chicken on top of farro. Drizzle 1/4 cup Herb Pistou around farro. Drizzle 1 teaspoon of extra-virgin olive oil over each plate. Squeeze lemon halves over chicken and sprinkle remaining 2 tablespoons of chives over.

Notes: The best way to get the air from the bag is to seal it (with the chicken inside), leaving a small 1 inch gap. Then place the bag into a big bowl of warm water – the air will be pushed to the top and out of the small gap, leaving you with a perfectly vacuum-sealed chicken.

Farro with Kale & Acorn Squash
4 tablespoons unsalted butter, divided
1 small acorn squash, peeled, halved, seeded, cut into 1/2″ cubes
Sea salt, freshly ground pepper
1/2 bunch red Russian or other kale (about 5 oz.), center stems removed, leaves torn
1 tablespoon vegetable oil
3/4 cup farro
1/4 cup diced white onion
1 small garlic clove, very thinly sliced
1/4 cup dry white wine
2 cups vegetable stock mixed with 2 cups water, warmed
1/4 cup finely grated Parmesan

Preheat oven to 375°. Melt 1 tablespoon of butter in a medium saucepan. Add squash, season lightly with salt and pepper, and toss to coat. Spread out on a rimmed baking sheet. Roast, turning squash every 10 minutes, until tender, 30-35 minutes.

Cook kale in a large pot of boiling salted water until wilted, about 2 minutes. Transfer to a bowl of ice water to cool and drain.

Heat oil in a large ovenproof skillet over medium heat. Add farro; toss to coat. Roast in oven until toasted, stirring once, about 6 minutes. Transfer to a bowl; wipe out skillet.

Melt 2 tablespoons butter in same skillet over medium heat. Add onion and cook, stirring occasionally, until translucent, about 4 minutes. Add garlic; stir until aromatic, about 2 minutes. Add wine; increase heat to high. Stir until almost evaporated, about 2 minutes. Add farro and 1/2 cup warm stock mixture. Stir until almost all liquid is absorbed, about 3 minutes. Continue cooking, adding broth by 1/2 cupfuls and allowing broth to be absorbed between additions, until farro is tender, about 45 minutes to an hour.

Add kale, squash, remaining tablespoon of butter, and cheese; stir gently until butter and cheese are melted and vegetables are heated through, about 2 minutes. Season to taste with salt and pepper.

Herb Pistou

1 1/4 cups flat-leaf parsley
1 cup fresh chervil leaves
3/4 cup fresh tarragon leaves
Sea salt
1/2 garlic clove
2 tablespoons extra-virgin olive oil

Blanch herbs in a large pot of boiling salted water for 10 seconds. Using a slotted spoon, transfer herbs to a medium bowl of ice water to cool. Drain, squeeze dry and chop, then purée herbs, garlic, and 3/4 cup ice water in a blender until smooth, about 3 minutes. With machine running, gradually add oil. Season with salt.

Source: Sean Brock of Husk

Posted in Mains, Poultry | Comments Off on Skillet-Roasted Chicken with Farro and Herb Pistou

Crispy Potato Salad with Anchovy ChimichurriPrint Recipe

When we lived in Chicago, we lived in an old greystone in Lincoln Park. We loved it because it was full of character, as was our landlord who lived upstairs – we became good friends and Friday nights were often spent having a glass of wine and a chat on our stoop.

Our conversations were largely about food & wine and more often than not, led to the opening of another ‘impromptu’ bottle of wine which was followed by more conversations on food and wine and so it went…

Whether it was chatting about the new hot dog place on the street corner, how long we had to wait in the queue at Hot Doug’s to get the famous duck fries or the best place to buy meat and seafood (seafood was a challenge – this  was Chicago remember!), it was all food related – stories, finds and advice.

One of the many things our landlord put us onto was chimichurri sauce – he ate it with everything. I became as equally addicted to this salty blend of fresh herbs and spices and started eating it almost every day. I ate it with steak and poultry,  and I found it perfect with vegetables – particularly potatoes.

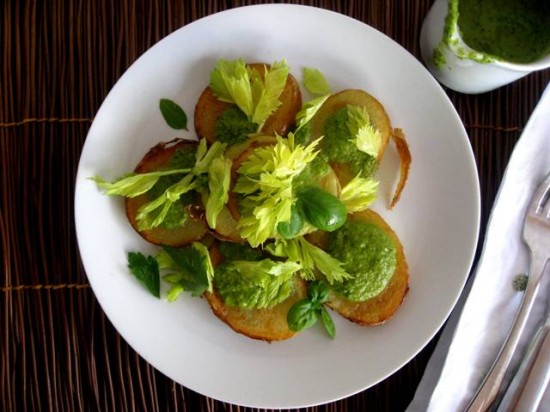
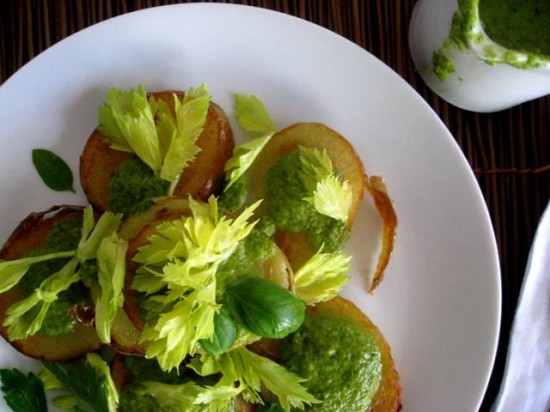
This salad combines crisp potatoes with an anchovy chimichurri – my favourite! The delightful salty, garlicky sauce is the perfect match for your standard day-to-day potato and turns this humble vegetable salad into a taste sensation.

Chimichurri Sauce
3/4 cup fresh basil
3/4 cup celery leaves
3/4 cup coriander (cilantro)
3/4 cup parsley
6 finely chopped anchovy fillets
1 sliced celery stalk
1 teaspoon + 1/4 cup of extra virgin olive oil
1 teaspoon + 2 tablespoons freshly squeezed lemon juice
1 husked tomatillo
1 garlic clove
a tiny pinch of crushed red pepper flakes

Crispy Potatoes

4 boiled medium potatoes
2 tablespoons olive oil
1 garlic clove, finely chopped
1 anchovy fillet, chopped

Chimichurri
Mix basil, celery leaves, coriander, parsley and anchovy fillets together in a large bowl, then transfer 1/3 of the mixture to a medium bowl. Add sliced celery stalk, 1 teaspoon of olive oil and 1 teaspoon lemon juice to the medium bowl and loosely mix, then set aside for garnish.

Puree the remaining mixture in a food processor with the tomatillo, garlic, remaining lemon juice and olive oil and red pepper flakes. Season with salt and set aside.

Crispy Potato Salad
Cut 4 boiled potatoes into 1/4 inch slices. Heat the olive oil in a large skillet, add the potatoes, garlic and anchovy fillet – fry until crispy.

Divide potatoes amongst 4 plates, spoon some chimichurri over the top and top with garnish. Serve!

Yeild: makes 4 starters or 1 large salad.

Source: Bon Appetit

Posted in Salads, Sauces/Dressings/Condiments, Sides, Starters, Vegetables, Vegetarian | 1 Comment

Apricot & Almond Tea CakesPrint Recipe

The idea for these little cakes came from Le Pain Quotidien – one of my favourite coffee shops in New York. And whilst I am not a fan of big chain coffee houses this particular one seems to retain a charm that most of them are lacking in. Their coffee is superb, their breads and pastries are also amazing, and even better they have pots of a nut based chocolate spread on each table – of course the children love it!

They also have these scrumptious little apricot madeleines that look alot like mini muffins, I tried hard to re-create them but unfortuntely it didn’t work. So I made these instead, and despite their lack of similarity, they are still great.

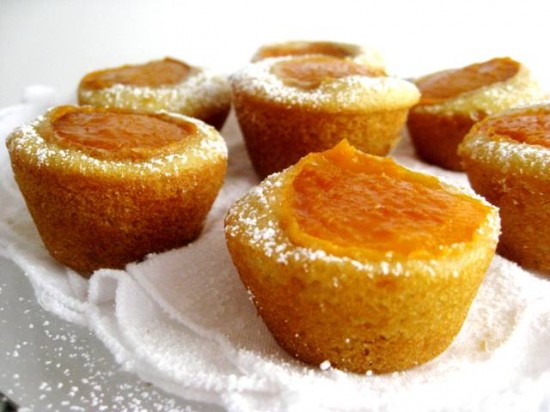
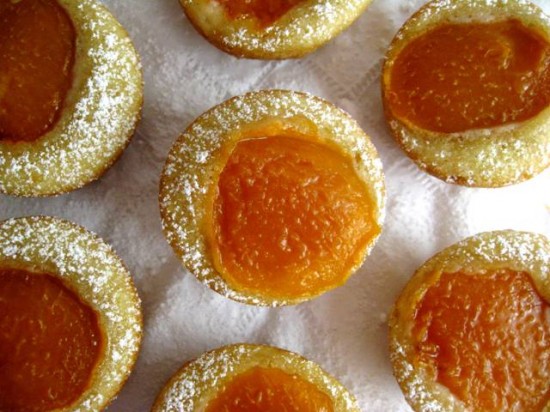
Almost a cross between a friand and a madeleine, these are sweet little bite sized cakes that would be ideal served at a morning or afternoon tea. The apricot on top lends a nice, slightly tart taste to the lemon scented cake and sprinkled with a little powdered sugar, they make for a very sweet treat indeed.

Ingredients
113 grams/4 ounces unsalted butter, room temperature
2 tablespoons light brown sugar
1/2 cup granulated sugar
2 large eggs
1 teaspoon grated lemon zest
1/2 teaspoon pure vanilla extract
3/4 cup all purpose flour
3/4 cup almond meal
3/4 teaspoon baking soda
1/3 cup buttermilk
6 – 8 ripe apricots, washed
to serve: icing (powdered/confectioners) sugar

Pre-heat oven to 350 degrees. Grease 24 mini muffin tins and cut rounds from your apricots* and set aside.

Using an electric mixer fitted with the paddle attachment, cream butter and sugars at a medium speed until light and fluffy. Beat in eggs, one at a time. Add lemon zest and vanilla and beat until combined.

Remove bowl from mixer stand and add in plain flour, almond flour, baking soda and buttermilk, mixing with a whisk until just incorporated.

Fill each muffin tin with batter – 2/3’s of the way up. Press an apricot segment, cut side up, into the center of the cup. Bake for 15 minutes or until tops are golden brown and the mixture is just set (springs back to the touch).

Sprinkle with sifted icing sugar and serve.

Notes: If you are lucky enough to get your hands on some small apricots then simple pit and halve them. I used big apricots so I cut segments from around the fruit to use.

Posted in Biscuits/Cookies/Slices/Bars, Cakes, Fruit, Morning Teas/High Teas, Picnic Food | Leave a comment

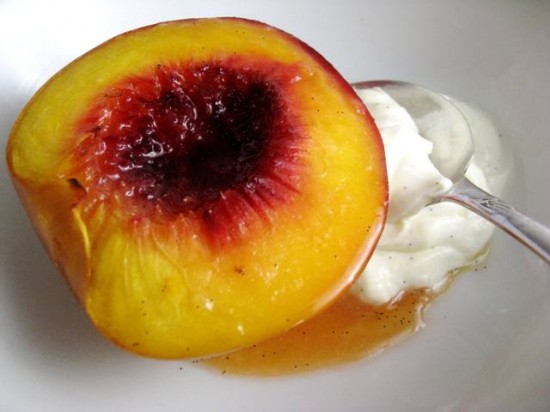
Honey Baked Nectarines with Vanilla Bean MarscaponePrint Recipe

I must confess that I am still in a Nutter Butter haze, in fact I am eating one right now – I think I neglected to say in my previous post how moorish they were. I am usually pretty good at managing my cookie intake – but not in this instance, not with these little babies.

Anyway, this morning at the markets my nose caught whiff of some delightfuly fragrant nectarines. Looking very pretty in their orange and yellow hues, I purchased a big bag full and headed home to flick through some recipes.

For those of you that are not nectarine savvy, here are a few tips; nectarines are one of those fruits that you should buy ripe – they do not ripen well if picked/purchased when they are not perfectly ready to eat. To choose the best nectarines, go by scent and touch, they should feel soft and give slightly when you feel them. And finally, they are best stored at room temperature because they lose flavour in the fridge.

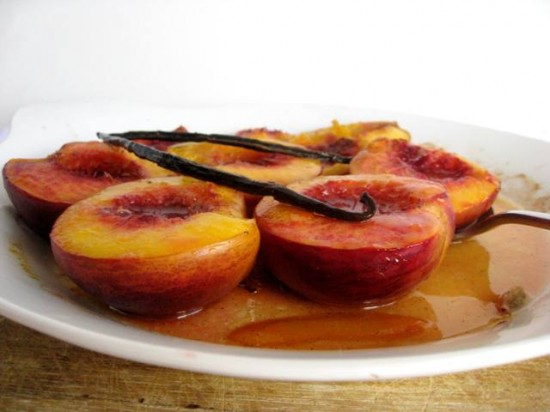
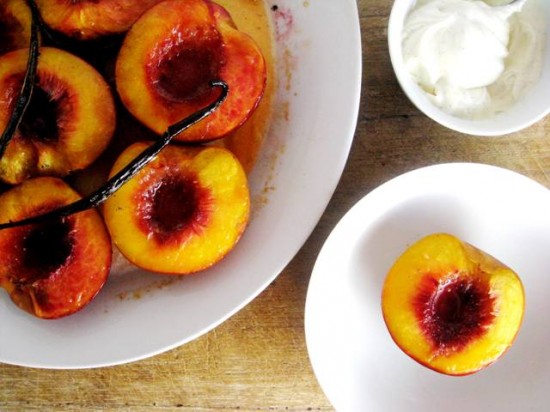
This dish is an easy Summer dessert, the baking brings out the full flavour of the fruit and the vanilla seeds and orange juice compliment it beautifully. The deep colours of the nectarines make it a gorgeous looking dish too – perfect for your next Summer dinner party!

Ingredients
.88 ounces/25 grams unsalted butter, coarsely chopped
6 nectarines, pitted, halved
3.5 ounces/100 grams honey
4 cardamom pods, bruised
1/2 vanilla bean, split and seeds scraped
1 cup orange juice
rind of an orange, thinly peeled

Vanilla Bean Marscapone
226 grams/8 ounces of marscapone
3 tablespoons icing (powdered/confectioners) sugar
1/2 vanilla bean, split and seeds scraped

Mix the icing sugar and vanilla bean seeds through the marscapone and refrigerate until ready to serve.

Preheat oven your oven to 375f. Scatter butter pieces across the base of your baking dish – your dish should be big enough for all the nectarines to fit snugly in a single layer. Place all nectarines, cut side up over the butter. Whisk vanilla bean seeds into orange juice and pour over the top. Scatter cardamom pods and orange rind on top of the nectarines and drizzle with honey.

Bake for about 20 minutes, until warm and golden and remove from oven. Serve warm with Vanilla Bean Marscapone on the side. 

Notes: Whilst I love the marscapone with this dish, there is a healthier option and that is yogurt. Substitute the marscapone for a thick, Greek style plain yogurt and continue with the recipe.

Source: adapted from Australian Gourmet Traveller

Posted in Desserts, Fruit | Leave a comment

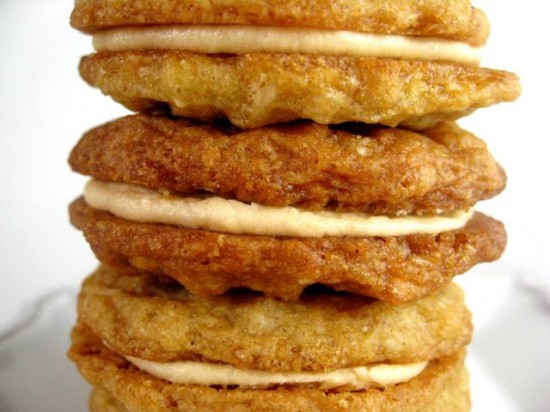
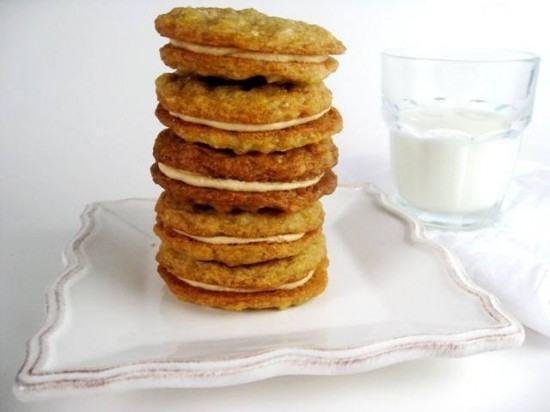
Thomas Keller Nutter ButtersPrint Recipe

All the way from Bouchon Bakery, we have these Nutter Butter cookies and I am glad they have the word ‘butter’ in the title because they are all that – and a little more. Delicious nonetheless, and as my daughter said ‘mummy, I think the cookie monster would love them!’ and yes, I think he might.

I did a little research on the Nutter Butter cookie and was surprised to find out they have been around as long as I have, being developed by Nabisco in the late 60’s. Thomas Keller has taken them to another level with his version that only a peanut-loving-person would truly appreciate.

My advise is to forget about the butter and just enjoy – they are particularly good with a chaser of ice cold milk!

Cookie Ingredients
1 1/2 teaspoons baking soda
1/2 teaspoon baking powder
155 grams/5.5 ounces plain (all purpose) flour
113 grams/4 ounces light brown sugar
226 grams/8 ounces butter
113 grams/4 ounces granulated sugar
92 grams/3 1/4 ounces smooth peanut butter
1 1/2 teaspoons vanilla extract
1 large egg
113 grams/4 ounces rolled oats
3 tablespoons peanuts, chopped

Combine flour baking powder and baking soda and set aside.

Using a paddle attachment on your mixer, cream the butter and peanut butter until well combined. Add the sugar and brown sugar to the butter mixture and cream on a mediuem to fast speed for 4 minutes, scraping the bowl down occasionally to ensure all ingredients are beat in. Reduce speed to slow and incorporate the vanilla and egg slowly. Incorporate dry ingredients and mix slowly, then add chopped peanut and oats.

Place your dough in the refrigerator for an hour to chill then remove and roll into 3/4″ balls (the size of your standard chocolate truffle). Place on a tray and back in the fridge for a further 30 minutes prior to baking (all this chilling is because the dough is incredibly sticky)

Turn your oven to 350f and bake cookies for 8 – 10 minutes. Leave to sit on tray for 10 minutes after baking, them remove them (with a spatula) to a cooling rack

Once baked, place Nutter Butter Filling on top of one cookie and place another cookie on top to form a sandwich. I found it easier to pipe the filling so I used a piping bag for this rather than spreading it.

Filling Ingredients
56 grams/2 ounces butter
1/4 cup Smooth Peanut Butter
113 grams/4 ounces icing (confectioners) sugar
4 teaspoons water

Pull butter out of refrigerator 2 hours prior to mixing. Cream butter, peanut butter and icing sugar together in your mix master with a paddle attachment until well combined, add water and beat for another minute.

Spread onto cooled cookies.

Source: adapted from Thomas Keller, Bouchon Bakery

Yield: 18 – 20 filled cookies

<

Posted in Biscuits/Cookies/Slices/Bars, Childrens Parties, Picnic Food | Comments Off on Thomas Keller Nutter Butters

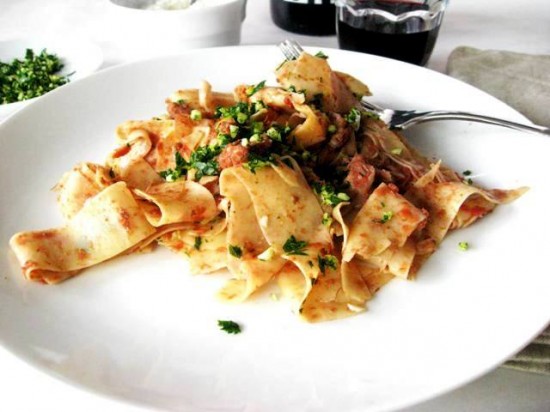
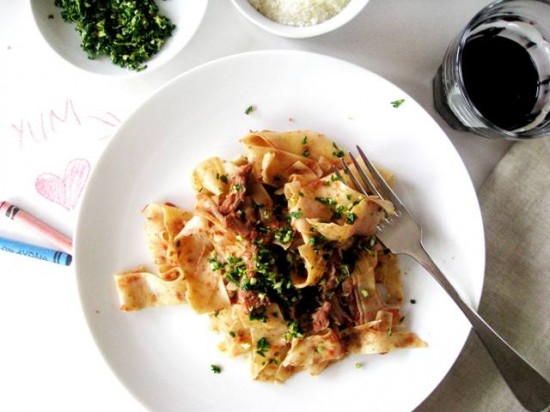
Parpadelle with Veal Ragu & GremolataPrint Recipe


I find it very hard to pass up a good ragu – one with meat so tender that it literally melts in your mouth. I also love ragu’s paired with a pasta and despite the warmer weather this dish was very much enjoyed – it also gave me the excuse to open a nice bottle of full bodied red.

Whilst I recommend leaving the meat overnight, it is not essential – although you will miss out on that little extra flavour that is created when a dish that is left to sit. The gremolata adds a nice little citrusy/garlicky kick and compliments the rich ragu sauce without being too overpowering.

For my friends in a bitterly cold Australia…

*it is best to start this recipe the day before*

Ingredients
1.1 kilos/2.5 pounds veal shank cross cuts
Salt and freshly ground pepper
All-purpose flour, for dusting
1/3 cup extra-virgin olive oil
1 small onion, finely chopped
2 garlic cloves, minced
4 anchovy fillets
3 sprigs thyme
1 teaspoon dried fennel powder
1 fresh bay leaf
2/3 cup dry red wine
1 x 28-ounce cans Italian whole tomatoes, drained and chopped
2 cups veal (or chicken) stock
283 grams/10 ounces fresh pappardelle
Freshly grated Parmigiano-Reggiano
Gremolata to serve (recipe below)

Season the veal with salt and pepper and dust with flour, tapping off the excess. In a large enameled cast-iron casserole, heat 1/4 cup of the olive oil. Add the veal and cook over moderately high heat until browned all over, about 12 minutes. Transfer the veal to a plate.

Add the remaining 1/4 cup of oil to the casserole. Stir in the onion and garlic and cook over low heat for 10 minutes. Add the wine and boil until reduced to 1/3 cup, 5 minutes. Add the tomatoes and cook over a medium to high heat for 5 minutes. Add the stock, anchovies, thyme, bay leaf and fennel and bring to a boil. Add the veal, cover partially and cook over low heat until very tender, 2 – 2 1/2 hours.

Remove from heat and allow pot to cool to room temperature then remove meat from the sauce and shred it, discarding the bones. Place the pan with the remaining sauce on your stove top and cook at a medium heat until reduced a little, about 5 minutes. Stir in the shredded meat, bring to room temperature and place in the refrigerator overnight.

The following day, warm over a low heat. In a large pot of boiling salted water, cook the pappardelle until al dente. Drain and return to the pot. Add the ragù and toss over low heat until the pasta is coated. Serve with grated or shaved parmesan and gremolata.

Gremolata
2 garlic cloves, finely chopped
Finely grated rind of 1 lemon
2 tablespoons flat-leaf parsley, finely chopped

Place all ingredients in a bowl and stir to combine.

Yield: Serves 4 as a main.

Posted in Mains, Meat, Pasta/Noodles | Leave a comment

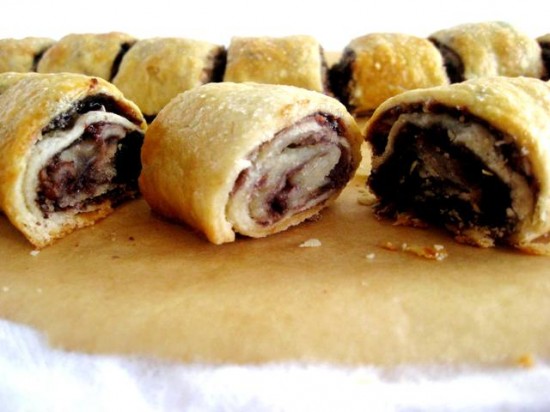
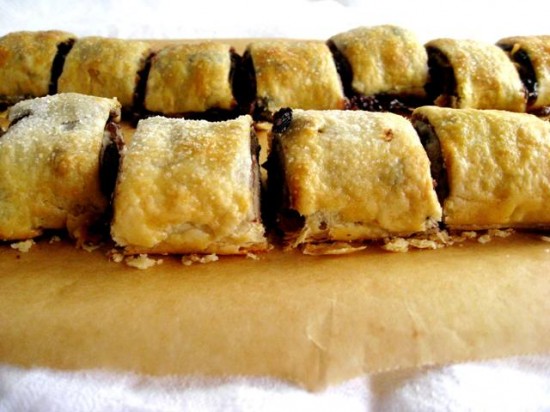
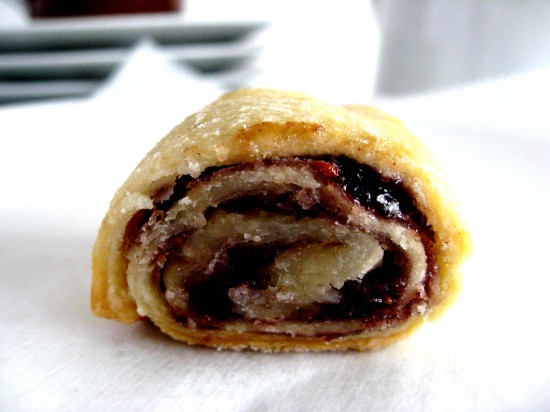
RugelachPrint Recipe


I am embarrassed to say I had never tried rugelach until I moved to the US – and it’s not like I grew up in a ‘meat and three veg’ household either. With my mother being of Eastern European origin we were exposed to lots of traditional European food, aside from Rugelach that is – which was somehow left behind in Europe, lost along the way or maybe they just didn’t like it!

At any rate, I do and have been purchasing a variety since I have moved here – my favourite being raspberry, closely followed by the apricot.  For those of you that new to rugelach, they are small and slightly chewy rolls of flakey pastry filled with a combination of nuts, currents (or raisins) and jam, some of them also include chocolate.

The addition of cream cheese to the pastry lends an extra element of flakiness (and let’s be honest – fat too) but it is all good and totally worth a morning on the treadmill.

In my quest to create the perfect Rugelach recipe I spoke to an old Jewish man of rugelach repute and he said this traditional treat was best eaten as the sweet ending to a brunch of bagels and lox. I think it works superbly with a coffee at any time of the day.

Dough Ingredients
113 grams/4 ounces cold cream cheese, cut into 4 pieces
113 grams/4 ounces cold unsalted butter, cut into 4 pieces
1 cup all-purpose flour
1/4 teaspoon salt
1/2 cup chopped nuts (walnuts or pecans are best)
1/3 cup plump, moist dried currants or chopped raisins

Glaze
1 large egg
1 teaspoon cold water
2 tablespoons granulated sugar

Filling
2/3 cup raspberry jam, apricot jam or marmalade
1/4 cup + 2 teaspoons granulated sugar
1/2 teaspoon ground cinnamon

Whisk together flour and salt in a bowl. Beat together butter and cream cheese in a large bowl with an electric mixer until combined well. Add flour mixture and stir with a spoon until a soft dough forms. Gather dough into a ball and shape it into an rectangle, wrap in plastic wrap and chill until firm, 8 to 24 hours.

Put oven rack in middle position and preheat oven to 350°F. Line a 9 x 12″ baking pan with parchment paper.

Cut dough into 2 pieces. Wrap one piece in plastic wrap and chill, and roll the other piece into a 12- by 8-inch rectangle on a well-floured surface with a floured rolling pin. Transfer this dough to a sheet of parchment or wax paper, then transfer to a tray and chill while rolling out remaining dough in same manner, transferring each to another sheet of parchment and stacking on tray.

Whisk 1/4 cup sugar with the cinnamon. Arrange one dough rectangle on work surface with a long side nearest you. Spread half the preserves evenly over dough with offset spatula. Sprinkle with half of the currents/raisins and half of the nuts over jam, then sprinkle with 2 tablespoons cinnamon sugar. Cover the filling with a piece of wax paper and gently press the filling into the dough, then remove the paper and save it for the next batch.

Using parchment as an aid, roll up dough tightly into a log. Place, seam side down, in your lined baking pan, then pinch ends closed and tuck underneath. Make the other log in same manner and arrange 1 inch apart in pan. Place back in your fridge for a further 30 minutes to chill.

Whisk the egg and the water together and brush both the logs, then sprinkle each with 1 teaspoon of remaining granulated sugar. With a sharp large knife, make deep cuts crosswise in dough (not all the way through) at 1 inch intervals.

Bake until golden, 35 to 40 minutes. Cool to warm in pan on a rack, about 30 minutes, then transfer logs to a cutting board and slice rugealch all the way through.

Notes:

Posted in Biscuits/Cookies/Slices/Bars, Morning Teas/High Teas, Picnic Food | Leave a comment

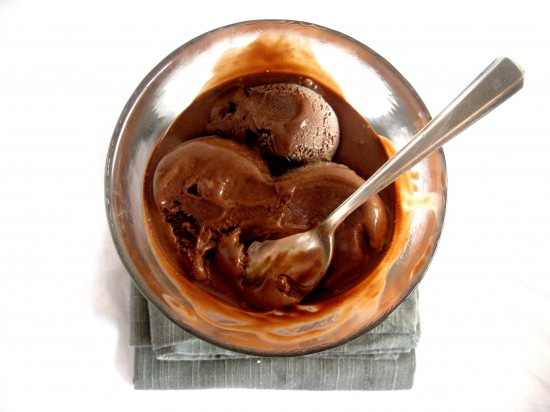
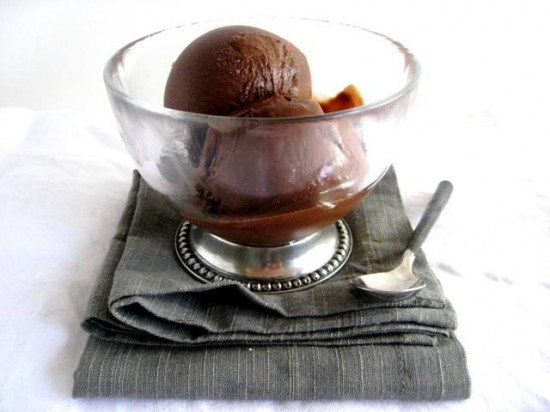
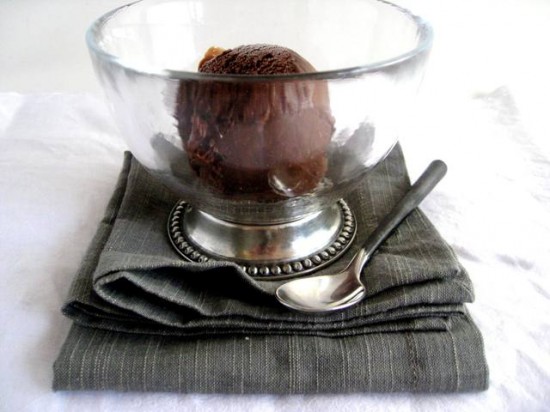
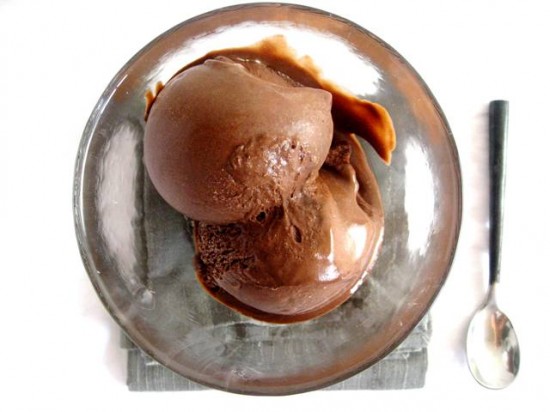
The Most Decadent Chocolate Ice Cream EVERPrint Recipe


This chocolate ice cream is the thickest, richest and most decadent chocolate ice cream I have ever tasted. And until I saw this recipe, I wasn’t particularly interested in trying to re-create something that was done so well commercially (most of the time).

But this is a little different than your run-of-the-mill ice cream recipe and found in an article about a man who serves his guests magnificently rustic and basic (and beautiful) dishes – my kind of entertaining – consequently I was sold.

His little trick (that apparently took 5 years to develop) is to swirl a caramel into the custard before the cooling/churning and freezing process, which adds a wonderful depth of flavour to the chocolate. He is quite specific about chilling the custard for 2 days prior to it’s churning and then freezing the ice cream for a further 3 days prior to eating – but the wait is worth it. It is so thick that when it melts it is almost mousse-like and incredibly delicious.

If you haven’t already got your shopping list out, ready to add the ingredients, you are crazy – or it might be a bitterly cold Winter you are battling through – but seriously, I wouldn’t let that stop you.

Ingredients
7 ounces dark chocolate (70% to 75% cacao), finely chopped
2 cups plus 2 tablespoons whole milk
1/3 cup unsweetened cocoa powder
6 large egg yolks
13 tablespoons sugar, divided
1/4 cup heavy whipping cream

Place chocolate in a medium metal bowl. Set bowl over a saucepan of barely simmering water. Stir chocolate until melted and smooth. Set melted chocolate aside; let cool slightly.

Whisk milk and cocoa powder in a medium heavy saucepan over medium heat until mixture begins to boil; set aside.

Using an electric mixer, beat egg yolks and 7 tablespoons sugar in another medium bowl until very thick ribbons form, about 2 minutes. Whisking constantly, gradually add hot milk mixture to egg yolk mixture. Return mixture to saucepan. Add melted chocolate and whisk to blend. Stir over low heat until slightly thickened and an instant-read thermometer registers 175°, about 5 minutes. Transfer chocolate custard to a large bowl and place over another large bowl of ice water. Stir until chocolate custard is cool.

Bring remaining 6 tablespoons sugar and 2 tablespoons water to a boil in a small heavy, deep saucepan over medium-high heat, stirring until sugar dissolves. Boil, occasionally swirling pan and brushing down sides with a wet pastry brush (do not stir), until a dark amber color forms, about 5 minutes. Gradually whisk in cream (mixture will bubble vigorously). Whisk caramel into chocolate custard. Strain into a large container; cover and chill for 2 days.

Process custard in an ice cream machine according to manufacturer’s instructions. Transfer to another container; freeze for 3 days before eating.

Yeild: 4 cups

Source: Fergus Henderson

Posted in Chocolate, Desserts, Frozen Treats | 5 Comments