Chocolate Truffle BrowniesPrint Recipe

I have no doubt in my mind that every couple of weeks, if not every week, at least one of my recipes will include chocolate. Chocolate is possibly the most favoured ingredient in our household and whilst I try not to be too indulgent I do like to make treats every now and then.

I stumbled upon this recipe recently and although I have a stack of brownie recipes that I love I was tempted by the title – it just sounds so decadent. And I must say that the finished product is that. Pure chocolate decadence.

The morning after I made these I discovered my daughters had taken them from the pantry and put them on top of their dressing table in their bedroom as a ‘snack for later’. They got quite upset when I replaced them with an apple.

The ganache topping gives these brownies an edge on the others and what an edge it is.

Mr Chocolate Truffle Brownie, you had me at hello!

Nonstick spray
340 grams/12 ounces bittersweet chocolate (do not exceed 61% cacao), chopped, divided
156 grams /11 tablespoons unsalted butter, cut into 1-inch cubes
1 1/4 cups sugar
3 large eggs
1 1/2 teaspoons vanilla extract
1/4 teaspoon salt
1 cup unbleached all purpose flour
1 cup walnuts, toasted, coarsely chopped
3/4 cup heavy whipping cream

Position rack in center of oven and preheat to 350°F. Line 9×9 inch metal baking pan with foil, leaving overhang. Spray foil with nonstick spray. Combine half the bittersweet chocolate and butter in medium bowl. Set bowl over saucepan of simmering water and stir until chocolate and butter are melted and smooth. Remove bowl from over water and cool chocolate mixture until lukewarm, 5 to 10 minutes.

Whisk sugar, eggs, vanilla extract, and salt in large bowl to blend. Whisk in chocolate mixture. Stir in flour, then chopped toasted walnuts.

Transfer batter to prepared baking pan. Bake brownies until tester inserted into center comes out with moist crumbs attached, 26 to 28 minutes. Transfer pan to cooling rack and let brownies cool completely.

Bring cream to simmer in small saucepan over medium heat. Remove from heat. Add remaining 6 ounces chocolate to hot cream and let stand 5 minutes to soften, then whisk until melted and smooth. Pour chocolate ganache over brownie sheet in pan and spread to cover completely. Let stand at cool room temperature until topping is set, about 4 hours.
Lift brownie sheet from pan. Fold down foil edges. Using large sharp knife, cut brownie sheet into 25 squares, wiping knife with hot moist cloth after each cut. Store in an airtight container.

Notes: The key to perfectly moist, fudgy brownies is not to overcook them. As soon as the tester comes out with moist crumbs attached, remove the pan from the oven.

Source: adapted from Foodnetwork.com

Posted in Biscuits/Cookies/Slices/Bars, Chocolate | 6 Comments

Macaroni & CheesePrint Recipe

I have a story for you. It’s a story about Neil Perry, the well renowned Australian chef.

Mr Perry had several restaurants running at this particular time and he had just opened an upscale Asian eatery on Crown Street in Surry Hills and it was ‘the place to go’. My friend Lizzie was about to celebrate a birthday and we decided that ‘the place to go’ was the place we were going to go.

It was a peculiar evening, the staff were very odd. I had the Maitre De raise her hand to me (as in stop) when I tried to get to the bar, we were constantly talked down to and they kept our bottles of wine off our table and neglected to fill them consistently. Oh lordy! this was a major mistake with us  (‘a man is not a camel!’ exclaimed the birthday girl when she reflected on the evening ). The food, however, was exceptional and after our delicious meal we headed off with very mixed feelings.

I was so disturbed by the evening that I thought I would send Mr Perry an email – I said that his staff did not do any justice to his chef or his reputation and although I loved all of his restaurants, I would reconsider going back to this particular one. I did not expect to hear anything back but no less than two hours after sending my email I received a phone call from My Perry himself. I was shocked to say the least. He apologised for my experience, told me to come back (on the house of course), he was gracious and thankful that I bothered to write what I did. I didn’t go back in the end, it wasn’t a deliberate choice it just never happened but my opinion of the pony-tailed chef rose immensely and now I would be more than happy to go to any of his restaurants knowing that he has pride in what he does and is passionate about his business and his patrons.

So now I am going to move on to his recipe for Macaroni and Cheese – a Neil Perry masterpiece. This is no two bit Mac and Cheese that you can throw together in a couple of minutes. It is a combination of well chosen ingredients that turn this ordinary and everyday dish into a spectacular one.  

300 grams/11 ounces of dried macaroni
2 tablespoons of extra virgin olive oil
50 gram/1.8 ounce piece of bacon, finely chopped
400 mls of pouring cream
200 grams/7 ounces of Gruyere, coarsely grated
100 grams/3.5 ounces of Cheddar, coarsely grated
1 clove of garlic, crushed
2 teaspoons of Dijon mustard
½ teaspoon of sweet paprika
2 tablespoons of dried breadcrumbs (see Note)
2 tablespoons of finely grated parmesan
½ cup of loosely packed flat leaf parsley, thinly sliced

Preheat your oven to 200c/400f. Cook the macaroni in plenty of boiling salted water until al dente. Drain and refresh in iced water.

Heat oil in a heavy based saucepan and cook bacon over a medium heat for 3 to 4 minutes or until golden. Remove bacon and drain on absorbant paper. Drain oil from pan. Add cream to pan and bring to the boil over a medium heat. Reduce heat to low, add the Gruyere, Cheddar, garlic, mustard and paprika and simmer stirring continually for around 5 minutes or until the cheese is melted and the sauce thickened. Add the bacon and macaroni, season to taste with sea salt and ground white pepper and stir to combine.

Divide mixture between 4 15cm gratin dishes and sprinkle with breadcrumbs and parmesan. Bake for 10 – 15 minutes or until golden. Scatter with parsley and serve immediately.

Note: I prefer to make my own breadcrumbs for this recipe. I toast whatever bread I have on hand and then give it a quick whizz in the blender to break it up. I do find that artisan bread works better than your standard everyday white loaf.

Source: Neil Perry for Australian Gourmet Traveller, November 2006

Posted in Pasta/Noodles, Sides | Leave a comment

Salmon RillettePrint Recipe

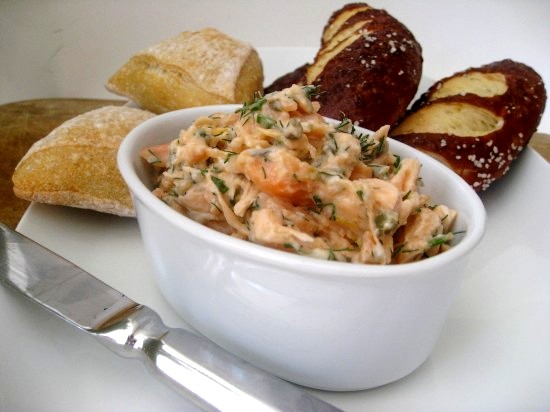
Sometimes when I have friends over and we are making our way through a bottle of champagne, I find myself thinking that we should be eating something – but conversation amongst good friends often gets the better of me and another couple of glasses and a sore head later I remember I was meant to make my salmon rillette. Yes, it would have been a whole lot better if I had.

This actually isn’t my recipe, it came to me via my friend Jen who found it in the Sydney Morning Herald last Christmas. Jen is one of those people who tinkers around in the kitchen for a while and produces these amazing looking dishes that look like they should be on the cover of a magazine. Anyway, we were very spoilt to stay in her sisters beautiful house in Sydney, Australia when we last visited – with Jen constantly whipping us up small treats. This one was my favourite and we nibbled on it every afternoon as we watched the sun set over the beautiful Sydney harbour – it was a perfect Summer holiday.

Very nice to have on hand for visitors and best served with a crusty baguette or a toasted rye and of course a nice champagne or white wine.

Ingredients
1 litre fish stock
Salt
300grams/10.6 ounces salmon fillet
150grams/5.3 ounces smoked salmon, chopped into very small pieces
100ml crème fraiche
½ bunch dill, chopped
½ bunch chives , chopped
Pinch cayenne pepper
Grated zest of 1 lemon
1 teaspoon grated horseradish
2 teaspoons capers, roughly chopped

Bring stock to boil and season. Place in a large bowl over the salmon fillet and cover with plastic film.  Leave for 30 minutes to poach.  Remove the skin from the salmon and break apart gently with a fork.

Mix all other ingredients together and then fold through the flaked salmon.  It will last in the fridge for 4 days.

Notes: I have made this with Horseradish Sauce when I have not had fresh horseradish at hand, using the same quantity – 1 teaspoon.

Source: The Sydney Morning Herald, December 2009

Posted in Nibbles & hors d'oeuvres, Seafood | 1 Comment

A Cookie RecipePrint Recipe

I have been pondering this cookie recipe for some time. Not whether or not I should make it but what I should call it – the Retribution Cookie, the Cookie of Consequence, help me here…

 The story is as follows, woman goes into a well known US department store with her family and after several hours of shopping they go to the store café for a hot chocolate and a cookie. The cookie they ordered was marvelous, so marvelous in fact that she cheekily asked for the recipe. The waitress told her she could have it for two fifty, the woman happily agreed and went home feeling great with her purchases. A couple of weeks later she got the statement for her store card and was shocked to see she had been charged two hundred and fifty dollars for the cookie recipe. She called the store accounts department and was told that the charge was correct and they could not and would not do anything as she already had seen the recipe. In anger and disbelief and to ensure that this store never made another penny from this recipe again, she emailed it out and out and out until it finally fell into my hands. Now it belongs to you too.

So call it what you will – I have enjoyed making this cookie and with each bite I take I think to myself that it doesn’t pay to be an ass!


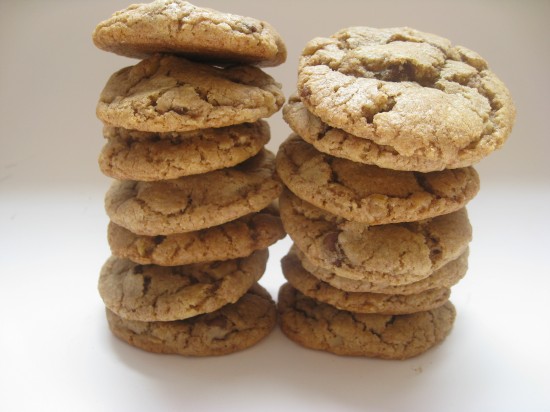
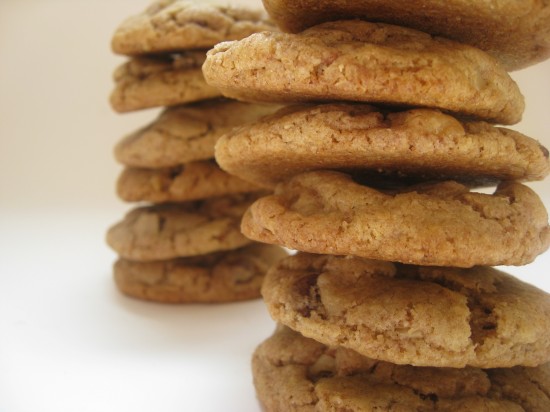
The ‘said’ cookie is a nicely textured full flavoured cookie with a welcoming chuck of chocolate or nut every now and then. One of the best cookies (biscuits for the Australians) I have ever made and eaten.

2 ½ cups of blended oatmeal
1 cup of butter (227 grams/8 ounces)
1 cup of brown sugar
1 cup of white sugar
2 eggs
1 teaspoon of vanilla
1 teaspoon of bicarbonate of soda
½  teaspoon of salt
2 cups of all purpose flour
1 teaspoon of baking powder
340 grams/12 ounces of chocolate chips
113 grams/4 ounces of finely grated chocolate
1 ½  cups of chopped nuts (walnuts are best)

Measure oatmeal and blend in a blender to a fine powder.  Cream the butter and both sugars. Add eggs and vanilla and mix. Then add flour, oatmeal, salt, baking powder and bicarbonate of soda (at which point I switched the beater on my mix master to a dough hook) and mix until mixture comes together. Finally, add chocolate chips, grated chocolate and nuts and mix until combined.

Roll into balls, one inch in diametre, and place two inches apart on a cookie sheet.  Bake for 10 minutes at 375 degrees. Makes around 50 cookies. (unless you have children like mine who insist on eating cookie dough)

Notes: I was just about to post this and my husband googled the story to discover it is an urban myth – however I chose to still post it, a) the recipe is great and b) urban myths do come from somewhere so I believe there is an element of truth to the story

Source: I would love to know.

Posted in Biscuits/Cookies/Slices/Bars, Chocolate | 9 Comments

Arugula Salad with Caramelized Onions, Goat Cheese and Candied WalnutsPrint Recipe

We escaped to New Buffalo, Michigan, a couple of months ago with some dear friends. We hired a log cabin, hung out by the lake, toasted marshmallows in the outdoor fire pit and did lots of running around in the woods with the children. It was so good to be outside in wide open spaces. Of course we did the mandatory eating and drinking – great food and wine are all part of a weekend getaway.  Oh the wine…

 I served this salad as part of a dinner one evening and it went down a treat. How could it not when it contains candied walnuts, caramelized onions – and goats cheese. A very simple salad with a harmonic convergance of flavours and textures. In a word, delicious.

The wonderful thing about this salad is that it is suited to both a very casual barbeque and a more substantial dinner. I think it would go incredibly well with a roast lamb perhaps. Anyway, there lots of options and opportunities and excuses to make it – not that you need one. It is and will remain one of my all time favourites.

Caramelized Onions
4 tablespoons olive oil
454 grams/1 pound of red onions, thinly sliced
1 tablespoon balsamic vinegar

Slice the onions keeping them in full rounds. Heat oil in heavy based frying pan over medium-high heat. Tip the onions into the pan and cover, cook for 15 minutes until onion has begun to soften, stirring frequently. Remove cover and continue to cook, stirring, until the onion has separated and is caramelized, a further 25 – 30 minutes. Remove from the heat, add in the balsamic vinegar and stir gently. Cool to room temperature.

Candied Walnuts
1/3 cup (packed) golden brown sugar
1/4 cup water
2 tablespoons butter
Large pinch of salt
1 ½ cups of walnut halves

Combine first 4 ingredients in another heavy based pan. Bring to boil, whisking. Boil 1 minute. Add walnuts; stir. Toss until syrup forms glaze on nuts, about 3-4 minutes. Transfer nuts to sheet of foil and quickly separate nuts with forks. Cool to room temperature.

Salad
4 tablespoons extra-virgin olive oil
2 tablespoons balsamic vinegar
142 grams/5 ounces arugula (rocket)
142 grams/5 ounces soft goat cheese, broken into small pieces, chilled

Whisk oil and vinegar in small bowl. Season dressing with salt and pepper.

Place arugula in very large bowl and toss with enough dressing to coat lightly. Drop in onions, and distribute evenly. Add nuts and sprinkle with goat cheese and serve.

Notes: Sometimes I actually don’t use a dressing on this salad as I find that the onions have enough oil on them to coat the arugula – try it both ways and see what you prefer or you can always serve the dressing on the side.

Source: adapted from Bon Appetite, March 2010

Posted in Salads, Vegetarian | 1 Comment

Grilled Asian Chicken with Bok Choy, Radishes and Shiitake MushroomsPrint Recipe

Chicagoans (and from what I can gather most of America) place a lot of importance on their grilling. They have a huge selection of barbeques that smoke, rotisserie, chargrill, sear – you name it they have it here.  From the classic Big Green Egg through to a more modern infared grill that offers restaurant style searing, they even have a contraption that cooks an entire pig and apparently it is comparable to Kalua pig which is cooked in the ground for an entire day.

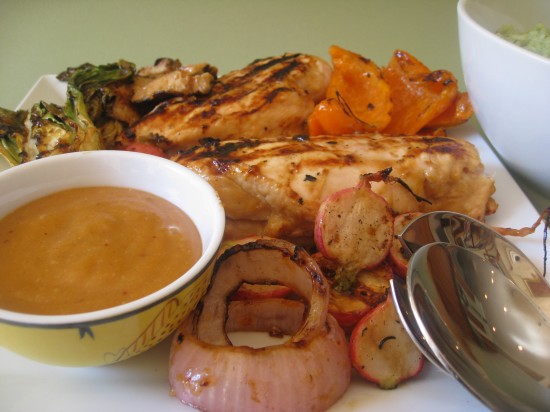
So to most of these serious grillers, a mere gas appliance just doesn’t cut it – my little Weber Q is one of these and no matter what a barbeque traditionalist/fundamentalist might say – I love it. This recipe is designed for such a grill or something similar. Having said that, it would also cook tremendously on coal. It appealed to me because it looks sensational, the flavours are wonderful and it had my two daughters fighting over radishes which has certainly never happened before.

So serious grillers, barbeques experts and people who simply enjoy standing over their little gas flames with a beer , next time you fire up your barbie you might want to give this recipe a go. The marinade and the grilling give the vegetables and chicken a lovely caramelized texture, the additional marinade then acts as a sauce. I have also included a recipe for a rice dish that serves as a very flavourful accompaniment.

In the meantime I am going to get serious about grilling, save my pennies for one of those big coal burning machines and barbeque seriously…very seriously.  Stay tuned.

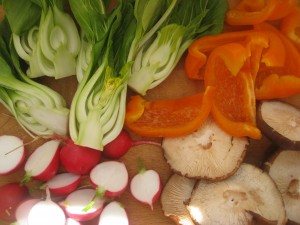
8 1/3-inch-thick rounds red onion
8 large shiitake mushrooms, stemmed
8 red radishes, trimmed, halved
4 baby bok choy, halved lengthwise
1 large orange capsicum/bell pepper, cut lengthwise into 8 strips
Mango-Sesame Dressing (recipe below)
4 boneless chicken breast halves with skin
Nonstick vegetable oil spray

Arrange all vegetables on large rimmed baking sheet. Brush vegetables lightly on both sides with 1/2 cup Mango-Sesame Dressing; sprinkle with salt and pepper.

Arrange chicken on sheet of foil. Brush both sides of chicken with 1/2 cup dressing, then sprinkle with salt and pepper.

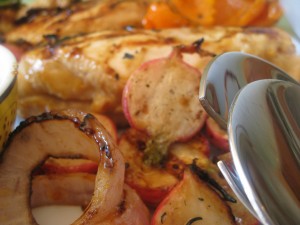
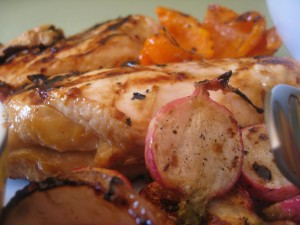
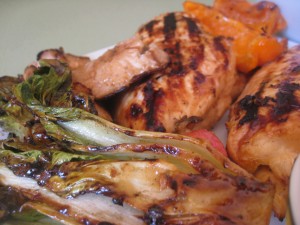
Coat grill rack generously with nonstick spray and prepare barbecue (medium-high heat). Grill vegetables until just tender, turning occasionally, about 8 minutes for onion rounds and 4 minutes for mushrooms, radishes, bok choy, and capsicum/bell pepper strips. Return all vegetables to same baking sheet.

Grill chicken until cooked through, 5 to 6 minutes per side. Transfer chicken to cutting board. Let stand 5 to 10 minutes.

Arrange chicken breasts and vegetables on platter. Serve with remaining dressing.

 Mango Sesame Dressing
3/4 cup vegetable oil
3/4 cup Major Grey’s mango chutney (or any mild mango chutney will do)
6 tablespoons unseasoned rice vinegar
3 large garlic cloves, peeled
6 3/4 teaspoons soy sauce
1 1/2 tablespoons Asian sesame oil
1 1/2 teaspoons Dijon mustard
1 1/2 teaspoons dried crushed red pepper

Combine all ingredients in blender. Cover tightly; blend until dressing is smooth. Season to taste with salt and pepper.

Ginger Coriander /Cilantro Rice
1 cup long-grain white rice
2 x 1-inch-long pieces fresh ginger, peeled, each cut into 4 rounds, plus 1 teaspoon minced peeled fresh ginger
1 2/3 cups low-salt chicken broth
1 1/3 cups chopped fresh coriander/cilantro
1 green onion, thinly sliced
3 tablespoons vegetable oil
1 tablespoon Asian sesame oil
1 teaspoon (or more) unseasoned rice vinegar

Combine rice and ginger rounds in large saucepan. Add broth; sprinkle with salt. Bring to boil, stirring often. Cover; reduce heat to low. Simmer until rice is tender and broth is absorbed, about 18 minutes.

Meanwhile, combine chopped cilantro, green onion, and minced ginger in mini processor. Add both oils and 1 teaspoon vinegar. Blend until almost smooth. Season cilantro oil to taste with salt, pepper, and more vinegar, if desired.

Transfer rice to bowl. Remove ginger rounds. Mix in coriander/cilantro oil and serve.

Source: Bon Appetit June 2010

Posted in Barbeques/Grilling, Mains, Poultry, Vegetables | 2 Comments

Strawberry ShortcakePrint Recipe

It’s summer time in Chicago. There are leaves on the trees and flowers in abundance, happy screams and shouts can be heard from the parks and the beaches, children are licking their ice creams while long melted drops trickle down their little hands and faces,  fresh lemonade can be bought from stands on the sidewalk and people gather to chat on their stoops – everyone is soaking up the warm sunshine after another bitterly cold Winter.

And us?  well, we are a couple of weeks away from heading back to Australia for a short while – back to Winter again. So I thought I should make the most of the wonderful produce that Summer brings, in this instance, strawberries.

I have a friend from New York who many years ago requested a strawberry shortcake for his birthday lunch. I had no idea what one was and couldn’t get my hands on a recipe (it was pre internet) so I drew inspiration from Strawberry Shortcake herself – the scented doll from the 80’s.  I made a vanilla cake, smothered it in a pale pink buttercream frosting, filled it with strawberries and whipped cream , then I sprinkled strawberries over the top. It looked very pretty and tasted very good but it was certainly no strawberry shortcake.

So Maurice, I know it’s late (by about 15 years) but here is your strawberry shortcake, the real deal. 

This most delightful little treat is a buttery and slightly sweet sugar crusted biscuit filled with whipped cream and strawberries. So very easy to make and perfect for any occasion. Tonight that occasion is a family dinner at home.

1 2/3 cups (224 grams) all-purpose flour
3 1/2 tablespoons (50 grams) sugar
1 tablespoon plus 1/2 teaspoon (20 grams) baking powder
2 hard-boiled egg yolks
1/8 teaspoon salt
6 tablespoons (84 grams) cold unsalted butter, cut into 1/2-inch cubes
2/3 cup (168 grams) plus 1 tablespoon heavy cream

1/2 pound (226 grams) strawberries, washed, hulled and quartered
2 tablespoons (25 grams) sugar
1 tablespoon lemon juice
1 cup whipping cream, beaten to soft peaks

 Preheat oven to 350°F.

In the bowl of a food processor, combine the flour, sugar, baking powder, egg yolks, and salt. Pulse to combine. Add the butter and zest, if using, and pulse until the flour resembles coarse meal. Add 2/3 cup of cream and pulse until the dough comes together.

Turn the dough out onto a lightly floured work surface and gather together. Knead gently to incorporate and then pat it into a rough circle about 3/4 to 1-inch thick.

Using a cookie cutter, cut as many shapes as you can and arrange on a parchment-lined baking sheet. As gently as possible reshape the dough and cut more shapes. (re-working the dough too much will make it tough – in order to keep the dough as tender as possible many choose to abandon the cookie cutter and cut into 6 rough squares with a very sharp knife, or shape dough in a circle and cut 6 cake-like wedges) Chill for 20 minutes (and up to 2 hours).

Brush the tops of the shortcakes very lightly with heavy cream and sprinkle lightly with the coarse sugar. Bake until risen and golden brown, 18 to 20 minutes.

While the shortcakes are baking, toss the strawberries, sugar and lemon juice together in a bowl. Macerate for several minutes or a little longer if your berries are on the firm side.

Split the shortcakes in half and place the bottoms on plates, heap strawberries over them and then spoon whipped cream generously over the strawberries. Replace the shortcake tops and serve immediately.

Source:  adapted from Claudia Flemings – The Last Course & James Beards Classic Strawberry Shortcake recipe

Notes: The only trick to perfecting these is to avoid handling the dough too much – this will render the finished product a little on the tough side.

Posted in Desserts, Fruit | 6 Comments