Spaghetti & MeatballsPrint Recipe


 ‘on top of spaghetti, all covered in cheese,

I lost my poor meatball when somebody sneezed

It rolled off the table and onto the floor

Before I could catch it – it rolled out the door’

now that would be a tragedy…

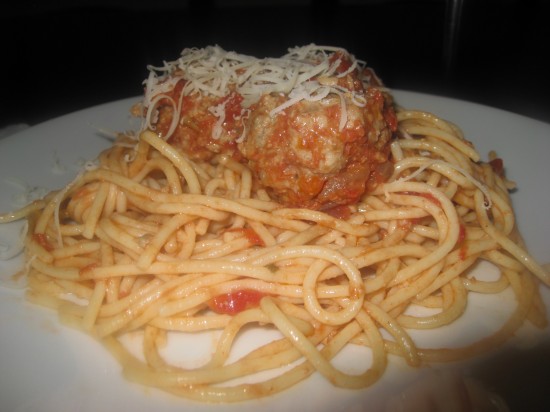
I love Spaghetti and Meatballs and I am surprised it has actually taken me this long to make them. Lucky for me I found a fantastic recipe for my meatball debut, I got it from an old American Gourmet magazine. It makes a lot of meatballs and if necessary you can always freeze those left over from your feast for a later date.

The mixture of meats give a lovely flavour to this dish and these flavours are intensified with the inclusion of fresh herbs, parmesan and lemon zest.

So call up your friends and organize that Sunday lunch – these meatballs and your lunching companions will make for a memorable and feel-good afternoon.

Tomato Sauce
4 (28oz) cans of diced tomatoes
1 large onion
¼ cup of extra virgin olive oil
4 cloves of garlic, finely chopped

Meatballs
1 large onion
¼ cup olive oil
7 garlic cloves, finely chopped
2 cups of day old Italian bread, torn
2 cups of full cream milk
4 large eggs
1 1/3 cups of grated parmesan
1/3 cup finely chopped flat leaf parsley
¼ cup finely chopped oregano or 1 teaspoon of dried oregano
1 tablespoon of grated lemon zest
455 grams/ 1 pound of ground veal
455 grams/ 1 pound of ground pork
455 grams/ 1 pound of ground beef (not lean)
2/3 cup of vegetable oil

Pasta
1 kilo of dried spaghetti

Sauce
Empty the tomatoes and their juices into a large bowl and crush further with your hands. In a large (really big) heavy based pot, cook the onions in the oil over a medium heat until softened – about 10 minutes. Add the garlic and cook for another 2 minutes – stirring occasionally. Stir in the tomatoes with 4 teaspoons of salt and a teaspoon of pepper. Simmer this uncovered for 45 minutes, stirring occasionally and set aside.

Meatballs
Cook the onions in the olive oil for approximately 10 minutes, add the garlic and cook for a further 2 minutes. Allow to cool.

Soak the bread in the milk until soft – about 5 minutes. Firmly squeeze the bread to remove the excess milk and discard the milk.

Stir together the cooled onions mixture, bread, eggs, parmesan, parsley, oregano, lemon zest, 3 teaspoons of salt and ½ teaspoon of pepper. With your hands, mix the 3 meats well and add to the bread mixture gently mixing with your hands until just combined – do not over mix.

Form meat mixture into about 1.5 inch balls with dampened hands, arrange on baking sheets or parchment paper.

Heat vegetable oil in a heavy frying pan/skillet and add meatballs. Brown in a couple of batches, turning frequently – cooking for about 5 minutes per batch. Return these semi cooked meatballs to the baking sheets.

Add all the meatballs to the tomato sauce and gently simmer, covered and stirring occasionally until cooked through – about 25 minutes. If you do not have a big enough pot – decide the meatballs and sauce between 2 pots. It may appear that you do not have enough sauce to cover them but you will – too much sauce can cause them to break up.

Preparation
Cook spaghetti in boiling salted water until al dente. Toss with some of the tomato sauce in a large serving dish. Serve with the meatballs, remaining sauce and grated parmesan.

Notes: The meatballs can be made and simmered in sauce 5 days ahead and chilled (covered once cool). Meatballs and the sauce can be frozen in an airtight container or heavy duty sealed bags for up to 3 months.

Source: Gourmet, January 2009

Posted in Mains, Meat, Pasta/Noodles, Recipes | 3 Comments

Chocolate Mayonnaise CakePrint Recipe


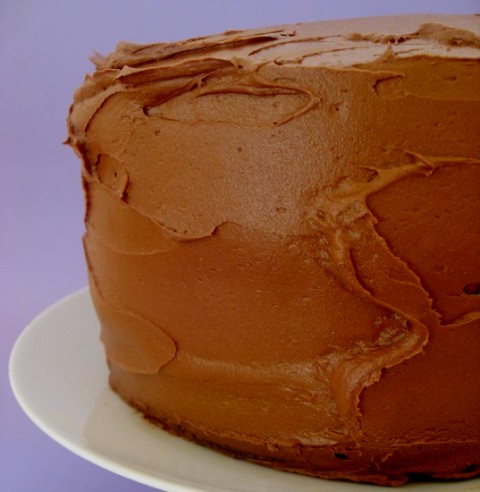
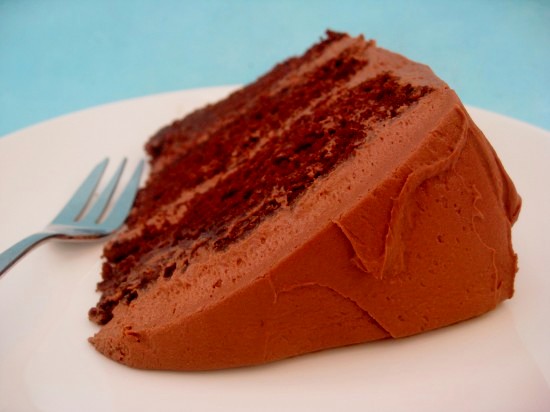
I had been sitting at my computer for quite a while before I attempted this post. My conundrum – should I reveal the secret ingredient of this fantastic cake in the title? As you can see I did and I am sure you will agree with me – it is certainly not enticing. This being said, I can assure you that this recipe will give you the most tender and moist chocolate cake you have ever tasted – with frosting to die for.

When I first came across this a magazine, I thought to myself – here we go, it’s another one of those crazy American cakes. But something compelled me to try it and I am so glad I did. This cake is now going to be my ‘go to’ chocolate cake. Oh, I have no doubt in my mind that I will make many others but this one is superbly sensational.

And just to let you know – once cooked there is no residual mayonnaise taste. The mayonnaise actually contributes to the cakes velvety texture by replacing the oil that is often used in chocolate cakes.

Are you sold yet?

I will finish off by telling you that the first person to try this cake put down her cake fork mid sentence, looked up towards the heavens and said OH. MY. GOD!

You cannot beat a reaction like that.

 Cake
57 grams/2 ounces bittersweet chocolate (do not exceed 61% cocao), chopped
2/3 cup unsweetened cocoa powder
1 3/4 cups boiling water
2 3/4 cups plain (all purpose) flour
1 1/4 teaspoons baking soda
1/4 teaspoon baking powder
1 cup sugar
1 cup (packed) dark brown sugar
1 1/3 cups mayonnaise (do not use reduced-fat or fat-free)
2 large eggs
1 teaspoon vanilla extract

Frosting
283 grams/10 ounces bittersweet chocolate (do not exceed 61% cacao), chopped
1 1/2 cups (339 grams/12 ounces) unsalted butter, room temperature
3 cups icing/powdered sugar
1 tablespoon vanilla extract

Cake
Preheat oven to 350°F. Grease three 8-inch-diameter cake pans with 1 1/2-inch-high sides. Combine chopped chocolate and cocoa powder in medium metal bowl. Add 1 3/4 cups boiling water and whisk until chocolate is melted and mixture is smooth.

Sift flour, baking soda, and baking powder into another medium bowl. Using electric mixer, beat both sugars and mayonnaise in large bowl until well blended, 2 to 3 minutes. Add eggs, 1 at a time, beating until well blended after each addition. Beat in vanilla. Add flour mixture in 4 additions alternately with chocolate mixture in 3 additions, beating until blended after each addition and occasionally scraping down sides of bowl. Divide batter among prepared cake pans.

Bake cakes until skewer inserted into center comes out clean, around 30 minutes. Cool cakes in pans on racks for about 30 minutes then run a small knife around sides of cakes to loosen. Carefully invert cakes onto racks and let cool completely.

Frosting
Place chopped chocolate in medium metal bowl; set bowl over saucepan of simmering water and stir until chocolate is melted and smooth. Remove bowl from over water; let melted chocolate cool until lukewarm, stirring occasionally.

Using electric mixer, beat butter in large bowl until smooth and creamy. Sift powdered sugar over butter and beat until well blended, about 2 minutes. Beat in vanilla. Add melted chocolate and beat until well blended and smooth, occasionally scraping down sides of bowl.

Place 1 cake layer on platter. Spread 3/4 cup frosting over top of cake layer to edges. Top with second cake layer; spread 3/4 cup frosting over. Top with third cake layer. Spread remaining frosting decoratively over top and sides of cake.

Notes: I did not have 3 x 8” cake tins so I divided the mixture into 3 and cooked one at a time ensuring I gave the mixture a good re-beating prior to placing in the oven.

Source: Bon Appetit, April 2010

Posted in Cakes, Chocolate | 6 Comments

Chicken Salad SandwichesPrint Recipe


 I have spent the better part of the last two days with my dear friends, butter and sugar – and what a combination they are. The kitchen countertops are laden with cupcakes, sugar cookies, jam drops, brownies and of course a birthday cake fit for a blossom of a birthday girl who is turning 4. We are having a small gathering to celebrate and want to do it in style.

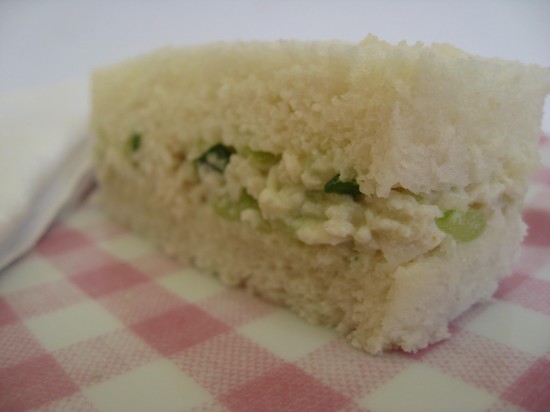
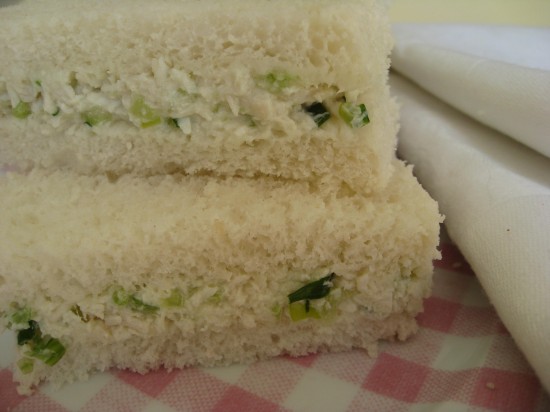
In addition to these sweet confections I am also putting together some chicken sandwiches and sliders. I know chicken sandwiches sound like pretty average fare for such an auspicious occasion however these have done the rounds at many parties and get togethers and have a cult-like following.  There is something about a good chicken sandwich that keeps you coming back for more.

There are a few essential factors to a good chicken sandwich and they are all as equally as important as each other. Firstly, the bread – it can’t be too soft, it has to have some texture and be able to hold the weight of the chicken salad. The second is the ratio of celery to chicken – we like a good crunch and thirdly the mayonnaise must be of good quality – I use Hellmans which I love as it’s not too vinegary. Then the seasoning – there is alot of disappointment that comes with eating a blandwich (be a little liberal with the salt) and finally, it is very important that you assemble them just before serving so the bread maintains it freshness. So, stick to these tips and you will have yourself a legendary chicken sandwich that will do many, many rounds at any brunch, lunch, afternoon tea or party. A chicken sandwich that your granny would be proud of.

2 organic chicken breasts (whole not halved)
2 litres of chicken stock
8 stalks of celery, finely diced
6 shallots, finely sliced
around 400 grams/14 ounces of whole egg mayonnaise
a small handful of italian parsley, finely diced
salt & pepper
white bread

Bring chicken stock to boil and reduce to a bare simmer, submerge chicken breasts and simmer until cooked through (ensure chicken is completely covered – top up with water if necessary). Remove from liquid and cool.

Chop chicken into tiny pieces and combine with celery, shallots, parsley. Mix in mayonnaise to bind and add salt and pepper to taste. Spread onto the bread – cut away the crusts and slice into fingers – I usually get three fingers from a standard piece of bread.

Notes: The amount of mayonnaise I have specified is a guide – please increase or decrease if you so desire but keep in mind you need a mixture that is not too runny and not too dry. Also, you can make the mixture a day in advance and refrigerate. And if you find yourself in a situation where you do need to make these a little in advance then cover with a damp tea towel to maintain freshness.

Posted in Childrens Parties, Morning Teas/High Teas, Picnic Food, Poultry, Sandwiches | 5 Comments

Raclette with potatoes and goat’s cheesePrint Recipe


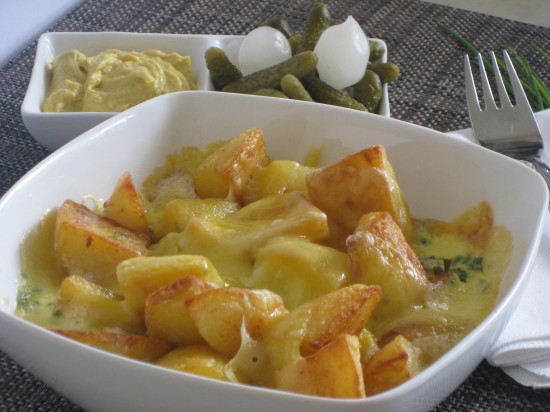
Something is up. Every time I make some sort of potato dish I envisage myself sitting in front of an open fire with a few good friends and a good, gutsy bottle of red. I cannot tell you why this is but today it has happened again. The culprit is this belly buster of a potato dish that is just so incredibly good. And when I say belly buster I don’t mean in a healthy way either. This is very much comfort fare; food to be shared amongst friends, with wine (there, see – it happened again!) and good conversation.

I think I am now resigned to this strange re-occurrence of associations in my life and will just have accept it for what it is.  Potatoes, red wine and open fires. It would seem a travesty to have this with say, a glass of water after all. At any rate, this dish would make the perfect side to something a little less rich or could also be a mighty good part of a tapas style meal and of course would shine served on its own.  The cream sauce (which is the highlight in my opinion) is flavoured in the most gentle of ways with a goats cheese and chives. Don’t forget to serve it with some little dishes of cornichons, pickled onions and mustard as is the tradition in the French Alps. And I probably don’t need to say it but you should open a bottle of red – enough? Yes, I think so.

650 grams/1.4 pounds waxy potatoes, peeled and cut into 2cm pieces (a little under an inch)
125 mls/ ½ cup clarified butter (see notes)
250 mls/ 1 cup pouring cream
90 grams/4 ounces soft goats cheese, coarsely crumbled ( I used an aged goats cheese – much like a Brie)
2 tablespoons of chives, finely chopped
250 grams/8.8 ounces Raclette, thinly sliced (can be substituted with Gruyere)

Preheat oven to 200c/400f. Pat potatoes dry with a tea towel. Heat clarified butter in a frying pan over medium heat, add potatoes, cook in 2 batches, stirring occasionally, until golden and tender (15-20 minutes). Remove potatoes with a slotted spoon, transfer to one large dish or divide between four 450ml oven proof serving dishes.

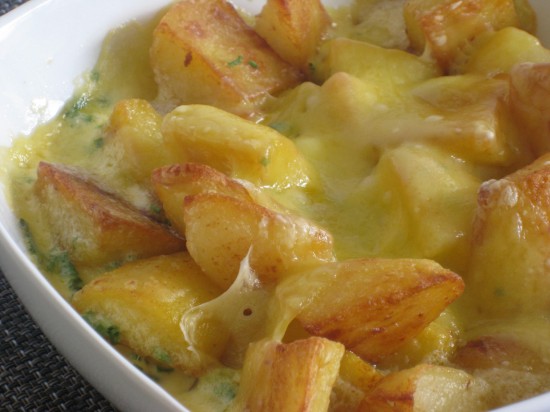
Meanwhile, bring cream to the simmer in a saucepan over medium heat and season to taste. Remove from heat and whisk in goat’s cheese and chives. Pour over potatoes, top with raclette and bake until golden (13-15 minutes). Serve hot with mustard, cornichons and pickled baby onions.

Notes: To make clarified butter, heat unsalted butter over a low heat till it starts to simmer and a foam appears on top. When it looks as though no more foam is rising then remove it with a spoon and discard. The remaining liquid is the clarified butter. You will lose around 20 -25% of the quantity during this process so ensure you add that onto the required amount. In this instance you would start out with 150mls of butter.

Source: Australian Gourmet Traveller, June 2010

Posted in Sides, Starters, Vegetables, Vegetarian | Leave a comment

World Peace CookiesPrint Recipe


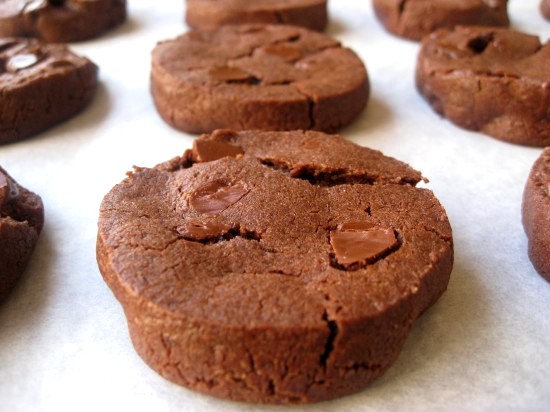
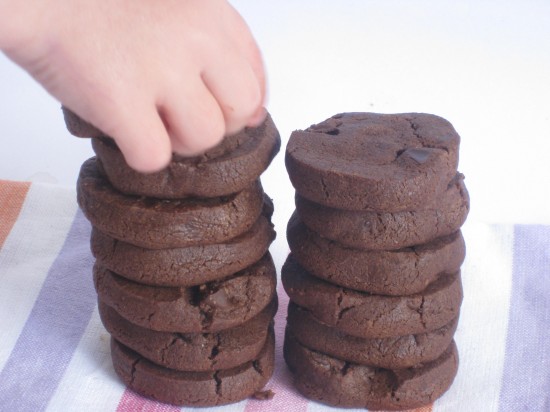
I have just stumbled upon a cookie (biscuit) recipe that will blow your chocolate loving minds and I am not exaggerating. I found it in a cookbook written by Dorie Greenspan, a woman who is enamoured with Paris and its sweets. She shall now be known as my brand new baking buddy.

So good are these that even in their uncooked state they can bring tears to your eyes. My initial batch barely made it to the oven – the frenzy in the kitchen to get to the fudgy dough was nothing short of animalistic. I could blame it on the children but no, I have to admit I was just as involved as they were.

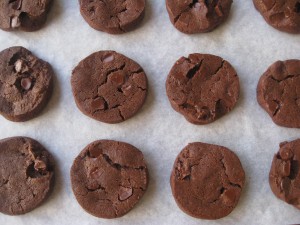
They are perfectly described as light yet dense, with drops of bittersweet chocolate that not only increase the already intense chocolate flavour but take you to chocolate cookie nirvana.

You should get around 36 cookies – if you don’t start nibbling on that cookie dough that is.

1 1/4 cups (175 grams) all-purpose flour
1/3 cup (30 grams) unsweetened cocoa powder
1/2 teaspoon baking soda
11 tablespoons/150 grams unsalted butter, at room temperature
2/3 cup (120 grams) (packed) light brown sugar
1/4 cup (50 grams) sugar
1/4 teaspoon fine sea salt
1 teaspoon vanilla extract
150 grams/5 ounces of bittersweet chocolate, chopped into chips, or store-bought mini chocolate chips
Sift the flour, cocoa and baking soda together.

Working with a stand mixer, preferably fitted with a paddle attachment, beat the butter on medium speed until soft and creamy. Add both sugars, the salt and vanilla extract and beat for 3 minutes more.

Turn off the mixer. Pour in the flour, and pulse the mixer at low speed about 5 times, two – three seconds each time. If there is still a lot of flour on the surface of the dough, pulse a couple of times more. Continuing at low speed, mix for about 30 seconds more, just until the flour disappears into the dough. For the best texture, work the dough as little as possible once the flour is added, and don’t be concerned if the dough looks a little crumbly. Toss in the chocolate pieces and mix only to incorporate.

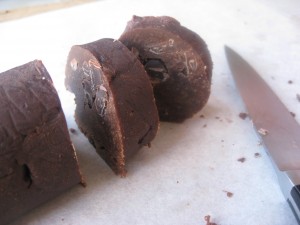
Turn the dough out onto a work surface, gather it together and divide it in half. Working with one half at a time, shape the dough into logs that are 1 1/2 inches in diameter. Wrap the logs in plastic wrap and refrigerate them for at least 3 hours. (The dough can be refrigerated for up to 3 days or frozen for up to 2 months. If you’ve frozen the dough, you needn’t defrost it before baking — just slice the logs into cookies and bake the cookies 1 minute longer.)

Center a rack in the oven and preheat the oven to 325°F (160°C). Line two baking sheets with parchment or silicone mats.

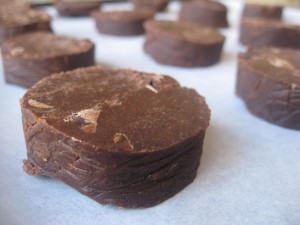
Working with a sharp thin knife, slice the logs into rounds that are 1/2 inch thick. (The rounds can crack as you’re cutting them — don’t be concerned, just squeeze the bits back onto each cookie.) Arrange the rounds on the baking sheets, leaving about one inch between them.

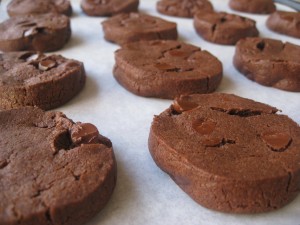
Bake the cookies one sheet at a time for 12 minutes ( no longer!). Transfer the baking sheet to a cooling rack and let the cookies rest until they firm up and are only just warm, at which point you can serve them or let them reach room temperature.

Notes: In Paris Sweets these cookies are called Korova Cookies, Sables Korova was the resaurant for which Pierre Herme created them.

Source: Paris Sweets, Dorie Greenspan Paris Sweets: Great Desserts From the City’s Best Pastry Shops 

Posted in Biscuits/Cookies/Slices/Bars, Chocolate | Leave a comment

Vitello TonnatoPrint Recipe


I am often asked what drives me to choose the recipes I attempt in my kitchen. Well, there is actually no hard and fast method. Sometimes it is the images, sometimes I like the ingredients or more simply, the name of it sounds good. And on the odd occasion it is because I have eaten it at a restaurant and would like to try making it myself. Such is the case with Vitello Tonnato.

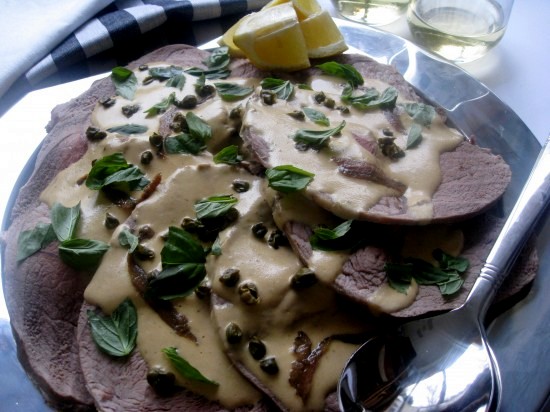
I have had this quite a few times, generally at Italian restaurants and I love it. The thinly sliced pieces of tender veal covered in a mayonnaise style sauce that has been flavoured with tuna, capers and anchovies. It is best served chilled or at room temperature and is simply superb served as part of a Summertime Italian banquet.

My biggest mistake in making this dish was not sharpening my knife properly before I sliced the veal, rendering my pieces of meat a little on the thick side. Nevertheless, still delicious and definetely one to keep in mind for my next dinner party.

And before I forget – it is best not to leave out any of the garnishes. The anchovies, the fried capers and the roughly torn basil really add a flavour burst to this already sensational dish.

Veal
60 mls (1/4 cup) of olive oil
2 kilo/4.4 pounds piece of veal rump
4 celery stalks, coarsely chopped
1 onion, quartered
3 fresh bay Leaves
5 sage leaves
3 thyme sprigs
1 tablespoon of black peppercorns
150mls (3/4 cup) of dry white wine
Torn basil and lemon wedges to serve

Tonnato
2 egg yolks
2 tablespoons of lemon juice
250 mls (1 cup) extra virgin olive oil
200 grams/7 ounces canned tuna in olive oil, drained
1 tablespoon salted capers, rinsed

Heat 2 tablespoons of the oil in a large frying pan over high heat, add veal rump and turn often until browned (around 6-8 minutes), remove from pan and set aside.

Combine celery, onion, herbs, peppercorns and wine with 3 litres cold water in a large saucepan and bring to the boil over high heat. Add veal, top up with water to cover if required (and continue to do so throughout the cooking process), reduce heat to low and simmer until veal is tender (1¼-1½ hours). Remove from heat and cool veal in liquid.

Meanwhile, for tonnato, process yolks, lemon juice and anchovies in a food processor until smooth then, with motor running, add oil in a thin, steady stream. Add the tuna and half the capers, pulse to just combine and set aside.

Heat remaining oil in a small frying pan, add remaining capers and fry over medium heat until crisp (1-2 minutes), strain through a metal sieve (discard oil), drain on absorbent paper and set aside.

Remove veal from liquid (discard liquid) and slice into 5mm-thick pieces. Arrange on a platter, spoon over tonnato, scatter with fried capers, extra anchovies and torn basil and serve with lemon wedges.

Notes: If you find the Tonnato a little too thick or too full of flavour for your taste you can dilute it with a little cream. But most importantly, don’t skimp on it – the veal should have lashings of this luscious sauce.

Source: adapted from Australian Gourmet Traveller, May 2010

Posted in Mains, Meat | Leave a comment

Blueberry MuffinsPrint Recipe

Do you remember when muffins became a seriously commercial item in the western world (circa 1990 I think?) – I am not talking about the English breakfast muffin but the muffin I would liken to a large cupcake without the icing. Which is, in fact, exactly what they were and yet for some strange reason or perhaps a very clever marketing strategy we all thought they were healthy. Cake by any other name but it was still cake!

Anyway, I will stop banging on about the misconception of the muffin and get to this wonderful blueberry muffin recipe I have been using from Baking Illustrated.  This recipe produces a nice moist muffin with enough texture to properly hold the blueberries without it being too heavy. The sour cream component compliments the blueberries and adds to the muffins tenderness – just what you have been after I am sure.

This recipe stipulates the use of a whisk and it is important that you use one over an electric beater as  overbeating can result in a tougher consistency in the finished product.

2 cups of unbleached plain (all purpose) flour
1 tablespoon of baking powder
½ teaspoon of salt
1 large egg
1 cup of sugar
4 tablespoons of unsalted butter – cooled slightly
1 ¼ cups of sour cream
1 ½ cups of frozen or fresh blueberries

Heat the oven to 350 degrees with the oven rack sitting in the middle position. Grease a standard 12 cup muffin tin (or the equivalent) and set aside. (I use paper muffin cups)

Melt the butter and set aside to cool. Whisk the flour, baking powder and salt in a bowl until combined.

In another bowl whisk the egg until well combined and lightly coloured – around 30 seconds. Add the sugar and whisk vigorously until thick and blended – around 30 seconds. Add the melted butter in 2 additions – whisking to combine. Follow with the sour cream in 2 additions – whisking again just to combine.

Add the berries to the dry mixture and stir till evenly dispersed.  Add this to the sour cream mixture and fold with a rubber spatula and the batter comes together. Do not overmix. Using a large spoon sprayed with non stick cooking spray (prevents the mixture sticking) divide the batter evenly between the muffin cups.

Bake until the muffins are a light gold brown and a skewer inserted comes out clean – around 25 – 30 minutes. Remove and invert on a wire rack, stand muffins upright and cool.

Variation: If you feel the need to add to this simple recipe (aside from a sprinkle of confectioners sugar) you can dip them into a cinnamon and sugar mixture. Let the muffins cool for 5 minutes and mix ½ cup of sugar and ½ a teaspoon of ground cinnamon in a bowl. Melt 4 tablespoons of butter and dip the top of each muffin into it and then the cinnamon sugar.

Notes: If you need to use frozen blueberries then they must remain completely frozen until they are stirred into the batter – this will prevent bleeding. And as with all tea cake types – these are best cooked and eaten on the same day.

Source: adapted from Baking Illustrated

Posted in Cakes | Leave a comment

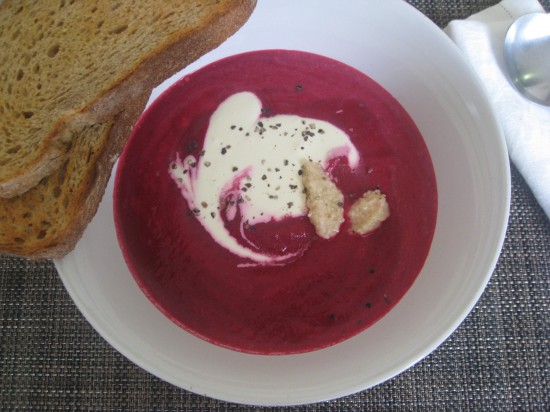
Beetroot Soup with Creme Fraiche & HorseradishPrint Recipe

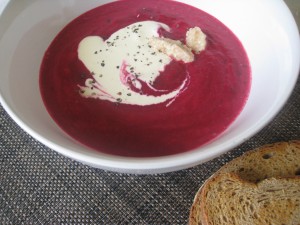
There is something quite nice about eating such a splendidly rich, pink soup. Well, my daughters thought so anyway. And once the novelty of the vibrant hue was gone, the simple and distinctive flavours of this earthy soup took over. The combination of slow roasted beetroot, pan fried bacon and cabbage will fill you as they will nourish you.

All of this is complimented with a nice spoonful of crème fraiche and a little grating of horseradish. A splendid soup indeed!

1.3 kilos/2.9 lbs of beetroot (approx 4 large beetroot)
50 grams/1.7 oz of lard
150 grams/5.3 oz bacon
1 onion, finely chopped
2 cloves of garlic, finely chopped
6 cups of chicken stock
270 grams/9.5 oz of white cabbage
1 carrot, finely chopped
1 teaspoon of red wine vinegar
Cayenne pepper
Fresh horseradish to garnish
A small tub of Crème fraiche to garnish

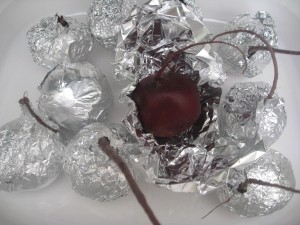
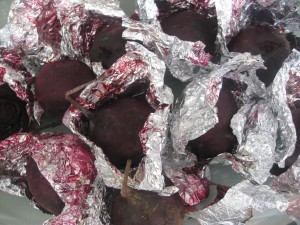
Pre-heat oven to 200c/392f. Wrap each beetroot in foil, roast until tender (1-1½ hours). Set aside to cool, then peel in running water (the skin should rub off very easily and I recommend using rubber gloves for this), coarsely chop and set aside.

Meanwhile, heat lard in a large saucepan over low heat, add bacon, onion and garlic and sauté until very tender (around 15-20 minutes). Add stock, cabbage, carrot and vinegar and simmer over medium heat until vegetables are very tender (40-45 minutes). Add roast beetroot, season to taste with sea salt, freshly ground black pepper and cayenne pepper, cook until beetroot is very tender (10 minutes), then purée with a hand-held blender until very smooth. Keep warm.

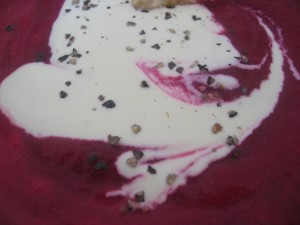
Sprinkle soup with extra cayenne pepper, top with horseradish and a spoonful of crème fraîche and serve with toasted rye bread or rye crackers.

Notes: As you can probably see from the images – I did not have fresh horseradish on hand so I finished it off with a little spoonful of horseradish sauce. Very nice too but try to use the fresh horseradish if you can.

Source:  Australian Gourmet Traveller, June 2010

Posted in Recipes, Soups, Starters, Vegetables | Leave a comment

Anzac Biscuits/Oatmeal CookiesPrint Recipe

Today I got to hang my washing outside. I am in country Victoria and loving the fact that I can use the great outdoors to dry my clothes rather than a dryer.  The flickering morning sunlight was just enough to keep me warm on this icy cold day.  I felt happy and content – and very Australian.

Maybe I have the hills hoist to thank for that? Or perhaps the Kookaburras laughing away in the eucalyptus trees above? Was it the sheepskin boots that kept my feet warm on the frosty grass? No, aside from all of that, I think it was because I was contemplating Anzac Biscuits.

Anzac Biscuits are a uniquely Australian biscuit (cookie) and I have spent years making them from various different recipes. A couple of months ago I used a Donna Hay recipe which I really liked, the only change I made was to use  shredded coconut instead of desicated coconut giving the biscuit a prettier texture.

So, Australian or not, if you like to bake you should try these out. Right now I am going to pop outside and feed some to those kookaburras – hopefully some tasty crumbs should stop them laughing at me.

Ingredients
1 cup of rolled oats
1 cup of plain/all purpose flour
¾ cup of shredded coconut
½ cup of sugar
125 grams/ 4 ounces of salted butter
2 tablespoons of golden syrup (or honey if you have none)
½ a teaspoon of bicarbonate of soda
1 tablespoon of hot water

Heat the oven to 325f/169c. Place the rolled oats, flours, sugar and coconut into a bowl and stir until blended. In a saucepan over a low heat, melt the butter and golden syrup.

Dissolve the bicarbonate of soda in the tablespoon of water and add to the melted butter and syrup mixture. Carefully mix the wet and dry ingredients together.

Form into 1 inch balls and place on a baking tray lined with a cookie sheet or non stick baking paper about 2 inches apart. Bake in the oven until they are golden in colour, approximately 10 – 12 minutes.

Remove and leave on the baking tray for a minute or two until they harden slightly and then cool on a wire rack and store in an airtight container.

Notes: Some people prefer a harder Anzac Biscuit – if you are one of these people then leave the biscuits in the oven for the full 12 minutes or even a fraction longer – check frequently though because it doesn’t take much to over cook them.

History: I know most people know the story but here it is again for those who don’t –  Anzac Biscuits were developed in the 1st World War by a group of women who wanted to send something nutritional to their loved ones (Australian New Zealand Army Corps) at war. Given that the distance they had to travel to get to the soldiers was lengthy, the biscuits had to last two months at least using ingredients that did not spoil. They were originally called Soldiers Biscuits however after the landing at Gallipoli were renamed Anzac Biscuits.

Source: adapted from a Donna Hay recipe in Modern Classics 2

Posted in Biscuits/Cookies/Slices/Bars, Picnic Food | 6 Comments

Mustard Roast PotatoesPrint Recipe

Until I cooked these I truly believed I had the recipe for the perfect roast potato, however, Mr Man has informed me that these are now his favourite – and he is a potato connoisseur. Not only are they supremely tasty , they are also relatively healthy – in the roast potato scheme of things. The mustard that coats the potatoes cooks to a crunchy golden brown while the inside remains creamy and sweet.

I don’t think you have to wait to cook a roast before you try these. Of course they would be fantastic with roast pork or any roast for that matter but I think paired with a nice salad for a lighter meal would also knock anyone’s socks off.  

vegetable oil or vegetable oil spray
½  cup whole grain Dijon mustard
2 tablespoons extra-virgin olive oil
2 tablespoons (1/2 ounce) butter, melted
2 tablespoons fresh lemon juice
3 garlic cloves, minced
1 tablespoon dried oregano
1 teaspoon finely grated lemon peel
1 teaspoon sea salt
1.3 kilograms/3 pounds of 1 to 1 ½ -inch-diameter mixed unpeeled red-skinned and white-skinned potatoes, cut in half

Preheat oven to 425f/220c.

Grease 2 large rimmed baking sheets with oil or nonstick spray. Whisk mustard, olive oil, butter, lemon juice, garlic, oregano, lemon peel, and salt in large bowl to blend. Add potatoes, sprinkle generously with freshly ground black pepper and toss to coat.

Divide potatoes between prepared baking sheets, leaving any excess mustard mixture behind in bowl. Spread potatoes in single layer. Roast until potatoes are crusty outside and tender inside, turning occasionally, about 60 minutes.

Transfer potatoes to serving platter.

 Notes: Sometimes when I have made these I find that 60 minutes is not quite enough as we prefer a really crunchy roast potato so I have cooked them for another 10 – 20 minutes.

Source: Adapted from Gourmet, December 2007

Posted in Sides, Vegetables, Vegetarian | 1 Comment