RatatouillePrint Recipe

Fall in New York City is full of inspiration when it comes to cooking. The markets are flooded with the most wonderful produce, from tomatoes, chard and capsicums (bell peppers) through to apples, pomegranates and figs. Here in New York, pumpkins and winter squash are spilling out onto the sidewalks of grocery stores in a vast array of oranges and yellows, and what a lovely site it is.

I went to the local market this morning and came home with the best of this seasonal produce, and realized I had all the makings for a good ratatouille. Ratatouille (a traditional French provincial dish of vegetables) is something I have been making for a long time – I was introduced to it by a girl I went to school with in my very young years and marveled at the fact that someone could make eggplant taste so good.  

Whilst I was growing up my parents had an enormous vegetable garden filled with the standard tomatoes, corn, carrots and potatoes. In an effort to expand their veggie repertoire they ventured into the unknown territory of eggplants, artichokes and a variety of other vegetables that were not so common in those days. And between you and me, not very many people knew how to use them. In fact the eggplant dishes that we made were so terrible that we took to shooting the perfectly purple vegetables with our bows and arrows. ‘We are not too sure what has happened to them’ we would say to our dad who was wondering why his precious eggplants were rotting on the vines. It was a conspiracy but we had no alternative – the thought of it on our dinner table again was too much.

Now I love eggplant and my mum has some wonderful recipes, ratatouille being one of them.  I love its delicious and rustic flavours and the colours that the ingredients bring to the dish, the reds, purples, oranges and yellows.

So, is eggplant the new black? That is something that I am not 100% sure of but tonight in my kitchen it most certainly is.

4 tablespoons of extra virgin olive oil
3 tomatoes, blanched and skin removed, roughly chopped
2 red onions, roughly chopped
2 zucchinis (courgete), roughly chopped
2 small yellow squash, roughly chopped
1 large eggplant, roughly chopped
1 red capsicum (red pepper), roughly chopped
1 green capsicum, (green pepper), roughly chopped
3 cloves of garlic, finely diced
A handful of Italian parsley
Salt to flavour

Heat the oil in a large saucepan over a medium heat. Add all ingredients, except the garlic and parsley, and cook uncovered for 25 minutes. Stir every 5 minutes. Add the garlic and cook (uncovered again) for a further 20 minutes until the vegetables are very soft. Season to taste and scatter with Italian parsley.

Notes: Ratatouille is delicious hot or cold. It can be served as a side dish with grilled meats or as a meal on its own with some crusty bread or couscous.

Source: Adapted from A Cooks Companion – Stephanie Alexander

Posted in Sides, Vegetables, Vegetarian | Leave a comment

BrowniesPrint Recipe

Here I am in New York City and it feels quite surreal. The flight over was brutal but we made it and are happy to be settled and not travelling from state to state in Australia like gypsies. This morning, after a long jet lag sleep-in I began to feel perplexed, wondering what I was going to bake for you in the confines of my oh-so-tiny temporary accommodation kitchen with the most minimal of utensils. Then it came to me – brownies, we are in the US afterall.

Brownies…where do I begin. I have made so many brownie recipes in my life and been very disappointed a lot of the time, too dry, too hard, too cakey, to bland, to crumbly etc. Living in America has also given me the opportunity to sample many brownies and decide which characteristics I think make the perfect brownie. Those are, moist and fudgy on the inside surrounded by a slightly cakey exterior, a thin crust on the top and most important of all, they must have a rich chocolate flavour.

I found this recipe in Baking Illustrated* and it is certainly one of the better ones, if not the best and it certainly fills all my criteria. Mr Man, on the other hand, prefers another recipe I use but I am currently trying to perfect the cooking time with that one and as soon as I do I will bake those for you too.

So, if you are a brownie lover, try your hand at these – they truly are a delicious piece of chocolately heaven.

141 grams/5 ounces of semi sweet or bittersweet chocolate, chopped
56 grams/2 ounces of unsweetened chocolate, chopped
8 tablespoons of unsalted butter
3 tablespoons of good quality cocoa powder (Droste is my favourite)
3 large eggs
1 ¼ cups of sugar
2 teaspoons of vanilla extract
½ a teaspoon of salt
1 cup of plain (all purpose) flour

Heat the oven to 350f/176c with the oven rack sitting in the lower middle position.

Grease or spray an 8” square baking pan and line with foil or parchment paper. Ensure that the sides are covered and there is a slight overhang – this will help with the removal of the brownies when they are cooked. Spray or grease the sheets.

Set a heatproof bowl over a pan of simmering water – add the chocolates and the butter and stir occasionally until smooth. Whisk in the cocoa and set aside to cool down a little.

Whisk (hand whisk) the eggs, sugar, vanilla and salt until combined. Then whisk the warm chocolate mixture into the egg mixture, once combined stir in the flour with a wooden spoon until just combined (do not over stir at this point).

Pour the mixture into the prepared cake pan and even out with a spatula. Bake for approximately 35 – 40 minutes, until slightly puffed and a skewer or toothpick inserted comes out with a few sticky crumbs attached. Cool on a wire rack until it reached room temperature – about 2 hours. Remove from the pan using the foil or parchment paper and cut as you so desire, although it is best not to cut them until they are ready to be served. Store in an air tight container.

Notes: Mr Man loves chunks of chocolate in his brownies so occasionally I will add a cup of chocolate chips just after I have stirred through the flour – cooking time will still remain the same.

To refrigerate or not to refrigerate – many people have asked me if I keep my brownies in the fridge or in the pantry and I opt for the fridge. This is a totally personal thing though – I prefer the added fudginess that comes with a refrigerated brownie – try both options yourself and see what you prefer.

* For those of you that have not come across Baking Illustrated, it is a great ‘go to’ book for baking. Full of tips, do’s and don’ts and some great step by step guides to the perfect pie crusts, cakes, slices and biscuits (cookies). It is written by a team of people who have slaved in test kitchens trialing and re-trialing recipes till they arrive at ‘the perfect’ recipe. It certainly is a bible for bakers.

Source: adapted from Baking Illustrated

Posted in Biscuits/Cookies/Slices/Bars, Childrens Parties, Chocolate | 4 Comments

Lamb Cutlets with Garlic & RosemaryPrint Recipe

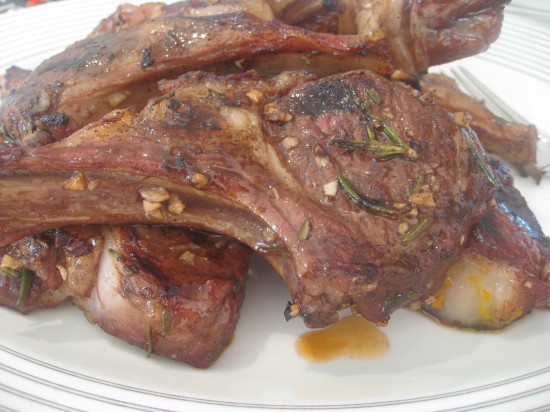
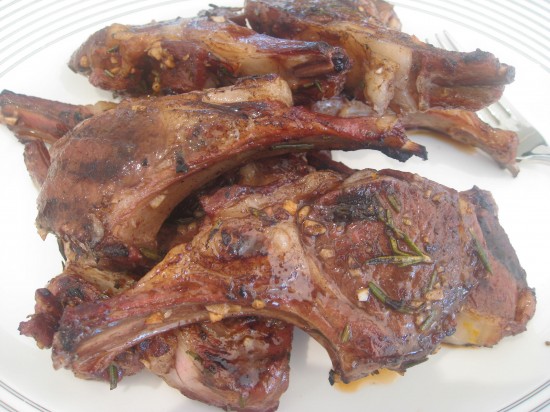
It is our last afternoon in Australia and it is shaping up to be the perfect evening to barbeque some lamb cutlets. We are enjoying the Sydney skyline on our sun spilt terrace, chatting about our holiday and wondering what the future will hold.

I cannot go past Australian lamb for our ‘last supper’. The recipe I have chosen is adapted from an article written by Neil Perry. I certainly don’t feel the need to adapt his recipe, it’s just that the original is in storage waiting to be shipped to New York and this is how I remember it. The ingredients are the same and the flavour is the same, although I am certain the quantities are a little different. This being said, I can only credit Neil (once again) for such a simple masterpiece.

The combination of ingredients and the marination process will give the cutlets a sensational flavour with a rustic and caramelised texture. In fact they smell so good when they are cooking it is torture.

So good bye Australia and hello New York. Our departure is bittersweet and as sad as I am to leave, I am excited to see what the Big Apple will have to offer us. I have my fingers crossed for a spacious pre-war apartment on Central Park with a chef’s kitchen and a terrace. And of course it should be around the corner from a string of New York’s finest providores and a great coffee shop – is that too much to wish for?

500 grams/1.1 pounds of lamb cutlets
1 cup extra virgin olive oil
1/4 cup balsamic vinegar
1 tablespoon of coarsely chopped rosemary
1 tablespoon of finelychopped garlic

Whisk olive oil and balsamic vinegar together in a bowl. Add in garlic and rosemary, season with freshly ground black pepper and sea salt and pour into a marinating container (a large zip lock bag can also work well). Let stand for 1 hour. Add the lamb cutlets and shake to ensure the mixture coats both sides of the lamb. Marinate overnight in the fridge.

Remove from fridge 1 hour prior to grilling/barbequing and bring to room temperature. Barbeque on both sides for approximately 6 – 7 minutes (depending on the size of the cutlets) or until a nice golden brown on the outside and rose coloured on the inside.

Notes: This lamb works really well with the Roasted Pumpkin with Persian Fetta & Pine Nuts recipe I posted a while ago.

Source: Neil Perry

Posted in Barbeques/Grilling, Mains, Meat | Leave a comment

Queen of PuddingsPrint Recipe


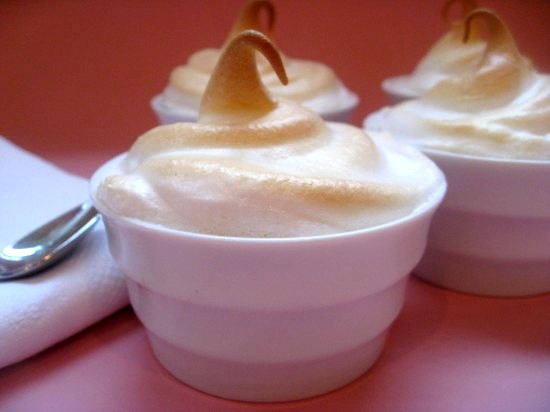
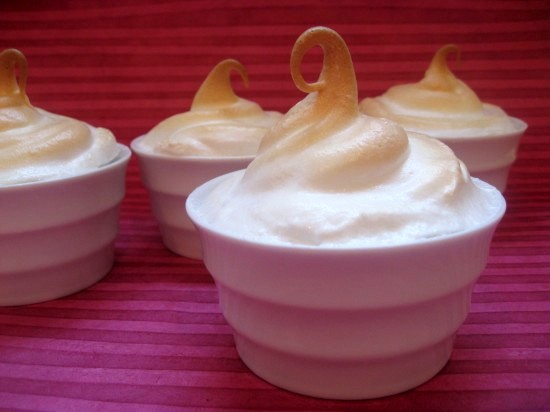
I love puddings, I am a sucker for anything with jam in it and these little beauties look simply gorgeous – three very good reasons for me to try them out.

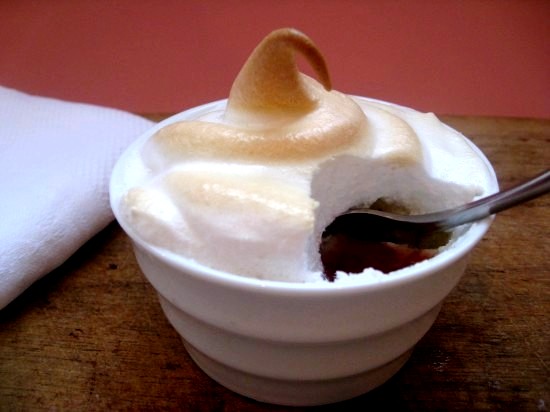
For those of you who are new to the ‘Queen of Puddings’ it is a “ye olde English” recipe that was created in the kitchens of Buckingham Palace for Queen Victoria. It has a base of breadcrumbs soaked in a vanilla infused custard with a hint of lemon, a smear of jam and a pretty meringue top. Pure comfort food.

Comfort food for two little girls that have endured a rainy Sydney afternoon being stuck indoors, finding amusement in forts made from couch pillows and blankets. These little puddings certainly made the afternoon a lot more exciting and it was a pleasure to watch them being devoured. Meringue, jam and custard across faces and fingers, one big sticky mess to clean up and many sticky kisses as a thank you for making something so ‘yummy’ for dessert.


The Queen of Puddings is a royal beauty and if she has not previously been a part of your life then its about time you make her acquaintance.

140 grams/4.9 ounces fresh fine breadcrumbs from white bread
Finely grated rind from two lemons
200 grams/7 ounces caster sugar
225 mls milk
225 mls pouring cream
1 vanilla bean, split and seeds scraped
4 eggs seperated
Butter for greasing
1/2 cup of berry jam (I like raspberry)

Preheat oven to 180c/356f. Combine breadcrumbs, lemon rind and 40gm sugar in a heatproof bowl, set aside. Bring milk, cream, vanilla bean and seeds just to the boil in a saucepan over medium heat, pour onto breadcrumb mixture and stir, then stand until breadcrumbs swell (3-5 minutes). Remove vanilla bean and discard, stir in yolks until well combined. Spoon into 4 buttered 200ml ovenproof and bake until custard just sets (12-15 minutes). Keep warm.

Meanwhile, whisk egg white in an electric mixer until soft peaks form (3-5 minutes). Gradually add remaining sugar in a steady stream, whisking continuously until stiff and glossy and sugar has dissolved (3-5 minutes). Spread a very thin layer of berry jam over puddings , top with meringue and bake until golden brown (approximately 10 minutes).

Source: Australian Gourmet Traveller May 2010

Posted in Desserts | 2 Comments

New York Style Crumb CakePrint Recipe

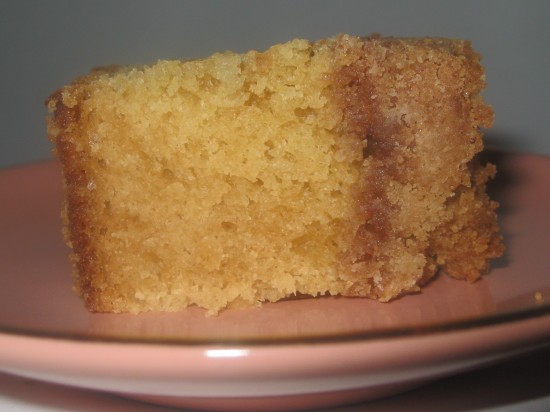
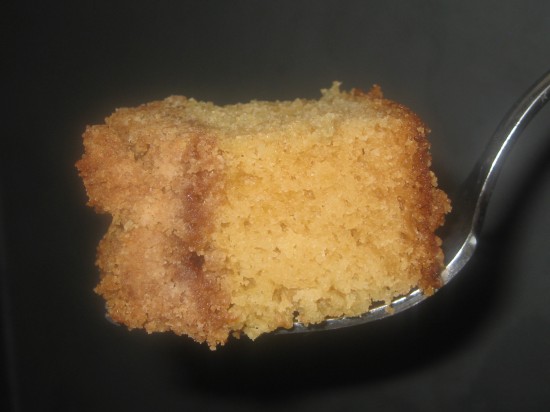
Given that we are moving to New York in less than a week I thought it was quite apt that I try this recipe. And I am so glad our move inspired me to attempt an American style coffee cake because this one is heavenly. A tender cake topped with a cinnamon infused crumble that is so moorish that you cannot help but stand over it and nibble. A little piece here, a little piece there, a tiny bit more and a little more…
In fact we ate a huge slab straight out of the oven, it was meant to last for an afternoon tea I was hosting but that fell by the wayside.

Aside from its perfect cake to crumb ratio, there is a bonus that comes with the baking of this cake and that is the glorious sugary, cinnamon fragrance that will fill your home – it is almost (but not quite) as good as eating the cake itself.

New York, I may not know that much about you yet but I now know your coffee cake and I am getting quite excited.

Topping
1 cup (packed) dark brown sugar
½ cup sugar
1 ½ tablespoons ground cinnamon
½ teaspoon salt
1 cup (454 grams/16 ounces) unsalted butter, melted & warm
2 ½ cups all purpose/plain flour

Cake
2 ½ cups plain (all purpose) flour
1 teaspoon baking soda
3/4 teaspoon baking powder
½ teaspoon salt
3/4 cup (340 grams/12 ounces) unsalted butter, room temperature
1 ½ cups sugar
2 large eggs
1 1/3 cups sour cream
1 teaspoon vanilla extract

Position rack in center of oven and preheat to 176c/350f. Butter a 13×9 inch baking dish or cake tin.

Mix both sugars, cinnamon, and salt in medium bowl and whisk to blend. Add warm melted butter and stir to blend. Add flour and toss with fork until moist clumps form (topping mixture will look slightly wet). Set aside.

Sift flour, baking soda, baking powder, and salt into medium bowl. Using electric mixer, beat room-temperature butter in large bowl until smooth. Add sugar and beat until light and fluffy. Add eggs 1 at a time, beating until well blended after each addition. Add sour cream and vanilla extract and beat just until blended. Add flour mixture in 3 additions, beating just until incorporated after each addition.

Transfer cake batter to prepared baking dish; spread batter evenly with rubber spatula or offset spatula. Squeeze small handfuls of topping together to form small clumps. Drop topping clumps evenly over cake batter, covering completely (topping will be thick).

Bake cake until tester inserted into center comes out clean and topping is deep golden brown and slightly crisp, about 1 hour. Cool cake in dish on rack at least 30 minutes. Cut cake into squares and serve slightly warm or at room temperature.

Notes: Best served on the day of baking, however it can be made 1 day ahead and stored, covered at room temperature.

Source: Bon Appetit April 2010

Posted in Cakes, Recipes | 1 Comment

Caramelized Chicken with Olives & PrunesPrint Recipe


When I first started my blog many people mentioned their favourite sources of recipes. My friend Kim was one of those and she told me of a great cookbook she had received at Christmas from her sister in Paris – Chocolate and Zucchini. I discovered the author also had a blog and hastened to look through it for any recipes that caught my eye, many did and so many I have yet to try. This one in particular caught my attention. The name had my mouth watering and I had no doubt in my mind it would be a taste sensation. I was set, I was going to cook it and I was going to cook it that evening, that is until I read the recipe and it asked me to marinate the chicken overnight. I hate when that happens!


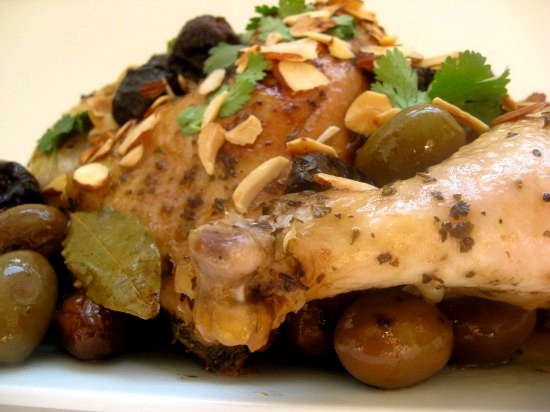
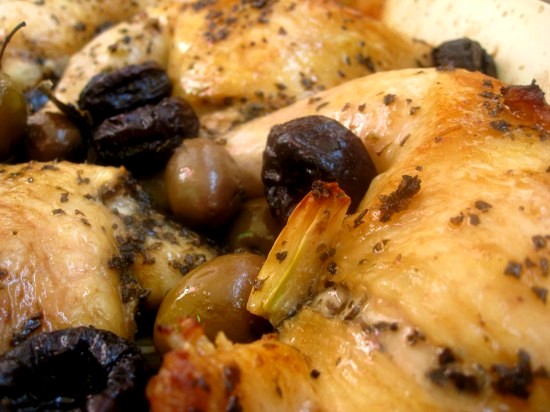
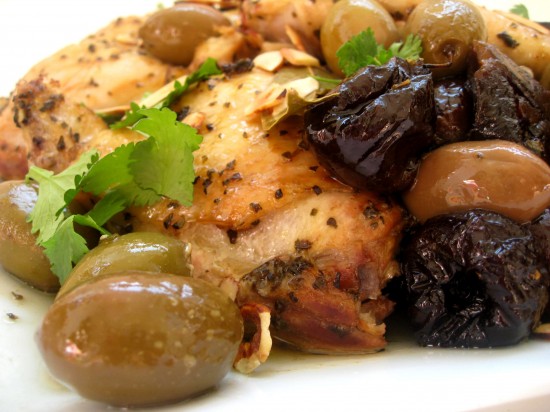
So after 24 hours of patiently whistling dixie I finally got to sample this sublime sounding dish and it was as I thought it would be – a taste sensation. The sweet, the salty, the delicious caramelised chicken, so tender and moist on the inside and glazed to a golden perfection on the outside.


The original dish ‘Chicken Marbella’ is a recipe from The Silver Palate Cookbook. I actually prefer this recipe and in particular the descriptive name change, only because it is so much more enticing.

8 legs of free range chicken (drumsticks and thighs) around 3 kilos/6.5 pounds
130 grams or ¾ cup of green olives
300 grams/10 ounces of pitted prunes, roughly chopped
3 cloves of garlic, crushed
4 bay leaves
1/3 cup of extra virgin olive oil
1/3 cup of sherry vinegar
3 rounded tablespoons of dried oregano
Sea salt
Freshly ground pepper
2 tablespoons of brown sugar
½ cup of dry white wine
1 small bunch of coriander (cilantro)
1/3 cup of sliced almonds, toasted

Start this recipe the night before. In a large bowl combine the chicken, olives, prunes, garlic and bay leaves. In a smaller bowl, whisk together the olive oil, vinegar and oregano. Season with pepper and salt. Pour this over the chicken and combine until the marinade coats the chicken thoroughly – use your hands and get it into every crevice. Cover with plastic wrap and refrigerate overnight.

Remove from the refrigerator an hour before baking to bring to room temperature. Preheat the oven to 180c (350f). Place the chicken into a baking dish large enough to accommodate in a single layer – you may need to use two. Pour the remaining marinade over the chicken, sprinkle with the sugar and add the white wine. Place in your oven and back for 1 to 1 ½ hours, basting and flipping the pieces every 20 minutes or so, until the juices run clear and the meat is caramelized.
Sprinkle with coriander and almonds and serve.

Notes: This dish is good either hot or at room temperature. It keeps and its flavours intensify over a couple of days in refrigeration (a good thing too because this recipe make enough for 10 people – you might want to halve it if cooking for a lot less)

Source: Chocolate and Zucchini

Posted in Mains, Poultry | 8 Comments

3 ways with Dulce De Leche (milk caramel)Print Recipe


Dulce De Leche is a milk based sauce that originates from Latin America. It is a handy little thing to have around the home, you can serve it on top of ice cream, mix it through ice cream, sandwich cakes and biscuits together and add it to just about anything sweet to make it even sweeter and more delicious. The only problem with having a jar of this on hand is that you will find yourself standing at your open fridge door, spoon in hand and before you know it your stash will be gone. But then you could always make another.

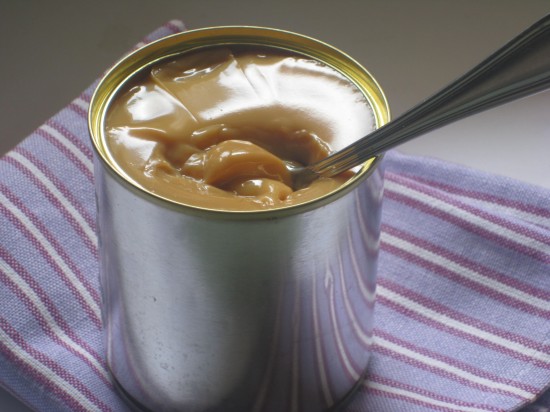
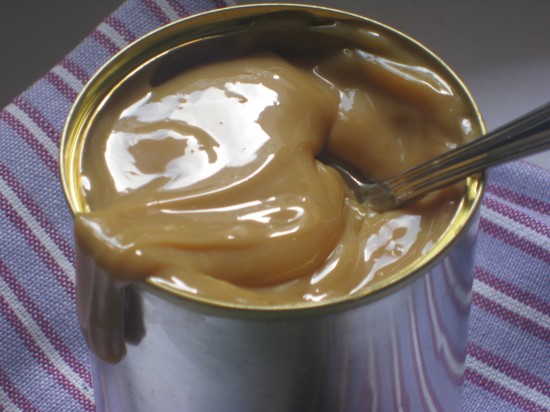
I am not too sure if you have tried the olde world method (pictured above) of boiling a can of condensed milk in its tin – a method fraught with danger and with dangerous repercussions. Well, having decided this is no longer for me, I rustled around and dug up a few alternatives recipes – safe ones. Recipes that will not result in exploding cans, 1st degree burns to your face/arms or days of scraping caramel off your stove, walls and floors.

Method 1
Preheat the oven to 425° F (220° C). Pour one can (14 ounces) of sweetened condensed milk into a glass pie plate or shallow baking dish. Stir in a few flecks of sea salt.

Set the pie plate within a larger pan, such as a roasting pan, and add hot water until it reaches halfway up the side of the pie plate. Cover the pie plate snugly with aluminum foil and bake for 1 to 1¼ hours. (Check a few times during baking and add more water to the roasting pan as necessary).

Once the Dulce de Leche is nicely browned and caramelized, remove from the oven and let cool. Once cool, whisk until smooth.

Method 2
Pour one can (14 ounce) sweetened condensed milk into top of double-boiler pan; cover. Place over boiling water. Cook over low heat, stirring occasionally, for 40 to 50 minutes, or until thick and light caramel-colored.

Remove from heat and whisk until smooth.

Method 3
(this method is the most authentic but beware, it will take 2 – 3 hours of continual stirring)

Place 2 litres of full fat milk (whole milk) is a saucepan, with 500 grams (1.10 pounds) of granulated sugar and 1 teaspoon of sea salt. Stir to incorporate.

On medium-low heat gently bring the mixture to a simmer. Stirring constantly and reduce the milk-sugar mixture. Once the mixture is thick and golden remove from heat. The consistency should be very thick.  

Note for all methods: Store the finished product in an air tight jar in the refrigerator until ready to serve, it will last a month. Warm gently in a warm water bath or microwave oven before using.

And one final thing – if you would like to take a walk on the wild side and try the ‘dangerous’ method, it simply involves placing an unopened can of condensed milk in a saucepan of water, bringing it to the boil and then letting it slowly simmer for 3 hours. The can MUST always be covered with at least 2 inches of water. Also, when the 3 hours is up turn off the heat and allow the can to cool completely before you take it out – it’s almost a day long procedure.

Posted in Recipes, Sauces/Dressings/Condiments | 2 Comments

Dulce De Leche Cheesecake SquaresPrint Recipe


Time in our beloved Australia is almost up and we are happily busy with a few farewell dinners. Tonight is no exception, it is our final night in Canberra and we have both of my brothers here so a big family dinner is in order.

Canberra is quite beautiful at the moment, Spring has sprung and there are blossoms, magnolias and camelia’s in abundance. My parent’s garden is full of heady scents, blooming buds and fallen petals – nature’s signs of a Summer to come.


So in keeping with the Spring theme we are having a dinner that makes the most of the seasonal produce. Pea and Asparagus soup (thank you for the tip Mary-Claire!), lamb with roasted spring vegetables and strawberry shortcakes for dessert. Everything seems to take on a lighter note when it’s Spring, don’t you think?


I know Mr Man is going to want a chocolate fix , not to mention his football team didn’t make it into the grand final last weekend so he needs some cheering up. I didn’t want to make a pudding or a cake so I whipped up these little dulche de leche cheesecake squares that I thought might make him happy. Oh and I forgot to mention that we had made dulche de leche a couple of days ago and I wanted to use it for something before I ate it all (I will post some recipes in a day or two).


So, if you enjoy a nice piece of cheesecake every now and then you should love these. The Dulce De Leche flavour is subtle but the milky caramel goodness makes these cheesecake squares that little more heavenly.

Base
99 grams/ 3.5 ounces wheatmeal/digestive crackers, crumbled (1cup)
2 tablespoons sugar
3 tablespoons unsalted butter, melted

Filling
1 teaspoon unflavored gelatin
1/4 cup whole milk
227 grams/8 ounces cream cheese, softened
2 large eggs
3/8 teaspoon salt
1 cup dulce de leche/caramel (354 grams/ 2.5 ounces)

Glaze
85 grams/3 ounces fine-quality bittersweet chocolate (not unsweetened), coarsely chopped
56 grams/2 ounces unsalted butter, cut into pieces
2 teaspoons light corn syrup or liquid glucose

Base
Put oven rack in middle position and preheat oven to 325f/170c. Line bottom and sides of an 8-inch square baking pan with 2 sheets of foil (crisscrossed), leaving a 2-inch overhang on all sides.
Finely grind crackers with sugar and a pinch of salt in a food processor. With motor running, add butter, blending until combined. Press mixture evenly onto bottom of baking pan. Bake 10 minutes, then cool in pan on a rack 5 minutes.

Filling
Sprinkle gelatin over milk in a small bowl and let stand 2 minutes to soften. Beat together cream cheese, eggs, salt, and gelatin mixture in a bowl with an electric mixer at medium speed until well combined, about 2 minutes, then stir in dulce de leche gently but thoroughly. Pour filling over crust, smoothing top, then bake in a hot water bath in oven until center is just set, about 45 minutes. Cool cheesecake completely in pan on rack, about 2 hours. Chill, covered, at least 6 hours.

Glaze
*These are best glazed within 2 hours of serving* Heat all glaze ingredients in a double boiler or a small metal bowl set over a saucepan of barely simmering water, stirring until smooth, then pour over cheesecake, tilting baking pan to coat top evenly. Chill, uncovered, 30 minutes.

Lift cheesecake from pan using foil overhang and cut into squares with a thin knife, wiping off knife after each cut. Cut into desired size pieces – I usually get 16 – 4 x 4.

Note: When it comes time to glazing these little beauties, the recipe suggests 30 minutes in the fridge – this with give you a hard chocolate shell as a topping. I prefer to put them in for 15 minutes only so the chocolate is semi set. It’s a lot easier to cut and I think if you are going to serve them immediately, the slightly softer glaze is prettier and seems to compliment the filling more….it’s totally up to you.

Source: Adapted from Gourmet, December 2003

Posted in Biscuits/Cookies/Slices/Bars, Chocolate, Desserts, Morning Teas/High Teas, Recipes | 1 Comment

Citrus Couscous SaladPrint Recipe

I could quite happily live off salads, some might say I even have a salad obsession. I especially enjoy being able to create a single dish that can include a variety of flavours and textures and look so visually spectacular. From sweet, salty, and tangy to crunchy, creamy, caramelized, roasted and toasted – it can all be contained on one platter and taste amazing together.

This recipe was passed onto me by my friend Julia, another friend who is a great in the kitchen (have I ever mentioned before that I am surrounded by great cooks? I am blessed, I tell you). She made this salad for one of my barbecues and from the first mouthful, I knew it was a keeper. It has a slightly tangy lemon flavor, offset by the coriander, red onion and the sultana’s – just plain delicious. I have made a few changes to the original recipe, such as increasing all the ingredients I think make the salad, in particular the yogurt dressing.

This salad is actually really good a day old as the flavours seem to intensify – but see for yourself. Fabulous on its own for a light Summer dinner or as an accompaniment to any barbeque or feast you may care to prepare.

175 grams/6.2 ounces of couscous
300 mls of hot vegetable stock
4 tablespoons of lemon juice and grated rind of 1 lemon
2 garlic cloves
350 grams/12.3 ounces of greek yogurt
½ a teaspoon of castor sugar
Freshly ground salt and pepper
1 tablespoons of olive oil
1 red onion finely chopped (or 120 grams/4.2 ounces)
1 can (454 grams /16 ounces) of chick peas – drained and rinsed
3 tablespoons of roughly chopped coriander and additional sprigs to garnish
80 grams/2.8 ounces of small sultanas

 Crush the garlic cloves and mix gently through the yogurt with the sugar, refrigerate until ready to use. Place the couscous into a large heatproof bowl and pour over the hot stock, lemon juice and rind. Leave for around 10 minutes – till all the liquid has been absorbed and then fluff with a fork to separate the grains.

Gently mix the olive oil, onion, chick peas, coriander and sultana’s into the couscous and  season to taste with the salt and pepper. The salad can now be refrigerated until ready to serve. When ready to serve, place couscous into a salad bowl and ripple the garlic yogurt over the top and garnish with coriander. 

Notes: To ensure the yogurt is flavoured well with the garlic make it an hour or two prior to dressing the salad – it will give the garlic time to really flavor the yogurt. Also, unless you want a garlicky mouthful it is best to remove the crushed garlic cloves prior to using.

 Source: Adapted from an Ainslie Harriot recipe

Posted in Lemons, Recipes, Salads, Sides, Vegetarian | 4 Comments

Apple & Prune BriochePrint Recipe

When Marie Antoinette uttered those infamous words ‘ let them eat cake’ during the French revolution she was referring to brioche. Brioche is a rich buttery bread originating from France, it has a golden flakey crust and a slightly sweet and tender crumb – perfect with a little pot of jam and a café au lait.

I once had a love affair with brioche – I ate it for breakfast with my coffee, made sandwiches from the larger loafs for lunch and sometimes for dinner I had it with a wedge of gooey brie and a chilled beaujolais. That was many years ago and I have since moved on from this rather obsessive (and slightly unhealthy) relationship, however, I must say I still really enjoy the occasional brioche and coffee.

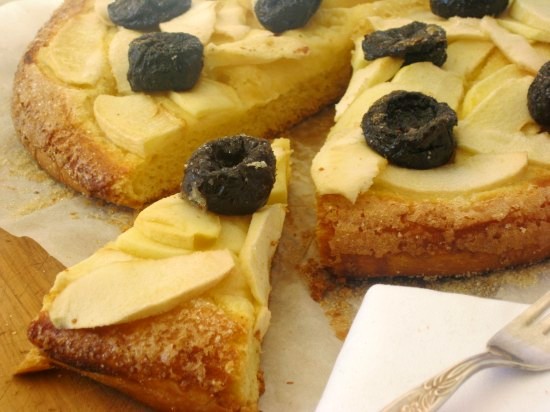
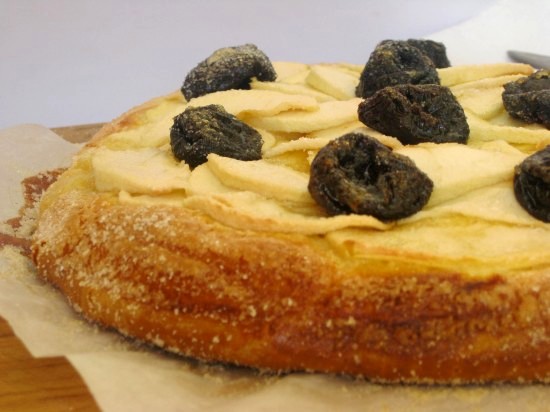
Having never made brioche before, I was a little nervous trying this recipe – but all my apprehensions were quickly dispelled when I checked my rising dough and found it creamy yellow, sweet scented, puffed and perfectly doubled in size.  After further kneading and proofing, I finished it off with a sprinkle of apple slices, a scattering of prunes and popped it into the oven to cook to a golden brown.

I didn’t eat it for breakfast, lunch and dinner but it was so good that if I am not careful I could almost be tempted back to those habits of the past. Yes, brioche certainly is the sweetest bread of all – I will never regret the time we spent together.

7 grams/.24 ounces dried yeast
2 tablespoons of luke warm milk
275 grams/9.7 ounces plain flour, plus extra for dusting
1 teaspoon fine sea salt
40 grams/1.41 ounces of caster sugar
3 eggs
175 grams/6.17 ounces softened butter
egg wash (1 egg whisked with 1 tablespoon of milk)
2 golden delicious apples
60 grams/2.1 ounces pitted prunes
¼ cup raw sugar

Combine flour, yeast, salt and sugar in the bowl of an electric mixer. Make a well in the centre. Lightly whisk together eggs and milk and pour into the centre of the well.

Fit the mixer with a dough hook and mix until dough is smooth and elastic (8 – 10 minutes). Add the butter a little at a time, allowing it to be completely blended in before you add the next. When all the butter has been incorporated beat until the dough is smooth and glossy (around 5 minutes). Keep the dough in the bowl and cover it with a tea towel, set aside in a warm place until doubled in size – around 1 ½ – 2 hours).

Knock back the dough on a floured surface and place it on a tray covered in a sheet of parchment paper and shape it into a 25cm/9.8 inch circle. Cover loosely with a tea towel and set aside in a warm place until doubled in size (around 1 hour).

Meanwhile preheat the oven to 220c/428f. Brush the top of the brioche with egg wash, scatter with apples and prunes then sprinkle with sugar. Bake until golden – around 35 minutes and serve warm.

Source: adapted from Australian Gourmet Traveller

Posted in Breads, Breakfast, Fruit, Morning Teas/High Teas | 3 Comments