Chocolate Truffles ala Robert LinxePrint Recipe


Who needs a reason to make truffles? Not I. Especially when I have just stumbled upon the truffle recipe from Robert Linxe, the famed Parisian chocolatier who founded La Maison du Chocolat. And apparently this recipe is everywhere – I was completely unaware.

These chocolates replicate the most simple (and desirable) of his famed truffles. They are rich, dark and delicious and are clearly designed to fulfill any chocolate cravings you might harbor.

When I was alot younger (my early teenage years) I was obsessed with chocolate making. I welcomed Easter months in advance, not for the thought of receiving but because I had a reason to create. I blew eggs, filled them with chocolate and painted them bright colours, I would make eggs out of marbled milk and white chocolate and chocolates filled with a sickenly sweet caramel type of filling that conveniently came in a toothpaste type tube. And I loved giving them as gifts. Most of them were probably never eaten, good chocolate was not available to me and they looked pretty average but it was the thought that counted. If I had known back then that the best (and by far the easiest and prettiest) type of chocolates to conquer were truffles, by now I’d be an expert.

My truffle making experience did not go as smoothly as I had hoped, in fact chocolate chaos ruled supreme. Halfway through the dusting of the truffles, with my latex gloves completely covered in melted chocolate (I myself was covered in flecks and smears – as were my daughters), I started to feel a little rattled. ‘Keep calm and carry on’  must have been muttered under my breath many times before I eventually finished. And the finished products themselves were very easy on the eye. Not perfectly round (far from it) but just gorgeous and very much like their namesake, truffles – that have been dug fresh from the earth.

11 ounces Valrhona chocolate (56% cocoa)
2/3 cup heavy cream
Valrhona cocoa powder for dusting

Finely chop 8 ounces of the chocolate and put in a bowl.

Bring heavy cream to a boil in a small heavy saucepan. Make sure your pan is small, so you’ll lose the least amount of cream to evaporation, and heavy, which will keep the cream from scorching. Linxe boils his cream three times—he believes that makes the ganache last longer. If you do this, compensate for the extra evaporation by starting with a little more cream.

Pour the cream over the chocolate, mashing any big pieces with a wooden spoon.

Then stir with a whisk in concentric circles (don’t beat or you’ll incorporate air), starting in the center and working your way to the edge, until the ganache is smooth.

Let stand at room temperature until thick enough to hold a shape, about 1 hour, then, using a pastry bag with a 3/8-inch opening or tip, pipe into mounds (about 3/4 inch high and 1 inch wide) on parchment-lined baking sheets. When piping, finish off each mound with a flick of the wrist to soften and angle the point tip. Freeze until firm, about 15 minutes.

Meanwhile, melt 3 more ounces of the same Valrhona and smear some on a gloved hand. Gently rub each chilled truffle to coat lightly with chocolate. The secret to a delicate coating of chocolate is to roll each truffle in a smear of melted chocolate in your hand. Linxe always uses gloves.

Toss the truffles in unsweetened Valrhona cocoa powder so they look like their namesakes, freshly dug from the earth. A fork is the best tool for tossing truffles in cocoa. Shake truffles in a sieve to eliminate excess cocoa. Store truffles in the fridge.

Note: You may not be able to get your hand on Valhrona – it is sold on Amazon but for whatever reason you cannot, then of course any chocolate will suffice. Buy the best you can and ensure the cocoa percentage is similar.

I intend to develop my truffle reportoire with nuts and of course some decent flavouring – like a good cognac. I will keep you posted.

Source: Gourmet 2001

This is not related to truffles in any way but look at the poster that I found on the street today – someone has lost their unicorn…

Posted in Chocolate, Desserts | 1 Comment

Mushroom & Ricotta GalettePrint Recipe

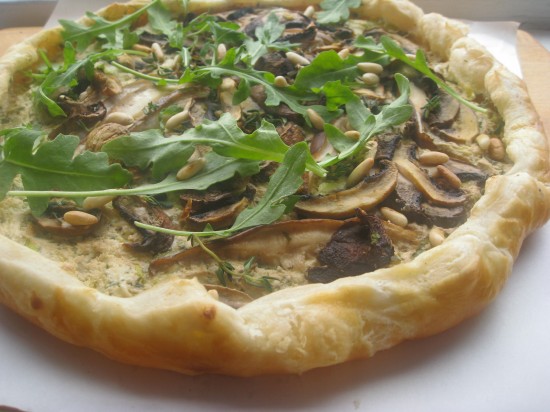
A little mushroom and ricotta galette was the perfect thing for us this evening – the weather in New York City is balmy (outrageously humid in fact) so we wanted something light to go with a beetroot salad we were taking to the park for our picnic dinner – we love our picnics. We had also been running around all day and I found myself a little short of time. Luckily because of my obsession in trialing all of New York’s deli’s, markets and grocery stores, I had the ingredients at hand.

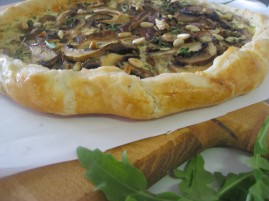
The beauty in baking a galette is that their style is free form. You can throw all that ‘precison with your pastry’ out the window and go rustic – because it is the way it should be. And even better – it looks good!

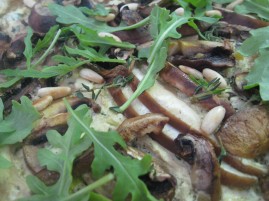
The ricotta and herb mixture gives a great, full flavoured base for the mushrooms. I couldn’t resist the urge to go green and added some pinenuts and rocket to the original recipe but it might also work well with a scattering of moroccan olives too (they are the black and wrinkly dry-salt cured olives). The opportunities are endless – as endless as the Indian Summer in New York.

500 grams/1 pound of puff pastry
30 grams/1 ounce butter, coarsely chopped
2 scallions (or golden shallots to Australians), finely chopped
1 garlic clove, finely chopped
230 grams/8 ounces ricotta
50 grams/1.76 ounces gruyere, coarsely grated
2 tablespoons each of finely chopped thyme, oregano and flat leaf parsley
Finely grated rind of 1 lemon
Juice of ½ lemon
1 egg, lightly beaten
180 grams/6 ounces of mixed mushrooms, sliced
Optional – a handful of toasted pinenuts and rocket (arugula)

Preheat the oven to 200c/395f. Roll out pastry on a lightly floured surface to 3mm thick, cut a rough 30cm diameter round, place on parchment paper and then on an oven tray and refrigerate for 15 minutes.

Melt 20 grams of butter in a small saucepan, add the shallots and garlic and sauté until tender (2 – 3 minutes), transfer to a bowl and combine with cheeses, herbs, rind and half the egg. Season to taste then spread in an even layer over pastry leaving a 3 cm border.

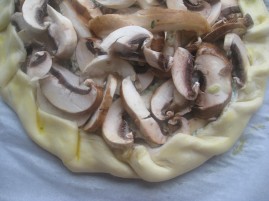
Melt remaining butter and remove from heat, add lemon juice and a pinch of salt. Scatter mushrooms over the ricotta mixture, drizzle with the butter/lemon mixture and fold in the pastry edges, pleating as you go. Brush edges with the remaining egg and bake until crisp and golden -around 20 to 25 minutes. Scatter with pine nuts and rocket (if you wish)and serve hot or cold.

Source: adapted from  Australian Gourmet Traveller, August 2010.

Posted in Picnic Food, Tarts/Flans/Quiches/Pies, Vegetables, Vegetarian | Leave a comment

Spaghetti CarbonaraPrint Recipe

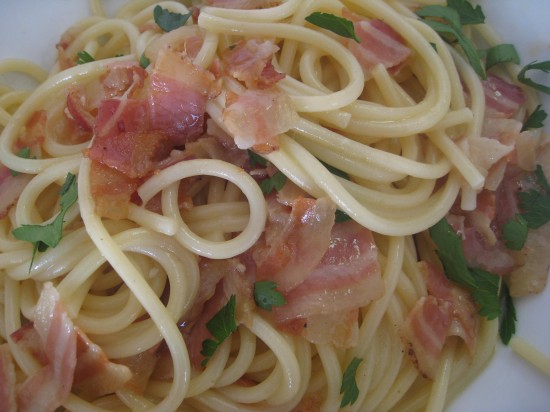
This is my first shot at a Spaghetti Carbonara and I am impressed. How can it have taken me so long to recognize such a beautifully simple dish?

In my research leading up to this quite significant occasion I learnt a few things. Namely, an authentic carbonara does not contain cream, nor does it contain mushrooms. Instead it is a dish that is based on eggs, pecorino romano, guanciale (a cured pork) and black pepper (don’t look too closely at my pictures – I forgot the pepper!) And the most important Carbonara rule of all – it should be eaten as soon as it comes off the stove or the heat will keep cooking the eggs and they will scramble.

Word on the street is that this originates from Rome and it is thought it was fed to the charcoal workers, carbone is the word ‘coal’ in Italian (hence the name). Another story involves the Carbonari – a secret society prominent in the unification of Italy. And there are a couple of other tales that include charcoal grills, liberal dashings of black pepper flakes and even squid ink. The real truth is that no one really knows.

This recipe was added to my ‘must try’ list when I saw Tom Cruise make it for Oprah. I haven’t used his recipe because it didn’t sound quite right (sorry Tom) but I did a bit of research into the quintessential ingredients and developed my own.

Whilst I am not in need of the sustenance a charcoal worker might require, I do like a hearty pasta every now and then. Tonight, for instance, I had to show my daughters how to do cartwheels and back flips.

400 grams/14 ounces of dried spaghetti
60 mls (1/4 cup) extra virgin olive oil
200 gram/7 ounce piece of guanciale or coppa, cut into pieces
4 eggs, lightly beaten
20 grams/.7 ounces (or 1/4 cup) finely grated pecorino, plus extra to serve
2 tablespoons parmesan reggiano, grated
Coarsely chopped flat leaf parsley (optional to serve)

Cook spaghetti in a saucepan of boiling water as per the packet instructions.

While the pasta is cooking, heat the oil in a fry pan, add the guanciale and sauté until crisp (around 3 minutes). Remove from heat.

Drain the pasta, keeping 2 tablespoons of the cooking water. Add the guanciale, cheeses, eggs, ground black pepper  and reserved cooking water. Toss until the pasta is coated and sauce begins to thicken. Serve immediately with a sprinkle of parsley and a little extra pecorino or parmesan on the side.

Notes: Pancetta is a good substitute for guanciale or coppa.

Source: Inspired by Tom Cruise’s Carbonara recipe for Oprah

Posted in Mains, Pasta/Noodles | Leave a comment

Hungarian ShortbreadPrint Recipe

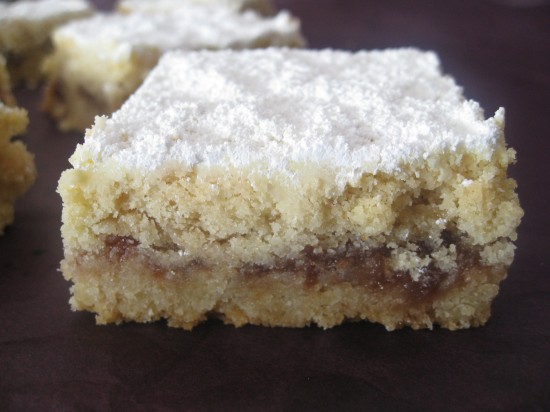
or Austrian shortbread, you take your pick. But by all accounts this recipe was bought to our attention by the great sage of American cooking, Julia Child (and it even has her trade mark ‘pound of butter’ in the ingredients). The shortbread biscuit has a buttery, crumbly texture that comes from grating the frozen dough and this is complimented with a trickle of jam running through the centre. On this occasion I chose strawberry and rhubarb jam, only because I found a very sweet looking jar at my new favourite market. Ordinarily I might use raspberry or apricot but my new jam-find was perfect – the slight tartness of the rhubarb worked exceptionally well with the sweet shortbread.

While this recipe calls for an electric mixer, I actually did it by hand, once again because I have no option (my mixer is still in storage). I will tell you something though, my arms are getting a work out like you would not believe. And I am wondering how they made cakes and fluffy concoctions prior to all these gadgets that cover our kitchen counters and fill our cupboards. Anyway, until I get my beloved Kitchenaide back I am in no way going to attempt cakes, cupcakes or anything that would require the arms of a professional wrestler.

So back to the shortbread – I ended up piping the jam through a piping bag – I am a klutz when it comes to spooning jam and I did not want to put any unnecessary pressure on the grated dough.

Apparently they sell this shortbread in quite a few bistro type places over the US. I can certainly understand everyone’s infatuation with it – and the woman who bought it to our attention. Thank you Julia!

454 grams/1 pound unsalted butter, slightly softened
4 egg yolks
2 cups granulated sugar
4 cups all-purpose flour
¼ teaspoon salt
2 teaspoons baking powder
1 cup of jam, at room temperature
1/4 cup icing/powdered sugar

Cream the butter in a mixer fitted with a paddle attachment until fluffy. Add the egg yolks and mix well.

Mix the granulated sugar, flour, baking powder, and salt together. Add to the butter and egg yolk mixture and mix just until combined and the dough starts to come together. Turn the dough out onto a floured work surface and form into two balls. Wrap each ball in plastic wrap and freeze at least 2 hours or overnight.

Heat the oven to 350 degrees and lightly grease and line a 9 x 13 inch baking tin.

Remove one ball of dough from the freezer and coarsely grate with a box grater into the bottom of the tin (you can use a food processor with a grater attachment). Make sure the surface is covered evenly with shreds of dough.

Drop the jam over the dough evenly with a spoon or alternatively use a piping bag – spread as much as you can without pushing down onto the shards of dough. Remove the remaining dough from the freezer and coarsely grate it over the entire surface.

Bake until lightly golden brown and set, around 45 to 50 minutes. As soon as the shortbread comes out of the oven, dust with icing sugar.

Cool on a wire rack, then cut in the pan with a serrated knife.

Notes: I popped my shortbread in the fridge for a couple of hours (after they had cooled) it makes it easier to slice. I tend to do the same with most of my slices and bars – cooling them also makes for a neater cut. AND one more thing – this recipe is all over cooking/food blogs, some of which suggest flavouring the shortbread with lemon, vanilla and even cinnamon (god forbid). I suggest you don’t – let the jam be the hero and enjoy it with the perfectly plain shortbread.

Source: Julia Child

Posted in Biscuits/Cookies/Slices/Bars, Morning Teas/High Teas | 1 Comment

Poulet rôti aux anchois et au romarin (roast chicken with anchovies and rosemary)Print Recipe

I arrived in New York with a suitcase full of cook books, Rotis by Stephane Reynaud was one of them.  This book is as charming as it is mouthwatering and will have you whipping up some sort of roast before you know it. Mr Reynaud has a roast for every night of the week with chicken being Wednesday’s roast of choice. And I made this yesterday so all is good.

I have a thing for anchovies which is probably what attracted me in the first place. But this recipe is slightly different to other anchovy dishes I have made, in that the anchovies are not melted down for their unique salty flavour . They are in fact, big and bold and coming right at you – together with a clove of garlic and a sprig of rosemary (how very lamb!). So I might start by recommending you cook this dish for those that are pro-anchovy rather than those that are no-anchovy (like my Mr Man) because that distinct flavour is there – make no mistake!

Aside from the anchovies, garlic and rosemary studded through the chicken, the stuffing is also sensational, a mixture of crème fraiche, shallots and tarragon.  This is outstanding on its own but paired with the already full flavoured and meltingly tender chicken meat, can really send you into a spin.

As the French would say oo la la. All I can say is that I am going to have a hard time going back to my standard roast chicken.

*You will need to start this recipe the day before*

1 large fee range chicken
12 small anchovies in oil, drained
12 garlic cloves, halved
2 rosemary branches, broken into small sprigs
1 small bunch of tarragon, leaves only
3 golden shallots, finely chopped
3 tablespoons of crème fraiche
2 tablespoons olive oil

Pierce the chicken with a knife in 12 places, ensuring that the incisions are evenly placed. Insert the anchovy, garlic clove and rosemary sprig in each opening. Cover with plastic wrap and refrigerate overnight.

The next day, preheat your oven to 180c/360f. Combine the tarragon leaves, shallots and crème fraiche in a bowl and mix well. Remove the chicken from the fridge and stuff with the tarragon mixture.

Tie the chicken at the legs and place in a roasting dish. Drizzle with olive oil and roast for 1 ½ hours or until the juices run clear when the chicken is pierced with a skewer.

Carve the chicken into portions and serve with the stuffing on the side.

Notes: Hold off on seasoning the chicken – anchovies are loaded with salt.

Source: “>Rotis by Stephane Reynaud

Posted in Mains, Poultry | 1 Comment

Clementine CakePrint Recipe


A poem I found;

Ode to Clementines

Oh, have you ever trifled with
a juicy tree treasure?
Oh, have you owned
an orange orb?
Oh, have you conjured
a clementine,
With all its juicy jumble?
The delicate flavors
tango on the tongue,
spraying their
supple sweetness.
Tangy but tart
tree treasure from
the earth—
the Courageous Clementine!

by Jacob, 3rd grade, www.witsblog.org

The characteristics of a Clementine, so eloquently put by an expressive and very talented young boy.

So onto my cake, I have heard around the traps that this particular cake is one of Nigella Lawson’s most popular and after making it I can see why. Including the entire boiled fruit gives the cake a wonderful texture and taste. It is perfectly moist, flavourful and very light. I served it to a (new) New York friend who popped over for afternoon tea yesterday, with a dollop of crème fraiche on the side – she loved it and so did I.

As Nigella suggested, I made up a little glaze with some powdered sugar (icing sugar) and a tiny squeeze of Clementine juice – I thought glazing the whole cake might be too much so I opted for a few random lines.

Given the nature of its ingredients the cake will go a lovely golden brown colour  – this is not a sign of having overcooked it, although one thing to note is that my cake never made it to the 60 minute mark – it was certainly cooked at 50 minutes. Ovens can be very temperamental creatures so I would check on your cake regularly from 45 minutes. 

4 to 5 clementines (about 375grams/.82 pounds)
6 eggs
1 cup plus 2 tablespoons (225 grams/7.9 ounces) sugar
2 1/3 cups (250 grams/8.8 ounces) ground almonds
1 heaping teaspoon baking powder
Powdered sugar for dusting, or for making a glaze

Put the clementines in a pot with cold water to cover, bring to the boil, and cook for 2 hours. Drain and, when cool, cut each clementine in half and remove the seeds. Then finely chop the skins, pith, and fruit in the processor (or by hand).

Preheat the oven to 375f/190c). Grease and line an 8-inch spring form pan with parchment paper.

Beat the eggs in an electric mixer (I used a whisk which worked just fine). Add the sugar, almonds, and baking powder. Mix well, adding the chopped clementines. Pour the cake mixture into the prepared pan and bake for 40 to 60 minutes, when a skewer will come out clean.

Remove from the oven and leave to cool, in the pan on a rack. When the cake is cold, you can take it out of the pan and dust it with powdered sugar or glaze.

Notes: You can actually substitute the clementines for oranges, just be sure the pith of the orange in very thin otherwise I am not too sure what the outcome would be – a very pithy cake perhaps?

Source: Nigella Lawson

Posted in Cakes, Fruit, Morning Teas/High Teas | Leave a comment

Caramelized Onion & Bacon TartPrint Recipe


Chicago was on my mind today. It was a place I never expected to live, but we did and we had some great times there. So I thought I might cook something that was characteristic of this fine city but I could not get past deep dish pizza. My mind wondered onto some of Chicago’s famed Chefs, and there are many. From Grant Achatz, Rick Bayless to Carrie Nahabedian (who I adore) and I then I thought of Charlie Trotter.

Charlie Trotter used to live on my street and on the odd occasion, when I strolled past his very manicured house, I would see his chefs out on the sidewalk – sweeping. I know it sounds strange (and it is strange) but I guess that is why his house was so well kept – prep in Trotter world was not limited to his kitchen. Anyway, Charlie Trotter is very well renowned and his dining establishment is an experience to say the least (and an excellent one at that).

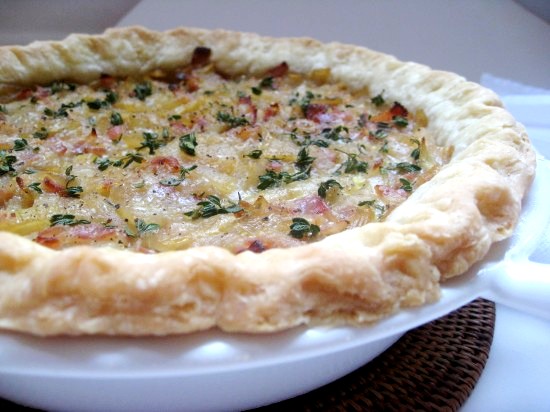
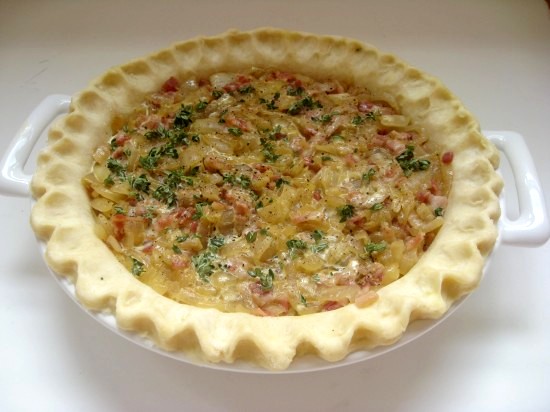
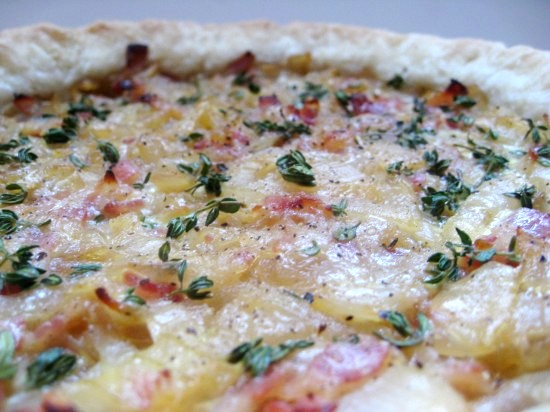
So tonight I am toasting the city of Chicago with a Charlie Trotter creation – a Caramelized Onion & Bacon Tart. For those of you that think this recipe might produce a type of quiche (like myself) then think again. It is literally as the title describes and aside from a lovely flakey pastry and a little thyme it is ALL onion and bacon. So if you love the combination of those two ingredients (again like myself) then this recipe is something to think about.

Dough
2 cups plain (all purpose) flour
½ teaspoon salt
1 cup cold unsalted butter, chopped
2/3 cup iced water

Place the flour, salt, and butter in a medium bowl.  Using a pastry cutter or fork, cut the butter into the flour until it forms pea-sized chunks.  Add the water and mix with a fork until the dough just comes together (it should have visible streaks of butter).  Form the dough into a disk, wrap in plastic wrap, and refrigerate for at least 1 hour.

Filling
3 large yellow onions, julienned
2 tablespoons unsalted butter
Salt and freshly ground black pepper
1 pound bacon, julienned
1 egg yolk
½ cup heavy cream
2 teaspoons fresh thyme leaves

Cook the onions with the butter in a large sauté pan over medium heat, stirring occasionally, for 50 minutes to an hour, or until the onions are golden brown and caramelized.   Season with salt and pepper to taste and cool to room temperature.

Cook the bacon in a large sauté pan over medium heat for 10 minutes, or until crisp.  Drain on paper towels and cool to room temperature.  Combine the bacon with the onions.

Preheat the oven to 375 degrees.  Whisk together the egg yolk, cream, and thyme in a small bowl.

Tart
On a floured surface, roll out the dough 1/8 inch thick, and then press into a baking dish that is about 1 ¼ inches deep and about 8 or 9 inches in diameter.  Crimp the edges of the dough along the top of the dish.  Spoon the onion-bacon mixture on top of the dough, pour in the cream mixture, and top with freshly ground pepper.

Bake for 40 to 45 minutes, or until just firm to the touch and a light golden brown.  Cool slightly before cutting and serving.

Notes: This tart is incredibly rich and would best be served with a light salad although would make a lovely side to a more substantial dinner.

Source: Home Cooking with Charlie Trotter

Posted in Sides, Tarts/Flans/Quiches/Pies | 1 Comment

Jam DropsPrint Recipe

Its 7am in the morning and I am sitting at the kitchen bench typing out this recipe and eating these jam drops for breakfast – quite similar to jam on toast really, and they go so well with my cup of tea. The only problem with this are my daughters who are wondering why they have been given oatmeal.

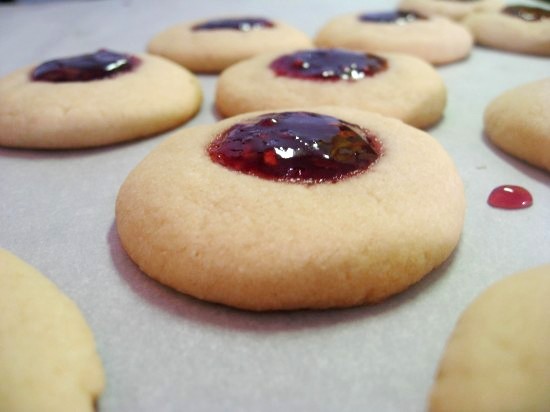
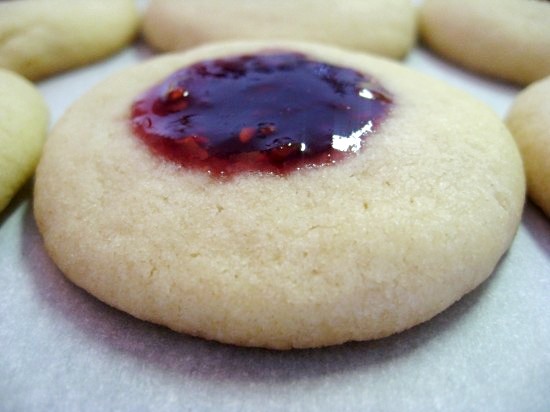
Jam drops are a delightful buttery cookie with a drop of jam in the centre (hence the name), so simple and comforting and if you like giving homemade treats they make a very sweet gift.

This recipe calls for the drops to be cooked for 10 minutes, maybe it was just my oven but after 10 minutes they were still a little undercooked. I had to leave them in for 12 – 13 to ensure they had a slight golden colour. 

Also, one thing I would do when I next make these is to make them smaller – to increase the jam to biscuit/cookie ratio. Let’s face it , whilst the biscuit part is nice, it really is that sweet drop of jam we are really after and together they are certainly a treat for those tastebuds – especially at breakfast.

Ingredients
250 grams/8.8 ounces butter, softened
¾ cup (165 grams/5.8 ounces) caster (superfine) sugar
2 teaspoons vanilla extract
1 egg yolk
2 ¼ cups plain (all purpose) flour
Jam, raspberry, strawberry or apricot

Preheat oven to 180c/350f.

Place butter and sugar in the bowl of an electric mixer and beat until pale and creamy. Add the vanilla and egg yolk and beat until well combined. Add the flour and beat until a smooth dough forms.

Roll the dough into balls approximately 1” in diameter and place on baking trays lined with parchment paper or non stick baking paper. Flatten slightly and press a finger into the centre of each drop to make an indent. Fill each indent with ¼ teaspoon of jam and bake for 10 – 15 minutes until golden. Top up with jam if necessary.

Notes: Sadly my temporary kitchen does not come with a Kitchenaide so I had to resort to a whisk and a wooden spoon to do my mixing but they turned out just as well. Also, I used a piping bag with a large nozzle for the jam as I find it tidier than using spoons.

Source: Donna Hay, Modern Classics 2

Now, I promise I won’t bombard you with thousands of pictures of my darling daughters but I thought I should include this one of Lucy enjoying her jam drop. She is self dressed in a sari with a polka dot dress over the top – so stylish at such a young age!

Posted in Biscuits/Cookies/Slices/Bars, Childrens Parties, Morning Teas/High Teas | Leave a comment

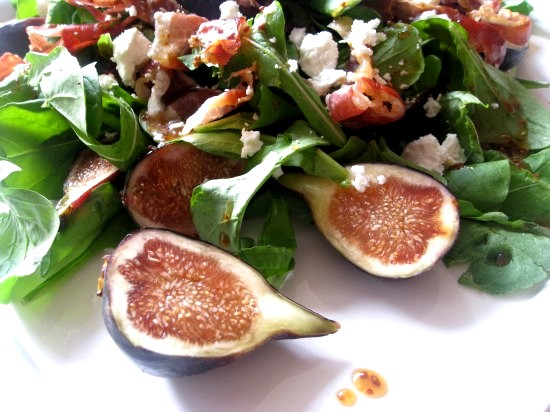
Fig & Goats Cheese SaladPrint Recipe


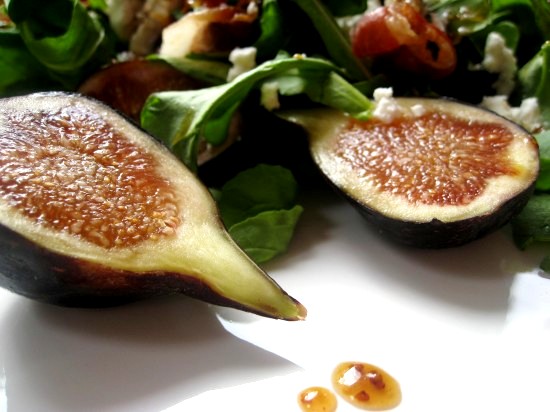
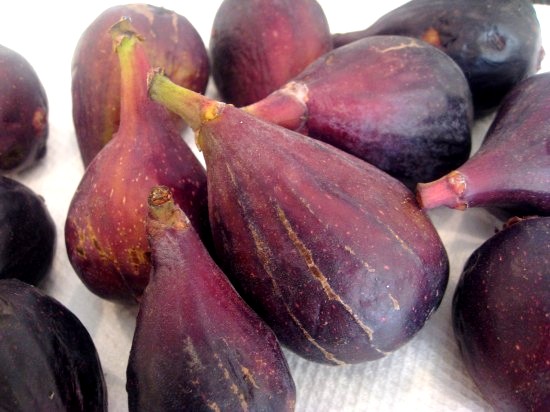
Alongside the pumpkins I am seeing spilt out of every corner store, I am also finding punnets of figs in abundance. So I bring you another recipe that is making the most of this seasons produce.

I have had a long standing relationship with figs and it began many, many years ago I when I first became a teenager. It was the day of my 13th birthday and my parents went to a nursery and bought home a fig tree for me. It was actually more like a fig stick – it was so small. We planted it in the garden and I watched over it lovingly feeling very special that I had my own tree. A year later it produced its first fruit and I must say that I was a little disappointed – figs didn’t taste as special as I thought they might. I loved they way they looked, the dark purple droplets hanging amongst the green velvety leaves but the taste was a little on the earthy side.

Many years later as I began my dining out experiences, I sampled figs in countless different ways; stuffed with goats cheese and wrapped in prosciutto, candied and set amongst string beans with slivers of almonds and one of my all time favourites, roasted with caramalised honey and served with vanilla bean icecream. Now I adore figs – used in every way possible and especially on their own, unadorned with their slightly sweet earthy taste. A taste that I have grown to love.

As you know I am a salad fiend and this is another of my absolute favourites – top notch ingredients set off with a superb dressing. Let me know what you think…
1 tablespoon honey
1 tablespoon balsamic vinegar
1 table spoon whole grain Mustard
3 tablespoons Extra Virgin Olive Oil
10 Slices of Proscuitto
8 – 10 figs
150 grams/5.25 ounces wild rocket (arugula) leaves
150 grams/ 5.25 ounces goats cheese, crumbled

Combine the honey, vinegar, mustard and oil and stir.

Heat a non stick fry pan and fry prosciutto over a medium heat until crisp and golden – remove from the pan and drain on paper towels. Break into smaller pieces.

Pour the dressing over the rocket and and toss lightly, halve the figs and scatter through the rocket with the  prosciutto. Crumble the goats cheese over the top.

 Source: Michele Cranston for Marie Claire

Posted in Salads, Sides, Starters | 3 Comments

Baked Lemon Ricotta DoughnutsPrint Recipe


H’mmm doughnuts. My earliest memory of doughnuts goes back many, many years to when I was about 8 years old and I would meet my father on a Friday after work. He would buy my brothers and I fresh sugar and cinnamon doughnuts for a very costly 10 cents each and we felt very spoilt. Part of the whole doughnut experience was watching them pop out of the dough machine into the spitting oil and then see them flipped and tossed through the sugary cinnamon – it could have entertained us for hours.

I was thinking I should attempt the old sugar and cinnamon doughnuts of days gone by, but I just couldn’t imagine doing them any justice. And then I found these.

These doughnuts are best described as wonderful lemon scented puffs of dough filled with a rind flecked ricotta. They are light and fluffy and I could raphsodise over them in many paragraphs of diatribe however I am going to sit down to a tea party with my daughters – teddy, baby beep, meow meow and the girls have been waiting for me (and the doughnuts of course!)…

Doughnuts
5 cups of plain (all purpose) flour
140 grams/ 5 ounces raw caster sugar
7 grams/ ¼ ounce of dried yeast
Finely grated rind of 2 lemons
1 cup of lukewarm milk + extra for brushing
1/3 cup of buttermilk
2 eggs at room temperature
30 grams/ 1.05 ounces of butter, melted
Oil for greasing

Lemon Ricotta Filling
250 grams/8.8 ounces of ricotta
¼ cup raw caster sugar
Finely grated rind of 2 lemons

Lemon Sugar
2 cups of caster sugar
Finely grated rind of 1 lemon
120 grams/4.2 ounces of butter, melted

Combine flour, sugar, yeast and lemon rind in the bowl of an electric mixer fitted with a dough hook, mix to combine. Whisk together milk, buttermilk, eggs and melted butter and with motor running add to flour mixture. Mix on medium speed until dough is smooth and elastic (4-5 minutes). Shape into a ball, place in a lightly oiled bowl, cover with plastic wrap and stand in a warm place until doubled in size (1-1½ hours).

For lemon ricotta filling, whisk ingredients until completely blended, transfer to a bowl and refrigerate until required.

Preheat oven to 190c/375f. Knock back dough, turn onto a lightly floured surface and roll to 5mm/.20 inch thick. Cut 16 rounds with a 6cm-diameter cutter and 16 rounds with a 7cm-diameter cutter (re-roll scraps if necessary). Place smaller rounds 5cm/2 inches apart on oven trays lined with baking paper, place a heaped teaspoon of lemon ricotta filling in centre of each. Brush edges with milk and cover with larger rounds, press to seal edges well. Cover and stand in a warm place for 1 ½ hours and bake until bottoms are just golden, around 8 – 10 minutes.

Meanwhile, for lemon sugar, combine sugar and lemon rind in a bowl, spread on a tray. Dip hot doughnuts immediately in remaining melted butter, toss in lemon sugar and serve hot.

Notes: These doughnuts would also be great as doughnut holes. Forget the ricotta filling and shape them into balls. Allow to rise, bake and coat in the lemon sugar as per the recipe.

Source: adapted from Australian Gourmet Traveller June 2010

Posted in Biscuits/Cookies/Slices/Bars, Lemons | Leave a comment