Gingerbread CookiesPrint Recipe


I couldn’t resist one more batch of cookies for Christmas and as you can probably tell, I found myself some snowflake cookie cutters (after searching the whole on NYC I decided to sensibly order them online). Now, ordinarily I would bake your standard sugar cookie for decorating purposes but I promised to make a gingerbread house for Lucy & Elouise which we did from the same dough.

They are a true gingerbread cookie – loaded with spices and flavour and a beautiful golden brown colour which makes decorating an easy task.

I decorated these cookies with royal icing and a sprinkle of sparkle (edible glitter, sparkling sugar and oyster pearls). I have included the royal icing recipe below, the easy option – using meringue powder over real egg whites. I hate to say it but the meringue powder version makes things so straight forward and there is very little room for error.

I promise you no more cookies for a while. I am done as they are dusted – frosted, sprinkled and speckled. I have had cookies up to pussies bow (meaning my neck) and I am going on a cookie strike for the next couple of weeks – or until I give in to the pleas of my daughters.

4 cups all-purpose flour
1 teaspoon salt
1½ teaspoons baking powder
½ teaspoon baking soda
1 teaspoon ground cinnamon
1 teaspoon ground cloves
2 teaspoons ground ginger
1 teaspoon ground nutmeg
226 grams/8 ounces unsalted butter, at room temperature
1 cup sugar
1 cup molasses
1 large egg

In a large mixing bowl, whisk together the flour, salt, baking powder, baking soda and spices to combine; set aside.

In the bowl of a stand mixer fitted with the paddle attachment, cream together the butter and sugar on medium-high speed until light and fluffy, about 2 minutes.  Mix in the molasses and egg until combined.  Add in the dry ingredients and mix just until incorporated.  Cover the bowl and chill the dough for at least one hour.

Preheat the oven to 180c/350f.  Line baking sheets with parchment paper.  Roll the dough out on a lightly floured work surface to about ¼-inch thickness.  Cut into shapes with cookie cutters.  Place the cookie shapes onto the prepared baking sheets, about 2 inches apart.  Pop back in your freezer for 10 minutes to chill further and then bake for 10 minutes, rotating the pans halfway through baking. 

Remove from the oven and let cool on the baking sheets for 10 minutes.  Transfer to a wire cooling rack and let cool completely.  Decorate as desired

Royal Icing
4 cups powdered sugar, sifted
2 tbsp. meringue powder
5 tbsp. water

Combine all ingredients in the bowl of a stand mixer fitted with the paddle attachment.  Mix on low speed until the sheen has disappeared and the icing has a matte appearance (about 7-10 minutes).  Add water slowly, a very small amount at a time and stir by hand until combined.  Continue until the icing has reached a consistency appropriate for piping.  Using a pastry bag, pipe your design on each cookie and let stand for several hours (1 – 2 hours) to set.  Ensure you keep the leftover icing covered at all times when not in use so that it does not begin to harden. Remember if the icing is too thick, to thin it with water and if it becomes too thin, then thicken it with icing sugar (confectioners sugar). Also, if you would like to colour your icing, then gels are the best option.

Source: adapted from Good Things Catered

Posted in Biscuits/Cookies/Slices/Bars | 1 Comment

Fritelli Con Conserva Di Fragole (mini Doughnuts with Strawberry Jam)Print Recipe


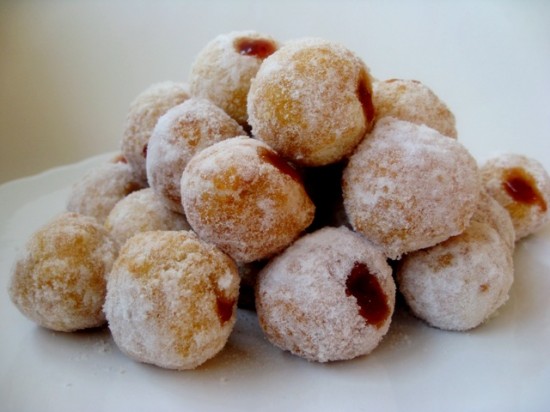
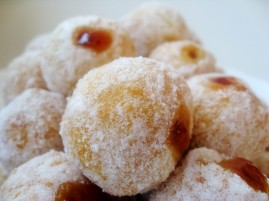
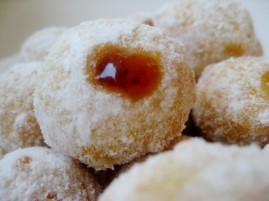
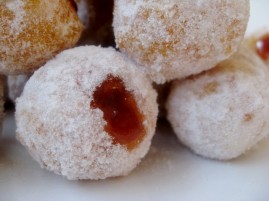
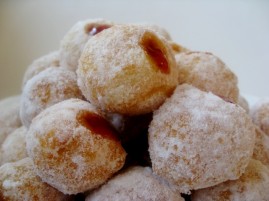
I must confess that I had every intention of making something Christmasy today, but these got the better of me. Having said that, when I glanced quickly at the photo I posted they almost looked Christmas like – the dusty white sugar with the ruby red of the jam? Anyway, who can resist a doughnut, especially the Italian version of a jam doughnut. They are delicious, quick and easy and very suited to a cup of strong, hot coffee.

Most doughnuts I have made in the past have contained yeast and although these have none they are still very light in texture. The eggs gives the dough a certain richness that your typical doughnut does not have – but remember these are Italian!

There are certain things that Italians do very well; shoes, clothes, pasta, wine, to name a few – I am now adding doughnuts to this list.

200 mls full cream (whole) milk
150 grams/5.3 ounces unsalted butter, chopped
200 grams/7 ounces (1 1/3 cups) plain flour (all purpose)
4 large eggs at room temperature
220 grams/7.8 ounces (1 cup) caster sugar
Vegtable oil, for deep frying
355 gram/12.5 ounce jar of strawberry jam

Place milk, butter and a pinch of salt in a saucepan and bring to boil over a medium-low heat. Add flour in one batch and stir vigorously with a wooden spoon until smooth and the mixture comes away from the side of the pan. Continue to stir to dry out a little. transfer the hot mixture to an electric mixer and with the motor running, beat in the eggs – one at a time, until smooth and glossy.

Pour batter onto a sheet of plastic wrap, wrap tightly and refrigerate for 1 1/2 hours until firmer. With oiled hands roll batter into 1 ” balls and place on a plastic-lined tray. Place the sugar on a second tray.

Fill a saucepan or a deep-fryer one third full of oil and on a small burner heat till 160c. Fry doughnuts in batches for 6 minutes or until golden and cooked through. Remove with a  slotted spoon and roll in sugar. Repeat with remaining doughnuts.

Place jam in a piping bag with a 3mm (around 1/8 inch) nozzle, push the piping tip into the doughnuts and fill with jam. Serve immediately.

Notes: Use a thermometre to regulate the temprature of the oil.

Source: Adam Bunn for Sopra at Fratelli Fresh

Posted in Breads, Breakfast, Morning Teas/High Teas | Leave a comment

Glittering Lemon Sandwich CookiesPrint Recipe


I am getting very caught up in the custom of holiday cookie making. All over America people have been planning their holiday cookies for the past month. Some have been making dough and freezing it, while others have been baking every night, decorating every spare minute and dropping them on the desks of colleagues, at the front doors of neighbours and handing them out left, right and centre. I don’t remember this kind of cookie frenzy in Australia, it is probably too hot and cookies are more condusive to a hot chocolate rather than an icy cold drink in a sweltering Summer.

What I actually planned to bake today were Gingerbread Biscuits (cookies), I had the design in mind and went looking for a snowflake cookie cutter this morning – to no avail. So these are the substitute, they have been on my recipe list for over a year and it was good to have the excuse to try them out.

Aside from looking absolutely gorgeous, they have a delightful lemon flavour that is enhanced with the tangy filling. The sugar coating privides a crisp, sweet crust that sparkles – just like a Christmas ornament, which makes them very apt for this time of year. So, if you are like me and a little behind with your holiday baking, add these to your list. There is nothing nicer than a little glitter amongst your holiday treats.

1 1/3 cups plain (all-purpose) flour
2/3 cup rice flour
1/4 teaspoon salt
2 sticks unsalted butter, softened
1/2 cup icing (confectioners) sugar
1 tablespoon grated lemon zest
1 teaspoon vanilla
White or colored sanding sugars

Filling
1 cup icing (confectioners) sugar
1 tablespoon grated lemon zest
1 tablespoon fresh lemon juice
1/2 stick unsalted butter, softened

Line 2 large baking sheets with parchment paper.

Whisk together flour, rice flour, and salt. Beat together butter and icing sugar with an electric mixer until pale and fluffy, then beat in zest and vanilla. At low speed, mix in flour mixture just until a soft dough forms.

Put sanding sugars in different bowls. Roll or scoop a scant teaspoon of dough into a ball and drop into sugar, turning to coat. Flatten a little and transfer to a baking sheet. Repeat, spacing balls 3/4 inch apart, until baking sheet is filled.

Preheat oven to 160c/350f and place cookies in the refrigerator for an hour to chill.

Bake until tops are slightly cracked but still pale (bottoms will be pale golden), 12 to 15 minutes. Transfer cookies on parchment to a rack to cool completely. Form and bake more cookies on second baking sheet with left over dough.

Filling
Beat together all filling ingredients in a large bowl with an electric mixer at medium speed until combined well. Transfer to sealable bag and chill for 1/4 hour.

Turn over half of cookies, snip the corner off the sealable bag and pipe about 1/2 teaspoon filling on flat side of each. Sandwich with remaining cookies, pressing gently.

Notes: Using a scoop to form the balls will help keep their shape symetrical. Also with the sanding sugar – I couldn’t find any strong colours but I think they would look even better in rich jewel tones.

Source: Adapted from Gourmet, December 2008

Posted in Recipes | Leave a comment

Balsamic Braised Brussel Sprouts with PancettaPrint Recipe

I was sitting down to dinner a couple of months ago with some dear school friends and we all agreed that brussel sprouts were our least favourite vegetable. All for different reasons, mine was the fact that we were forced to eat them as children. Our vegetable garden seemed to produce them in overabundance every season, consequently I had to endure them on my dinner plate at least once a week. The taste was the worst I had ever experienced and to make things even worse I used to find the occasional bug(s) hidden inside their leaves. I declared Brussel Sprouts my Vegetable Enemy Number 1.

So fast forward to last night. I was out to dinner with some friends in New York and we ordered brussel sprouts as a side. I am always happy to retry food I dislike in the hope that I might now like it – seeing as I am older (and more mature of course). Anyway, I was floored – these brussel sprouts were sensational. They were the highlight of my meal and that is saying alot because everything I ordered was outrageously good.
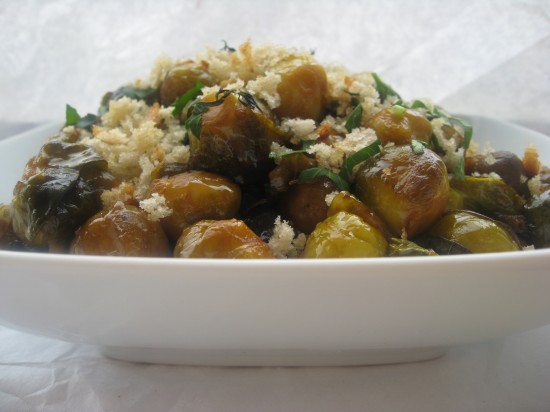
So I spent the better part of this morning looking through recipes and I stumbled across this one from Sunday Suppers. It’s not quite the brussel sprouts of last night but I will certainly be making it again and better still – I can now cross brussel sprouts off my ‘I would rather eat dirt’ list.

1 cup fresh bread crumbs
2 teaspoons thyme leaves
2 tablespoons extra virgin olive oil plus an extra glug or two for drizzling
4 tablespoons unsalted butter
900 grams/2 pounds small brussels sprouts, washed and trimmed
Salt and pepper
170 grams/6 ounces pancetta in small dice (1 1/2 cups)
3 tablespoons minced eschalots (shallots for the USA)
1 tablespoon minced garlic
1/2 cup balsamic vinegar
1 1/2 cups veal stock, rich chicken or vegetable broth, more if needed
2 tablespoons chopped parsley

Heat oven to 350 degrees. In a bowl, mix bread crumbs and thyme with a couple glugs of olive oil, and spread on a cookie sheet. Toast, tossing frequently, until golden brown, 10 to 12 minutes.

Heat butter and remaining olive oil in a large skillet over medium-high heat until foamy. Add brussels sprouts, sprinkle with salt and pepper, and sauté, tossing frequently, until lightly browned, about 7 to 10 minutes. Add diced pancetta, and sauté, tossing frequently, until sprouts are well browned and softened slightly, and pancetta is crisp, about 10 to 15 minutes more. Reduce heat, add shallots and garlic, and sauté until fragrant, 2 minutes.

Increase heat to high, add balsamic vinegar and stock, and cook, tossing frequently, until sprouts are glazed and tender, about 20 minutes; add more stock if needed. Taste, adjusting seasoning if necessary, and sprinkle with chopped parsley. Transfer to a warm serving bowl and scatter bread crumbs on top.

Source: Sunday Suppers

Posted in Sides, Vegetables | Leave a comment

Fleur De Sel CaramelsPrint Recipe


Christmas is almost upon us and it has me thinking about homemade gifts, which I am sure you agree are the nicest by far. I have been making gifts on and off for the last 30 years a very long time. From chocolates, to shortbread and even preserves (jam).

Mentioning preserves brings back memories of a Christmas long ago. A holiday season when I was hell bent on making strawberry and cointreau preserves as a gift for some colleagues and friends. I had allocated one night to do this and after a long day at work I set myself up in the kitchen full of enthusiasm. I had my jars, my ribbon, my hand drawn labels and the very best of ingredients – I was ready to go.

My excitement was shortlived when I discovered my jam did not set and it was a horrible murky red colour instead of the rich, ruby red I was hoping for, I was devesated. Instead of admiting defeat, I became a little crafty and the very next day purchased some good quality jam, mixed it around with a splash of cointreau and packaged it all up. No one knew and no one was any the wiser – aside from me who felt terrible especially when they were so well recieved. The shame, oh the shame. I wanted to crawl under a rock. This terrible feeling was not outweighed by people’s pleasure – in fact it made it even worse and I vowed never to do it again.

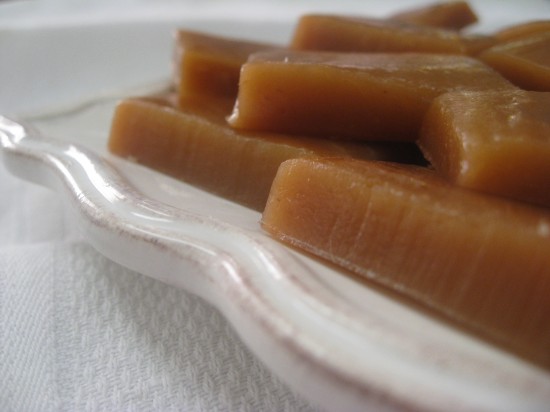
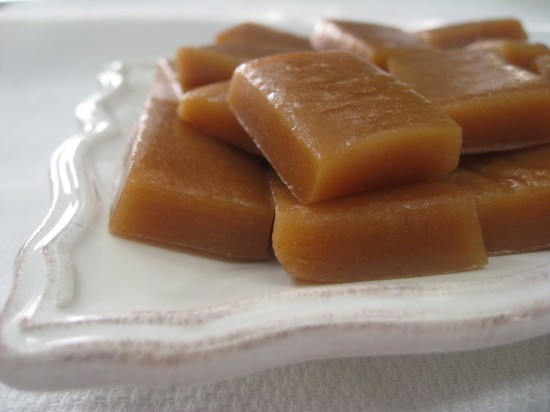
So back to my home made gifts, here are some caramels – and yes, I promise you they are mine. They are without a doubt the best I have ever made – not too hard & not too chewy, creamy and sweet with a slight fleur de sel taste. If you like you can dip them in chocolate and sprinkle a little fleur del sel on top.

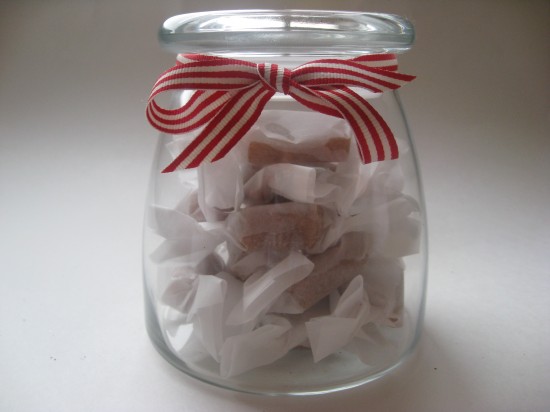
They can be packaged in the prettiest of ways, from cellophane bags through to tins and jars, with ribbon – lots of ribbon. Your gifts will bring joy and you will feel wonderful having gone to the all the effort you have, bringing a little happiness to those you care for – which is what Christmas is all about.

1 cup heavy cream
5 tablespoons unsalted butter, cut into pieces
1 teaspoon fleur de sel*
1 1/2 cups sugar
1/4 cup light corn syrup
1/4 cup water

Line bottom and sides of an 8-inch square baking pan with slightly oiled parchment paper.

Bring cream, butter, and fleur de sel to a boil in a small saucepan, then remove from heat and set aside.

Boil sugar, corn syrup, and water in a heavy based saucepan, stirring until sugar is dissolved. Boil, without stirring but gently swirling pan, until mixture is a light golden caramel.

Carefully stir in cream mixture and simmer, stirring frequently, until caramel registers 248°F on thermometer, 10 to 15 minutes. Remove from the stove immediately and pour into baking pan to cool for 1 hour. With an oiled knife,  cut into 1-inch pieces (or smaller if you desire), then wrap each piece in a square of wax paper, twisting 2 ends to close.

Notes: At the final boiling stage it took me around 25 minutes to reach the 248f. So do not be concerned if it does take longer than 15 mins.

Source: adapted from Gourmet 2004

Posted in Candies | 1 Comment

Brown Sugar Butterfly Cakes with Raspberry CreamPrint Recipe

There is something very whimsical about a butterfly cake. They take me back to childhood. Back to childrens birthday’s, tea parties with a crowd of dolls and stuffed animals and back to one of my very initial baking experiences. I distinctly remember butterfly cakes being one of the first things I really wanted to make. Most little girls are enamoured with butterflys and I was no exception – I loved the fact they resembled two dear little butterfly wings sitting atop a mound of fluffy frosting (or cream).

Ordinarily my butterfly cakes consist of the cake with a smudge of jam or lemon curd followed by a dollop of cream, and of course the wings and a sprinkle of icing sugar. These particular cakes are a little more complex and what I would call the adult version – being that the cream contains creme fraiche and a little alcohol (optional of course).

I have made these for a dinner party we are having tonight. Sometimes I like to do my desserts tapas style – so my guests can opt not to have anything at all or graze over a selection of sweet confections (and the obligatory stinky cheese). I am serving these with some tiny chocolate mousses, mini lemon tarts and a big bowl of fresh strawberries. Yum!

1 1/4 cups plain flour (all purpose), sifted
3/4 teaspoon baking powder
2 eggs
1/3 cup caster sugar
1/3 cup dark brown sugar 
125 grams/4.4 ounces butter, melted and cooled
3/4 cup of full cream milk (whole milk)
1 teaspoon vanilla essence

Raspberry Cream
125 grams/4.4 ounces raspberries (about 1 punnet)
75 grams/2.6 ounces caster sugar
½ a lemon, juice only
2 teaspoons of raspberry liqueur (optional)
100 grams/3.5 ounces crème fraîche
100 mls pouring cream
30 grams/1 ounce pure icing sugar (confectioners sugar), sifted

Preheat oven to 160c/325f.

Place flour, baking powder, eggs, sugars, milk, vanilla essence and melted butter into a large mixing bowl and beat until well combined. Spoon into 24 medium sized cup cake cases setout in muffin tins and bake for around 20 – 25 minutes or until cooked when tested with a skewer.

Cool in tins for 5 minutes, then cool on a wire rack. Use a 3.5cm-diameter cutter to cut a circle part-way through the centre of each cake to about 1cm deep and remove cake round with a sharp knife. Halve each round and set aside.

Meanwhile, for raspberry cream, combine raspberries, sugar, lemon juice and liqueur in a small saucepan and stir over medium-high heat until sugar dissolves. Bring to the boil, cook until jam-like (6-8 minutes), remove from heat and cool completely. Whisk crème fraîche, cream and icing sugar until soft peaks form, then fold in the raspberry mixture, a teaspoonful at a time, to taste. I opted to add only a couple of teaspoons but you may wish to increase the colour and flavour intensity with more (or the entire amount).Transfer to a zip lock bag and store in refrigerator until required.

To assemble, cut a small hole (1/2 inch) in the corner of the zip lock bag and pipe raspberry crème fraîche into holes in cakes. Top with reserved halved cake circles, dust with icing sugar and serve.

Notes: I made these using the smaller cupcake cases – which made 24 and cooked for 15 minutes.

Source: Raspberry Cream adapted from Gourmet Traveller

Posted in Cakes, Childrens Parties, Morning Teas/High Teas | Leave a comment

Sticky Caramel Poached Pears with Vanilla Bean CremePrint Recipe

Pears are one of my favourite fruits – it’s not so much about the taste but more about the look. Don’t get me wrong – I love a good pear but what really attracts me is their shape and colour. Their beautiful Botticelli curves, their rich autumnal hues and their oh-so-rosy cheeks. There is also something incredibly sensual about them. The pear I have in mind is the Corella, rather than your every day pear. Having said that, your run of the mill pear has some of these merits too.

I have been poaching pears in red wine for years and I wanted to try something new so I looked up a few recipes, got some tips and whipped these up. I use the word ‘sticky’ in their name because they are poached in a liquid that contains a botrytis affected wine, it is also very syrupy (and is still stuck in splatters on my kitchen floor).

The pears are infused and caramelized with the spiced poaching liquid that gives them the most luscious of flavours, this is complimented with the mild tang and nuttiness of the vanilla bean creme. This dish is as simple as it is beautiful leaving your guests sticky lipped and full of praise for the perfect pear.

750 grams/1.6 pounds organic caster sugar
rind of 1 lemons and 1 orange
4 tablespoons of lemon juice
4 tablespoons of orange juice
2 cinnamon quills
1 vanilla bean, split and seeds scraped (reserve 1/2 the seeds for the creme)
10 small ripe corella pears, peeled, halved, cores removed with a melon baller
120 mls dessert wine (Sauturne)
90 mls pouring cream
30 gm butter

Vanilla Bean Creme
227 grams/8 ounces crème fraîche
300 mls pouring cream
3 tablespoons icing sugar (confectioners sugar)
vanilla bean seeds (1/2 from the vanilla bean used in the liquid)
 
Combine 1 litre of water with sugar, rinds, juices, spices, vanilla bean and 1/2 the seeds in a large saucepan, stir over medium-high heat until sugar dissolves. Add pears, cover closely with a round of baking paper, weigh down with a plate and bring to the simmer. Reduce heat to medium and cook until just tender (20-25 minutes). Remove pears from liquid and set aside. Strain cooking liquid into a large deep-sided frying pan and simmer over medium-high heat until mixture reduces by 2/3’s and turns thick and syrupy (around 35-45 minutes). Add dessert wine, cream and butter, then stir until combined. Add pears to pan and cook, spooning caramel over pears until glazed (2-3 minutes), remove from heat and steep for a further 20 minutes. Remove from the liquid with a slotted spoon and serve with Vanilla Bean Creme on the side and a drizzle of the caramel liquid.

Vanilla Bean Creme
Whisk crème fraîche, cream, icing sugar and remaining vanilla seeds in a bowl until firm peaks form (2-3 minutes).

Notes: Get your stickys out – this is best served with a chilled Sauturne (a Chateau d Yquem perhaps?)

Posted in Desserts, Fruit | 1 Comment

Quail with Melting Onions, Saffron and ChickpeasPrint Recipe

This particular recipe is from a cookbook called Saraban – an absolute treasure for anyone who appreciates culturally rich cuisines. Saraban navigates its reader through the culinary landscapes of ancient Persia and gives us an insight to one of the worlds oldest and most sophisticated cuisines. The dishes are as alluring as they are rich in history.

I actually hadn’t cooked quail for a very long time – in fact I could easily say the last time was back in the ‘Like Water for Chocolate’ days when I attempted the movies’ Quail with Rose Petal Sauce, a very romantic dish. Generally speaking, I am not overly fond of game but I find quail not too ‘gamey’ in taste and very easy to use.

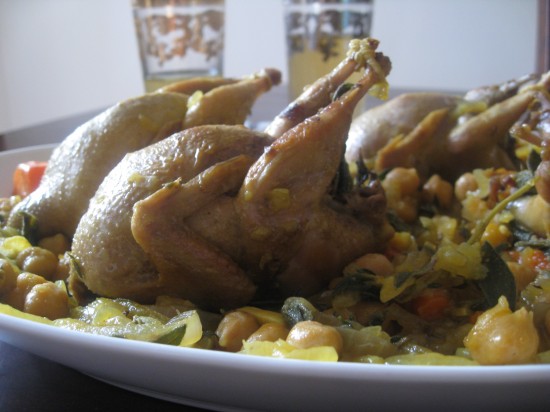
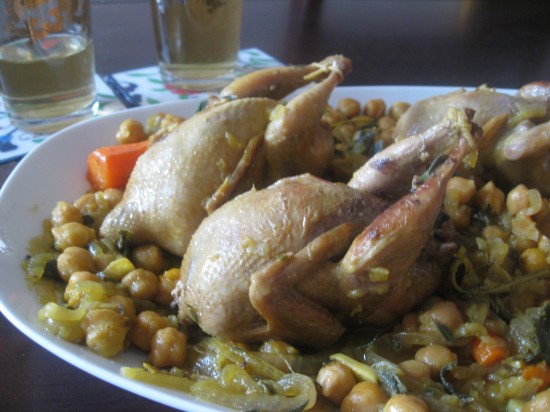
The aroma of these fragrant and succulent little birds can only be described as glorious. I served this with a very plain couscous which embraced the wonderful flavours of the herbs and spices. Of course the saffron is magic – and magic it brings to this enchanting dish.

* if you use dried chick peas please start this recipe the day ahead*

60 ml (¼ cup) olive oil
2  large Spanish onions, thinly sliced
4  garlic cloves, thinly sliced
½ tsp cardamom seeds, lightly crushed
½ tsp dried oregano
6  jumbo quail (180-200gm each), legs tied
150 grams/5.2 ounces dried chickpeas, soaked overnight in cold water, or 200 grams/ 7 ounces canned chickpeas
4  baby carrots, trimmed and halved widthways
1/3 cup oregano leaves
8 thyme sprigs
1 bay leaf
300 mls good-quality chicken stock
2 tbsp currants
Squeeze of lemon juice

Saffron liquid
30 saffron threads
60 ml (¼ cup) boiling water

To make the saffron liquid, lightly toast the saffron threads in a dry frying pan over a medium heat for about 30 seconds. While the threads must be totally dry, be very careful not to burn them. As they crisp up, they will begin to release a wonderfully pungent aroma. Tip the saffron into a mortar and leave for a moment or two before grinding to a powder. Mix the ground saffron with the boiling water and set aside to infuse for at least 1 hour before using. The colour will continue to develop for about 12 hours.

Heat the oil in a large, heavy-based saucepan or casserole dish over a low heat. Add the onion and garlic and fry gently until soft and translucent (8-10 minutes). Stir in the cardamom seeds and dried oregano and cook for another couple of minutes. Lift the mixture out of the pan with a slotted spoon and set aside.

Season the quail with salt and pepper. Add a little more oil to the pan, if need be, and brown the quail thoroughly (10-12 minutes). Drain the soaked chickpeas (rinse and drain the canned ones, if using). Return the onion mixture to the pan and add the chickpeas, carrot and fresh herbs. Pour in the stock and 2-3 tbsp saffron liquid or to taste (you may have some left over). Bring to the boil, then lower the heat, cover the pan, and simmer very gently until the quail and onions are very tender and the chickpeas are cooked (1-1½ hours). From time to time, skim away any impurities that rise to the surface.

Towards the end of the cooking time, add the currants to the pan. Simmer for a further 4-5 minutes, then season with salt to your liking and stir in the lemon juice. Serve straight away.

Source: Saraban by Greg and Lucy Malouf.

Posted in Game, Mains | Leave a comment

Roast Tomato SaucePrint Recipe

I had one of those days today. I attempted two different dishes and for various reasons they did not come to fruition. The butcher gave me the wrong cut of meat for one so it has been made however is not quite right and the other, lets just say I am still cleaning the remnants off the floor. So I opted for an old faithful.

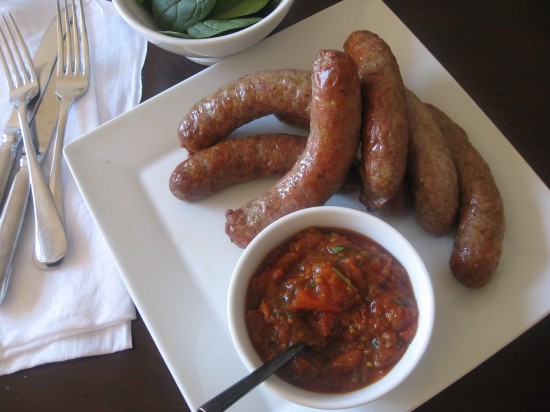
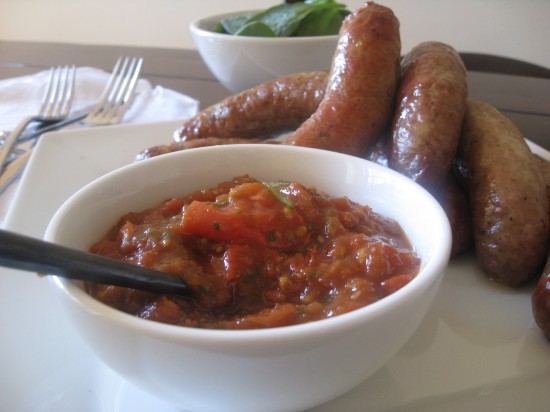
This very tasty little sauce is something you can almost serve with anything. To date I have made it to accompany chargrilled lamb, seared tuna steaks, barbequed filet mignons, even corn fritters and today it is pork & fennel sausages. The sauce is incredibly versatile and having it on hand can bring a simple meal to life – it just seems to add that something extra.

The pomegranate molasses and ground cumin add flavours that are reminiscent of Middle Eastern cooking. In particular the molasses, which adds a piquancy in its own very sweet and tart way.

Perhaps, its about time you put away your ketchup and ventured out into the unknown – this sauce will add an exotic flavour to whatever you pair it with. Enjoy!

500 grams/1 pound 2 ounces Roma (plum) tomatoes
1 teaspoon salt
1 teaspoon sugar
1 tablespoon pomegranate molasses
10 basil leaves
1 garlic clove, roughly chopped
1 teaspoon ground cumin

Preheat your oven to 180c/350f.

Cut the tomatoes into quarters and place them in a baking dish. Sprinkle with the salt and sugar and place in the oven. Roast for 40 minutes or until the edges start to blacken a little. Remove and allow to cool for 10 minutes.

Place the tomatoes in a food processor with all the other ingredients and blend to a smooth paste. Season with freshly ground black pepper.

Notes: This will keep for around two weeks in an airtight container in the refrigerator.

Source: Michele Cranston

Posted in Sauces/Dressings/Condiments | Leave a comment

Chocolate Mudslide Cookies from Jacques TorresPrint Recipe

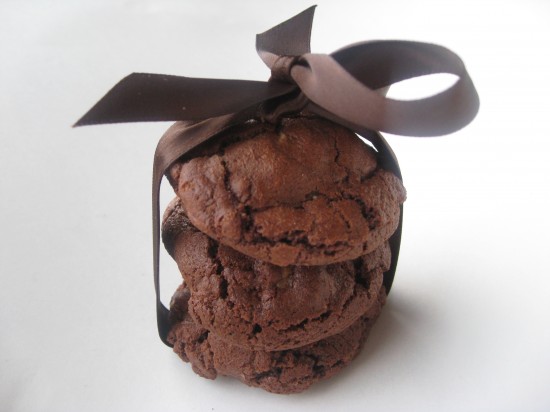
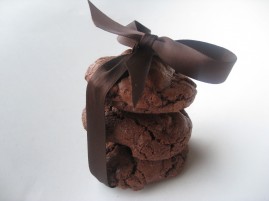
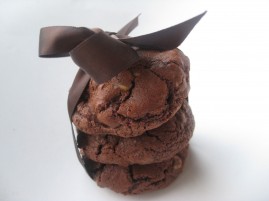
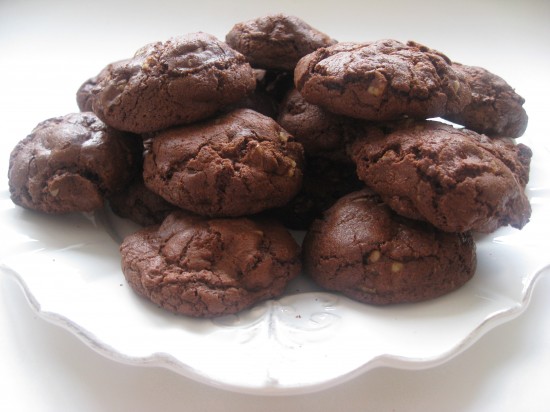
The Chocolate Mudslide Cookie was created by Jacques Torres, a renowned pastry chef and chocolate afficonado. He is famous for his chocolate creations, which consist of decadent desserts, sculptures and various edible artworks. Quite clearly these cookies do not fall into those categories, they are nonetheless, extravagent in every way. The taste and the texture alone are heaven – not to mention they way they look and the simple fact that they contain over 8 cups of chocolate (and that is no exaggeration).

You will find these a cross between a brownie and a cookie – heaven for chocoholics and so good that even those of you who find chocolate a little ho-hum will sigh and admit defeat.

Now, I should let you into a little secret – the real reason I made these is for the boys that run our building. My aim is to get a little more space in the trunk room, to store our bbq (amongst other things). So I am hoping these will do the trick, I will keep you posted.

170 grams/6 ounces unsweetened chocolate for melting
454 grams/16 ounces bittersweet chocolate for melting
6 tablespoons butter
2 1/4 cups sugar
5 eggs
1/2 cup plus 3 tablespoons all-purpose flour
1 tablespoons baking powder
Pinch salt
1 1/4 cups plus 1 tablespoon walnuts, chopped
454 grams/16 ounces bittersweet chocolate, chopped

Melt the unsweetened and bittersweet chocolates together over a double-boiler (a simple double boiler can be set up by putting a metal bowl over a simmering pot), stirring periodically. Set aside.

Place the butter and sugar in the bowl of a stand mixer and cream. Add the eggs 1 at a time, mixing until blended. Add in the flour, baking powder and salt and mix just until combined. Pour in the melted chocolate, mix, then stir in the walnuts and chopped chocolate pieces.

Pour the mixture onto a parchment-lined baking sheet or tray. Put the mixture into a refrigerator for 5 to10 minutes until slightly, but not completely, hardened.

Reverse the sheet or tray onto another piece of parchment paper on a hard surface. Use a knife to divide the mixture into 40 squares. With your hands, roll each of the squares into a ball and evenly space them on one or two parchment-lined baking sheets (leave room for them to spread).

Bake in a preheated 350f convection oven for 16 minutes.

Note: Check your cookies from 10 minutes – if you have a hot oven they may take less time to cook and burnt bottoms on heavily dosed chocolate cookies are not good.

Source: Jacques Torres for the New York Times

Posted in Biscuits/Cookies/Slices/Bars, Chocolate | Leave a comment