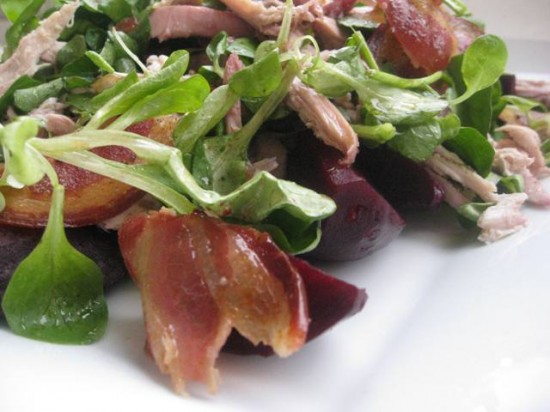
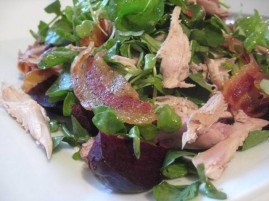
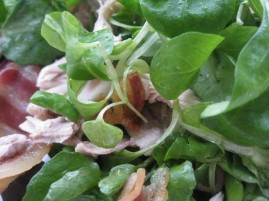
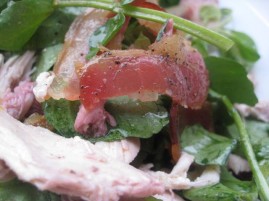
Warm Pheasant Salad with BeetrootPrint Recipe


I had a dinner planned tonight – or should I say a dessert. It had already taken the better part of the day (and the day before) to make and it was going to be quite spectacular, not to mention incredibly rich. So I thought a salad might be the best option for dinner.

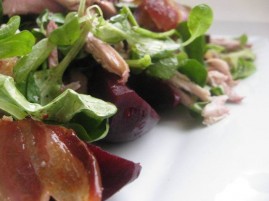
I had been pottering around our local supermarket looking for inspiration when I spied a lonely little pheasant in the game section. I whisked him home and popped him in the oven for this salad. I had made it before so it didn’t take long to put together.

The raspberry vinegar gives everything a fresh and slightly tangy flavour, including the roasted pheasant which is quite succulent – roasting it with the pancetta on top enhances its flavour and texture. One thing I would say though, is to use a mild tasting olive oil in the dressing, I remember using a strongly flavoured extra virgin olive oil last time I made it and it overpowered the raspberry vinegar. Best to stick to a straight olive oil rather than the extra virgin.

It’s not Winter food I know but it is the perfect salad for a light and simple dinner. It went really well with the nice bottle of white we opened to celebrate nothing other than a Saturday evening in. And as for dessert, take a peak below…

2 pheasants or spatchcock (around 1 kilo/2 pounds each)
8 slices of pancetta (cut not too thin)
4 beetroots
3 cups of loosely packed watercress
2 cups of loosely packed mache
1/3 cup raspberry vinegar
1/4 cup mild olive oil

Preheat oven to 250c/482f. Clean and truss the pheasants and place 4 pieces of pancetta over each bird, covering the breasts and legs. Place in a roasting pan, season to taste with salt and pepper. Reduce the oven to 180c/356f and place in the oven to roast for 1 hour and 10 minutes or until juices run clear when a skewer is inserted into the leg. Remove bacon from the pheasant and set aside, place pheasants back in the oven and roast for a further 10 minutes until golden brown. Cool slightly, then remove meat from the pheasant and coarsely shred, discarding skin and bones. Keep warm.

Meanwhile, cut the stems and leaves away from the beetroot, leaving about 1″ attached and wash to remove any surface soil (do not cut off the long tapering root).  Place each beetroot on a square of oiled foil, wrap and ensure all of the beetroot surface is covered. Bake from 30 minutes through to 1 1/2 hours depending on the size of your beetroot. Test with a skewer, it would slip through the beetroot without any resistance. Remove foil and leave to cool for 20 minutes. Rub skins off under running water and cut into small segments and arrange on a platter.

Combine watercress and mache in a bowl and break reserved bacon into peices. Heat vinegar in a saucepan over a medium heat and simmer for 5 minutes or until reduced by half, add oil and season to taste. Add dressing, pheasant meat and bacon to salad leaves, toss to combine and arrange on a platter. Serve immediately.

Notes: It might suit you to roast the beetroot prior to roasting the pheasant – it can be left at room temprature until the pheasant is done.

a sneak peak of tomorrow’s posting…

Posted in Game, Mains, Salads | 1 Comment

Red Velvet Cupcakes with Cream Cheese FrostingPrint Recipe

It’s hard to pass up a really good red velvet cupcake, it can also be quite hard to find one. The best I have ever had was from Sweet Mandy B’s in Chicago. If you know of it, I am certain you will agree  they have amazing cupcakes and classic American baked treats. Their frosting is to die for and I know of many a Sweet Mandy B’s devotee trying desperately to get their hands on the recipe – to no avail. It seems it is almost as guarded as the recipe for Coke.

When we lived in Chicago , Sweey Mandy B’s was a 10 minutes walk from our house and it was quite amazing how many excuses I found to walk in its direction. Of course it was mandatory that we stop in to see what they had just pulled out of their ovens. Their key lime pie and banana cream pies were amazing, as were their peanut butter and jelly bars and raspberry bars.

Anyway, I digress – back onto my Red Velvet Cupcakes. These are from the Hummingbird Bakery Cookbook and are certainly the best I have ever made. They are fluffy and moist, they have a subtle hint of chocolate, and are RED. Red and delicious! They are made even more so with a lovely little dollop of cream cheese frosting. The frosting is my own recipe – I tend to use alot more cream cheese and a lot less icing/confectioners sugar than most, only because I make it to taste and prefer it that way. As you can see I used a piping bag for the frosting but you know what, I think I actually prefer the frosting to but slathered on rather than piped – next time.

So if Sweet Mandy B’s is not within walking distance then hot foot it to your kitchen and start gathering these ingredients. Eating bad red velvet cake is unfathomable, especially with this recipe at your (cupcake loving) fingertips.

4 Tablespoons unsalted butter, at room temperature
3/4 cup sugar
1 egg
3 Tablespoons unsweetened cocoa powder
2 1/2 tablespoons red food colouring
1/2 teaspoon vanilla extract
1/2 cup buttermilk
1 cup plus 2 tablespoons plain (all-purpose) flour
1/2 teaspoon salt
1/2 teaspoon baking soda
1 1/2 teaspoons distilled white vinegar

In the bowl of a stand mixer fit with a paddle attachment, cream the butter and sugar until light and fluffy, about three minutes. Turn mixer to high and add the egg. Scrape down the bowl and beat until well incorporated.

In a separate bowl mix together cocoa, vanilla and red food coloring to make a thick paste. Add to the batter, mixing thoroughly until completely combined. You may need to stop the mixer to scrape the bottom of the bowl, making sure that all the batter gets colour.

Turn mixer to low and slowly add half of the buttermilk. Add half of the flour and mix until combined. Scrape the bowl and repeat the process with the remaining milk and flour. Beat on high until smooth.
Turn mixer to low and add baking soda and white vinegar. Turn to high and beat a few more minutes.
Spoon batter into a paper lined cupcake baking pan and bake for 20-25 minutes or until a skewer inserted into the center cupcake comes out clean.

Place on a cooling rack to cool completely before frosting.

Frosting
*if you are going to pipe the icing then increase the quantaties by 50%*
8 ounces cream cheese at room temperature
2 ounces butter at room temperature
1 1/2 cups confectioner’s sugar, sifted
1 teaspoon pure vanilla extract

Place cream cheese and butter in a medium bowl. With a handheld electric mixer, beat until light and fluffy, about 2 minutes. Add sugar and vanilla. Beat, on low speed to combine. If too soft, chill until slightly stiff, about 10 minutes, before using.

Source: Hummingbird Bakery Cookbook

Posted in Cakes, Childrens Parties, Morning Teas/High Teas | Leave a comment

Swedish Potato and Anchovy Gratin/Janssen’s TemptationPrint Recipe


I have spent the better part of the week going over my New Years resolutions. They are slightly different to last years but the most important ones are still right at the top. Patience being one of them. I am not too sure if I will ever get to a point where I can wipe this from my list (it’s been on there for 5 years) but I am working on it. I want patience and I want it now! now, now, NOW!

Something about healthy eating was on there too – bah!

So onto my recipe for the day, this simple Swedish potato gratin hails gets a huge flavour burst from the addition of anchovies, onions and a little sage. Elegant enough for a more formal occasion or simple enough for a  casual one. I would actually be quite happy to eat it on its own – for light supper perhaps.

So if your New Years Resolutions include cutting down on carbs and dairy,  you might need to turn a blind eye to the potatoes and cream (or check out my salad recipes). I hope you enjoy.

1 large Sebago or Yukon Gold potato (about 350 grams/12.3 ounces)
1 tablespoon olive oil
1 large onion, thinly sliced
1 clove of garlic, crushed
1 tablespoon of finely shredded sage leaves
1 cup pouring (heavy) cream
1 x 45 gram/1.5 ounces tin of anchovy fillets in oil
1 cup of fresh sourdough bread crumbs (see notes)
25 grams/.88 ounces butter, finely chopped plus extra for greasing
Cornichons to serve

Using a mandolin or a v-slicer, cut the potato into short julienne over a bowl of cold water, drain then blanche the potato in a saucepan of boiling salted water for 30 seconds and drain well.

Heat oil in a frying pan, add onion and garlic and cook over a medium-low heat for 8 minutes or until onion is very tender. Remove from heat and stir in the sage.

Place cream in a small saucepan and bring almost to the boil, reduce heat and simmer for 5 minutes until it thickens. Remove from heat and season to taste with sea salt and freshly ground pepper. Drain anchovy fillets through a sieve placed over a small bowl and reserve the oil.

Place a layer of the potato over the base of 6 (150 ml capacity) ramekins and top with a little of the onion mixture and 1 torn (into small pieces) anchovy fillet per dish. Repeat layering once more, packing ingredients tightly and finishing with a layer of potato. Drizzle each ramekin with enough cream to fill it by 2/3’s and bake at 170c/350f for 15 minutes or until potato is tender.

Meanwhile put the sourdough bread crumbs in a bowl and pour in the reserved anchovy oil – mix through so the bread crumbs are covered lightly in the oil.

Remove gratins from the oven and scatter with breadcrumbs and butter, cook for another 10 – 12 minutes or until golden. Serve immediately with cornichons on the side.

Notes: To make sourdough breadcrumbs – simply place slices of the bread in a blender and chop till desired crumb size is reached

Source: adapted from an old Gourmet Traveller (no date attached to the torn out page)

Posted in Sides, Starters, Vegetables, Vegetarian | Leave a comment

Antonio Banderas Serano Ham and Manchego Cheese CroquettesPrint Recipe

I would love to say Mr Banderas gave me this recipe after I raved about them at his last dinner party – but that would be boloney. He and I are not on a first name basis, we don’t swap recipes or shoot the breeze over a pizza and wine – in fact I am pretty certain that he does not know I exist. There is one thing I do know about him though, and that is his croquettes are sensational.

I was at the gym many months ago, (it is a little ironic that I was working off a cake I had just baked/eaten), watching a Martha Stewart show that featured Antonio making his croquettes. I was drawn to it because of his accent (which I love – obviously) but then the croquettes took all my attention and they immediately went on my ‘must cook’ list.

Croquettes are something I don’t cook alot of – in fact I tend to steer clear from most fried food. However, they do have a time and a place which include tapas and nibbles with a few cocktails (which, if you are a wise hostess, are as substantial as tapas anyway).

So now I can say that Antonio and I do have something in common and something we can chat about when if/when we meet. The converstaion will be pretty short I imagine – ‘hey Antonio, I made your croquettes, they were great‘ to which he might reply (somewhat puzzled and wondering if he should know me) ‘how very nice my dear?’ …anyway, enough of my musing. I am just happy I can bring a little of this charming Spanish coquette and his croquettes to your kitchens. Adios!

2 tablespoons unsalted butter
2 tablespoons olive oil
1/4 cup finely chopped onion
Coarse salt and freshly ground pepper
7 tablespoons all-purpose flour, plus more for shaping
3/4 cup whole milk
6 tablespoons finely chopped serrano ham
1/3 cup plus 1/4 cup grated Manchego cheese (about 1 3/4 ounces)
2 large eggs
1 cup fresh breadcrumbs
Vegetable oil, for frying

Heat butter and oil in a medium saucepan over medium heat until butter has melted. Add onion; season with salt and pepper. Cook, stirring occasionally, until onion is translucent, about 3 minutes. Add flour; cook, stirring, 1 minute. Whisk in milk, and cook, whisking, 3 minutes. Whisk in ham and 1/3 cup cheese. Season with salt and pepper as desired. Spread mixture onto a baking sheet, and let cool completely. Mixture can be refrigerated in an airtight container up to 2 days.

Whisk together eggs in a shallow dish. Stir together breadcrumbs and remaining 1/4 cup cheese in another shallow dish. Scoop tablespoons of cooled mixture, and shape with floured hands into 2-inch ovals. Working with 1 oval at a time, coat in beaten egg, then in breadcrumb mixture. Transfer to a baking sheet lined with parchment paper.

Heat 2 1/2 inches oil in a large, heavy stockpot until it registers 375 degrees on a deep-fry thermometer. Working in batches to avoid crowding, fry croquettes, flipping once, until dark golden brown, 1 to 2 minutes total. Using a slotted spoon, transfer to paper towels to drain. (Adjust heat between batches as needed to keep oil at a steady temperature.) Serve warm.

Source: Antonio Banderas for Martha Stewart

Posted in Nibbles & hors d'oeuvres, Picnic Food | 1 Comment

Hazelnut Brown Butter CakePrint Recipe


I had every intention of providing you with some sort of boozy recipe (a bellini perhaps?) so you could welcome in 2011. But it did not eventuate – a day of sledding and building snow forts in Central Park took precedence. When we finally arrived home after an action packed 4 hours the last thing I wanted to do with my daughters was to teach them what kind of fruit I could mix with a good Prosceco (or champagne in my case) to make mummy and daddy silly. So we ventured into cakedom.

When I first made this cake I thought I burnt the brown butter (it was actually perfect) and threw it out, replacing it with something that was far from brown. The second time around I got it right, thankfully! because there is nothing more frustrating than baking a cake that everyone raves about to find it quite bland.

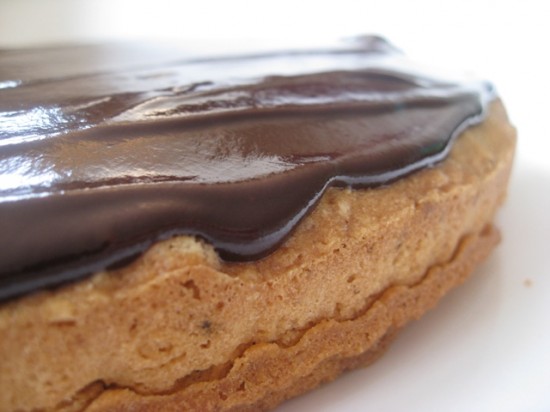
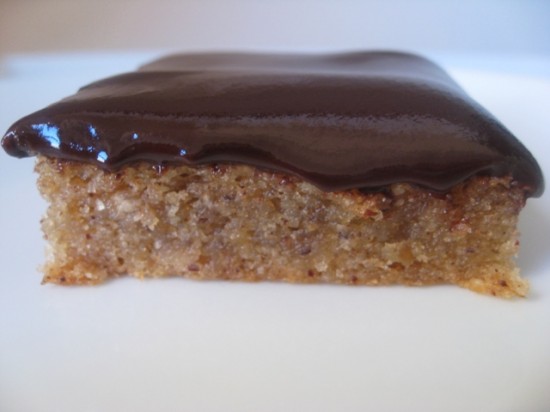
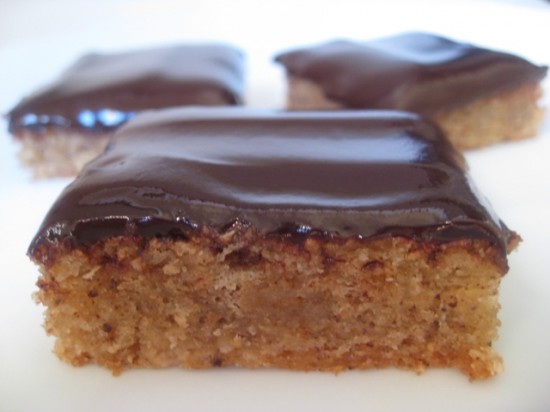
The cake itself is simply delightful, so good in fact that I want to shout it OUT LOUD. A soft hazelnutty interior with a slightly chewy exterior, the caramelized (burnt) butter seems to enhance the flavour of the nuts and give it a texture that can only be described as lush. You can serve it with a sprinkle of icing (confectioners) sugar or cover it with something simple and chocolatey. I chose a basic chocolate ganache – hazelnuts and chocolate are a marriage made in heaven and Mr Man would also be wondering why I would use icing sugar when I could have used chocolate.

Now, more importantly, Happy New Year! I hope the year ahead holds happiness and joy for all you xx

142 grams/5 ounces (about one heaping cup) hazelnuts, blanched to remove dark skins*
227 grams/8 ounces unsalted butter (plus 1 tablespoon melted extra for greasing the pan)
1/2 vanilla bean
1 1/3 cups powdered sugar, plus extra for dusting the cake
1/3 cup plain (all-purpose) flour
5 extra-large egg whites
3 tablespoons granulated sugar

Preheat oven to 350f.

Spread the hazelnuts on a baking sheet, and toast 12 to 15 minutes, until they’re golden brown and smell nutty. Let them cool.

Cut out parchment paper to fit in the bottom of a 10″ round or a 9″ square cake pan. Brush the pan with a little melted butter and line the bottom with the paper.

Place the rest of the butter in a medium saucepan. Slice the vanilla bean lengthwise down the center, and using a paring knife to scrape the seeds and pulp onto the butter. To make sure not to lose any of the seeds, run your vanilla-coated knife through the butter. Add the vanilla pod to the pan, and cook the butter, swirling occsionally, until it browns and smells nutty (about 6 to 8 minutes – the butter will have a golden brown colour and look like it has grit through it – see pictures below). It helps to frequently scrape the solids off the bottom of the pan in the last couple minutes to ensure even browning. Set aside to cool to room temperature. Remove the vanilla pod and discard.

Place the hazelnuts with the confectioners’ sugar in a food processor and blend until finely ground. Add the flour and pulse to combine. Transfer to a large bowl.

Place the egg whites in the bowl of a stand mixer fitted with the whisk attachment. Add the granulated sugar and mix on high speed 4 to 5 minutes, until the mixture forms very stiff peaks. When you turn the whisk upside down, the peaks should hold. Transfer the whites to a large mixing bowl.

Alternate folding the dry ingredients and the brown butter into the egg whites, a third of a time. Remember to scrap the bottom of the brown butter pan with a rubber spatula to get all the little brown bits.

Pour the batter into the prepared cake pan, and bake for 40 – 50 minutes. Cool on a rack 30 minutes. Run a knife around the inside edge of the pan, and invert the cake onto a plate. Peel off the paper, and turn the cake back over onto a serving platter. Sprinkle it with powdered sugar or cover with ganache (recipe below).

* To blanche the hazelnuts (remove the skins), place them on a baking sheet at 350°F for about 15 minutes then wrap the warm nuts in a dish towel, letting them sit for five minutes and vigorously rub together to brush their skins off.

Ganache for 10-inch Cake
6 ounces semisweet chocolate, chips or finely chopped
1/3 cup heavy cream

Melt the chocolate and cream in the top of a double boiler over simmering water until smooth and warm, stirring occasionally. Remove from heat and pour over cake, smoothing out to the sides.

Notes: I found that browning butter took some practice – best to give it your full attention and not try to do it whilst playing with your children (like I did). I have included some photos below that show what it should look like.

Source: Sunday Suppers at Lucques

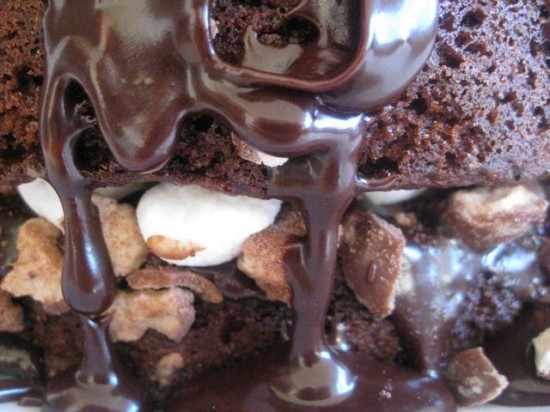
and did I tell you that the batter is delicious also?

Posted in Cakes, Chocolate, Desserts | 3 Comments

Cranberry Shortbread CakePrint Recipe

I am constantly amazed at how many food blogs are out there. Food blogging has become a huge industry and with this there are many groups and organisations that have been set up to get these people together – comparing recipes, photos of their baking etc etc, in fact I think in this coming year there is even a food blogging conference in New Orleans. Anyway, yesterday I found a site called ‘Tuesdays with Dorie’. Dorie Greenspan has a great selection of cook books out but this group cook from a particular one; ‘Baking: From My Home To Yours’.  Each week someone picks a recipe and everyone cooks it, takes pictures and compares notes and the like. Doesn’t that sound like fun? Only problem is that membership is limited and from what I can gather on the website, people have been trying desperately to join since 2008. And I mean, really desperately – it’s kind of crazy.

So I added my name to the list and I am not expecting a call for quite some time. But you know what? I have Dorie’s book and I can cook what I like from it, whenever I want! I am not limited to someone elses choice and cooking on Tuesdays. So I may start my own group – WILWILWD (Whatever I Like, Whenever I Like with Dorie). Membership is open to everyone, you are not required to write pleading emails and you can cook to your hearts desire. Sound good?

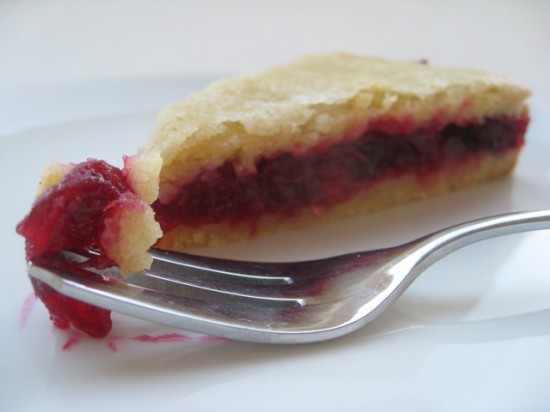
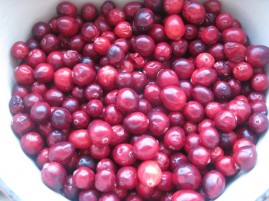
So, today I chose to cook Dorie’s Cranberry Shortbread Cake. A nice tart little treat which would be well suited to a Thanksgiving or Christmas Dinner – I know we are in the Christmas aftermath but I still had cranberries in my fridge and I got sick of seeing them every time I opened my fruit drawer.

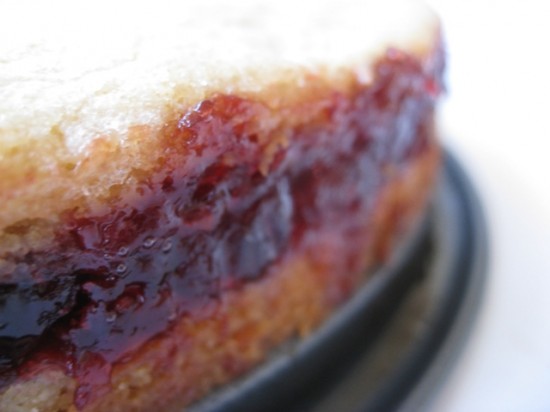
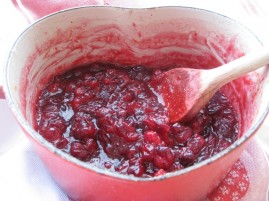
The shortbread itself is lovely and buttery which is perfect for the quite tart cranberry filling. I particularly love the red of the cranberries – so perfectly crimson and pretty. Anyway, I served this with a vanilla bean ice cream which balanced out the tart of the filling very nicely (the little mouths of my daughters preferred it this way too).

So whether I get accepted to ‘Tuesdays with Dorie’ remains to be seen (probably not now that I have started my own organisation) but at the moment I am happy navigating my own way through the food blogging universe – doing my own thing :)

Jam Filling
1 large navel orange
1/4 cup of orange juice
1 12-ounce bag cranberries, fresh or frozen (not thawed)
1 cup sugar

Shortbread
2 1/2 cups all-purpose flour
1 teaspoon baking powder
Pinch of salt
13 tablespoons unsalted butter, at room temperature
1 cup plus 2 teaspoons sugar
1 large egg
1 large egg yolk
1 teaspoon pure vanilla extract

Jam Filling
Grate the zest of an orange into a medium heavy-bottomed saucepan. Slice off the peel, removing the white, cottony pith that sticks to the fruit, and slice between the membranes to release the orange segments. Cut the segments into 1/4-inch wide pieces and toss these into the pan and add the orange juice.

Put the cranberries in the pan, stir in the sugar, set the pan over medium heat and bring to a boil, stirring frequently. Cook, stirring almost constantly, until the cranberries pop and your spoon leaves tracks, between 5 – 10 minutes.

Scrape the jam into a bowl and taste it, if it’s too tart, add more sugar to taste. Cool to room temperature. (The filling can be made up to 2 weeks ahead and stored in an airtight container in the refrigerator)

Shortbread
Whisk together the flour, baking powder and salt.

Working with a stand mixer, preferably fitted with a paddle attachment, or with a hand mixer in a large bowl, beat the butter on medium speed until soft and smooth. Add 1 cup of sugar and continue to beat until it dissolves into the butter. Reduce the mixer speed to low and add the egg and egg yolk and, beating until they too are absorbed. Beat in the vanilla. Add the flour mixture, mixing only until it is incorporated; since this is a delicate dough, one that should not be over beaten, you might want to finish mixing in the flour by hand using a sturdy spatula. You’ll have a thick dough, one that is quite malleable.

Turn the dough out onto a smooth surface and gather it together in a ball, then divide in half and pat each half into a disk. Wrap the disks in plastic and refrigerate them for 15 to 30 minutes. (At this point, the dough can be refrigerated overnight; set it out at room temperature for about 20 minutes before proceeding)

Baking
While the dough is chilling, center a rack in the oven and preheat the oven to 350f. Lightly butter a 9” springform pan (preferably nonstick) and line with parchment paper.

Work with one piece of dough at a time. For the bottom layer, either roll out the dough to size between two pieces of plastic wrap — it’s an easy enough dough to roll — and lay it in the pan, or put the dough in the pan and press it lightly and evenly across the bottom with your fingertips. Spread the cranberry filling over the dough.

Unwrap the second piece of dough, but leave it on the plastic. Press and/or roll it until it is just the diameter of the pan. Carefully lift the dough and invert it on the filling, lift off the plastic and use your fingers to even it as necessary so that it covers the filling. Brush the top of the cake very lightly with water and sprinkle with the remaining 2 teaspoons of sugar.

Bake for 35 to 40 minutes, or until the top of the cake is lightly golden and a thin knife inserted into the center comes out clean. Transfer the pan to a cooling rack and cool for about 20 minutes, then run a blunt knife around the cake, remove the sides of the pan and let cool to room temperature.

Source: Adapted from Dorie Greenspan

Posted in Biscuits/Cookies/Slices/Bars, Cakes, Desserts | 2 Comments

Italian White Bean & Tuna DipPrint Recipe

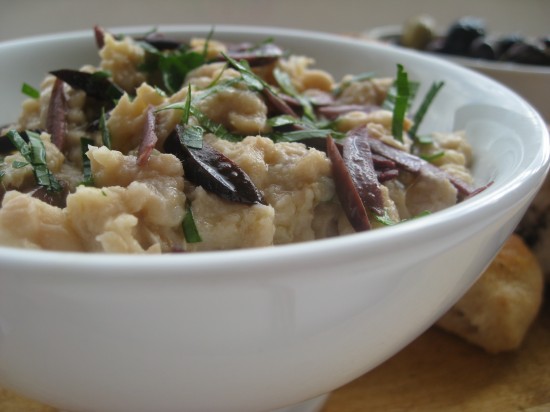
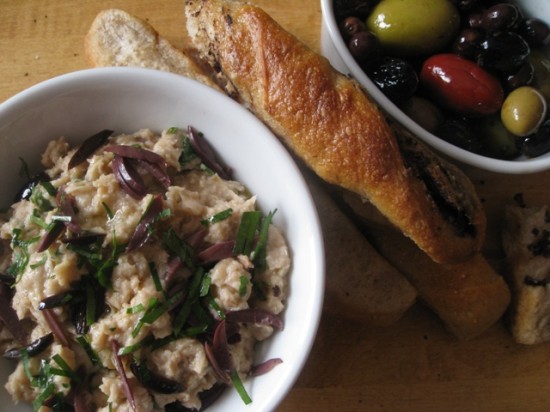
The holidays may almost be over but the socialising that comes with this time of year certainly isn’t. This is one of the dips I often whip up when we have impromtu guests, I always seem to have all the ingredients at hand and I love its mediterranean flavours. Aside from being tasty it is also relatively healthy – even healthier still if you serve it with crudites (celery comes to mind).

Just before I made this today I googled some similar recipes to see what ingredients they use – thinking I might make some adaptations to my standard white bean and tuna dip. One woman recommended the addition of liquid smoke! h’mmmm, I am not too sure about that one. Now speaking of smoke – I have been smelling it for the last couple of minutes. I just called our doorman and found out we have a fire in the building. Although I have been told to stay inside my apartment I simply cannot concentrate on dip anymore. Must go and pace the floor/ready ourselves for a quick exit. Back soon!

400 grams/14 ounces tin of cannellini (white) beans, drained and rinsed
3 tablespoons of extra virgin olive oil
1 tablespoon lemon juice
1/2 teaspoon grated lemon rind
95 grams/3.35 ounces tin of tuna in oil, drained
1 handful of flat leaf (Italian) parsley, chopped
1 teaspoon of garlic chives, finely chopped
8 kalamata olives, pitted and finely chopped
extra virgin olive oil for drizzling
To serve: pide/Turkish flatbread, toasted

Place the cannellini beans, oil, lemon juice and tuna in food processor and pulse several times so that beans are broken up but not mashed. Scoop into a bowl and fold through the garlic chives, parsley and olives. Drizzle with a little extra olive oil and serve with toasted pide or crudites.

Source: adapted from Michele Cranston

Posted in Nibbles & hors d'oeuvres, Picnic Food, Vegetarian | 1 Comment

Classic Basil PestoPrint Recipe

 
Christmas has passed, I am feeling well fed (positively tubby), my pantry is stocked with everything you can imagine and my fridge looks like a tornado went through it. This morning I began the cleaning and sorting process in attempt to get some order back into my kitchen. I hate waste and I was determined to use all the fresh produce before it spoilt – mainly herbs. Today my choice of herb was basil and I thought a jar of pesto might be in order.

Pesto originates from Genoa, it has a powerful flavour that is best suited to milder flavoured, starchy foods such as pasta or gnocchi. It also works well on grilled pide – topped with boccocini and tomato, on lamb, chicken and grilled vegetables such as eggplant and zucchini. As you can see its applications are endless and with a jar of this herby accompaniament at hand you will never be short of something to liven up your meal. I am going to pop some on a grilled baguette topped with goats cheese and continue my (post) Christmas eating. Delicious!

1 cup of well packed basil leaves
1/2 cup of extra virgin olive oil
3 tablespoons of pine nuts
2 cloves of garlic, crushed
a pinch of salt
60 grams/2.11 ounces of best quality freshly grated parmesan cheese

Blend basil, oil, pine nuts, garlic and salt until smooth. This can be done in a blender, food processor or with a large mortar and pestle. When evenly blended, scrape into a bowl and stir in the cheese. Store, covered in a thin layer of olive oil in a screw top jar.

Notes: Pesto kept in a screw to jar with a thin layer of olive oil should last for several months at least.

Source: Stephanie Alexander, The Cooks Companion

Posted in Pasta/Noodles, Sauces/Dressings/Condiments, Vegetarian | 1 Comment

Il Duomo (Zuccotto)Print Recipe


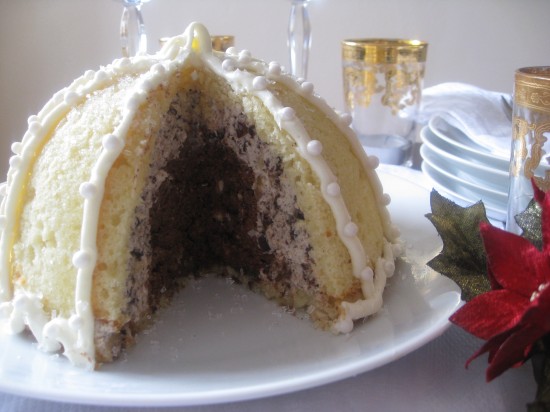
I think there is something very festive about a Zuccotto, I seem to make one whenever we are celebrating important occasions – this year it is Christmas. It is taking the place of our classic Christmas Pudding and Mr Man is so happy because it contains his beloved chocolate.

My good friend Mary Claire is an exceptional cook, her mother Gaye, is equally so and it was at her house (way back when) that I tried my first Zuccotto. She had made it for her husband’s birthday and it looked spectacular. When I tasted it I thought it was possibly the best thing I had ever eaten, I was actually going through a ‘chocolate is my world’ phase and I still remember thinking it was heaven – to this day I still do.

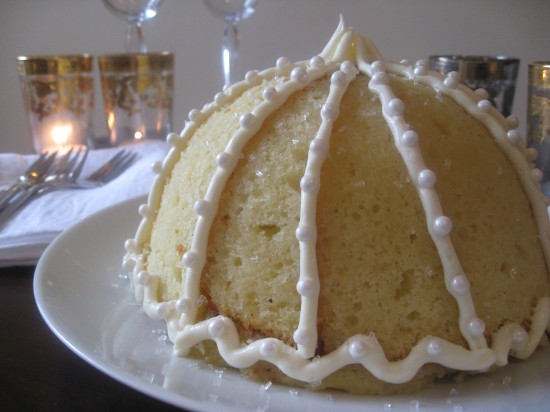
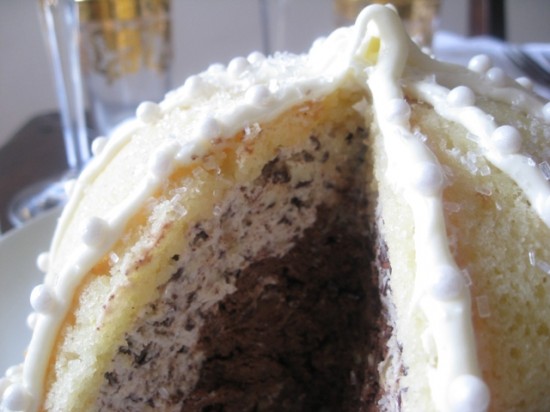
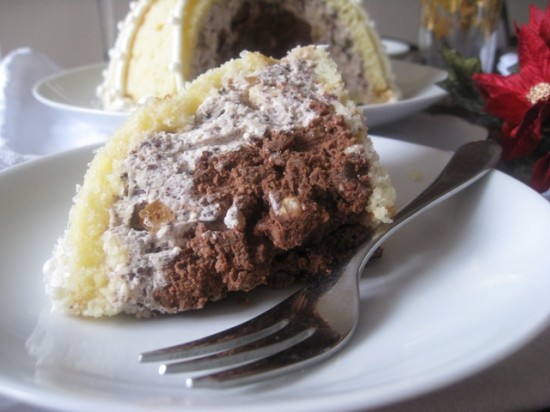
The Zuccotto is a Florentine speciality that was inspired by the dome of the city’s cathedral. It is formed by lining a large bowl with cake, the crusts of the cake represent the ribbing on the dome. It is filled with a blend of ricotta, marscapone, nuts, candied fruit and chocolate. I chose to decorate it with a little piping and a few edible pearls but you can do whatever you see fit.

and something I haven’t said yet – Merry Christmas, I hope you have all had a wonderful holiday and the year ahead is full of joy and happiness. xx

Cake

1 1/2 cups of plain (all purpose) flour
1 1/2 teaspoons baking powder
a pinch of salt
1 tablespoon of lemon juice
1/4 cup of milk
125 grams unsalted butter, softened
3/4 cup castor sugar
3 eggs

Lemon Syrup
1/4 cup water
3/4 cup sugar
1/4 cup lemon juice
1/4 cup orange juice
1/4 cup limoncello or grappa

Filling
200 grams bittersweet couverture chocolate
1 cup cream
125 grams icing sugar
1 cup marscapone
100 grams drained ricotta
100 grams of blanched almonds, roughly chopped
100 grams toasted hazelnuts, skins rubbed off and roughly chopped
100 grams candied citron, grapefruit or lemon peel, chopped

Preheat your oven to 160c. To make the cake, grease a 23cm x 13 cm x 8 cm loaf tin and line it with baking paper. Sift the flour, baking powder and salt together. Mix the lemon juice into the milk and set aside. Cream the butter and the sugar until thick and pale, then add the eggs, one at a time beating thoroughly after each. Lightly beat in 1/3 of the flour. Add the milk and lemon juice and the remaining flour and combine gently (this is really important – I didn’t do it so gently and as you can see in my pictures I have too many air bubbles in my cake). Spoon the mixture into the prepared tin and bake for 1 hour or until a skewer comes out clean. Turn the cake out onto a wire rack and allow to cool completely before cutting.

Meanwhile, put a mixing bowl into the refrigerator to chill it. To make the syrup gently beat the water and sugar in a saucepan, stirring until the sugar has dissolved. Add the lemon and orange juice. Remove the pan from the heat and stir in your chosen liqueur.

Cut the cake into 5mm slices, then cut each slice in half on the diagonal. Paint the cake slices lightly with the syrup, then line a 1.5 litre round bottom bowl with the cake. The point of each slice towards the bottom and a crust meeting a non crust edge will echo the lines of the famous dome (keep the ribs of the dome in mind as you do this and you can’t go wrong – when the dessert is inverted, the ‘ribs’ run down the cake). Ensure the surface of the bowl is completely covered. Patch any holes with more moistened cake. Set aside left over cake and syrup to make the lid later on.

To make the filling, chop or grate half the chocolate. Carefully melt the remaining chocolate in a bowl standing over a saucepan of simmering water. remove the pan from the heat and allow the chocolate to cool but not set.

Whip the cream and icing sugar in a chilled mixing bowl until very stiff. Whisk together the marscapone and ricotta. Fold this mixture with the whipped cream. Mix in the nuts, candied peel and chopped or grated chocolate. Put a third of the mixture in a bowl and add the cooled, melted chocolate and fold through thoroughly.

Spread the mixture without the melted chocolate over the moistened cake in the bowl, smoothing it evenly and leaving a hole in the centre. Fill the centre of the bowl with the chocolate mixture and level off the top. Cover the top with the reserved slices of moistened cake. cover the bowl with plastic film and refrigerate overnight or for 24 hours.

To unmould, carefully invert the zuccotto onto a plate and moisten the cake with the reserved syrup if it is looking dry. Cut into wedges and serve alone or with poached fruits.

Source: Tuscan Cookbook – Stephanie Alexander and Maggie Beer

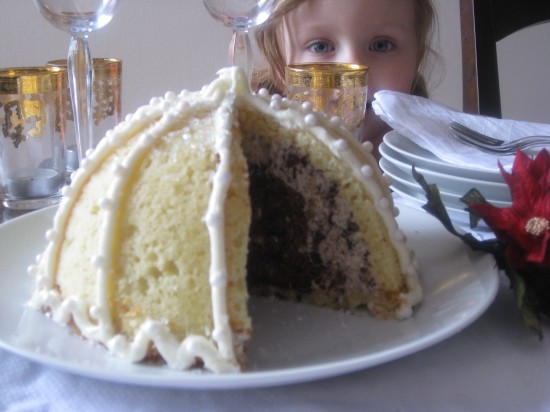
A picture of my little helper waiting patiently for her Zuccotto.

Posted in Cakes, Desserts | 2 Comments

Baked Spinach & Artichoke DipPrint Recipe

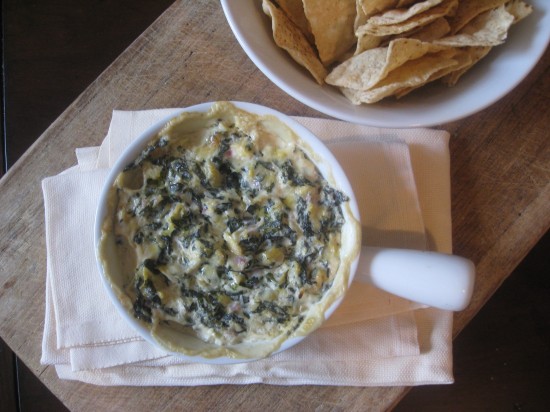
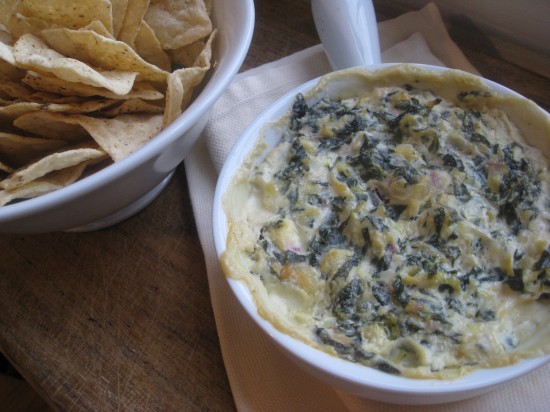
With all the Christmas socialising that is going on, I am often finding Mr Man staring into the refrigerator looking for a pick-me-up after his night out. Something that says comfort, something quite heavy and preferably something cheesy. This morning (after what can only be described as a bender), he found this dip, polished it off in next to no time and promptly went back to bed. He woke a couple of hours later feeling fantastic, declaring it a miracle and attributing his quick recovery to the melty, cheesy dip he had previously consumed. This is no lie.

I shouldn’t really be trying to sell this as a ‘morning after’ cure because it is great on any occasion. It is a sensational mix of spinach, artichoke, garlic and melted cheeses that will have you and your guests hanging around the dip bowl at whatever occasion you may serve it at. It is a dish we discovered when we first moved to the US a couple of years ago – it was love at first taste and after playing around with various recipes and ingredients we came up with our own style of making it.

Being baked, it is probably more suited to eating in the colder months but I wouldn’t let that stop you. It would be great at a barbeque washed down with a few beers, really good as part of a casual lunch and as I have already mentioned, a great comfort to any of you out there that might have been tripping the light fantastic, painting the town red or dancing till dawn.

113 grams/4 ounces cream cheese, softened
113 grams/4 ounces marscapone
1/3 cup sour cream
1/4 cup grated Parmesan cheese
1/4 cup grated Romano cheese
1/4 cup shredded mozzarella cheese
2 cloves garlic, peeled and minced
salt and pepper to taste
1 (14 ounce) can artichoke hearts, drained and chopped
1 cup cooked & chopped spinach (1 cup after it has been cooked) or 10 oz. frozen chopped spinach, thawed and drained
1/4 cup spanish onion, finely chopped

Preheat oven to 350f/175c. Lightly grease a small baking dish.

In a medium bowl, mix together cream cheese, sour cream, Marscapone, Parmesan cheese, Romano cheese, garlic, salt and pepper, and mozzarella cheese. Gently stir in artichoke hearts, onion and spinach.

Transfer the mixture to the prepared baking dish. Bake in the preheated oven 25 minutes, until bubbly and lightly browned.

Notes: Great with breads and pita chips. Really, really good with corn chips.

Posted in Nibbles & hors d'oeuvres, Vegetables, Vegetarian | Leave a comment