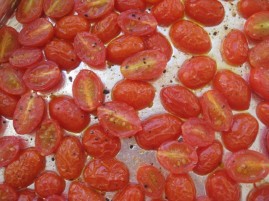
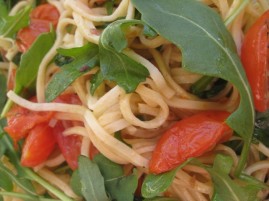
Coq Au VinPrint Recipe


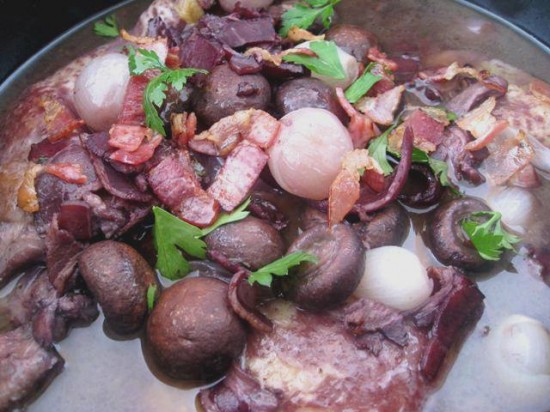
Coq Au Vin is a classic French dish which is exactly as the name describes – chicken cooked in wine. Actually that’s not quite true, ‘coq’ is rooster in French and apparently cooking a tough old bird in this manner tenderizes it and its for this purpose that the dish originated – a very long time ago I should add.

Today we have the luxury of fresh juicy birds to choose from so most recipes call for chicken. Together with wine, herbs, bacon, mushrooms and pearl onions this dish is magic. It is so incredibly aromatic, flavoursome and tender that you might be momentarily transported to a little French Village in the cool of Winter. There might be an open fire, a gathering of people around an old wooden table and a big pot of this delicious dish to saveur.

And then back to reality – two small children under my feet in the kitchen, eagerly awaiting their dinner. I think the most surprising thing about this braised chicken dish was that my daughters loved it – wine, herbs and all, they couldn’t get enough. It will certainly become a regular.
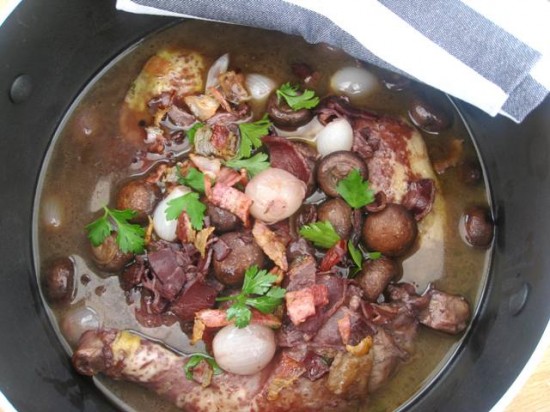
 

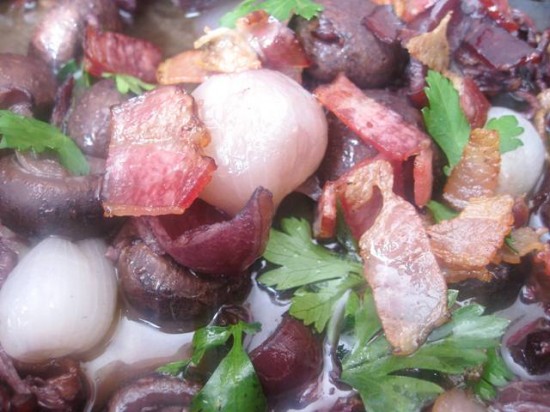
I didn’t make many changes to the original Julia Child recipe but I thought I might garnish the dish with some crisp bacon to add depth of colour. This also provided a nice crunchy addition to compliment the chicken and various other bits and pieces stewed in wine and juices. 

Time to bring a little bit of France into your kitchen, don’t you think?
 

226 grams/8 ounces of bacon slices
20 pearl onions, peeled, or 1 large yellow onion, sliced
1.4 kilos/ 3 pounds chicken thighs and legs, excess fat trimmed, skin ON
6 garlic cloves, peeled
Salt and pepper to taste
2 cups chicken stock
2 cups red wine (pinot noir, burgundy, or zinfandel)
2 bay leaves
Several fresh thyme sprigs
Several fresh parsley sprigs
226 grams/8 ounces button mushrooms, trimmed and roughly chopped
2 tablespoons butter
Chopped fresh parsley for garnish

Blanch the bacon to remove some of its saltiness. Drop the bacon into a saucepan of cold water, covered by a couple of inches. Bring to a boil, simmer for a minute and drain. Rinse in cold water, pat dry with paper towels. Cut the bacon into 1 inch by 1/4 inch pieces.

Brown bacon on medium high heat in a dutch oven big enough to hold the chicken, about 10 minutes. Remove the cooked bacon, set aside. Keep the bacon fat in the pan. Working in batches if necessary, add onions and chicken, skin side down. Brown the chicken well, on all sides, about 10 minutes. Halfway through the browning, add the garlic and sprinkle the chicken with salt and pepper. (Note: it is best to add salt while cooking, not just at the very end. It brings out the flavor of the chicken.)

Spoon off any excess fat. Add the chicken stock, wine, and herbs. Add back the 2/3’s of the bacon. Lower heat to a simmer. Cover and cook for 20 minutes, or until chicken is tender and cooked through. Remove chicken and onions to a separate platter. Remove the bay leaves, herb sprigs, garlic, and discard.

Add mushrooms to the remaining liquid and turn the heat to high. Boil quickly and reduce the liquid by ¾’s until it becomes thick and saucy. Lower the heat, stir in the butter. Return the chicken and onions to the pan to reheat and coat with sauce. Adjust seasoning. Garnish with the remaining bacon and parsley.

Notes: Whilst most recipes I have read suggest you serve this with egg noodles I actually prefer it with a fresh salad and a crusty baguette to mop up all those delicious juices.

Source: Adapted from a Julia Child recipe

Posted in Mains, Poultry | 2 Comments

PavlovaPrint Recipe

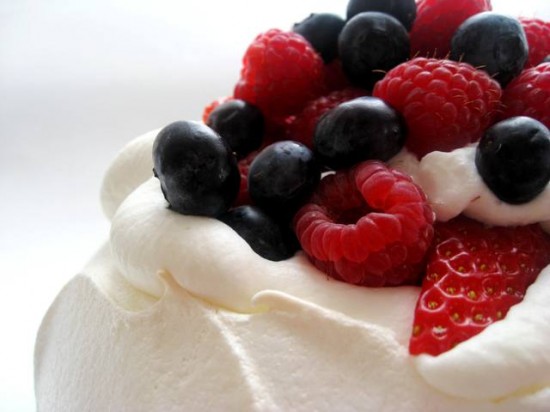
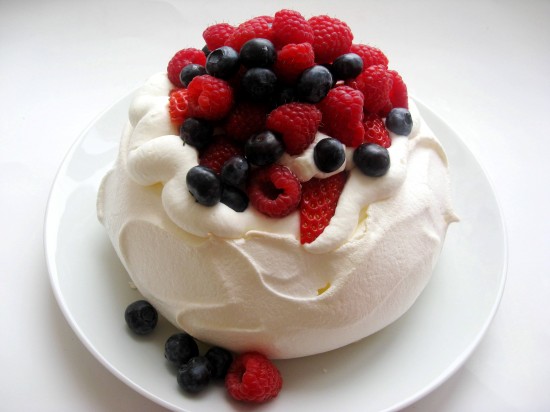
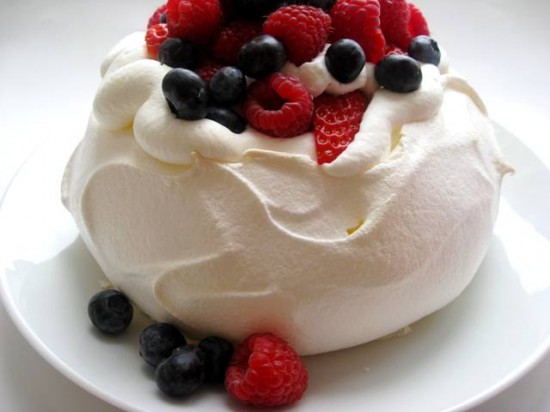
It’s Australia Day and I had to make something iconic to celebrate – a pavlova came to mind. This quintessential dessert is meringue based with a crisp shell and a light & fluffy centre. It is topped with whipped cream and fruit – my favourite combination being strawberry’s with passionfruit pulp.

The pavlova is named in honour of Anna Pavlova, a Russian ballet dancer who travelled to Australia and New Zealand in the 1920’s, there is some dispute as to whether it was created in New Zealand as opposed to Australia but at the end of day its origin is inconsiquential, it is a celebrated national cuisine in both countries. I have my own little story of the lovely ‘pav’ and it couldn’t be further removed from the graceful undertones set by its namesake because it’s about two girls having an eating competition.

In my final years at school I had cravings for pavlova and challenged my good friend Nicki to a pavlova eating competition as an excuse to eat alot of this fine concoction. I turned up to school laden with an enormous pavlova covered in whipped cream and berries ready for some serious meringue action. In the first round I was so in awe of Nicki’s pavlova eating prowess that all I could eat were two mouthfuls while I watched her quickly devour three pieces. By the second round (a week later with an improved technique), I still only managed one piece because I was laughing so hard while Nicki quickly (and very seriously) polished off four. To this day I still cannot fathom how this whippet thin friend of mine could eat so much, so quickly and so neatly.

Nicki and I haven’t eaten pavlova together since but we remain dear friends. It has crossed my mind to suggest a third challenge but I might leave till we are old and rickety with more time on our hands. It might also give me a chance to get in some practice too – which I shall enjoy because it still is one of my most favourite desserts. Happy Australia Day folks!

Pavlova Shell
4 egg whites or 150 mls of egg white
1 cup caster (superfine) sugar
3 teaspoons cornflour (cornstarch), sifted
1 teaspoon white vinegar
1 teaspoon vanilla extract

Topping
1 cup single (pouring) cream
½ cup passionfruit pulp (approximately 4 passionfruit)
1 1/2 cups of strawberries, hulled and halved

Preheat oven to 150c/300f. Place the eggwhite in the bowl of an electric mixer and whisk until stiff peaks form. Gradually add the sugar, whisking well, until the mixture is stiff and glossy (the mixture should have tripled in volume and stand up when the beaters are lifted).

Add the cornflour, vanilla and vinegar and whisk until just combined. Shape the mixture into an 7″ round on a baking tray lined with non-stick baking paper. Reduce oven to 120c/250f and bake for 1 hour and 15 minutes. Turn the oven off and allow the pavlova to cool completely in the oven. Whisk the cream until soft peaks form. Spread over the pavlova, top with passionfruit and strawberries and serve immediately.

Notes: As you can see I couldn’t get my hands on passionfruit pulp so I used a mixture of berries instead which were nice but I recommend the passionfruit if you can find it – the slightly tart taste really works well with the sweet meringue. Also, you can store your pavlova, undressed, in an airtight container at room temperature for up to 5 days.

Source: Adapted from recipes by Donna Hay and Stephanie Alexander

Posted in Desserts | 3 Comments

Brown Butter & Walnut BrowniesPrint Recipe

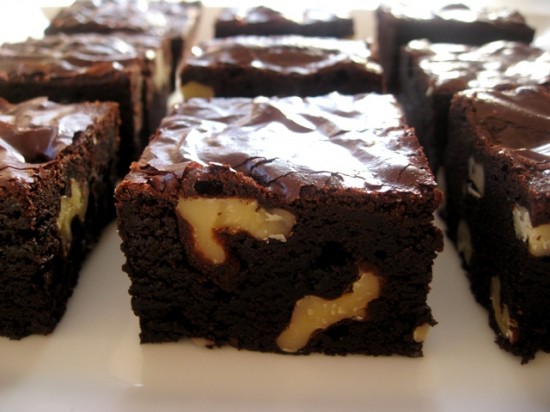
I swore when I started my blog it wouldn’t be all about brownies, cookies scattered with m&m’s and similar baked treats. Well, I am going to have to eat my words because here we have another brownie recipe and later this week I am making something with m&m’s (with my daughters) but please stay tuned because I do promise more adventurous things too.

What attracted me to this recipe in the first place was one of its ingredients being brown butter, this being my most recently learnt and favourite ingredient/technique. The Brown Butter Hazelnut Cake I made a couple of weeks ago would easily fall into my top 5 best cakes ever and I attribute it’s heavenly tasting, melt-in-your-mouth characteristics to the brown butter it contains. So it didn’t take much to convince me that this special ingredient might also be wonderful in a brownie too.
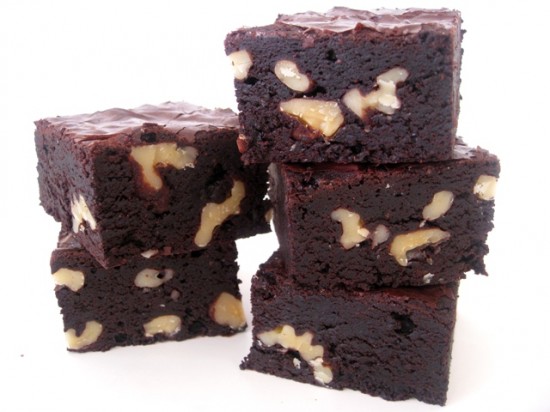
I was not wrong. Once again this simple ingredient performs some sort of culinary miracle on your humble brownie. Now I love a good dense & fudgy brownie but these are dense & chewy but somehow quite light, yet rich. Alot of this can be attributed to the fact that you use cocoa instead of chocolate but the brown butter really does add a decadent and nutty flavour that takes the brownie into the taste sensation category.

Consider this another version of your standard brownie – the dinner party version, certainly a must-try for all you chocoholics out there.

Nonstick vegetable oil spray
10 tablespoons (1 1/4 sticks) unsalted butter, cut into 1-inch pieces
1 1/4 cups sugar
3/4 cup natural unsweetened cocoa powder (spooned into cup to measure, then leveled)
1 teaspoon vanilla extract
2 large eggs, chilled
1/3 cup plus 1 tablespoon unbleached all purpose flour
1 cup walnut pieces

Position rack in bottom third of oven; preheat to 325°F. Line 8x8x2-inch metal baking pan with foil, pressing foil firmly against pan sides and leaving 2-inch overhang. Coat foil with nonstick spray.

Melt butter in medium saucepan over medium heat. Continue cooking until butter stops foaming and browned bits form at bottom of pan, stirring often, about 5 minutes. Remove from heat; immediately add sugar, cocoa, 2 teaspoons water, vanilla, and 1/4 teaspoon (generous) salt. Stir to blend. Let cool 5 minutes (mixture will still be hot). Add eggs to hot mixture 1 at a time, beating vigorously to blend after each addition. When mixture looks thick and shiny, add flour and stir until blended. Beat vigorously 60 strokes. Stir in nuts. Transfer batter to prepared pan.

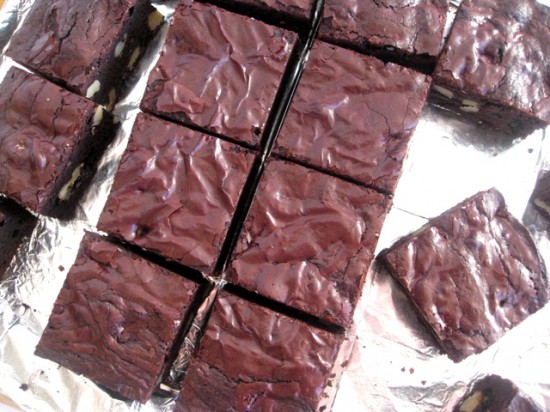
Bake brownies until toothpick inserted into center comes out almost clean (with a few moist crumbs attached), about 25 minutes. Cool in pan on rack. Using foil overhang, lift brownies from pan. Cut into 4 strips. Cut each strip crosswise into 4 brownies.

Notes: My brownies took a little longer than 25 minutes – around 35 in fact. I am stilll working on my oven nuaunces – I think it may be slow but don’t be alarmed if at 25 minutes you still have an uncooked middle and need to bake it a little longer.

Source: Alice Medrich for Bon Appetit

Posted in Biscuits/Cookies/Slices/Bars, Chocolate, Desserts, Morning Teas/High Teas | Leave a comment

Zucchini, asparagus, peas and ricotta salata saladPrint Recipe
 

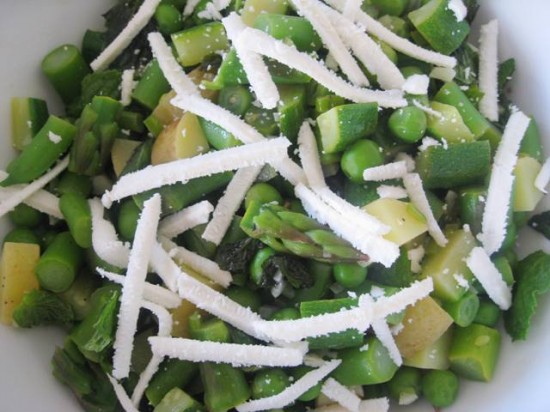
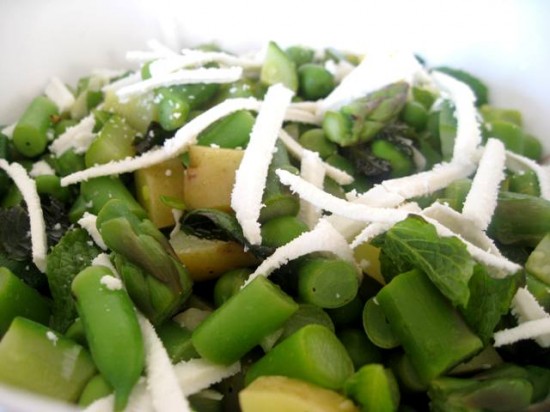
This salad has Spring written all over it. Now, I am well aware that we are still 6 weeks away from the warmer weather but I just had to get an early start. It looked so healthy and refreshing and quite unremarkably, it is. In fact this is one of those amazingly flavoursome vegetable dishes that will have even the most stringent veggie avoider going back for more.

Consider a mix of zucchini, asparagus, beans and peas, peppered with fresh mint, dressed with a buttery, lemony, garlicy sauce and topped off with a grating of ricotta salata. The ricotta has a mild nutty taste that perfectly compliments and contrasts the flavours of the other ingredients.

Spring has not yet sprung, but when it does arrive there will be many Spring dinners – roast lamb and the like. This salad will certainly be on the menu, not only for it’s flavours but also for it pretty shades of green – a glimpse of the Summer to come.

1  kipfler/fingerling potato, scrubbed and cut into 1cm dice
75 grams/2.6 ounces (about 12) baby green beans, trimmed and cut into 1cm lengths
6 spears of asparagus, trimmed and cut into 1cm lengths
1 small zucchini, cut into 1cm dice
75 grams/2.6 ounces (about 225 grams/7.9 ounces unpodded) podded peas
1 tablespoon extra-virgin olive oil
20 grams/.7 ounces butter
1 golden shallot (scallion), thinly sliced
2 cloves of garlic, finely chopped
¼ cup (loosely packed) mint leaves
1 tablespoon lemon juice, or to taste
50 grams/1.7 ounces ricotta salata, coarsely grated (see notes)

Bring a saucepan of salted water to the boil, cook potato for 2 minutes, then add beans, asparagus, zucchini and peas and continue cooking for another 3 minutes or until vegetables are tender. Using a slotted spoon, transfer to a bowl of iced water to refresh, then drain and place in a bowl. Reserve 1 tablespoon blanching liquid.

Heat olive oil and butter in a frying pan over medium heat, add shallot and garlic and sauté for 3 minutes or until softened, add vegetables and cook for another 2 minutes or until heated through, season to taste with sea salt and freshly ground black pepper, add reserved blanching liquid and stir to combine. Add mint and lemon juice and stir to combine. Spoon into a bowl, scatter with ricotta salata and serve.

Notes: Ricotta Salata is a variation of Ricotta. This pure white, firm, rindless cheese originated in the hot, dry island climate of Sicily. It is made from lightly salted sheep’s milk curd that is pressed and dried, then aged for a minimum of three months. Ricotta Salata is mild in taste. It’s not at all salty, but has rather a nutty, milky flavour. It can be used in salads and pasta dishes and is ideal for grating.

Source: Robert Marchetti, North Bondi Italian Food

Posted in Salads, Sides, Vegetables, Vegetarian | 4 Comments

Sformato-di-cavolfiorePrint Recipe
 

I love it when I stumble across recipes that are completely new to me and this is one of those. I was browsing through an old La Cucina Italiana magazine when I spotted this most delightful looking thing that looked like it could almost be the Italian version of a souffle crossed with a cauliflower cheese. I had never made one before (or dare I say – heard of one) and it looked like it might work well with the roast beef I was going to pop in the oven for dinner.

After doing a little research I discovered that a Sformata is a molded dish that is typically made with a vegetable (in this case cauliflower) and a bechamel parmesan sauce. It can be served with an accompanying sauce – I think anything would work beautifully but a basic tomato passata immediately springs to mind. I would describe it as a heavier and heartier version of a souffle with a sinfully good crust that is created by coating the mold in butter and breadcrumbs.

In the end I did serve it with my dinner (roasted scotch fillet with root vegetables and a salsa verde) and it was exceptional – so good that I didn’t want to eat anything else. I wanted to shout ‘Sformata – where have you been all my life’ but I was taught not to speak when my mouth is full.

Béchamel
1 1/2 cups whole milk
3 tablespoons unsalted butter
2 tablespoons plus 3⁄4 teaspoon unbleached all-purpose flour
Fine sea salt
Freshly ground black pepper
Pinch freshly grated nutmeg

Cauliflower
1 medium head cauliflower (about 1.1 kilos/2 1/2 pounds)
2 large eggs
1 cup freshly grated Parmigiano-Reggiano cheese
1/2 teaspoon fine sea salt
1/4 teaspoon freshly ground black pepper
2 tablespoons unsalted butter, at room temperature
1/4 cup fine bread crumbs

Bechamel
Combine milk, butter and flour in a heavy medium saucepan; bring to a boil, then reduce to a simmer and cook, stirring constantly, first with a whisk, then with a wooden spoon, until sauce is very thick, about 20 minutes. Season to taste with salt, pepper and nutmeg. Remove béchamel from heat, strain through a fine-mesh sieve into a small bowl, and cover surface with plastic wrap to keep skin from forming.

Cauliflower
Remove any leaves from cauliflower, leaving core intact. Cut cauliflower into quarters and put in a large pot. Add water to come up 1 inch. Cook, covered, over high heat until cauliflower is tender, about 20 minutes; then drain.

Trim tough stems from cauliflower, then, working with 1 quarter at a time, wrap cauliflower in a large, clean dishtowel (do not use a new, unwashed, colored dishtowel) and, over sink, twist dishtowel until all excess liquid is removed from cauliflower. Pulse cauliflower in a food processor until finely chopped.

Heat oven to 325c/160f. Beat eggs in a large bowl; add béchamel and whisk to combine. Add cauliflower, cheese, salt and pepper; stir to combine.

Butter a 1 1 ⁄2- to 2-quart baking dish (or a similar size ring mold – I used a cake tin with a pattern in it) with 2 tablespoons butter (it is important to use all of the butter) and coat with bread crumbs. Add cauliflower mixture. Bake until sformato sets and lightly browns, about 40 minutes. Remove the sformato from oven; let rest for 15 to 20 minutes, then unmold (optional). Serve warm or at room temperature.

Notes: I actually steamed the cauliflower which saved me from having to wring it out in a teatowel to remove any excess liquid – this method worked very well. I also turned up the heat to 400c/200f in the last 5 minutes of cooking – just to get a nice golden brown colour.

Source: Marco Canora for La Cucina Italiana

Posted in Sides, Vegetables, Vegetarian | Leave a comment

KourabiedesPrint Recipe
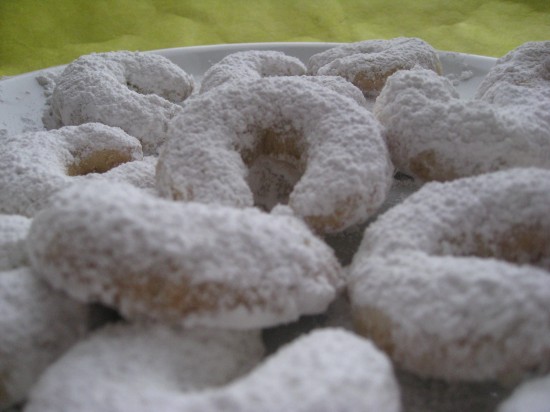
It is probably a little odd that I attempt to immortalise my grandmother on my blog when I am writing about Kourabiedes. She was not Greek, in fact she hailed from Eastern Europe. Nonetheless, making these has compelled me to write a little about her.

My grandmother was an exceptional cook and alot of what she baked was either written down on loose sheets of paper in foreign tongue or kept in her head. She often threw ingredients together completely unmeasured, yet with consistency and the outcome was always sensational. One of my favourite things to do when we visited her (aside from eating the biscuits and tortes she made for our arrival) was to pop myself up on the kitchen bench and watch her cooking. In the old days (when I was really little) she didn’t even have a mix master – she did everything with a hand beater and I would marvel at her strength.

One of the biscuits she would make for our visits were very similar to Kourabiedes – hence my little trip down memory lane. I have made these a couple of times and often wondered how such an iconic Greek shortbread would be similar to a biscuit from Eastern Europe, but in my cooking adventures I have discovered that many European countries have some sort of shortbread treat made with almonds, walnuts – or if you head over to the Middle East it’s Pistachios. So really it’s not that strange at all.

Kourabiedes are usually made with almonds, although doing my research I also found a several recipes that used walnuts instead. Other common ingredients (aside from the obvious flour & butter etc) include brandy and sometimes rosewater. They are found all over Greece and are always present at important occasions, namely Christmas and baptisims – a true celebration biscuit. I have meddled a little with the recipe – hopefully not enough to cause a Greek mumma to throw her hands up in despair and cry ‘for the love of god!’. No, I have tried hard to keep it authentic – just added a little more almond meal than usual.
My beloved grandmother isn’t here any more but she is around in funny ways – the odd (and very old) cooking utensil I still use, the occasional song from the Sound of Music that I break into and in my love for cooking (amongst many other things). Little things that carry on the memories of her, like these biscuits – even though they are Greek.

1 1/3 cups sifted plain/all-purpose flour
2/3 cup of almond flour/almond meal
1/2 teaspoon baking powder
1 cup butter
1/3 cup icing confectioners’ sugar
1 egg yolk
2 tablespoons brandy
1 tablespoon vanilla extract
1/2 cup finely chopped blanched almonds
1/2 cup icing/confectioners’ sugar for decoration

Sift flour and almond meal with baking powder and set aside.

Cream butter and gradually add sugar and beat until fluffy. Add egg yolk, brandy and vanilla. Beat again until very light and stir in finely chopped almonds.

Blend in flour mixture, mix to form a soft, smooth dough. Chill 60 minutes or until it can be handled easily.

Preheat oven to 325f/170c.

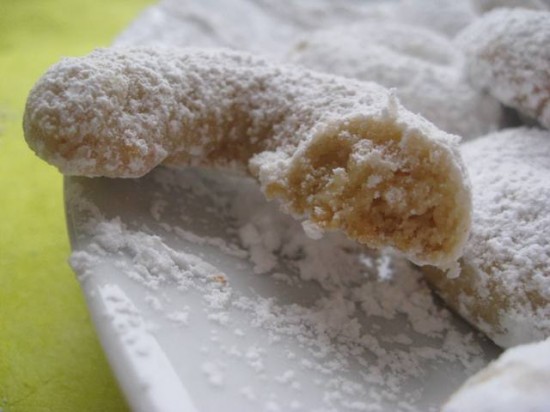
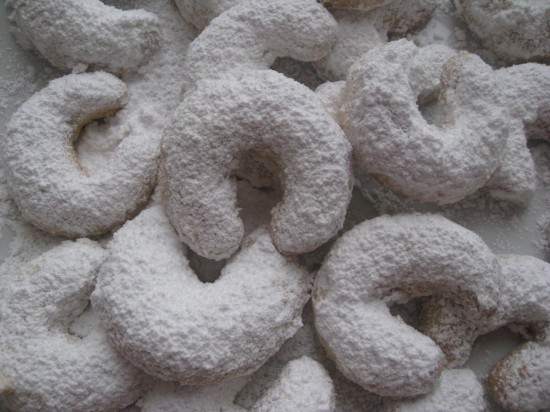
Shape level tablespoonfuls of dough into crescent-shapes. Place 1 inch apart on ungreased cookie sheet. Bake for 20 – 25 minutes or until light…do not brown. Cool on rack and dust very generously with confectioners’ sugar. Ensure you dust the whole cookie not just the top.

Notes: Don’t skimp on the icing sugar that you dust these little beauties with – the final dusting is equally as important an ingredient as any.

Posted in Biscuits/Cookies/Slices/Bars | 4 Comments

LamingtonsPrint Recipe

Back in Australia, in the very early 1900’s, when Lady Lamington presented her husband with these newly created cakes, you think his response might have been ‘ how lovely my dear’ instead he referred to them as “those bloody poofy woolly biscuits“. I don’t think he was a fan.

Thankfully their guests thought quite the opposite and Lord Lamington’s namesake cake became legendary. Generations later, they are still being consumed in every part of Australia and are an iconic Australian treat. You will find them anywhere from bake sales to the general store, even sitting on top of well worn bars in the outback – just in case any of the beer drinking locals feels like a small cake to nibble on with their VB or Fosters.

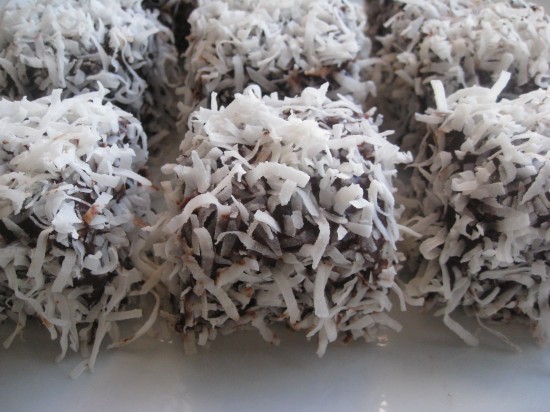
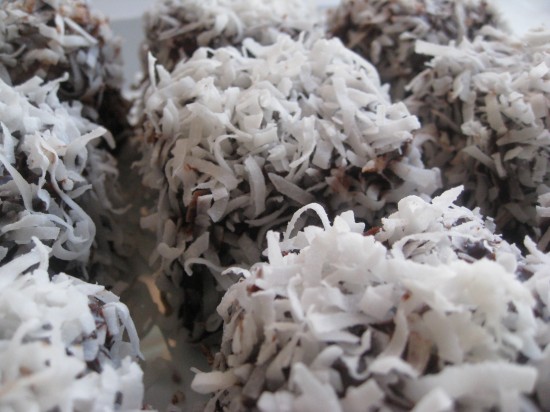
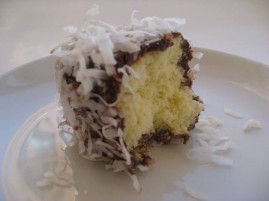
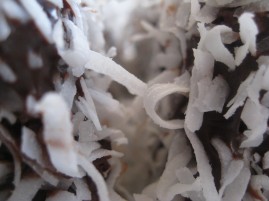
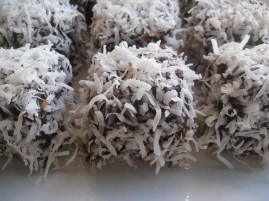
For those of you who are new to the Lamington, they are a piece of sponge that has been dipped in chocolate and then tossed through some coconut. The coconut I have used here is flaked, most people tend to use desicated coconut which is alot finer in texture.

If you’re stuck for something to cook at the next bake sale you might want to try these out. They may have been labelled poofy woolly biscuits by one man but I assure you, they are not.

8  eggs
250 grams/8.8 ounces caster sugar
250 grams/8.8 ounces plain flour
30 grams/1 ounce unsalted butter, melted
400 grams/14 ounces shredded or desicated coconut

Chocolate ganache coating
356 grams/12 ounces dark chocolate (65% cocoa solids), coarsely chopped
450 ml pouring cream

Preheat oven to 190c/375f. Whisk eggs and sugar in a heatproof bowl over a saucepan of gently simmering water for 5-10 minutes or until warm (about 40C), pale and frothy. Transfer to an electric mixer and whisk on high speed for 10 minutes or until mixture has tripled in volume. Sift over plain flour in batches and, using a metal spoon, fold gently to combine between additions. Just before adding the last of the flour, fold through melted butter. Divide batter between 2 lightly greased and base-lined 20cm square cake pans. Bake in centre of oven for 20 minutes or until a skewer withdraws clean. Stand in pans on wire racks for 10 minutes, then turn out onto racks and cool completely.

For chocolate ganache coating, combine chocolate and cream in a heatproof bowl over a saucepan of gently simmering water. When chocolate begins to melt, stir gently until combined and smooth and set aside in a warm place.

Scatter shredded coconut over a tray. Cut each sponge into sixteen 3 – 4cm (around 1 1/2 inches) squares. Using 2 forks, dip each square into the chocolate and shake to remove excess. (If chocolate starts to thicken, place bowl over gently simmering water to thin.) Roll each square in coconut, shake off excess and place on a wire rack (sitting over a tray). Stand for at least 1 hour or until chocolate sets. Store in an airtight container in a cool dry place for up to 3 days.

Notes: Some people prefer to use a mixture made from cocoa, water and sugar instead of the chocolate ganache – it’s slightly easier to work with and still very good.

Source: adapted from Australian Gourmet Traveller

Posted in Cakes, Childrens Parties, Chocolate, Morning Teas/High Teas | 6 Comments

Angelhair Pasta with Melted Anchovies, Arugula & Roast TomatoesPrint Recipe


This is a pasta I put together many years ago. It’s very simple and the flavour combinations are quite obvious so it’s by no means revolutionary. I would call it delicious though, because it includes one of my most favourite combinations – garlic and anchovies.

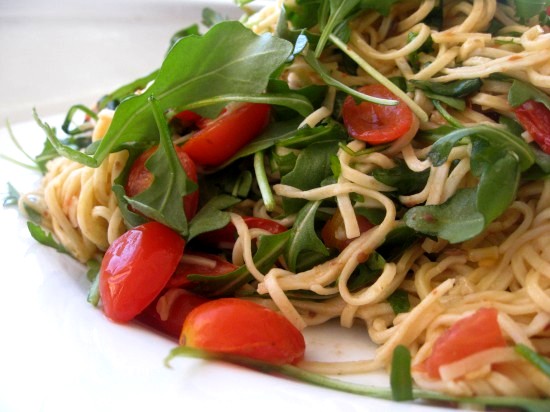
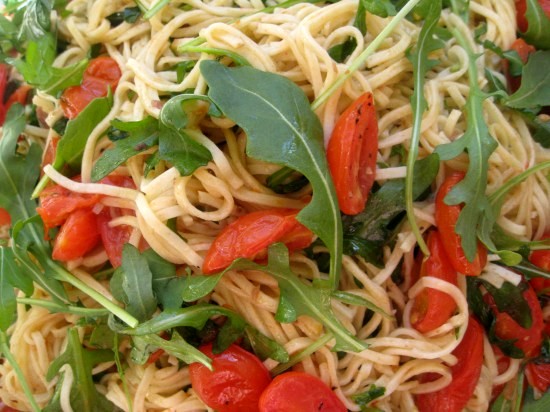
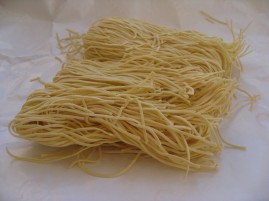
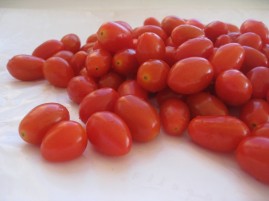
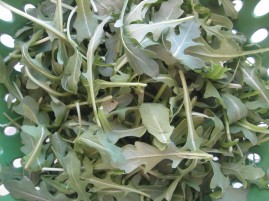
It’s a glorious tangle of fine pasta, oven roasted tomatoes and wilted arugula all coated in an oil of melted anchovies and flecks of garlic. Oh, and it does has a hint of chili as well – certainly optional but the little extra kick is really, really good.

Perfect for a quick Friday night dinner after a long week at work – or for that Saturday lunch when you feel like something a little more nourishing than a sandwich.

as you can see I got a little snap happy…

454 grams/1 pound angelhair pasta (fresh is great if you have it at hand)
350 grams/12 ounces grape tomatoes
80 grams/2.8 ounces arugula (rocket)
1 tin anchovies
3 large garlic cloves, finely chopped
4 tablespoons olive oil
1/2 teaspoon salt
freshly ground pepper

Preheat your oven to 375f/190c. Slice the grape tomatoes in 1/2 and place them in a bowl with two tablespoons of the olive oil, the salt and a couple of grinds of the black pepper. Gently stir to ensure the tomatoes are coated with the oil and seasoning – lay out on a large baking dish. Place in the oven and roast for 10 – 15 minutes or until tomatoes are soft. Set aside.

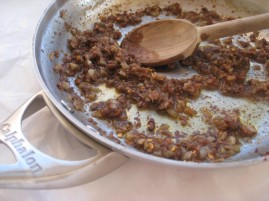
Meanwhile chop anchovies until they almost form a paste (I usually use a cleaver and chop and re-chop). Heat the remaining two tablespoons of oil in a frypan and over a medium to low heat, gently cook the anchovies and the garlic together for around 2 – 3 minutes. The anchovies will almost melt into the oil and and form a thick and fragrant paste. Remove from heat, mix through the chilis and set aside.

Cook pasta as per packet directions. Drain and place in a big bowl. Mix through the anchovy, garlic and chili mixture and ensure all the pasta is coated. Gently mix through the roast tomatoes and the rocket. Serve on a large platter.

Notes: Using fresh chili is my preference but I couldn’t find any today. If you do decide to go with fresh ensure you remove the seeds and use it to taste – a little at a time so you don’t get one hell of a shock.

Posted in Mains, Pasta/Noodles, Vegetables, Vegetarian | Leave a comment

Sweet Corn FrittersPrint Recipe


 I did not intend to make these today but I realised this morning that I had a fridge full of corn and needed to offload a couple of ears at least. I also had a play date planned for my daughters that involved two little boys with enormous appetites. So clearly it was meant to be.

Making them reminded me of one of my favourite breakfast haunts in Sydney, Australia. The place was called Bills and Bill (Granger) served his corn fritters with bacon and a salsa of finely chopped tomato and avocado. It was always a toss up between that and his ricotta pancakes with honeycomb butter- he is famous for both and both are amazing.

Whilst the corn is obviously the staple ingredient in these little fried numbers, the addition of coriander (cilantro) and capsicum (red pepper) really bring the corn to life. Aside from playdates, these are sensational at breakfast with a side of bacon or roasted tomatoes and I have also served them as a mid afternoon, footy watching snack with my roast tomato sauce. An oldy but a goody!

1 cup plain (all purpose) flour
1 teaspoon baking powder
1 teaspoon paprika
1 tablespoon sugar
1 teaspoon sea salt
2 eggs
1/2 cup milk
4 corn cobs
1/2 red capsicum (pepper), diced
4 spring onions (scallions), finely sliced
90 grams coriander (cilantro), chopped
4 tablespoons vegetable oil

Sift the flour, baking powder and paprika into a large bowl, stir in the sugar and salt and make a well in the centre. In a seperate bowl whisk together the eggs and milk. Gradually add the liquid ingredients to the dry, stirring to ensure you have a stiff, lump free batter. Cover and refrigerate until ready to use.

With a sharp knife, cut the corn kernals away from the cobs and put the kernels in a large bowl. Add the capsicum, spring onion and coriander. Toss to combine.

Just before serving, slowly work the batter into the fresh ingredients. Heat 2 tablespoons of the oil in a large non stick frypan over a medium heat. Using 1 tablespoon at a time, drop spoonfulls of batter onto the hot surface. cook for a few minutes or until the underside is golden, then flip and cook for further two minutes until quite crisp. Remove from the pan and keep warm while you make the remainder of the fritters, adding more oil when necessary. You should make around 30.

Notes: Don’t be tempted to use canned corn – they will not be half as good.

Source: Michele Cranston

Posted in Breakfast, Nibbles & hors d'oeuvres, Vegetables, Vegetarian | Leave a comment

Momofuku Chocolate Malt CakePrint Recipe


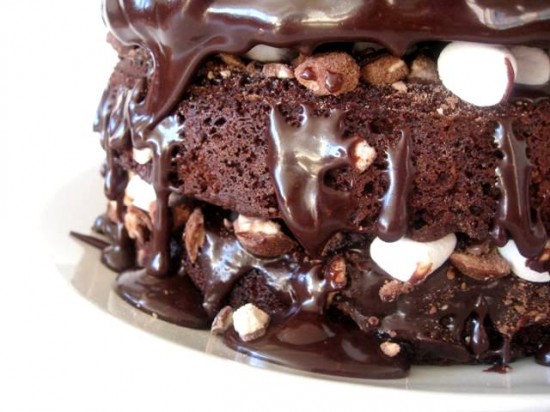
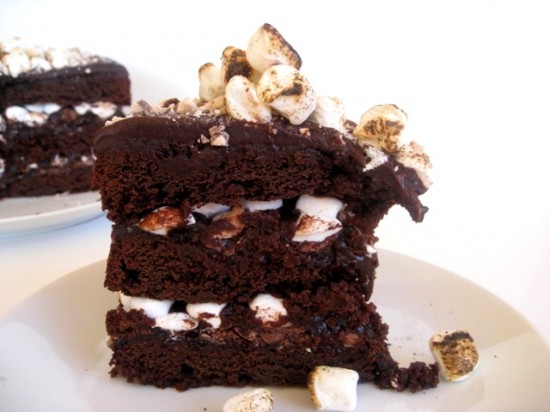
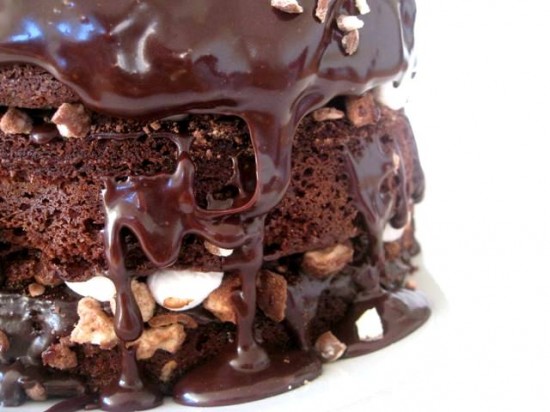
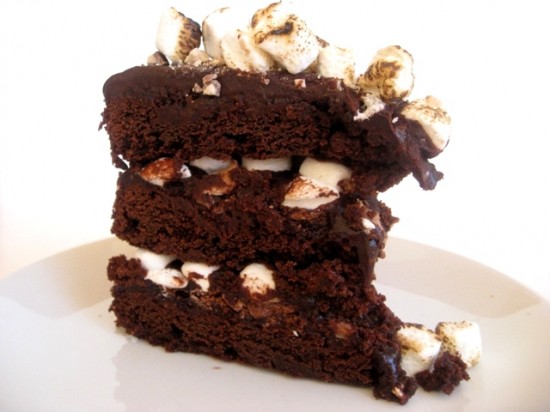
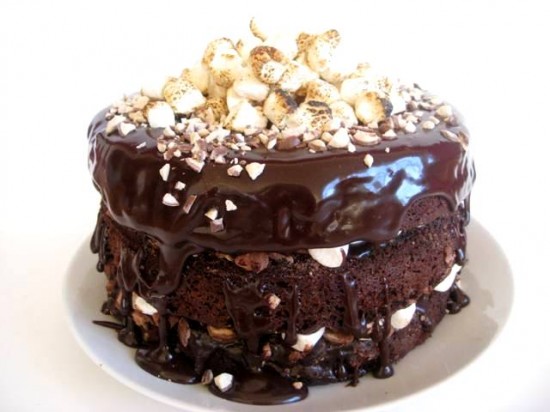
I have one word for this cake and it’s ‘insane’ – on so many levels, to look at, to taste and to bake. It is all worth it though because once you get a mouthful of this magnificent gooey, chocolatey, malty, toasted marshmallowy conglomeration, you will know that all your efforts have been worth it. Imagine three layers of a dense brownie type cake, smothered in a chocolate malt fudge sauce, sprinkled with chocolate malt crumbs (think Whoppers or Maltesers) and charred marshmallows and then even more chocolate malt fudge sauce.

When I first read this recipe all I could think of was who, how and why. But then I remembered a phase in my life when I made alot of birthday cakes for friends with a filling that I put together using a combination of melted white chocolate, marshmallows, chocolate truffles and cream. So really this is not so different – only better. So much better and certainly more sophisticated.

Its creator is Christina Tosi who bakes for the Momofuku Milk Bar in New York. Apparently she has many other spectacular treats – something I will have to investigate further.

A little advice before I hand over this quite amazing recipe – choose your audience. I would serve this to friends who will eat it with gusto – Nigella-like. You really want to see people enjoy it, people who don’t mind a little smear of chocolate malt fudge sauce on their chin or sticky marshmallow on their fingertips. Enjoy!

*It is necessary to start this recipe the day before you wish to serve it but to make things easy you can make the malt crumbs and the fudge sauce well in advance. You will also need a blow torch to toast the marshmallows.*

Chocolate-Malt Crumbs
2/3 cup Milk Crumbs (see recipe below)
6 tablespoons Ovaltine Chocolate Malt Mix
42 grams/1 1/2 ounces high-quality white chocolate (such as Lindt or Perugina), chopped

Malt-Fudge Sauce
1 1/3 cups Ovaltine Chocolate Malt Mix
113 grams/4 ounces bittersweet chocolate (70% to 72% cacao), chopped
1 teaspoon mild-flavored (light) molasses
Pinch of coarse kosher salt
1/2 cup heavy whipping cream
1/2 cup light corn syrup
1/4 cup sugar

Cake
Nonstick vegetable oil spray
56 grams/2 ounces bittersweet chocolate (70% to 72% cacao), chopped
1 3/4 cups all purpose flour
3/4 cup unsweetened cocoa powder
2 teaspoons baking powder
1 teaspoon coarse kosher salt
3/4 cup (1 1/2 sticks) unsalted butter, room temperature
2 1/4 cups sugar
3 tablespoons light corn syrup
3 large eggs
3/4 cup buttermilk
1/3 cup vegetable oil
1 teaspoon vanilla extract
1/2 cup whole milk
3 tablespoons Ovaltine Classic Malt Mix
2 cups mini marshmallows

Chocolate-Malt Crumbs
Mix Milk Crumbs and Ovaltine in small bowl. Place white chocolate in small microwave-safe bowl. Heat in microwave in 15-second intervals just until melted, stirring occasionally. Drizzle chocolate over Milk Crumb mixture; toss to coat.

Malt-Fudge Sauce
Place first 4 ingredients in medium bowl; set aside. Combine cream, corn syrup, and sugar in heavy medium saucepan. Bring to boil, stirring until sugar dissolves. Pour cream mixture over chocolate mixture in bowl. Let stand 1 minute, then stir until smooth. Whisk until sauce is glossy, about 1 minute. DO AHEAD Can be made 1 week ahead. Cool completely. Cover and chill. Rewarm just until pourable before using.

Cake

Preheat oven to 350°F. Coat three 8-inch cake pans with nonstick spray. Line bottom of each pan with parchment round; coat parchment with nonstick spray. Place chocolate in small microwave-safe bowl. Melt in microwave in 15-second intervals just until melted, stirring occasionally. Set aside. Sift flour, cocoa powder, baking powder, and coarse salt into medium bowl. Combine butter, sugar, and corn syrup in large bowl of stand mixer fitted with paddle attachment; beat on medium-high speed until fluffy and pale, about 2 minutes. Scrape down sides of bowl. Add eggs; beat on low speed to incorporate, then increase speed to medium-high and beat until mixture is fluffy, about 2 minutes. Scrape down sides of bowl. Add melted chocolate. Beat until blended, about 1 minute. Add buttermilk, oil, and vanilla; beat on medium-high speed until pale brown, about 2 minutes. Add dry ingredients; beat on low speed just until blended, about 45 seconds. Divide batter among pans; smooth tops. Bake cakes until tester inserted into center comes out clean, about 20 minutes. Cool completely in pans on racks.

Stir milk and Ovaltine in small bowl. Invert 1 cake from pan onto flat plate or tart pan bottom; peel off parchment. Place cake, top side down, in 8-inch springform pan. Brush cake with generous 2 1/2 tablespoons Ovaltine-milk mixture. Let Ovaltine-milk mixture soak into cake. Drizzle 1/3 cup malt-fudge sauce over cake; spread evenly over top. Sprinkle 1/2 cup chocolate-malt crumbs over sauce. Drizzle 1/3 cup malt-fudge sauce over crumbs. Scatter 1 cup mini marshmallows over. Using kitchen torch, toast marshmallows. Repeat with second cake layer, Ovaltine-milk mixture, malt-fudge sauce, chocolate-malt crumbs, malt-fudge sauce, and marshmallows. Remove third cake from pan; peel off parchment. Place cake, top side down, atop marshmallows on second cake layer. Brush with remaining Ovaltine-milk mixture (assembled cake will rise well above edge of pan). Cover cake with plastic wrap; chill overnight. Cover and chill fudge sauce.

Run thin knife around sides of pan to release cake. Remove pan sides. Place cake (still on springform pan bottom) on plate. Rewarm sauce just until pourable. Pour over top of cake, allowing sauce to drip over edges. Mound handful of marshmallows in center of cake. Using kitchen torch, toast marshmallows. Sprinkle remaining malt crumbs over cake. Let cake stand at room temperature 3 hours before serving.

Cut cake into wedges and serve.

Milk Crumbs
3/4 cup nonfat dry milk powder
1/2 cup all purpose flour
3 tablespoons sugar
2 tablespoons cornstarch
3/4 teaspoon coarse kosher salt
6 tablespoons (3/4 stick) unsalted butter, melted

Preheat oven to 275°F. Line large rimmed baking sheet with parchment. Combine milk powder, flour, sugar, cornstarch, and coarse salt in medium bowl; toss to mix evenly. Add butter; stir with fork until clusters form. Spread mixture evenly on prepared sheet. Bake until crumbs are dry and crumbly but still pale, about 10 minutes. Cool Milk Crumbs completely on sheet. DO AHEAD Can be made 1 week ahead. Store in airtight container at room temperature.

Notes: Whilst the recipe stipulates the need for 3 x 8 inch cake pans, I used one only and baked them straight after each other – giving the batter a little whisk in between. Consequently the cooked cakes were not cooled in the tins, I removed them literally 5 minutes after coming out of the oven.

Source: Christina Tosi for Bon Appetit, September 2010

and just in case you didn’t get enough pictures to look at…

Posted in Cakes, Chocolate, Desserts | 2 Comments