Chewy Chunky BlondiesPrint Recipe


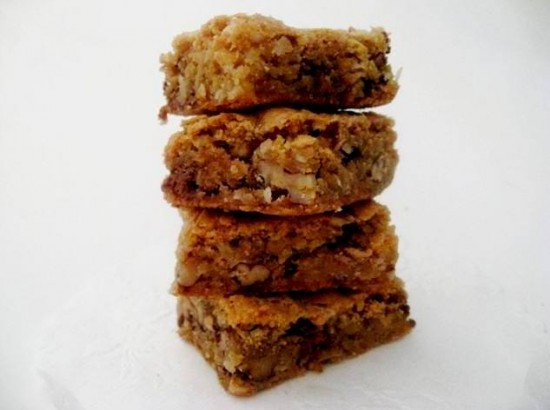
My daughters announced today that it was cookie time again, it must have been torture for them waiting so long – I mean it’s been a week since we made the Linzer Cookies – a whole week!  what a terrible mother I am. I was prompted to start flicking through my pile of magazines and cookbooks in search of this weeks sugar hit and then remembered that I had seen these on the Bon Appetit web site. And they looked very good.

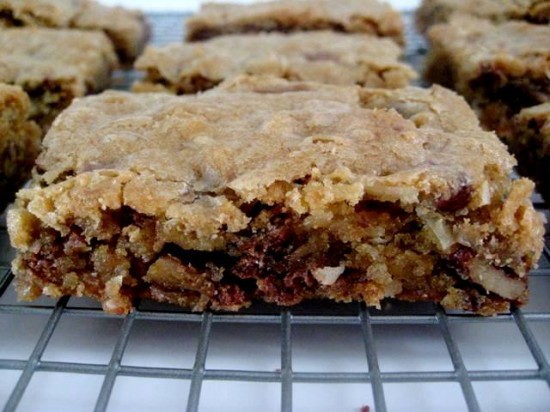
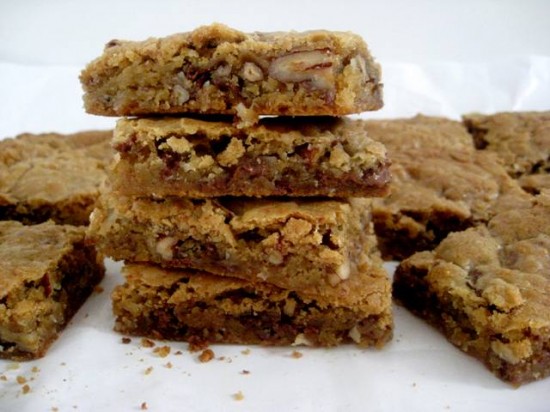
As the name describes, they are chewy and chunky. Chunky being the pecans and large (by our design) chips of milk chocolate that are scattered through the bars. The addition of the coconut lends a nice touch and almost made me feel as though I was eating something healthy (ish). They have the characteristics of a good brownie being slightly crisp on the outside and dense and fudgy on the inside. The girls are happy with my choice, as am I – now, I had better be on the ball and start planning next weeks sweet delight. Bon Appetit!

2 cups plain (all-purpose) flour
3/4 teaspoon baking powder
1/2 teaspoon baking soda
1/2 teaspoon salt
226 grams/8 ounces unsalted butter, at room temperature
1 1/2 cups (packed) light brown sugar
1/2 cup sugar
2 large eggs
1 teaspoon pure vanilla extract
170 grams/6 ounces best-quality milk chocolate, chopped into chip-size pieces
1 cup toasted pecans, chopped
1 cup sweetened shredded coconut

Center a rack in the oven and preheat the oven to 325f. Butter a 9 x 13-inch baking pan and put it on a baking sheet.

Whisk together the flour, baking powder, baking soda and salt.

Working in a stand mixer, preferably fitted with a paddle attachment, or with a hand mixer in a large bowl, beat the butter on medium speed until smooth and creamy. Add both sugars and beat for another 3 minutes, or until well incorporated. Add the eggs one by one, beating for 1 minute after each addition, then beat in the vanilla. Reduce the mixer speed to low and add the dry ingredients, mixing just until they disappear into the batter. Using a rubber spatula, stir in the chocolate, nuts and coconut. Scrape the batter into the buttered pan and use the spatula to even the top as best as you can.

Bake for about 40 minutes, or until a knife inserted into the center of the blondies comes out clean. The cake should pull away from the sides of the pan a little and the top should be a nice honey brown. Transfer the pan to a rack and cool for about 15 minutes. You can now invert the cake onto another rack, and then turn it over onto a rack and cool to room temperature. Alternatively, you can keep the blondies in the pan.

Cut the blondies into 32 bars, each roughly 2 1/4 x 1 1/2 inches.

Source: Adapted for Bon Appetit from Baking From My Home to Yours, by Dorie Greenspan

Posted in Biscuits/Cookies/Slices/Bars, Chocolate, Morning Teas/High Teas | Leave a comment

Wagyu Beef & Shiitake PiesPrint Recipe

There was a breath of Spring in the air today and it felt really good not to go outside looking like a sherpa. It is still too early to hang out at the markets looking for spring produce but I am getting quite excited with the prospects that a new seasons produce can bring. Very excited in fact because I have a list of Spring recipes that is going to see me well into the next millenium.

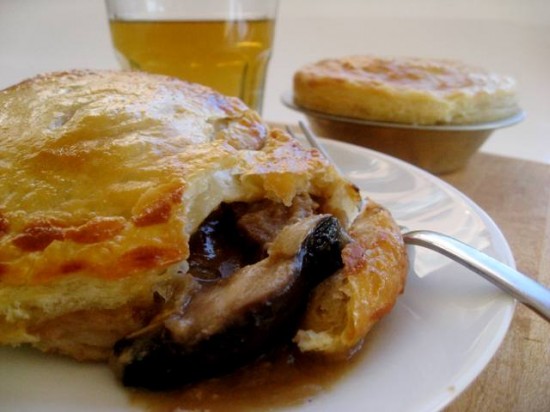
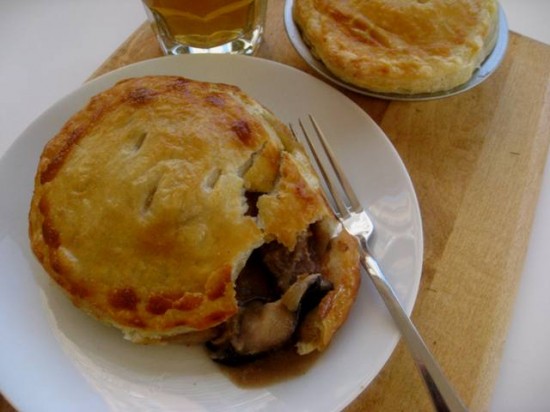
Consequently, I am finding myself on the outer cusp of the comfort food zone. I still have a few things that I set out to make this Winter, this pie being one of them and I am so glad that I didn’t pass on the opportunity because it is sensational. The primest of prime meats is delicately enhanced with ginger, sake and shiitake mushrooms and wrapped in a buttery pastry that only serves to compliment its melting qualities.

I actually made the meat mixture a day in advance because I thought the pastry might take some serious concentration and a little time – it did, but that is only because all good things take time and I am not a regular pastry buff. My efforts did not go unrewarded because it turned out as good puff pastry should – buttery, flakey and light, I felt quite proud.

Nothing like a good pie to embrace the last gasps of Winter – a Winter wagyu pie too see you through to Spring.

Filling
1 kilo/2 pounds Wagyu oyster blade cut into 2cm peices
1/2 cup plain (all purpose) flour
2 tablespoons vegetable oil
2 onions, coarsely chopped
1 tablespoon finely grated ginger
1/3 cup soy sauce
1/3 cup sake
200 grams/7 ounces shiitake mushrooms
1 egg, lightly beaten
to serve: freshly grated horseradish

Pastry
3 cups plain (all purpose) flour
450 grams/1 pound frozen unsalted butter, coarsely grated

Place beef and flour in a bowl and toss to coat. Heat 1 tablespoon of the oil in a large heavy based saucepan, add onion, cook over low-medium heat for 8 minutes or until soft, then stir in the ginger. Remove onion mixture from the pan and set aside.

Return pan to heat, add remaining oil and heat, then add beef in two batches and cook over medium-high heat, stirring occasionally for 3 minutes or until browned, then remove from pan. Return beef and onion to the pan, add the soy, sake and 2 cups of water and bring to the boil. Add shiitake mushrooms, reduce heat to low and cook, stirring occasionally for 40 minutes or until beef is tender and liquid is thickened. Season to taste with sea salt and ground black pepper. Cool to room temperature then refrigerate until chilled.

For pastry, sift flour and a pinch of salt onto a work surface, scatter butter over then cut through the butter (using a knife or a pastry scraper) until roughly mixed. Make a well in the centre, add 3/4 cup ice-cold water and using the pastry scraper mix until the dough forms. Divide pastry in half, wrap in plastic wrap and refrigerate for 20 minutes.

Work with one pastry half at a time, roll out on a floured surface to form a 1.5 cm thick rectangle, fold shortest ends over to meet in centre, then fold in half from the same direction. Cover with plastic and refrigerate for 20 minutes, then repeat rolling, folding and resting process twice more for each half.

Roll out each pastry half on a floured surface until 5mm thick, then cut into 6 pieces large enough to fit the pie tins. Line the tins with the pastry, then fill with the beef mixture. Brush the pastry edges with the egg. Cut lids from the remaining pastry and press onto pies, trim edges and press to seal. Cut small slits in the top and brush with egg. Bake at 200c/380f for 30 minutes or until golden. Serve immediately with grated horseradish.

Source: Rodney Dunn

Posted in Meat, Tarts/Flans/Quiches/Pies | Leave a comment

White Chocolate CheesecakesPrint Recipe


It’s Valentines Day tomorrow and we have a special tradition in our fairly new family and that is to celebrate the day as a family. To cut a long story short – my husband and I also have another anniversary in early March, so rather than having two almost back-to-back celebrations we only celebrate the latter date as a couple. And I must say celebrating Valentines day as a family is fun, the girls get very excited.

So this year for the dessert I thought I would make mini White Chocolate Cheesecakes knowing that I should indulge Mr Man with some sort of chocolate creation. Just to fill you in – his soul is made of chocolate, he lives and breathes it – like we breath the air. Now I am fully aware that white chocolate is not officially chocolate but in his mind it is so that is all that matters.

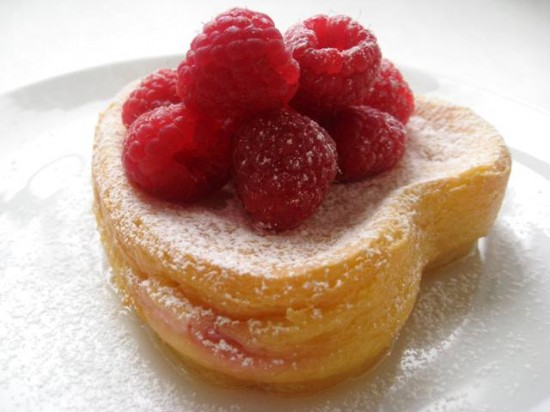
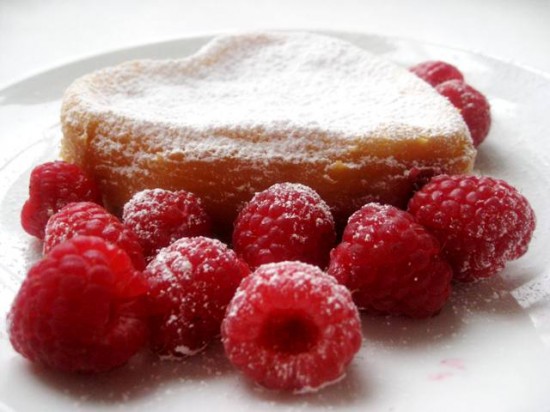
These particular cheesecakes are baked with the subtlest hint of white chocolate, orange and vanilla. They have a tumble of berries through the centre that tone down the sweet of the cheesecake in that slightly tart ‘raspberry’ way. All in all – a gorgeous dessert for this special occasion.

Whatever you are planning to do on this lovey dovey day – I hope you enjoy it. One of my most memorable Valentines was spent sitting on a wharf drinking champagne from a bottle and eating chicken sandwiches .We didn’t have a huge budget and forgot our champagne glasses but it was an evening that was more romantic than alot of my fine dining occasions. It doesn’t take much and in the words of John Lennon – all you need is love. xx

160 grams/5.6 ounces good quality white chocolate
650 grams/1.4 pounds cream cheese
250 grams/8.8 ounces caster (superfine) sugar
3 eggs, lightly beaten
grated zest of 1 orange
1/2 cup freshly squeezed orange juice
seeds from 1/2 vanilla bean
200 grams/7 ounces raspberries and a few extra for decorating
icing sugar/confectioners sugar for dusting

Preheat your oven to 160c/320f. Lightly grease 6 small oven proof dishes (approx 10cm/4 inches in diametre) with a non stick spray.

Melt the white chocolate in a double boiler until smooth. Combine the cream cheese and caster sugar in a mixer, slowly add the white chocolate, eggs, orange zest, orange juice and vanilla seeds. Beat slowly until well combined.

Pour half the chocolate mixture evenly in the bottoms of the 6 small dishes or the one larger dish. Cover with the raspberries and pour over the remaining mixture. Bake for 20 minutes or until just set.

Allow to cool – the cakes will become more stable and easier to remove from the dishes once completely cooled. Dust with icing sugar and serve at room temperature scattered with more raspberries.

Notes: This can be made in one large dish – a 5cm (2 inches) deep rectangular baking dish, 28 x 21cm (11 x 8.25 inches), greased and lined with greaseproof paper – bake for 1 hour.

Source: Adapted from Grossi Florentino, Secrets & Recipes by Guy Grossi

Posted in Cakes, Chocolate, Desserts | 4 Comments

Roasted Winter Vegetables with Polenta and Salsa VerdePrint Recipe


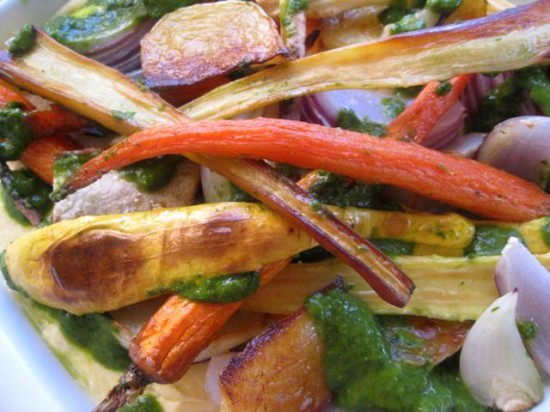
I made something like this many years ago for a dinner party because I had a few vegetarian friends coming over. Everyone liked it so much that my poor roast sat there virtually untouched. I have since searched high and low for the recipe – to no avail so I have improvised and put it together from memory. The best thing about doing this has been that I have adapted things to my personal preference and this has made it even better (if I do say so myself).

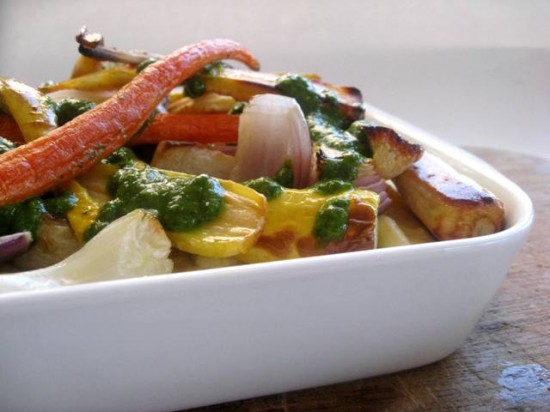
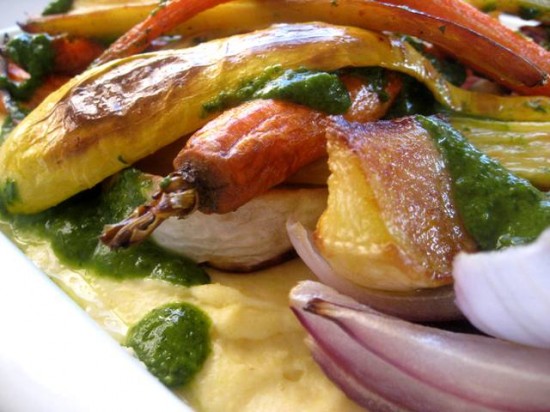
Of course you can use any roasted vegetables you like, I just thought being Winter – still (how many more weeks do I have to endure?!) that I would roast up some Winter root veggies. The polenta is creamy and wonderful, the vegetables are themselves (roasted to perfection and delicious) and both of these are sensationalised by the robust flavours and the vibrant green of the salsa verde. A true Winter meal or side!

Roasted Vegetables
1/4 cup olive oil
6 small carrots, peeled
2 yellow squash, cut into quarters
2 medium turnips, peeled, cut in half and each half cut into quarters
4 small parsnips, peeled, cut in half
1 spanish onion, peeled and cut in half, each half cut into quarters
4 garlic cloves, peeled
1 sprig of rosemary

Polenta
800 mls milk
300 grams/10.5 ounces coarse yellow polenta
1 cup pouring cream
1 1/2 cups finely grated parmesan
60 grams/2.1 ounces unsalted butter, coarsely chopped

Salsa Verde
50 gm day-old sourdough bread, coarsely torn
150 ml red wine vinegar
2 cups (loosely packed) flat-leaf parsley, coarsely chopped
3 anchovy fillets, coarsely chopped
3 garlic cloves, coarsely chopped
1 tbsp salted capers, rinsed
60 ml (¼ cup) extra-virgin olive oil

For salsa verde, combine bread and vinegar in a small bowl and stand until vinegar is almost absorbed (5-7 minutes). Process parsley, anchovy, garlic, capers and bread mixture in a food processor until a coarse paste forms, then stir in oil, season to taste and set aside.

Position 1 rack in top third and 1 rack in bottom third of oven and preheat to 375°F. Combine all vegetables and herbs, garlic, and oil in large bowl. Sprinkle generously with salt and pepper and toss to coat. Divide vegetable mixture between two baking sheets.

Roast vegetables 30 minutes. Reverse baking sheets and continue to roast until all vegetables are tender, stirring occasionally, about 45 minutes longer.

Meanwhile, for polenta, bring milk and 800ml water to the boil in a large saucepan, season generously to taste (keep in mind the parmesan will add quite a salty flavour too) and slowly add polenta in a thin stream, whisking continuously. Reduce heat to low and stir continuously with a wooden spoon until smooth and creamy (20-30 minutes), then stir through cream, parmesan and butter.

Pour polenta into a serving dish, scatter roasted vegetables over the top followed by a good drizzle of the salsa verde. Serve immediately.

Notes: The polenta starts to set as soon as it is removed from the heat so pour it into your serving dish straight away. With regards to the vegetables – please see the ingredients as guidelines. Also, chop the vegetables into any size you like, just as long as they are roughly the same size so they will cook evenly.

Source: inspired by a recipe somewhere out there

Posted in Sides, Vegetables, Vegetarian | Leave a comment

Linzer Heart CookiesPrint Recipe


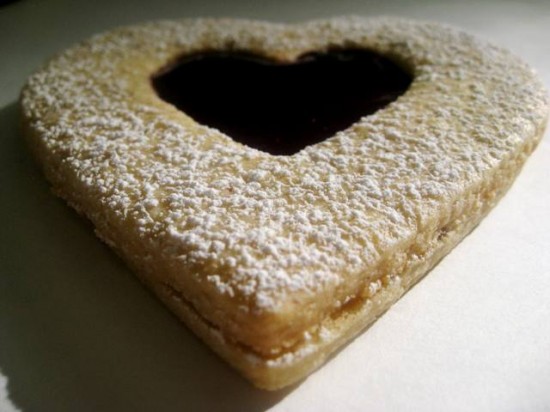
I love the sentiment of Valentines Day, cards with tender tones, flowers and various tokens of admiration – quite clearly I am a total romantic. I also love hearts, so it’s alot of fun to have Valentines Day as a reason to decorate everything with hearts or make everything in heart shapes. Of course my daughters love it too, there is something very sweet and whimsical in the shape of a heart – or maybe it’s what it stands for that draws us in, everyone wants to be loved afterall.

Linzer Cookies are an obvious choice for heart shapes and the traditional almond biscuit with jam combination is a great one. I have made these many times before and in my travels through linzer cookie land have stumbled upon a few tips to make the baking of these cookies alot less fussy. They are a little more time consuming than your standard cookie so these little handy hints certainly help with a dough that is alot easier to manage and ultimately a much neater cookie.

I am not too sure how you are planning to spend this loved-up day but it would be nice to make these and hand them out to those who are dear to you – a little something to share the sentiment. Love to you all! xx

1 ½ cups plain/all purpose flour
1 cup almond meal
½ teaspoon baking powder
½ teaspoon ground cinnamon
¼ teaspoon salt
2/3 cup granulated sugar
113 grams/4 ounces salted butter, softened
½ tsp grated lemon rind
½ tsp almond extract
4 large egg yolks
raspberry preserves or jam
icing sugar (powdered sugar), sifted

In a bowl, combine the flour with the almond meal, baking powder, cinnamon and salt. Stir well.

In a seperate bowl, place sugar, butter and lemon rind; beat with a mixer at medium speed until light and fluffy (2-3 minutes). Add egg yolks and almond extract and continue beating until well blended. At low speed, begin adding flour mixture gradually, beating at low speed until all flour is integrated. Beat just until a soft dough forms. Turn the dough out onto a nonstick surface or piece of plastic wrap and knead lightly until smooth. Divide the dough into 2 equal portions, wrapping each piece in a sheet of plastic wrap. Chill for 2 hours.

Pre-heat oven to 350°. Roll each dough portion into about an 1/8 of an inch thickness onto a sheet of parchment paper cut to the size of your baking pan (or other nonstick baking mat). Then cut dough into shapes using a cookie cutter, leaving a very small amount of space (¼ of an inch) between cookies. With each batch, remember to cut equal amounts of tops and bottoms. Your cookie cutter can be any shape and the size of the hole in the cookie top is totally up to you. Remove remaining dough around cutouts, forming it into a ball and returning it to the plastic. Place dough in freezer to re-roll later, and begin working on the next portion of dough. Repeat until all dough is exhausted.

In between rolling out sections of dough, bake cookies one batch at a time at 350° for 8-10 minutes. Lift the entire piece of parchment paper onto the baking sheet and place in the oven. It helps to have a few baking sheets in rotation so that one pan is being prepped to go in the oven while the other is baking. After pulling the cookies from the oven, let them cool several minutes before transferring to a cooling rack. Let cookies cool completely.

Heat jam in the microwave for around 1 minute so it is runny and hot. Take a butter knife and coat the bottom half of the cookie with a thin layer of raspberry jam and glue the cookies together. Use a sifter to coat the tops lightly with the icing sugar then fill in the hole with a little more jam.

Notes: This recipe should make 9 – 10 really large cookies or 20 smaller cookies.

Posted in Biscuits/Cookies/Slices/Bars, Morning Teas/High Teas | 1 Comment

Apple & Pear Amaretti CrumblesPrint Recipe


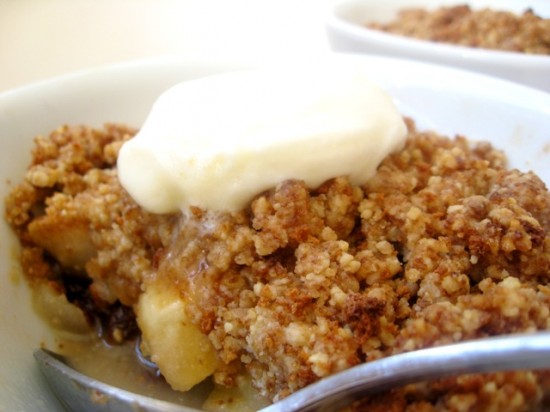
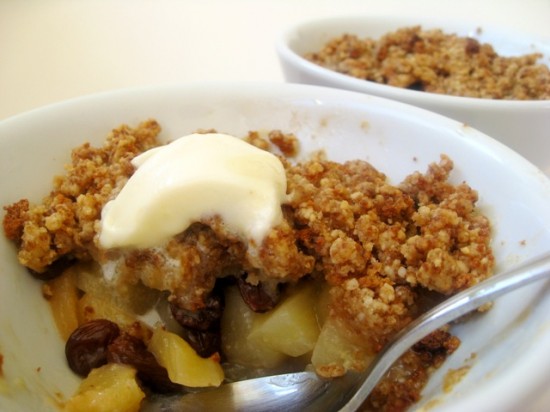
Your humble fruit crumble takes on a rustic Italian feel with this lovely, feel good, wintery dessert. I love this particular recipe because it contains marsala, almond meal and crushed amaretti biscuits, giving it quite a distinct almond flavour with a marvelous hint of booziness.

I can imagine digging into this after eating my way through some sort of roast dinner, or just on its own when the girls are in bed and I am feeling like something sweet for dinner rather than savoury. Either way, it is one of those quintessential desserts for the cooler months – something that will warm your tummy and your soul.

3 golden delicious apples
3 ripe and firm beurre bosc pears
50 grams/1.8 ounces of raisins or sultanas
25 grams/.88 ounces of unsalted butter, melted
1 teaspoon plain (all purpose) flour
1/4 cup sweet marsala
Icing sugar and double cream to serve

Crumble
2/3 cup plain flour (all purpose flour)
1/3 cup firmly packed brown sugar
1/2 cup ground almonds
100 grams/3.5 ounces unsalted butter, chopped
50 grams/1.8 ounces amaretti biscuits, crushed

Preheat oven to 180c/355f.

Place flour, sugar, ground almonds and a pinch of salt in a bowl. Using your fingertips rub the butter into the flour mixture until it resembles coarse breadcrumbs. Add amaretti biscuits and rub in till just combined.

Peel, core and cut apples and pears into small pieces (around 1/2 inch), then toss together in a bowl with raisins, butter, flour and marsala. Divide the fruit mixture among 4 x 325 ml ovenproof dishes, then top with crumble mixture.

Place dishes on an oven tray and cover with foil, bake for 30 minutes. Uncover and bake for a further 20 minutes or until the crumble is golden brown and the fruit is tender.

Serve dusted with icing sugar and a dollop of double cream.

Notes: The 4 portions of apple & pear crumble are very big so I recommend you use six smaller dishes.

Source: Andy Bunn, Sopra at Fratelli Fresh

my little helper…

Posted in Desserts, Fruit | Leave a comment

Broccolini with Italian Herb OilPrint Recipe


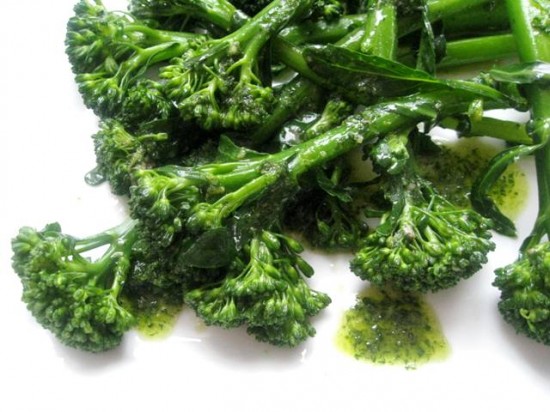
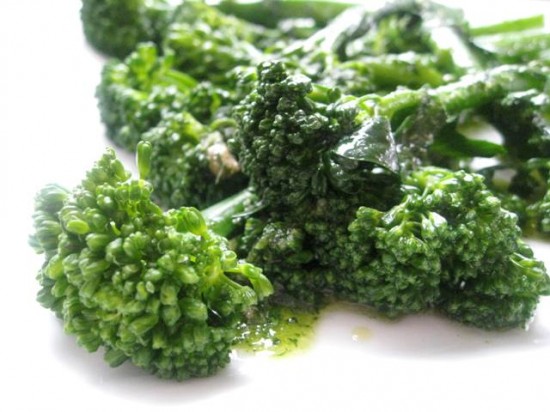
Is broccolini the pretty sibling of broccoli? no, it’s more of a step sibling – actually being a hybrid of broccoli and kai-lan (a Chinese broccoli – not the cartoon character). It is sweeter in taste than the stockier looking broccoli and has smaller florets with longer, thinner stems. And much like broccoli it can be steamed, sauteed, boiled and stir-fried.

In our house we eat broccolini almost every second day – my daughters love it and I love its healthy attributes. Generally I steam it but that has been getting a little monotonous so I have been on the look out for a few flavouring tips. Don’t get me wrong, we love the flavour it’s just that we eat it so often I wanted to diversify a little.

I came across this recipe in an old Gourmet magazine. It was simple, easy and so incredibly good (being that it has anchovies and garlic and you know what I think about them). So if you are finding the need to dress your greens with a little herby, garlicky oil then look no further because this recipe will do just that.

680 grams/1.5 pounds Broccolini, tough ends trimmed
1/3 cup coarsely chopped flat-leaf parsley
2 tablespoons coarsely chopped oregano
1 small garlic clove, smashed
1 teaspoon anchovy paste
1/3 cup olive oil
Accompaniment: lemon wedges

Cook broccolini in a large pot of boiling salted water until just tender, about 6 minutes, then drain.

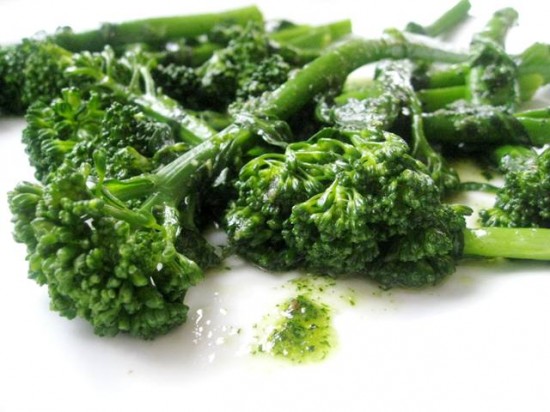
Meanwhile, blend herbs, garlic, anchovy paste, 1/8 teaspoon salt, and 1/2 teaspoon pepper in a blender until finely chopped. With motor running, add oil in a slow stream, blending until mixture is green and herbs are very finely chopped.

Serve Broccolini tossed in the herb oil with lemon wedges on the side – should you so desire.

Notes: I couldn’t get my hands on anchovy paste so I used 1 anchovy fillet which worked perfectly.

Source: Gourmet

Posted in Sides, Vegetables, Vegetarian | Leave a comment

Olive Oil and Sauternes Cake with Roast PearsPrint Recipe


Once again I get to raphsodise about yet another Neil Perry masterpiece. I found this recipe while I was trawling through my Neil Perry file looking for one of his Thai curries to cook. I was thinking that something hot, spicy and flavoursome might keep the Winter blues at bay. Instead I found this and got very distracted.

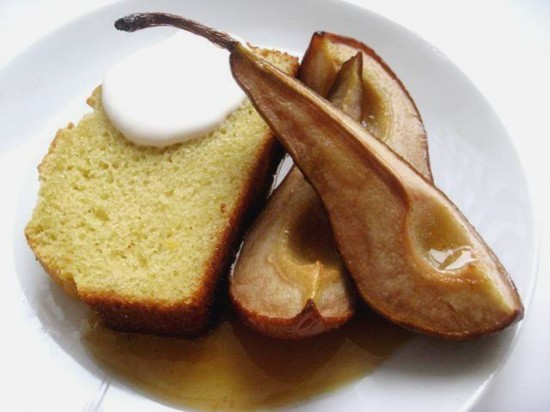
Once again Neil Perry embraces flavour in his typical fashion, in this instance he also embraces his passion for wine, using Sauterne in every component – from the cake through to the syrup. The olive oil gives the cake an incredibly moist texture and paired with the Sauturne you have an indulgent and subtly boozie dessert.

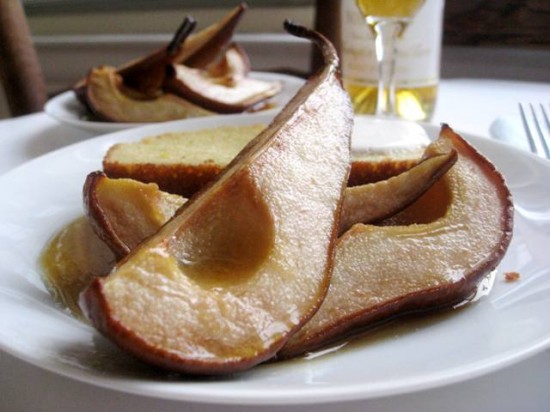
Thanks again Neil! And what better to way to serve this other than with the remaining Sauturne, although there actually won’t be much left from a 375ml bottle so you may have to purchase another.

Roast pears
4  beurre bosc pears, halved or quartered lengthways, core removed, stem intact
1/3 cup Sauternes dessert wine
2 tablespoons olive oil
2 tablespoons caster sugar

Cake
½ cup caster sugar
2 eggs
¾ cup olive oil
½ cup Sauternes dessert wine
1/3 cup milk
2 lemons, finely grated zest only
1½ cups plain flour
2½ teaspoons baking powder

Sauternes syrup
½ cup caster sugar
½ cup Sauternes dessert wine
To serve:thick (double/heavy) cream

Preheat the oven to 180c/360f. Place the pears in a roasting tin, drizzle with the wine and oil and sprinkle with the sugar. Roast for 45 minutes, turning occasionally, until tender and starting to caramelise. Allow to cool to room temperature.

Meanwhile, to make the cake, lightly grease an 11 x 22cm loaf tin, and line the base and sides with baking paper. Beat the sugar and eggs together in a large bowl with an electric mixer until pale and creamy. Add the oil, wine, milk and lemon zest and beat until well combined. Add the combined, sifted flour and baking powder and slowly beat until just combined. Pour the mixture into the prepared tin. Bake alongside the pears for 40 minutes, or until cooked when tested with a skewer. Allow to stand for 5 minutes before turning out onto a wire rack to cool completely.

Meanwhile, to make the Sauternes syrup, place the sugar and 2 tbsp water in a small pan and stir constantly, over very low heat, without letting it boil, until the sugar has completely dissolved. Increase the heat and allow the syrup to simmer, brushing the side of the pan with a wet pastry brush if necessary, until the syrup turns a golden colour. It is important to keep an eye on the syrup at all times, as once it starts to colour, it will continue to darken very quickly. Turn off the heat, add the wine and stir to combine. Some of the syrup may solidify at this point. If this is the case, return it to a very low heat until it dissolves again. Set aside to cool.

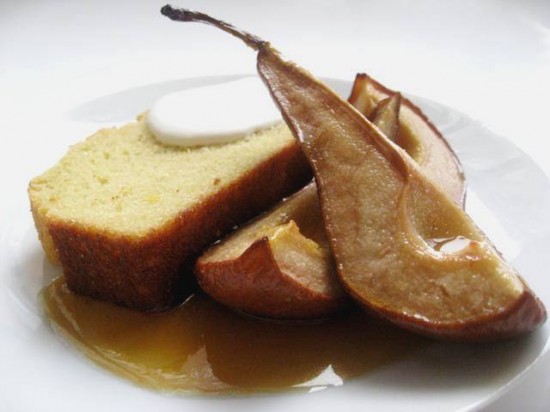
Serve the cake with the pears, drizzle with the syrup and add a dollop of cream.

Notes: The most aesthetic way to core the pear is to use a melon baller.

Source: Neil Perry

Posted in Cakes, Desserts | 1 Comment

Lemon TassiesPrint Recipe

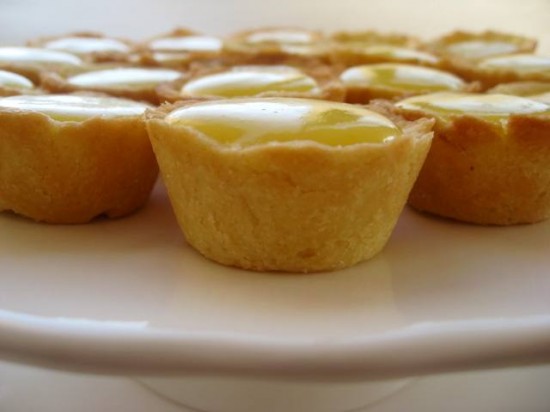
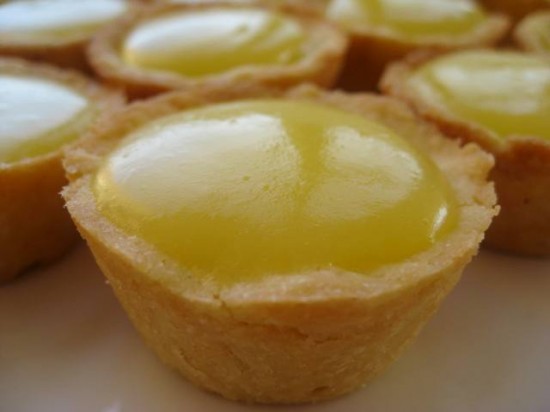
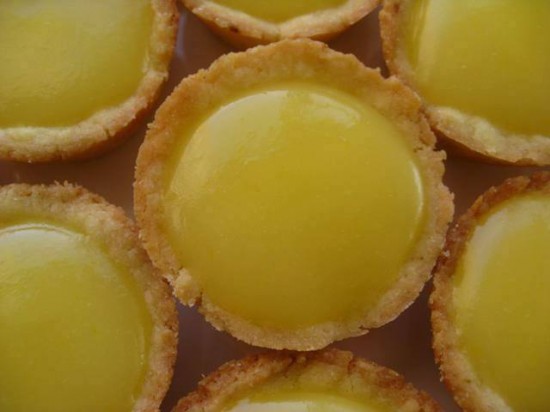
Did you know that lemon is the new chocolate? I read this somewhere recently and I would have to agree. It appears that all over the place people are casting aside their slabs of couverture chocolate, cocoa and chocolate drops to celebrate this wonderful fruit in every way possible.

Lemon Tassies are very similar to mini lemon tarts. I am not too sure why they are called tassies and my research was not too successful. It seems that they may have originated in the deep South (USA) but I only found one very vague indication of this. One thing I did discover was that the word ‘tassie’ can also mean ‘small cup’ so I am wondering if perhaps it’s somehow transfered to a mini dessert and the pastry shell is the small cup that holds the filling…

I know in some minds (Mr Man’s in particular) chocolate will never take a back seat to the luscious lemon. It really doesn’t matter anyway, with these little delights as part of your dessert tray I am sure you can fit in both lemon and chocolate.

Pastry Shells
1 1/4 cups all-purpose flour
1/3 cup sugar
2 teaspoons finely shredded lemon peel
1/2 cup butter
1 egg yolk, lightly beaten
2 tablespoons cold water

Lemon Curd
¾ cup (200 mls) of fresh lemon juice
1 tablespoon of freshly grated lemon rind
¾ cup sugar
3 eggs
125 grams/4.4 ounces of unsalted butter, cut into cubes

In a medium bowl stir together flour, the 1/3 cup sugar, and 2 teaspoons lemon peel.  Cut in the 1/2 cup butter until the mixture resembles coarse crumbs.  In a small bowl combine the 1 egg yolk and the 2 tablespoons cold water.  Gradually stir egg yolk mixture into the flour mixture.  Gently knead to form a ball.  If necessary, cover and chill for 30 to 60 minutes or until dough is easy to handle.

Preheat oven to 375° F.  For filling, place all ingredients in a medium sized saucepan. Cook over a medium low heat, whisking until thick enough to hold marks from the whisk and first bubbles appear on the surface, about 6 minutes. Remove from heat and cool for 5 minutes.

Divide dough into 30 pieces.  Press evenly onto bottoms and up sides of thirty small (1 3/4-inch) muffin cups.  Bake about 10 minutes or until pastry is golden, rotating pan half-way through.  Cool in muffin cups on wire racks for 10 minutes.  Remove tassies from the cups.

Spoon filling amongst all pastry shells – about 1 heaped teaspoon each.  Cover and chill for 1 to 2 hours before serving.

Notes: This lemon curd recipe is so easy and the best by a long shot (in my opinion). If necessary you may need to strain it through a fine seive – but whatever you do don’t let it cool too much before you place it into the pastry shells.

Source: Adapted from Better Homes & Gardens

Posted in Biscuits/Cookies/Slices/Bars, Desserts, Lemons, Tarts/Flans/Quiches/Pies | Leave a comment

English FlapjacksPrint Recipe

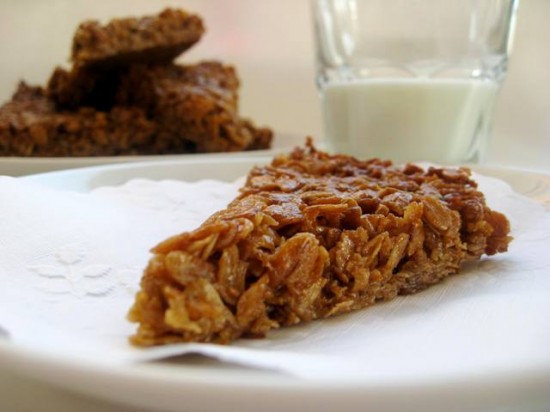
Flapjacks are one of those things that take me back to a certain time in my life and it wasn’t that long ago. I had just given birth to my first daughter, so grappling with no sleep and the initial shock of being a first time parent. It was in this foggy haze that I would stumble across the road to visit the local cafe and buy them for the stream of guests visiting my new & beautiful baby. Generally nobody ate much so consequently I survived for the first three months of my daughters life on flapjacks and cups of tea. There was something incredibly soothing in their buttery caramel flavour and oaty chewy texture. I think it may have been the mild sugar hit that ensued that kept me going through the sleepless nights.

The flapjack originated in the UK – they are also found throughout Ireland and Australia and some form or another. Some people like to add chocolate drops and other favour dried fruit. I like the plain verson though, because they are quite perfect in their oaty simplicity without the adornment of further flavour.

This particular recipe produces a flapjack that is thicker than those I ate in my new parent stage but still wonderful nonetheless.

1/2 cup (4 ounces/113 grams) unsalted butter, cut into 8 pieces
1/2 cup (packed) golden brown sugar
1/4 cup golden syrup (see notes)
2 1/3 cups quick-cooking oats (not instant or old-fashioned)
Pinch of salt

Preheat oven to 350f/160c. Butter 8 x 8 x 2-inch metal baking pan. Combine first 3 ingredients in heavy medium saucepan. Stir constantly over medium-low heat until butter melts, sugar dissolves, and mixture is smooth. Remove from heat. Add oats and salt; stir until coated. Transfer mixture to prepared pan and spread out in even layer.

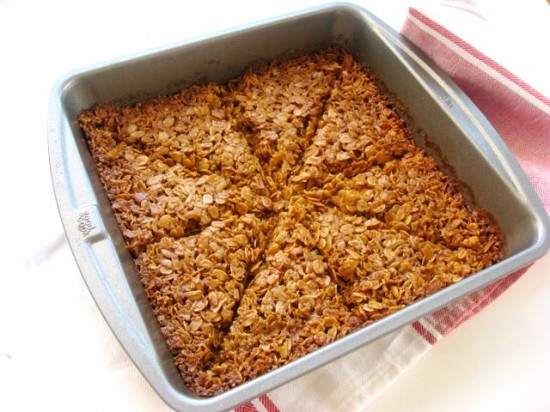
Bake until top is golden (edges will be darker), about 25 minutes. Cool in pan on rack 5 minutes. Cut into 4 squares; cut each into 4 triangles (mixture will still be soft). Cool completely in pan before serving.

Notes: Golden Syrup can be purchased in most supermarkets in the UK and Australia. In the USA you can find it in some health food stores and a few supermarkets including Wholefoods. For those of you that live elsewhere, I would try online British import stores. If you cannot get your hands on any you can make a similar syrup from one part molasses and two parts light corn syrup. It won’t have the exact flavour but it is the closest.

Source: Molly Wizenberg for Bon Appetit

Posted in Biscuits/Cookies/Slices/Bars | Leave a comment