Nanaimo BarsPrint Recipe

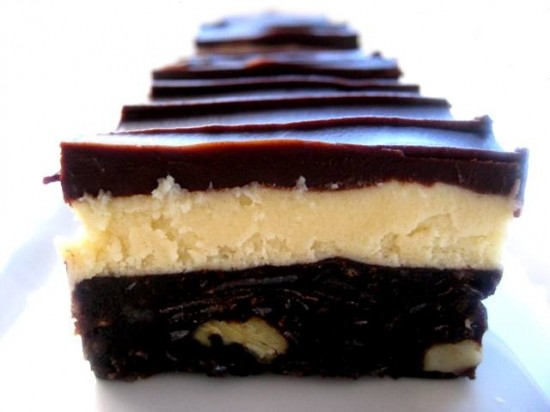
Nanaimo Bars originated in Ladysmith, just south of Nanaimo (Canada) in the 1950’s – their creator was a housewife named Mabel Jenkins who probably had no idea that her recipe would be so celebrated in years to come. They have since been embraced by cities all over North America, in fact some have quite cheekily claimed the recipe as their own.

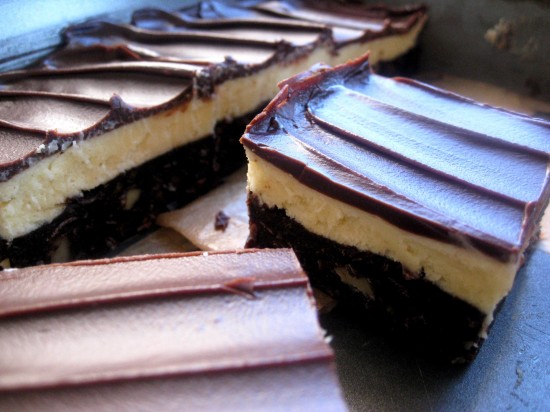
There is a very good reason why Nanaimo Bars are still going strong and I’ll sum it up in one word – sugar. The three layers that make these bars are so laden with the substance that they are very hard to avoid – especially if you have a craving. The first layer is a dense chocolatey, cookie crumb base that is peppered with nuts and coconut, this is topped with something I thought (at a glance) might be a custard but is essentially a custard flavoured frosting. And then (only because there isn’t enough sugar in the both of these), you have a nice little layer of chocolate to top it all off.  And guess what  – no oven required!

In my (humble) opinion, the Nanaimo Bar has a time and place – and when both of these are right, this bar is just sensational.

Bottom Layer
4 ounces/113 grams unsalted butter, room temperature
1/4 cup granulated white sugar
1/3 cup unsweetened cocoa (I use Dutch-processed)
1 large egg, beaten
1 teaspoon pure vanilla extract
1 1/2 cups graham cracker crumbs
1 cup shredded coconut (either sweetened or unsweetened)
1/2 cup walnuts, coarsely chopped

Middle Layer
56 grams/1.9 ounces unsalted butter, room temperature
3 tablespoons of cream
2 tablespoons vanilla custard powder (Bird’s) or vanilla pudding powder
1/2 teaspoon pure vanilla extract
2 cups icing sugar (powdered) sugar

Top Layer
113 grams/4 ounces semisweet chocolate, chopped
2 tablespoons unsalted butter
1 tablespoon cream

Butter or spray a 8 x 8 inch pan with a non stick vegetable spray.

In a saucepan over low heat, melt the butter. Stir in the sugar and cocoa powder and then gradually whisk in the beaten egg. Cook, stirring constantly, until the mixture thickens (1 – 2 minutes). Remove from heat and stir in the vanilla extract, graham cracker crumbs, coconut, and chopped nuts. Press the mixture evenly onto the bottom of the prepared pan. Cover and refrigerate until firm (about an hour).

Beat the butter until smooth and creamy with an electric mixer. Add the remaining ingredients and beat until the mixture is smooth. Spread the filling over the bottom layer, cover, and refrigerate until firm (about 30 minutes).

Melt chocolate and butter over low heat, mix in cream and set aside to cool. Once cool, but still liquid, pour over second layer and chill in refrigerator. Bring to room temperature and slice with a warm knife when ready to serve.

Makes about 20 squares.

Notes: You can actually make this bar in a 9 x 9 ” tin. Also, Nanaimo Bars are designed to be eaten chilled so keep them in the refigerator.

Source: adapted from The Joy of Baking

Posted in Biscuits/Cookies/Slices/Bars, Chocolate | 3 Comments

Graham CrackersPrint Recipe


why, hello Mr Graham Cracker, finally we get the chance to meet…

I get some sort of peculiar satisfaction from making biscuits (cookies) that we all equate with a supermarket purchase. I have made Oreo’s, Iced Vovo’s, Fig Newtons and Wagon Wheels, I have even tried to re-create a Tim Tam (and let’s just say that the store bought version remains far superior).

Somehow amongst all of this baking, I forgot one of the America’s most utilised cookies – the Graham Cracker. Granted the Graham Cracker is more humble than your Wagon Wheel or Oreo but it is so incredibly adaptable, not to mention a staple ingredient in so many hundreds of recipes, that it cannot possibly go ignored. I stumbled across this recipe a couple of days ago and it was all systems go.

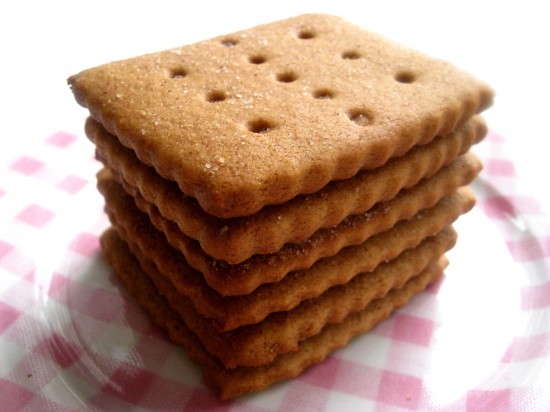
These crackers are the real deal, baked to a golden brown perfection with a slight honey taste. They are so much better than their cardboard store-bought counterparts that I swear I am not going to buy them again – unless it’s for an emergency.

Are you thinking ‘is this it? I spend my time looking at this site and all I get is a lousy Graham Cracker?’ well, wait – there is more…

I have also included a recipe for cream cheese frosting.

Can it get any better than this?

Cracker Ingredients
2 1/2 cups plus 2 tablespoons unbleached all-purpose flour
1 cup dark brown sugar, lightly packed
1 teaspoon baking soda
3/4 teaspoon salt
7 tablespoons (3 1/2 ounces) unsalted butter, cut into 1-inch cubes and frozen
1/3 cup mild-flavored honey, such as clover
5 tablespoons whole milk
2 tablespoons pure vanilla extract

Topping
3 tablespoons granulated sugar
1 teaspoon ground cinnamon

In the bowl of a food processor fitted with the steel blade or in the bowl of an electric mixer fitted with the paddle attachment, combine the flour, brown sugar, baking soda, and salt. Pulse or mix on low to incorporate. Add the butter and pulse on and off on and off, or mix on low, until the mixture is the consistency of a coarse meal.

In a small bowl, whisk together the honey, milk, and vanilla extract. Add to the flour mixture and pulse on and off a few times or mix on low until the dough barely comes together. It will be very soft and sticky.

Turn the dough out onto a lightly floured work surface and pat the dough into a rectangle about 1 inch thick. Wrap in plastic and chill until firm, about 2 hours or overnight.

To prepare the topping: In a small bowl, combine the sugar and cinnamon, and set aside.

Divide the dough in half and return one half to the refrigerator. Sift an even layer of flour onto the work surface and roll the dough into a long rectangle about 1/8 inch thick. The dough will be sticky, so flour as necessary. Trim the edges of the rectangle and cut into equal sized rectangles with a knife or a pastry wheel (mine were approx 3 inches x 2.5 inches). Gather the scraps together and set aside. Place the crackers on one or two parchment-lined baking sheets and sprinkle with the topping. Chill until firm, about 30 to 45 minutes. Repeat with the second batch of dough and left over scraps. You will need to re-refrigerate the scraps till firm.

Adjust the oven rack to the upper and lower positions and preheat the oven to 350 degrees.

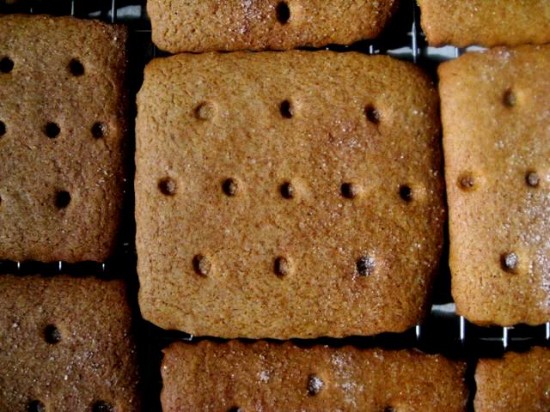
Using a toothpick or skewer, prick the dough to form a dotted row down the centre of the cracker (as you can see I added a few other dots too).

Bake for 25 minutes, until browned and slightly firm to the tough, rotating the sheets halfway through to ensure even baking. Remove from the oven and allow to cool for 5 minutes before moving to a cooling rack.

You should get about 20 crackers.

Notes: My crackers were actually cooked at 20 minutes so watch them carefully around that time.

Source:Nancy Silverton’s Pastries from La Brea Bakery

Cream Cheese Frosting
1 x 226 gram/8 ounce package of cream cheese
2 tablespoons butter, softened
1 teaspoon pure vanilla extract
2 cups of icing (powdered) sugar, sifted

Beat the butter in the bowl of an electric mixer until creamy. Mix in the cream cheese and beat until light and fluffy. Stir in the vanilla extract and when fully incorporated add the powdered sugar. Mix until smooth and creamy. Place in the refrigerator for an hour before using.

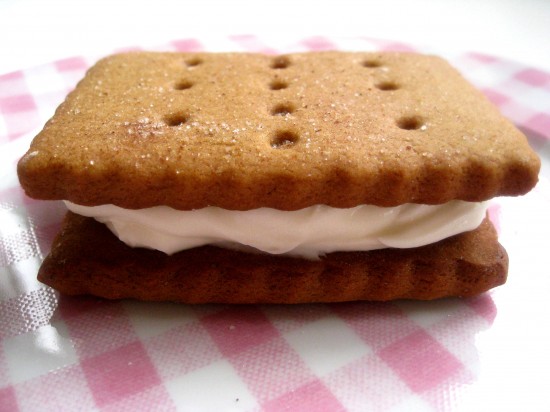
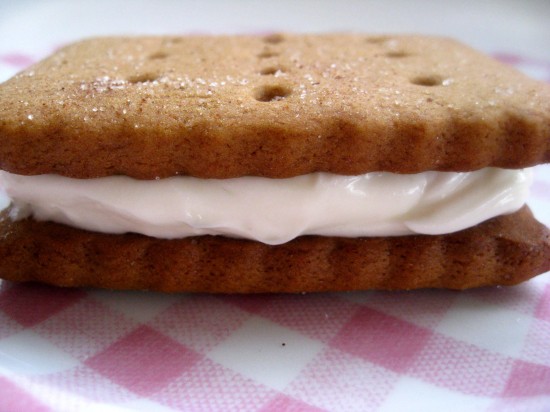
Spread the cream cheese frosting onto one Graham Cracker and top with another cracker – you will have one of the most simple and delicious treats you can imagine.

Posted in Biscuits/Cookies/Slices/Bars | 3 Comments

Sang Choi BaoPrint Recipe

I have decided to bring a little Sang Choi Boa into your day. But it has to be quick because I have three hungry mouths to feed and they are patiently waiting for me to finish.

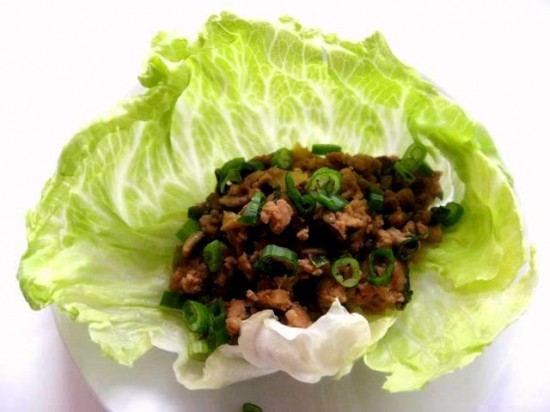
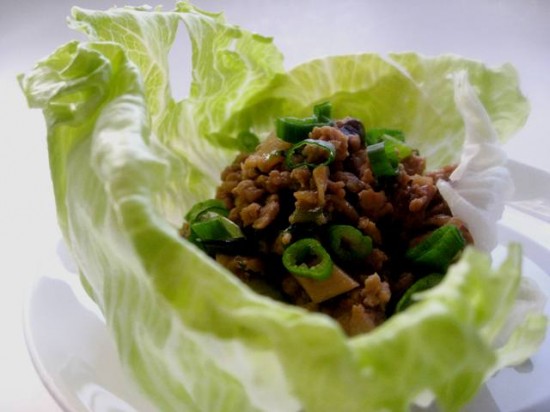
Sang Choi Bao is a mince mixture made up of vegetables and usually a pork, it is spooned into a lettuce leaf, rolled and eaten. It has an irresistible combination of textures and flavours, crisp and crunchy vegetables with succulent pork and a subtly sweet and slightly spicy taste. It is traditionally part of a Cantonese banquet but makes for a nice light meal on its own – like we are having tonight (in just a minute guys!)

Sang Choi Bao literally means ‘lettuce delights’ and I assure you, you will be delighted.

1 large iceberg lettuce, leaves washed and trimmed to form cups
1 teaspoon of Sesame Oil
1 tablespoon of Peanut Oil
500 grams/1 pound Pork Mince (not lean)
2 teaspoons Garlic, minced
2 teaspoons Ginger, grated
50 grams oyster mushrooms, coarsely chopped
50 grams shiitake mushrooms, coarsely chopped
2 tablespoons Chinese mustard greens (Gai Choy), chopped
1/2 cup Bok Choy, coarsely chopped
1 tin Water Chestnuts (net weight 230 grams/8 ounces), finely chopped
6 long shallots (scallions in the USA), sliced into rounds
1 small red chili, chopped finely (optional – use only if you would like a little heat)
3 tablespoons shao xing cooking wine
1 tablespoon sugar
2 tablespoons light soy sauce
¼ cup oyster sauce

Place lettuce cups in a bowl of cold water and refrigerate for 30 minutes to crisp.

Heat the oils in a wok over a high heat and when smoking, add the pork, garlic and ginger and stir-fry until browned. Add bok choy, mustard greens, mushrooms, water chestnuts and chilli (if you are using it) and toss well. Add the shao xing wine then add the caster sugar and soy and stir, simmer till most of the liquid has evaporated. Finally, add the oyster sauce and half the shallots continue to stir-fry a further minute.

Remove lettuce cups from refrigerator, pat dry and place onto a serving dish. Serve the Sang Choi Bao mince on a platter, sprinkle with remaining shallots. Simply spoon the mince into the lettuce cups, roll up and eat – with your fingers of course!

Notes: Use my measurements of the spices and vegetables as a guide only, feel free to find your own balance of flavours and make it to suit your palatte – Sang Choi Bao is a very adaptable dish.

Posted in Mains, Meat, Starters | Leave a comment

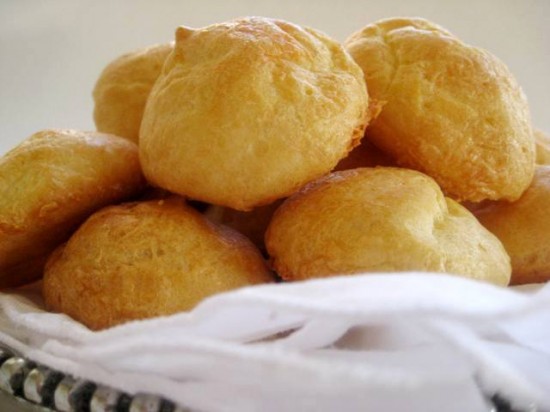
GougèresPrint Recipe

 
A couple of weeks ago I had the good fortune of getting a spot of sunshine in Miami. It was a short getaway but believe me, that sun – for 4 whole days, was just magical.

One of the highlights of our trip was dinner at the Betsy Ross Hotel. The restaurant is called BLT (Bistro Laurent Tourondel) and it was perfect in every sense. It is American Steakhouse meets French Bistro in a traditional colonnial setting. Just before dinner we were treated to Gruyère Popovers and they were so good that I, (who doesn’t usually eat bread before dinner because it fills me up) polished off two. Mind you, I don’t think you can classify a popover as bread, can you?!

We left Miami a little bronzed and feeling a whole lot healthier – I spent the next couple of days going through recipes and fiddling around the kitchen. These popovers seemed very similar to yorkshire puddings but more like Gougères (pronounced ‘goozhair’) – which are a savoury pastry from Burgundy (France), traditionally made with Gruyère.

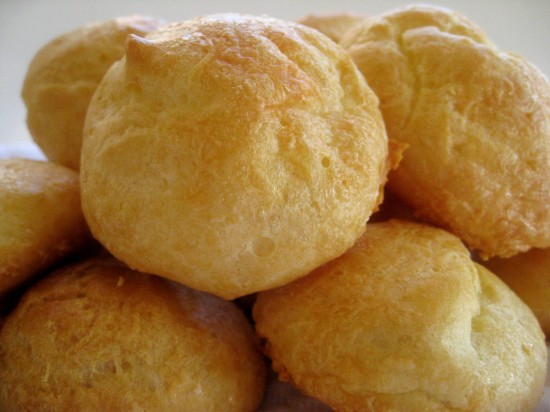
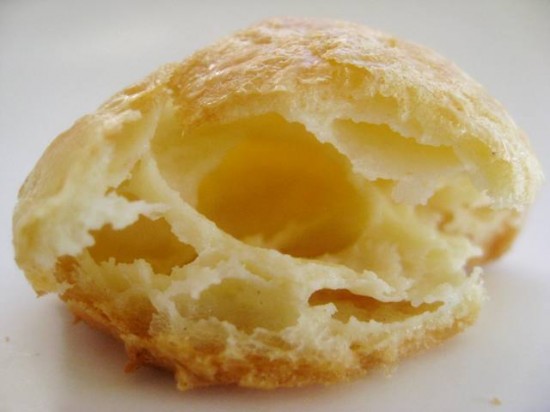
They are basically a baked choux pastry with a touch of Gruyère – so very simple. I imagine they would be delicious in all manner of ways but I think they would work really well as something to nibble on with a glass of champagne, a beer – or any aperatif in fact. And if the plain, golden and crisp crust, infused with gruyere is not enough – then perhaps with a little slice of ham (off the bone of course!) and a smear of mustard.

Time for you to get your head oven – for all the right reasons!

80 grams/2.8 ounces butter
80 grams/2.8 ounces plain (all purpose) flour
3 large eggs (no bigger)
200 mls water
40 grams/1.4 ounces quality Gruyère or Comté cheese plus extra for grating over the top
A pinch of salt

Heat the water, butter and a pinch of salt in a saucepan. When the butter has melted, whisk until the ingredients are completely incorporated. Pour the flour into the saucepan in one go and mix vigorously with the whisk so that all the flour is moistened with the butter mixture. What you will have is pâte à choux (translated that means ‘cabbage dough’).

Cook your pâte à choux for a further 3 minutes, stirring constantly – the mixture should pull away from the sides of your saucepan. Turn the heat off and let cool for a few minutes then add the eggs and mix vigorously until you obtain a smooth, fluffy dough (you can actually pour the mixure into a food processor or stand mixer and mix the eggs in that way) Mix in the 40 grams of cheese and whisk till incorporated.

Heat oven to 200°C and place oiled parchment paper on a baking tray. Using a pastry bag (or a zip lock bag with a hole cut in one of the bottom corners), pipe the gougère dough into small, regular, evenly spaced rounds about 1 inch in diametre. Ensure there is enough space between the rounds as they will inflate. Sprinkle some grated cheese evenly over the top of the rounds.

Bake the gougères at 200°C until they become nicely tanned, around 15 – 18 minutes. Turn up your oven to its maximum temperature and watch them carefully till they turn golden brown. The intense heat will give them a beautifully crisp crust.

Serve them straight out of the oven.

Notes: You cannot prepare gougères in advance but the pâte à choux only takes 10 minutes to put together. Because it is very quick to make it is important that you have all the ingredients measured and ready to go.

The biggest problem people have with these is that they do not inflate – this can happen for two reasons 1) your pâte à choux is too liquidy, so ensure you use large eggs and not extra large, also ensure you cook the flour in the butter mixture for the full 3 minutes and 2) you do not whisk enough air into the batter which is why I suggest using a mixer to beat in the eggs.

Today’s helper – I can’t help but squeeze those cheeks…

Posted in Nibbles & hors d'oeuvres | Leave a comment

Rose Macarons with Raspberry GanachePrint Recipe

 
I know I am very late to jump on the macaron bandwagon, but here they are – finally. No reason for my trepidation other than the fact I have never made them before. Scaredy cat that I am.

A couple of months ago I was lucky enough to win a copy of Mad about Macarons (thanks to Paris Patisseries) and have been flicking through it every week waiting for some sort of sign. That sign came to me yesterday when I took refuge from a storm in the entrance of La Maison Du Chocolat. While I waited out the pouring rain I had nothing more to do than stare into the window at their macaron display. It was like looking inside a treasure chest – all their pretty pastels and jewel tones, looking so delicate and luscious. Clearly it was time for me to try my hand at these sweet confections.

Surprisingly they were not as difficult as I thought, although I did get my knickers in a knot during the piping process when I realised that they were all different sizes. And then again, when they I thought they look a little haphazard rather than the perfectly round macaron I was striving for. Anyway, there is beauty in irregularity and I eventually saw it in these – somewhat mismatched and sandwiched together with a decadent smear of raspberry ganache.

Thanks to the wealth of knowledge in Mad about Macarons, I am no longer a scaredy cat de macaron. I am going to make more soon and include a step by step guide (because you should try them too!) – I am thinking pistachio or maybe something pretty and purple, I am visualising sugar coated violets…

Macarons
270 grams/9.5 ounces pure icing (confectioners) sugar
180 grams/6.3 ounces almond meal
150 grams/5.3 ounces egg white (aged about 4 days and left out overnight)
100 grams/3.5 ounces caster (superfine) sugar
4-5 drops rose food colouring

Ganache
1/3 cup pouring cream
170 grams/6 ounces white chocolate
3 tablespoons raspberry jam
a few drops of rose food colouring

Line 3 baking sheets with parchment paper and set aside.

Whisk egg whites till soft peaks form, add the caster sugar gradually and beat until glossy firm peaks form. Add food colouring and whisk till incorporated.

Sift the ground almonds with the icing sugar using a medium sieve. Discard and large pieces of almond. Mix well to incorporate the icing sugar and almonds.

Incorporate the beaten eggs whites into the dry ingredients using a large spatula, then works on the mixture using a large scraper. Press down with the scraper, going backwards and forwards along the bottom of you bowl, to press out any oxygen from the whites. Do this for no more than 5 minutes, the result should form a smooth and brilliant mixture that forms a ‘ribbon’ on the scraper. It can also be described as ‘magma like’.

Transfer the mixture to a piping bag with a plain nozzle (1cm round the tip). Twist or clip the bag above the nozzle to stop the mixture from escaping.  Pipe out the desired size of rounds (3cm for your standard medium sized macaron). Leave a good space between each round as they do spread slightly.

Leave for 30 minutes – 1 hour to set. This helps produce the feet that define a macaron. They are ready to go into the oven when they are hard to touch and no mixture sticks to your fingertips.

While they are setting, preheat your oven to 160c/320f. Bake in the centre of the oven, 1 tray at a time for about 10 – 12 minutes. (test after 8 minutes – touch the top of the macaron and gently move your finger side to side), if there is a wobble, cook for 2 – 3 minutes longer till firm.

When ready, leave on the baking tray until cool and then scrape them off carefully with a palette knife.

Meanwhile, for white chocolate and raspberry ganache, bring cream just to the boil in a small saucepan. Remove from heat, add chocolate, stand until melted (5 minutes), stir until smooth and glossy. Add the raspberry jam and a few drops of the rose food colouring (or more should you so desire). Refrigerate until firm yet pliable and spoon into a piping bag with a 1/4 inch nozzle.

Match up the discs in pairs on the greaseproof paper, one row flatside up and one row flat side down. Pipe the filling  onto each upturned shell. Place its partner on top, using a circular motion to squash the shell down on the filling.  Do not use too much filling but use enough so you can see a hint of it between the macarons.

* the use of this recipe and relating material is by kind permission of Waverley Books *

Notes: It is very important to to leave your macarons in the fridge for 24 hours prior to eating to let the filling infuse into the shell. Also, leave them at room temperature for 30 minutes before serving – this will give the macarons their soft inside and crisp exterior.

When it comes to the ganache, it is best to use a concentrated flavour which is why I have used a jam over fresh raspberries. Mixed with a little cream and white chocolate, it creates the perfect filling to infuse into the meringue.

And regarding the egg whites that have been aged for 4 days, this means seperated from the yolk. I was lucky enough to have a fridge full of old egg whites after I made the Crack Pie a week ago.

Source:Macarons from “>Mad about Macarons by Jill Colonna, Ganache recipe is my own

Posted in Biscuits/Cookies/Slices/Bars, Chocolate, Morning Teas/High Teas | 1 Comment

Melted Cheese and Chorizo with Grilled BreadPrint Recipe

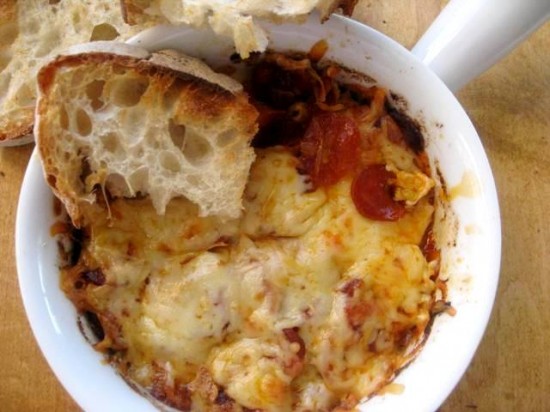
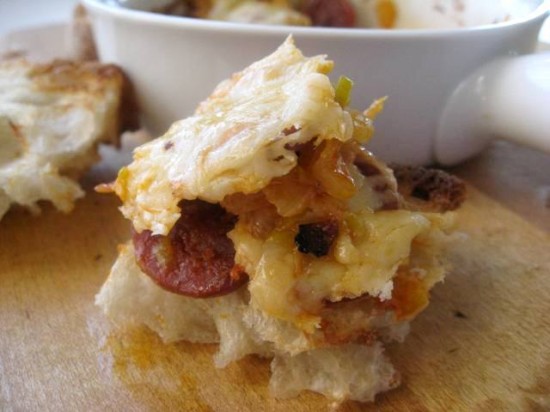
This melted Petit Basque cheese and chorizo dip is one of the more popular dishes from Animal restaurant in Los Angeles. And it’s quite a dish I must say. I would actually liken it more to tapas fare being that it is literally chorizo and cheese atop a thin layer of softened onion and leek. Excellent nonetheless and certainly full of flavour.

It is not the type of thing you might make when you are hosting an elegant champagne-sipping affair, it is more suited to a big sporting get together, a barbeque or something where your beverages are a little more robust. The combination of the chorizo and cheese made me quite thirsty and although I didn’t, I would have loved to have washed it down with a ice cold brew or two.

I know the Super Bowl is done and dusted but here is one to remember for next years big game snacks. Or there are the Academy Awards on tonight – consider this if you are planning a Red Carpet party with your red blooded friends and your drinks of choice are beer, beer and more beer.

2 1/2 tablespoons grapeseed oil, or other neutral oil, divided
2 cups chopped white onions
1 cup (packed) thinly sliced leeks (about 2 small; white and pale green parts only)
1/2 cup dry white wine
8 ounces smoked Spanish chorizo, cut into 1/16-inch-thick rounds
3 cups coarsely grated Petit Basque cheese or Gruyère cheese
Grilled sourdough bread slices

Heat 1 1/2 tablespoons oil in large skillet over medium heat. Add onions; sauté until deep golden brown, stirring often and adjusting heat as needed to prevent burning, 25 to 30 minutes. Sprinkle with salt and pepper.

Meanwhile, heat remaining 1 tablespoon oil in medium skillet over medium heat. Add leeks; sauté 3 to 4 minutes. Add 3/4 cup water; cover and cook until leeks are tender, stirring often and adding more water by tablespoonfuls to moisten as needed, 10 to 15 minutes. Add wine; cook uncovered until leeks are very soft, about 5 minutes longer. Sprinkle with salt and pepper. Combine onions and leeks in small bowl.

Preheat oven to 450°F. Divide onion-leek mixture among 4 small gratin dishes. Top mixture in each dish with chorizo slices, then cheese.

Bake until cheese melts and bubbles, about 15 minutes. Serve hot with grilled bread.

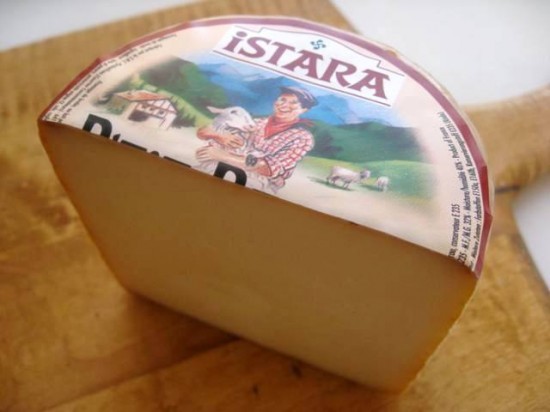
Notes: Petit Basque is a sheeps milk cheese. It is made in the Pyrenees Mountains using the same techniques that shepherds used hundreds of years ago. It is mild with a slightly sweet and nutty taste making it an ideal match with anything from fruit through to cured meats – in this instance chorizo. Also, don’t discount this dip if you don’t drink beer – it would be well suited to a full bodied red as well.

Source: Jon Shook and Vinny Dotolo, Animal, Los Angeles

Posted in Nibbles & hors d'oeuvres | Leave a comment

Baci SemifreddoPrint Recipe


There are many times I have gone to make icecream and read through the recipe to find that I need an icecream maker which I don’t have – so very annoying! I guess I should buy one but I am trying really hard not to cover my kitchen in gadgets – I actually don’t even own a food processor, I make do with my blender and a variety of olde world utensils.

In my latest bout of icecream frustration I decided to go Italian and make a semifreddo. Semifreddo means ‘half cold’, it has the same ingredients as icecream (egg yolks, cream and sugar), it’s just that the technique is different. A sabayon is made with the eggs and sugar which is then folded with a whipped cream. It has a mousse-like texture meaning it doesn’t freeze as hard as an ice cream and the only gadget you need is a spoon – to eat it with.

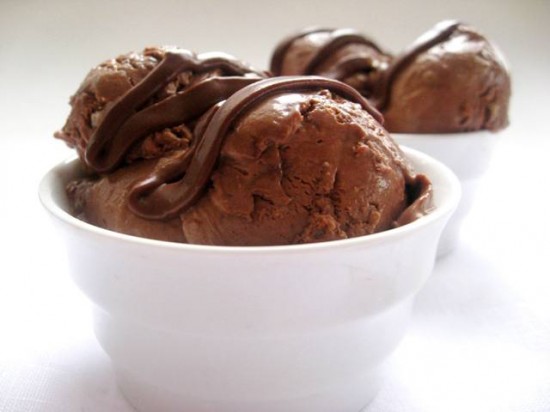
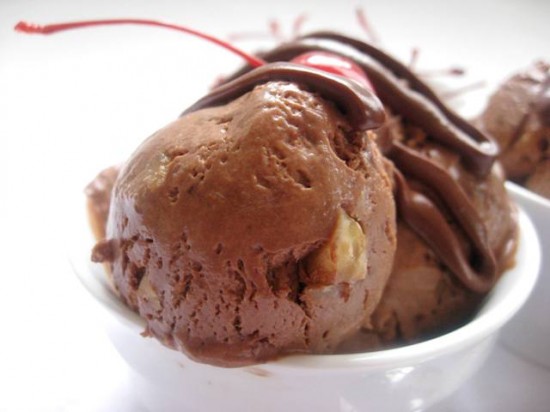
This Baci Semifreddo is so sinfully lush that I am cursing myself for not having tried it out years ago. It is best described as a lightly frozen chocolate mousse with the occasional toasted hazelnut to add a little crunch. We ate quite alot before it was put in the freezer and it didn’t take long for the remainder to be eaten once it was ready.

I will eventually buy an icecream maker, we eat so much of the icy treat at home that I really think it would be worthwhile. Or it could backfire terribly and I will end up in the kitchen every day churning out a new flavour – is that a good thing or a bad thing?

9 egg yolks
250 grams/8.8 ounces caster (superfine)  sugar
Scraped seeds of 1 vanilla bean or 1 tsp vanilla paste
20 mls Frangelico
200 grams/7 ounces dark chocolate (55% cocoa solids), melted, plus extra to serve
2 tablespoons Dutch-process cocoa, sieved
600 mls thickened cream
250 grams/8.8 ounces crème fraîche
150 grams/5.3 ounces roasted hazelnuts, skins removed, coarsely chopped
To serve: maraschino cherries (optional)

Line a 2 litre-capacity mould with plastic wrap or baking paper. 

Whisk yolks, sugar, vanilla seeds and Frangelico in a heatproof bowl over a saucepan of simmering water until mixture is tripled in volume, thick and pale and holds a ribbon (4-5 minutes). Transfer semifreddo mixture to an electric mixer and whisk until cool (2-3 minutes). Add chocolate and cocoa and mix to combine.

Meanwhile, whisk cream and crème fraîche in a bowl until soft peaks form. Fold one-third into egg mixture to loosen mixture, then fold through remaining cream and hazelnuts. Spoon into container, cover, freeze until firm (6 hours-overnight). Makes about 2 litres. 

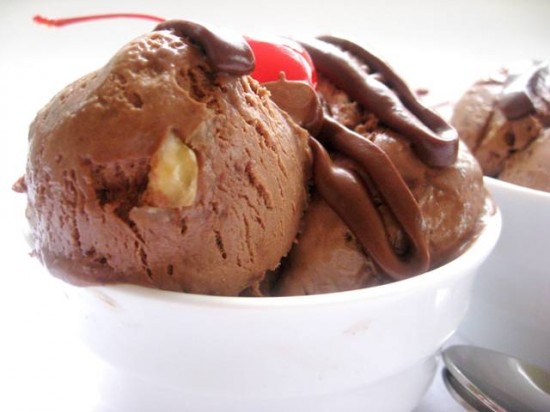
Serve scoops of Baci semifreddo drizzled with extra melted chocolate and topped with a maraschino cherry.

Source:  Lisa Featherby for Australian Gourmet Traveller, January 2010

Posted in Chocolate, Desserts, Frozen Treats | Leave a comment

Goats Cheese Salad with Anchovy DressingPrint Recipe


The most resourced book on my laden kitchen shelves is ‘A Cooks Companion’ by Stephanie Alexander. It is not your typical cook book, it is an encyclopedia of food with chapters based on individual ingredients (ie. Mushrooms, Eggs or Chocolate) – and there are no images. Now, I do admit that photos can be very enticing but it is also quite refreshing not having an picture to compare your creation too. Gone is the pressure to make your dish look like what could be a very styled (or stylised) image put together by professionals – both in and out of the kitchen.

Anyway, I digress – this recipe is from the above mentioned cook book. We had it one night when our Chicago friends, the Flatmans, hosted a dinner party. They are the same people that introduced me to one of the best crostini’s I have ever eaten (Tomato, Olive & Caper Crostini). The Flatmans are quite the kitchen dandy’s and also have the knack for picking out recipes that really rock your culinary world.

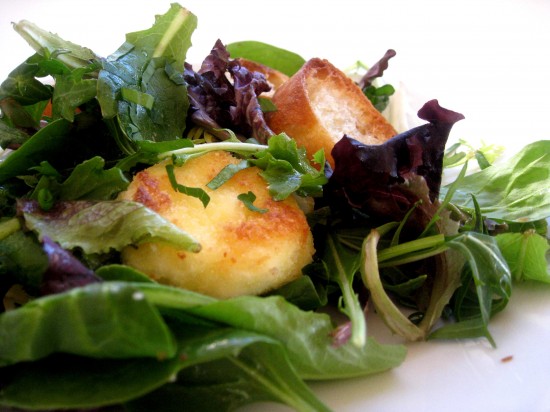
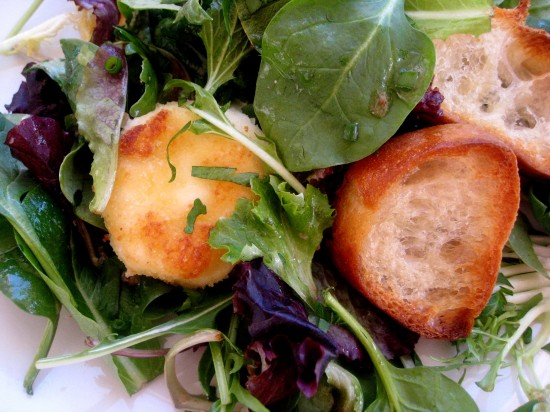
This salad has anchovies, goats cheese and garlic and being that I love all three ingredients it quickly became a regular in our household – usually part of a light dinner with a chilled glass of white. It is delightfully flavoursome and moorish whilst being fresh and light (despite the fact that the goats cheese is sauteed). It can be served as individual portions (4) or as one large salad – either way it will give those taste buds a nice little kick.

8 slices breadsticks
4 tablespoons extra-virgin olive oil
2 cloves garlic
40 grams of butter
1 egg
8 slices fresh goats cheese
1 cup fine fresh bread crumbs
2 anchovies, finely chopped
2 cups small salad leaves, washed and dried
2 tablespoons freshly chopped parsley
2 tablespoons freshly chopped chives
freshly ground black pepper

Brush breadstick slices with 1 tablespoon of the oil. Bake of grill quickly until golden on both sides, then wipe with 1 cut garlic clove and set aside. Whisk the egg lightly and roll each slice of goat’s cheese in it. Press a generous layer of breadcrumbs onto each slice of cheese and refrigerate until needed. Place anchovies in a small bowl resting over a saucepan of simmering water. Once they melt into a cream, remove and keep aside. Roll salad leaves in a clean cloth and refrigerate until needed.

When ready to serve, divide salad leaves between 4 warmed plates. Divide breadstick croutons between salads. Heat remaining butter in a non-stick frying pan and cook crumbed slices of cheese on both sides until golden, turning very gently with a wide spatula. Slip cheeses onto salad leaves. Finely chop remaining garlic clove, add to frying pan and saute for 1 minute. Stir in anchovies, remaining oil and herbs. Remove at once from heat and spoon over salad leaves and cheese. Grind pepper over and serve as a first course.

Notes: The first time I made this, I made the mistake of adding more anchovies – best not too as the flavours were far too overpowering. Stick to the recipe quantities – Stephanie knows best!

Source: Stephanie Alexander – A Cooks Companion via Kim & Shane Flatman

Posted in Salads, Sides, Starters, Vegetarian | Leave a comment

Momofuku Crack PiePrint Recipe


‘Gimme some more
Gimme some more of that stuff, love
Gimme some more
Too much is not enough…’
Numb – U2

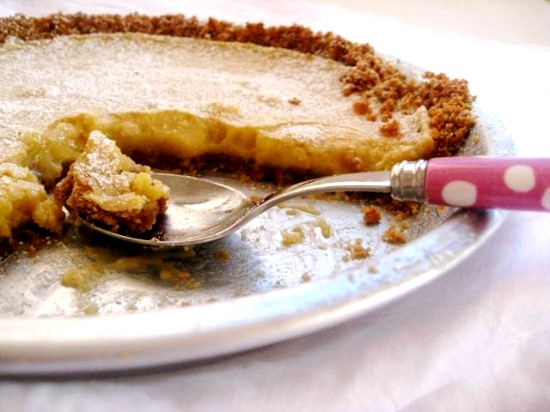
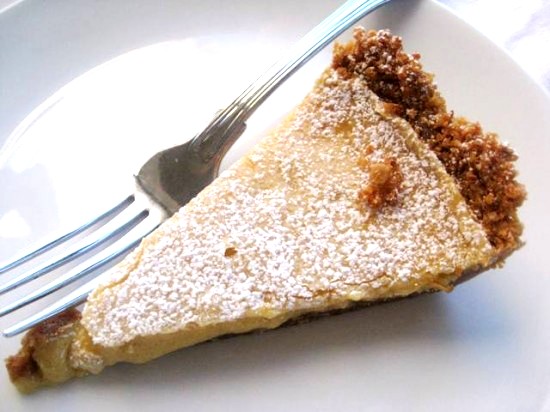
I was listening to U2 whilst I was pottering in the kitchen today and I think there is a chance they may have been eating this pie while penning their song. As its audacious name suggests, Crack Pie is incredibly moorish and one piece will simply not suffice.

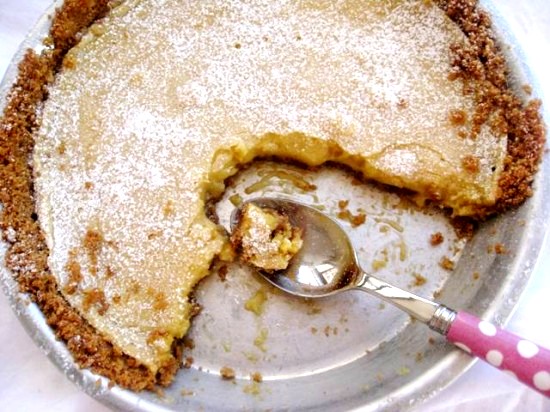
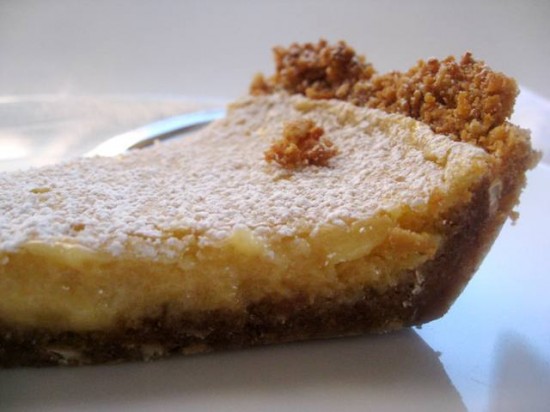
I cannot put my finger on the flavour but I would say it’s almost a 1950’s old school English butterscotch. It has a slightly salty oatmeal shell which is filled with something so gooey, sweet and luscious it will send you into a spin.


Crack Pie was created by Christine Tosi of the Momofuku Bakery and Milk Bar. She has created a number of spectacular desserts and treats – the Chocolate Malt Cake being one of them. Her Crack Pie has become so famous that if you live in the USA you can purchase one online and have Fedex deliver it. It’s name is even trademarked. Her advise to those who eat it is:

‘With a spoon.’

‘While it’s still in the pie plate.’

‘With your favorite someone.’

The recipe makes two 10 inch pies, and as U2 sang – too much is not enough!

Oatmeal Cookie For Pie Shell
2/3 cup plus 1 tablespoon flour
Scant 1/8 teaspoon baking powder
Scant 1/8 teaspoon baking soda
1/4 teaspoon salt
113 grams/4 ounces softened butter
1/3 cup light brown sugar
3 tablespoons sugar
1 egg
1 cup rolled oats

Heat the oven to 375 degrees. 

In a medium bowl, sift together the flour, baking powder, baking soda and salt. 

Cream the butter, brown sugar and sugar until light and fluffy. Whisk the egg into the butter mixture until fully incorporated. Stir in the flour mixture until fully combined. Stir in the oats.

Spread the mixture onto a 9-inch-by-13-inch baking sheet and bake until golden brown and set, about 20 minutes. Remove from heat and cool to the touch on a rack. Crumble the cooled cookie to use in the pie shell.

Pie Shell
crumbled cookie
56.5 grams/2 ounces butter, melted
1 1/2 tablespoons brown sugar
1/8 teaspoon salt

Combine the crumbled cookie, butter, brown sugar and salt in a food processor and pulse until evenly combined and blended (a little of the mixture clumped between your fingers should hold together). Divide the crust between 2 (10-inch) pie tins. Press the crust into each shell to form a thin, even layer along the bottom and sides of the tins. Set the prepared crusts aside while you prepare the filling.

Filling
1 1/2 cups sugar
3/4 cup plus 3 tablespoons light brown sugar
1/4 teaspoon salt
1/3 cup plus 1 teaspoon milk powder
1 cup butter, melted
3/4 cup plus 2 tablespoons heavy cream
1 teaspoon vanilla extract
8 egg yolks
icing (powdered) sugar to garnish

Heat the oven to 350 degrees.

Whisk together the sugar, brown sugar, salt and milk powder. Whisk in the melted butter, then whisk in the heavy cream and vanilla. Gently whisk in the egg yolks, being careful not to add too much air. Divide the filling evenly between the 2 prepared pie shells.

Bake the pies, one at a time, for 15 minutes, then reduce the heat to 325 degrees and bake until the filling is slightly jiggly and golden brown, about 10 minutes. Remove the pies and cool on a rack.

Refrigerate the cooled pies until well chilled. Serve cold, and the filling will be gooey. Dust with powdered sugar before serving.

Note: While it is suggested you eat this pie chilled, it is also very nice at room temperature.

Posted in Desserts, Recipes, Tarts/Flans/Quiches/Pies | 3 Comments

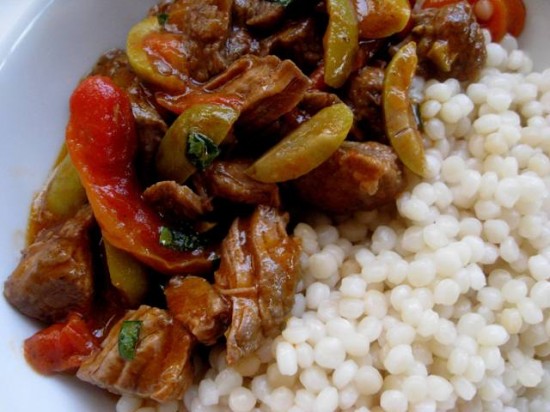
Lamb Ragout with Olives and PeppersPrint Recipe


Mr Man likes to shop and oddly enough he loves to shop at large grocery stores – you know the stores that bring in huge amounts of whatever is flooding the market (not a bad thing because the produce is always great). Last weekend his pilgrimage took him to a place that had just bought in truckloads of lamb shoulder – hence our fridge-full.

As you would know by now, I love my lamb and have a few lamb recipes that I just adore – because of this I find it very hard to venture out of my comfort zone and try new lamb dishes. I also find it hard to steer away from the flavours that I think are best suited to lamb – those being garlic, rosemary and anchovies. But sometimes the ‘if it ain’t broke, don’t fix it’ rule has to be ignored and for the sake of blog monotony, my family (‘not this again mum!’) and the lamb shoulder that occupied most of my refrigerater this was the case.

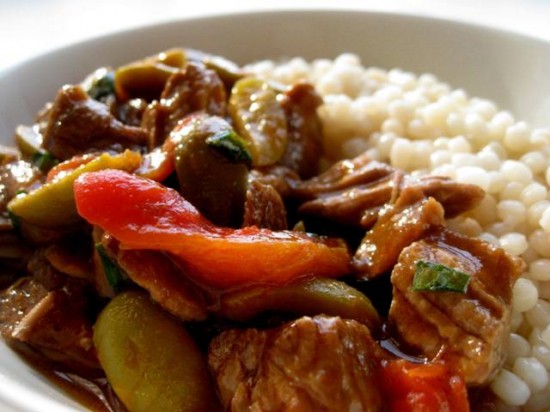
The slow braising of the lamb makes it so incredibly tender and flavoursome, it is complimented perfectly with the briney taste that the olives impart and the almost sweet flavour from the roasted peppers – a very hearty mediterranian-style dish. The Israeli couscous is the perfect accompaniment although I can imagine it would also be well suited to some sort of potato side – even a mash.

The creator of this dish suggests serving it with a good Shiraz/Syrah – I could think of nothing better!

1/4 cup canola oil
1.8 kilos/4 pounds boneless lamb shoulder, cut into 2-inch chunks
Salt and freshly ground black pepper
2 large white onions, coarsely chopped
4 celery ribs, coarsely chopped
3 carrots, coarsely chopped
1/4 cup tomato paste
1 cup dry red wine
10 cups water
1 tablespoon unsalted butter, softened
1 tablespoon all-purpose flour
3/4 cup sliced pitted Picholine olive
3/4 cup sliced roasted red peppers (capsicum)
2 tablespoons chopped tarragon
2 cups Israeli couscous

Preheat the oven to 250°. In a large enameled cast-iron casserole dish, heat the oil until shimmering. Season the lamb with salt and black pepper and add it to the casserole. Cook over moderately high heat, turning the pieces once or twice, until deeply browned, 15 to 18 minutes. Transfer the lamb to a platter.

Add the onions, celery and carrots to the casserole. Cover and cook over low heat just until softened, about 5 minutes. Add the tomato paste and cook over moderately high heat, stirring until the paste is lightly browned, about 5 minutes. Add the wine and cook, scraping up any browned bits stuck to the pot, until nearly evaporated, about 5 minutes. Add the water, season with salt and bring to a boil. Return the lamb and any accumulated juices to the casserole. Cover and braise in the oven for about 2 1/2 hours, until tender.

Transfer the lamb to the platter. Remove any fat and gristle and coarsely shred the meat. Strain the broth and discard the solids. Skim the fat from the surface of the broth. Return the broth to the casserole and boil until reduced to 4 cups, about 30 minutes.

In a small bowl, mix the butter with the flour to form a paste; whisk it into the broth and simmer until thickened, about 5 minutes. Return the lamb to the sauce. Add the olives, red peppers and tarragon and keep warm.

Bring a large pot of salted water to a boil. Add the couscous and cook until tender, about 5 minutes. Drain the couscous and transfer to shallow bowls. Spoon the lamb ragout over the couscous and serve.

Notes: The braising is best done the day or evening before you serve it – it will allow the flavours to evolve.

Source: Jason Franey for Food & Wine

Posted in Mains, Meat | Leave a comment