Warm Wild Mushroom Salad with Soft Herbs, Pecorino, and HazelnutsPrint Recipe

Can I be forgiven if I sneak off without my usual couple of paragraphs of diatribe? I am sick you see, I have a nasty cold and I have been losing my lustre as the morning has progressed. But I just had to post this today in case you were looking for inspiration for tonights dinner.

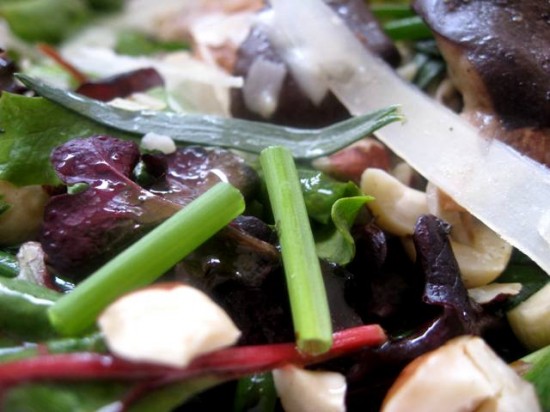
I am going to leave you with a couple of words to best describe this creation (that is as wonderful as it sounds), and they are; packed with flavour (so many flavours – it’s creator, Suzanne Goin is right in saying each mouthful will taste different), decadent, indulgent, tender and crisp.

Okay, more than a few words I know, but I just had to get the message across – this salad is sensational!

Now, back to bed for me, have great weekend!

Ingredients
1/2 cup blanched hazelnuts (no skins)
2 tablespoons finely diced scallions (shallots)
3 tablespoons sherry vinegar
9 tablespoons extra virgin olive oil
1 kilo/2 pounds wild mushrooms, such as chanterelles, black trumpets, or hedgehogs, cleaned
2 tablespoons unsalted butter
2 teaspoons thyme leaves
170 grams/6 ounces mixed salad of treviso, dandelion greens, and frisée, (or any other leafy green), washed
¼ cup tarragon leaves
¼ cup chervil sprigs
½ cup flat leaf parsley leaves
¼ cup of ½ inch chive batonnets
¼ cup sliced scallions (shallots)
¼ pound wedge Pecorino di Grotta or other pecorino
Sea salt and freshly ground black pepper

Preheat oven to 375f.

Toast the hazelnuts on a baking sheet 8 – 10 minutes, tossing them once or twice, until they smell nutty and are a light golden brown. Let them cool, then chop the nuts coarsely.

Place the diced shallots, sherry vinegar, and ½ tsp. salt in a bowl, and let sit for 5 minutes. Whisk in 5 Tbsp. olive oil and set aside.

If the mushrooms are large, tear them into smaller (1 – 1½ inch) pieces. (They’ll shrink once they’re cooked, so don’t make them too small.)

Heat a large sauté pan over high heat for 2 minutes. Add 2 Tbsp. olive oil and heat another minute. Swirl in 1 Tbsp. butter, and when it foams, scatter half the mushrooms in the pan. Season with 1 tsp. thyme, ¾ tsp. salt, and a healthy pinch of pepper. Sauté the mushrooms about 5 minutes, stirring occasionally, until they’re tender and a little crispy. They should not be soggy. (The cooking time will depend on the particular mushrooms you use.) Transfer the cooked mushrooms to a plate, and repeat with the second batch.

Meanwhile, place the salad and herbs in a large salad bowl.

When the second batch of mushrooms is done, add the first batch back to the pan. Cook for another minute or two to heat thoroughly, then toss in the sliced shallots. Spoon the hot mushrooms over the salad. Return the pan to the stove and add three-quarters of the vinaigrette, swirling the pan to heat it. When the dressing is very warm, pour it over the salad. Season with ¼ tsp. salt and freshly ground black pepper. Toss carefully to dress the salad and mushrooms, and taste for seasoning. You may need a little more salt, pepper, vinaigrette, or straight sherry vinegar.

Arrange half the salad on a large platter. Use a vegetable peeler to shave some pecorino over the salad, and sprinkle half the hazelnuts over that. Place the remaining salad on top, and finish with shavings of cheese and the rest of the nuts.

Notes: This salad has quite a few steps and involves quite a bit of prep so make sure everything is chopped and ready to go before you start. Also, if you cannot get your hands on the mushrooms specified then any will do – even plain brown mushrooms work really well.

Source: Sunday Suppers

Posted in Salads, Sides, Vegetarian | Leave a comment

Mint Choc Chip Ice CreamPrint Recipe

I finally bought myself an ice cream maker – wahoo! And after using it a couple of times, I am wondering how my lets-eat-ice-cream-like-crazy family survived without one. Can I tell you that this machine is worth every penny and every single thing I have made has been better than fantastic.

Yes, I am fully aware that I have previously mentioned I am not a gadget person but I am totally prepared to create a little space in my kitchen for this blessed machine. Just as long as it’s happy – I want it to feel as though its part of the family.

I began my venture into frozen treat land with a blood orange sorbet and the following night got a little creative, adding some Campari. I will post the recipe soon, it was so good. Anyway, I eventually decided to venture into the custard style of icecreams and wanted to do something classic – hence the mint choc chip.

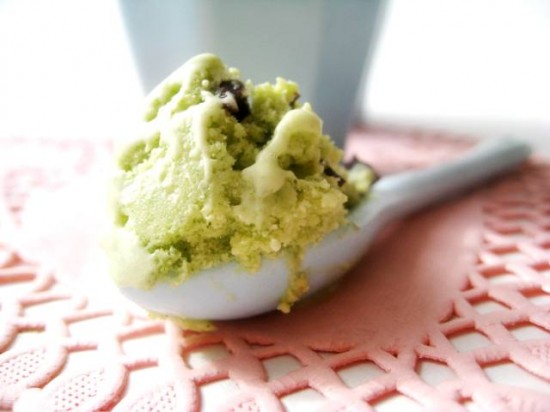
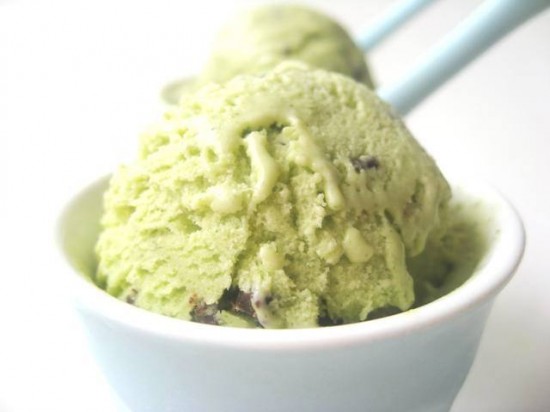
This Mint Choc Chip Ice Cream is intensely minty being that I blended the mint into it after steeping. You can, of course, discard it and have a milder mint flavour but we are fans of that really strong and fresh, minty burst. And rather than mix in shards or chips of chocolate we opted to melt it and drizzle it through the ice cream  – making the chocolate bits a little finer.

I have only had this machine for a week but the last time I made this icecream (two days ago) I had no chocolate and threw in some broken Oreo’s – fantastic! I think peppermint patties would also work really well – anything really, as long as it has a scrap of chocolate on it for that classic mint & chocolate combination. The sky is your limit and the world is your oyster – Mint Choc Chip is only the beginning, over to you…

Ingredients
2 cups full cream (whole) milk
2 cups whipping (heavy) cream
1 cup granulated suagr, divided
pinch of salt
2 cups of packed fresh mint leaves (around 40 grams/1.4 ounces)
5 large egg yolks
140 grams/5 ounces dark chocolate

Whisk together milk, cream, half the sugar and the salt – place into a medium sized saucepan and bring to the boil over a medium heat. As soon as it starts to boil, remove from heat and add the mint leaves. Let steep for 20 to 30 minutes. After the steeping process you can opt to discard the mint leaves, however if you would prefer a fresher and stronger mint taste, then place the contents of your saucepan into a blender and blend for a good 5 minutes, until the mint is completely broken down (an immersion blender would work well if you have one, however I used an ordinary blender which was fine).

Once you have blended the mint leaves (or discarded them), place the mixture back in the saucepan and rewarm over a low heat. Meanwhile, whisk the egg yolks with the remaining sugar until pale and thick. Once the mixture in the saucepan is almost ready to boil, add the egg mixture in a slow and steady stream. Using a wooden spoon, stir the mixture constantly over a low heat but do not allow it to boil. After a few minutes the mixture should thicken and coat the back of the spoon – remove from heat immediately. It is important that the mixture does not boil because the eggs will overcook.

Pour the mixture through a fine mesh strainer and leave to come to room temperature. Cover and refrigerate for 2 hours at least, preferably overnight. From this point churn as per the directions of your ice cream maker.

Whilst the ice cream is churning, melt the chocolate over a double boiler. Once the ice cream is ready, spoon a layer into a container, drizzle with melted chocolate in random lines, spoon over more ice cream and drizzle again – do this until the chocolate and ice cream are all in the container. Let the chocolate set for a minute (or two) and then stir vigerously, breaking the chocolate into small pieces. Seal the container and refrigerate for a couple of hours.

Notes: If you do decide to add another form of chocolate (such as crushed cookies or Peppermint Patties) then 1 cup should suffice. Add this in during the last two minutes of the ice cream being churned in the machine.

Posted in Chocolate, Desserts, Frozen Treats | 2 Comments

Bakewell SlicePrint Recipe


I could have quite happily stayed in bed today – curled up under the covers, thinking about this and that. Contemplating life, wondering how I might get my hands on a couple of bottles of my new favourite (and very scarce) Italian wine, or if I should attempt fresh pasta this weekend – maybe even planning my Spring wardrobe.

Which brings me to Spring. Spring, where are you? It is cold and it is raining – half an hour ago it was snowing! On the weekend I packed away my snow boots and my down jacket only to unpack them again this morning. Everything is grey – still! Please, I need some sunshine, some warmth on my face and I want to wear strappy shoes again.

Obviously, I had to get up and get breakfast for the girls but I did the next best thing to staying in bed on a rainy day and that was bake something to have with a cup of tea – it is all about dreary day comfort afterall.

The Bakewell Slice was perfect and its combination of shortcrust pastry, frangipane and raspberry jam certainly did keep my Winter Blues at bay – for today. It is sweet and buttery and thoroughly delicious. So delicious that I might disregard the ‘no crumbs in bed’ rule and have some in bed tonight with a cup of tea.

Base
225 grams/7.9 ounces butter, cubed
60 grams/2.1 ounces icing (powdered) sugar
Pinch salt
225 grams/7.9 ounces plain flour

Filling
150 grams/5.3 ounces butter
150 grams/5.3 ounces ground almonds
150 grams/5.3 ounces caster (superfine) sugar
4 eggs
325 grams/11.5 ounces raspberry jam
60 grams/2.1 ounces flaked almonds

Sieve the flour, icing sugar and salt into a mixing bowl, combine and then add the butter, work with your fingers until it becomes a crumbly mixture, just about coming together (you can actually do this in a food processer too).

Line a 9″ x 12″ baking tray with foil and then tip the mix out onto it , pressing down firmly to form an even layer.  Bake this in the oven at 180c/360f , for 20 minutes or until it starts to turn a pale golden colour.

Meanwhile, melt the butter and set aside to cool slightly. Toast the flaked almonds in a dry pan till lightly golden and set aside also. Combine the almonds, flour and eggs in a bowl with a whisk.

When the base is cooked, remove from oven and let sit for 3 minutes before spreading it evenly with jam. Pour the slightly cooled butter into the almond mixture and whisk until blended.  Pour this over the jam covered base and top with the toasted flaked almonds. Bake for a further 35 minutes. 

Allow to cool before cutting into around 16 peices.

Source: Nigella Lawson

Posted in Biscuits/Cookies/Slices/Bars, Morning Teas/High Teas, Picnic Food | 3 Comments

Braised Veal Rolls in Tomato Sauce (Braciole di Vitello)Print Recipe

Our Saturday night dinner-in couldn’t have been nicer. It was one of those crazy weeks, Mr Man working long hours and the girls having alot on – which meant I did too. So it was nice to have a family dinner at home and just do nothing.

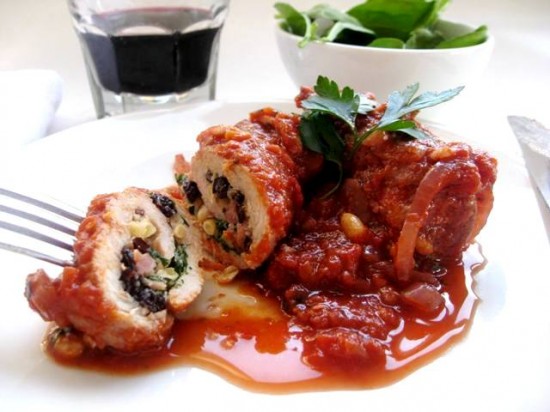
This veal dish is relatively simple and the flavours are bold, qualities that I find in alot of Italian recipes I love. The original recipe called for equal amounts of wine and tomato – I changed this slightly because I thought the wine might overpower the flavours in the tomato sauce and I think I made the right decision. We ate this with a parmesan polenta and green salad, had the obligatory Saturday night glass of wine and were in bed by 8.00pm – perfect!

Ingredients
12 thin slices of veal, shoulder or leg, pounded to 1/4-inch thickness
Salt and pepper
1/2 cup pine nuts, toasted in a 400°F oven for 2 minutes
1/2 cup currants
1/2 cup freshly grated pecorino
3 ounces prosciutto, cut into 1/8-inch dice
1 cup Italian parsley leaves, coarsely chopped
4 garlic cloves, crushed
1 egg
1/4 cup extra-virgin olive oil
2 ounces pancetta, cut into 1/8-inch dice
1 large Spanish onion, thinly sliced
3 cups Basic Tomato Sauce
1 cup red wine

Season the veal with salt and pepper. In a medium bowl, combine the pine nuts, currants, pecorino, prosciutto, parsley and garlic. Add the egg and mix well. Divide the pine nut mixture among the 12 veal pieces, leaving a 1/2-inch perimeter uncovered. Roll each piece of veal tightly and bind with butcher’s twine to ensure that the filling stays intact.

In a large casserole or Dutch oven, heat the olive oil until almost smoking. Add the pancetta and sauté for 2 minutes. Add the onion and sauté for 2 minutes. Remove the pancetta and onion with a slotted spoon, reserving on a plate. Add the veal pieces and brown them on all sides, then remove to a plate, working in batches if necessary to avoid overcrowding the pan. When all of the veal has been browned, add the tomato sauce and wine and bring to a boil, scraping the bottom of the pan to loosen the browned bits. Reduce to a simmer and add the veal, onions and pancetta. Cover tightly and simmer for 1 hour. Allow to rest 10 minutes off the heat before serving.

Notes: If you do prefer a stronger wine flavour then change the quantity of red wine to 2 cups and reduce the tomato sauce to 2 cups.

Source: adapted from Mario Batalli

Posted in Mains, Meat | 3 Comments

Basic Tomato SaucePrint Recipe


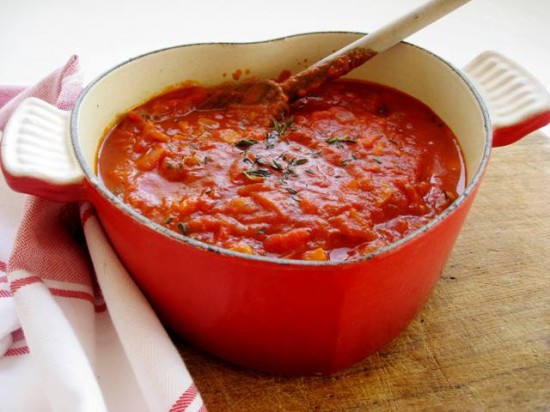
When I first left home, Tomato Sauce was the only thing I really ever made and I thought I was quite the cook – seriously. I poured it onto pasta and gnocchi on more occasions than I care to remember. It was the dish I served at dinner when I had friends over and the dish I ate alone whilst pondering things a 20 year old ponders.

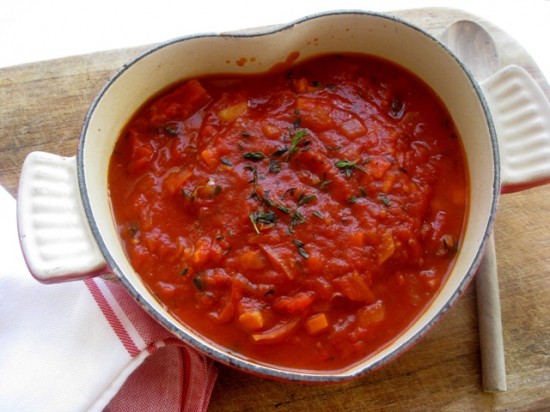
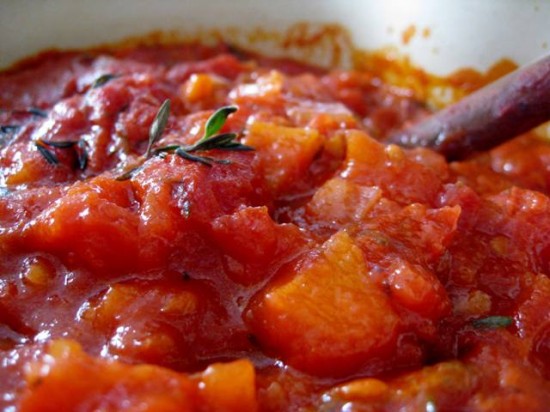
I still have my own recipe but I recently made this one from Mario Batali, and it was so good I thought I should share it with you (I am also using it for a veal dish tomorrow). It is not that dissimilar to my original tomato sauce, it just has thyme instead of basil which I think I prefer.  Mr Batalli also adds carrots which I think is a little odd but he is Italian and I am not.

You say tomato, I say tomahto – now you too can have your own jar of this delicious and rich tomatoey sauce to play with.

Ingredients
1/4 cup extra-virgin olive oil
1 Spanish onion, chopped in 1/4-inch dice
4 garlic cloves, thinly sliced
3 tablespoons chopped fresh thyme leaves, or 1 tablespoon dried thyme
1/2 medium carrot, finely shredded
Two 28-ounce cans peeled whole tomatoes, crushed by hand and juices reserved
Salt

In a large heavy based saucepan, heat the olive oil over moderate heat. Add the onion and garlic and cook until soft and light golden brown, 8 to 10 minutes. Add the thyme and carrot and cook 5 minutes more, until the carrot is quite soft. Add the tomatoes and juice and bring to a boil, stirring often. Lower the heat and simmer for 30 minutes. Season with salt and serve.

Notes: This sauce can be refrigerated for 1 week or frozen for 6 months.

Source: Mario Batalli

Posted in Sauces/Dressings/Condiments | 1 Comment

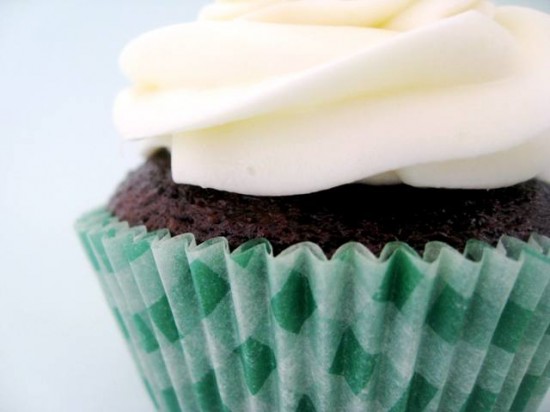
Chocolate Guinness Cupcakes & Whiskey Cream IcingPrint Recipe


I have a fraction of Irish blood in me so I always feel like I should celebrate St Patricks day in some small way. I have never been one to partake in an all day pub crawl, wear a crazy leprechaun hat or drink green coffee (Starbucks – you have alot to answer for!) but I do like a little touch of green here and there.

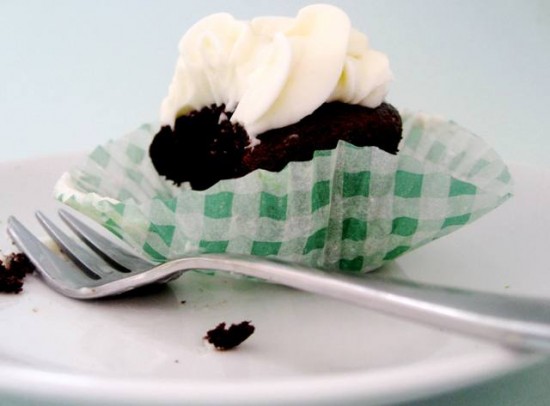
These cupcakes are about as Irish as I am going to get this year, I have tried the recipe before, as a single cake which is just as great. The cake adopts the attributes of a good Guinness being dense and rich, this is perfectly complimented by the cream cheese icing with a tipple of Whiskey. You can barely taste the Guinness with the sugar counter acting any beer bitterness, though it does add a decadent depth to the chocolate.

If you aren’t heading off to the pub or going to watch the St Paddy’s parade, you might want to venture into your kitchen and enjoy some cupcakes, in the meantime I am going to leave you with a classic Irish blessing:

There are many good reasons for drinking,
One has just entered my head.
If a man doesn’t drink when he’s living,
How in the hell can he drink when he’s dead?

whoops! that was the wrong one – sorry, here it is:

These things I warmly wish to you-
Someone to love
Some work to do
A bit o’ sun
A bit o’ cheer
And a guardian angel always near.

Happy St Patricks Day!

Ingredients
1 cup Guinness
4 ounces and two tablespoons of unsalted butter, cut into peices
2 cups caster (superfine) sugar
3/4 cup unsweetened cocoa
3/4 cup sour cream
2 eggs
1 tablespoon vanilla
2 cups flour
2 1/2 teaspoons baking soda

Icing
12 ounces cream cheese
1 3/4 cup icing (powdered) sugar, sifted
3/4 cup whipping (heavy) cream
2 tablespoons Whiskey (or less/more should your tastes prefer)

Heat your oven to 350 degrees. Place 24 medium sized cupcake cases in muffin tins.

Pour the beer into a large saucepan and add the butter, cook over a medium heat, stirring regularly until the butter melts. Whisk in the cocoa and butter and set aside.

Beat the sour cream, eggs and vanilla in a large bowl with a mixer on medium speed until light and creamy (about 5 minutes), blend in the reserved beer mixture. Add the flour and baking soda, beating until just combined. Divide batter amongst the cupcake cases – filling to 2/3’s full.

Bake for 25 minutes or until cake springs back when lightly pressed with your finger. Remove from the oven and allow to sit for 5 minutes, then remove cupcake cases from the tins and place on racks – allow to cool completely before icing.

For icing, beat the cream cheese with a mixer until smooth, add the sifted icing sugar, whiskey and the cream and beat thoroughly until completely blended. Either spread the icing over the cupcakes or put into a piping bag and pipe.

Notes: If you would prefer to cook the cake whole, then pour the mixture into a prepared 9″ cake tin and bake at 350 for 45 minutes.

Source: Nigella Lawson

Posted in Cakes | 2 Comments

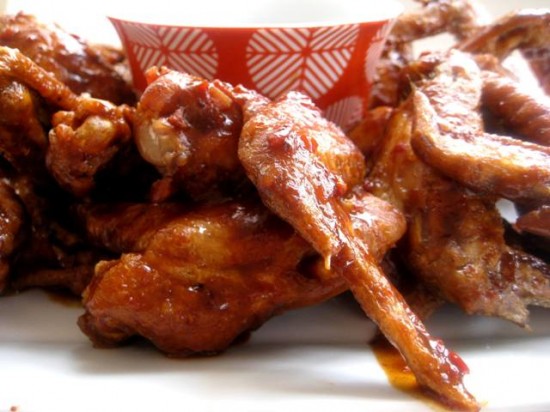
Roy Choi Chinese Chicken WingsPrint Recipe

There is an art to eating chicken wings – in fact if you Google ‘eating chicken wings’ you will find videos that show you how to get the most from your wing, in the quickest amount of time (for those of you who are planning to enter a chicken wing eating competition), with the least mess. It appears that eating chicken wings has become quite an area of expertise.

Back in my single life, chicken wings were something I would buy from a shop in Kings Cross (after a few too many wines at the Baywater Brasserie) and eat on my walk home. I am not too sure what their appeal was and the last time I walked past the said ‘chicken wing shop’ it looked so terrible I had to shudder.

Chicken wings now play a different role in my life. They are more about the enjoyment of food rather than staving off the munchies – being able to put my elbows up on the table and use my fingers to pull away the tender, marinated meat – not having to worry about juices running down my chin and the smears of food across my face (what a lovely picture I am painting!).

This recipe came my way a couple of days ago and if you have a chicken wing hankering then this is for you. They are Chinese and they are terrific – the process is as simple as the marinade is delicious (and spicy – be warned!). Perhaps it’s time to put your good table manners on hold for the evening…

*you must begin this recipe the day ahead*

Ingredients
24 chicken wings (about 2.7kg)
vegetable oil

Chinese Sauce
90 mls hoisin sauce
90 mls chilli garlic sauce
90 mls freshly squeezed orange juice
2 tablespoons oyster sauce
2 tablespoons black bean sauce
2 tablespoons rice wine vinegar
 
Place chicken in a large saucepan with enough lightly salted cold water to cover generously and bring to the boil over medium-high heat. Reduce heat to medium and simmer rapidly until skins start to split (12-15 minutes). Drain, cool to room temperature, then spread in a single layer on two trays lined with absorbent paper and refrigerate overnight for skin to dry.

For Chinese sauce, combine ingredients in a bowl and set aside.

Heat oil in a large saucepan or deep-fryer to 180c. Deep-fry chicken in batches until golden and very crisp (10-12 minutes; be careful as hot oil will spit), drain on absorbent paper, toss in Chinese sauce and serve hot (immediately).

Source: Roy Choi, Kogi, Los Angeles

Posted in Mains, Poultry, Recipes | 3 Comments

Candied Orange PeelPrint Recipe


I find candied peel to be one of those things that I encounter every year or so and when I do, I am reminded what a wonderful thing they are – and so unassuming. They may be small and sweet but they pack a powerful citrus burst with quite a sharp flavour that can catch you unaware.

These sugary little strips can be a sweet embellishment to a cup of herbal tea, they are wonderful dipped in chocolate and served with coffee or just great to have on hand to nibble on every now and then.

Of course, once you have tried orange you will be wanting to expand your candying reportoire and try out lemon and grapefruit too, or any citrus fruit for that matter, go on – knock yourself out!

Ingredients
2 oranges
2 cups of sugar
1 tablespoon light corn syrup
1/3 cup water

Wash the oranges and wipe dry. Using a potato peeler or a sharp knife, remove the outer layer of the orange peel in strips – try to remove as little of the pith as possible. If you do get a little too much pith then scrap it off gently with a knife.

Place the orange peel in a saucepan and cover it with cold water. Place the saucepan on the stove and over a medium heat, bring to the boil. As soon as it boils remove from the heat and strain, discarding the water. Repeat this process two more times and set the peel aside. Cut the peel into strips – you can make them as thin or as thick as you like, I prefer them at about 1/4 inch wide.

In the same saucepan (now empty), place 1 cup of sugar, the corn syrup and the water. Place on the stove and simmer over a medium heat for around 6 minutes. Add in the sliced peel and stir to ensure that the peel is covered with the sugar mixture, let sit over a low simmer (very low) till translucent – around 40 minutes. Remove from heat and strain , reserving the liquid if you wish (it has a myriad of uses).

Place the remaining cup of sugar on a rimmed plate or pie dish. Toss the peel through the sugar and ensure they are all evenly coated – I find it is best to use a fork for this process as it also help seperate them too.

Place on a cake rack to dry for 1/2 hour – they will now be ready to serve or store. They last around 1 month in a sealed container at room temperature. You might also like to dip them in chocolate which really takes them to the next level.

Notes: The 3 step boiling process removes the bitterness from the rind. Also, the syrup that is left from boiling the rind for 40 minutes cans be used as a cordial, to flavour cakes and frostings or even sorbets – amongst many other things.

Posted in Candies, Desserts | 1 Comment

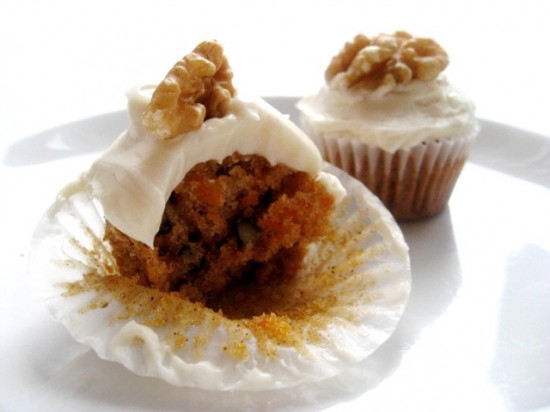
Carrot Cake Cupcakes with Cream Cheese FrostingPrint Recipe

I used to make alot of carrot cakes (a good 20 years ago at least) and I tried many different versions to get the right texture and flavour. It came down to grated carrot versus cooked carrot and I must say that cooked carrot won hands down. I also tried a variety of additions – coconut, sultana’s (raisins), pineapple and even pureed apple – but they were not for me. So I came up with this recipe because, aside from a nice hint of cinnamon, it is plain and it allows the carrot to really shine. It also gave me an excuse to eat cream cheese frosting, which was the real reason I started making carrot cakes in the first place.

Whilst a whole carrot cake is very nice, I find the cupcake version almost irresistable and more importantly the ratio of cream cheese frosting to cake is so much higher. They are also quite picturesque and would make a splendid addition to your picnic basket if you are planning to escape to the countryside – or in our case, the park.

They are simple and they are sweet and if you like carrot cake, you will love these – I promise, right from the bottom of my cream cheese loving heart.

Ingredients
2 cups all-purpose flour
2 cups granulated sugar
1/2 teaspoon salt
2 teaspoons baking soda
2 teaspoons ground cinnamon
1 cup canola oil
3 large eggs, lightly beaten
2 teaspoons vanilla extract
1 cup shelled walnuts, chopped
2 1/2  cups pureed cooked carrots

Cream Cheese Frosting (recipe below)
1/2 cup walnuts peices for the top

Preheat oven to 350 & place small cupcake cases into muffin tins.

Peel and cook carrots until a fork easily can be poked in to them. Drain and mash while still warm with a fork or a potato masher, keeping a little texture. Set aside 2 cups. 

Sift dry ingredients into a bowl and whisk to combine. Add oil, eggs and vanilla. Beat for about 2 minutes. Fold in walnuts and carrots. Pour equal amounts of batter into each cupcake case – filling to 2/3’s. Set in the middle of the oven and bake for about 15 minutes for small cupcakes and 25 for medium sized cupcakes or until a toothpick inserted in middle comes out clean. 

Remove from oven and let sit in the pans for 5 minutes then turn out onto a rack and cool completely. When cool spread the cream cheese frosting on top followed by a sprinkle of chopped walnuts or a walnut half. Alternatively you can pipe the icing but I prefer the rustic look of spread frosting.  

Cream Cheese Frosting
(this amount will allow a very healthy spread of cream cheese on your cupcakes)
16 ounces cream cheese at room temperature
1/3 cup cream 
4 cups confectioners sugar, sifted 
1 tablespoon vanilla extract

Cream together cream cheese, vanilla and cream. Slowly stir in sifted confectioners sugar and continue beating until incorporated and light and fluffy.

Notes: This recipe should make around 40 mini cupcakes or 25 medium sized cupcakes

Posted in Cakes, Morning Teas/High Teas, Picnic Food | 1 Comment

Radicchio Salad with Beets, Pear, Walnuts and RoquefortPrint Recipe

This salad is for my Australian friends being that they are entering into Autumn and this is a serious Autumn salad – in every way. From the sweet roasted onions and beets through to the crisp lettuces and pear – all set off by the creamy and slightly salty (fabulous, fabulous and one more time – fabulous) taste of the Roquefort.

Along with the flavours and textures, this salad also has a compelling range of purple hues that makes for a very pretty platter on your dinner table.

Whoever described salad as ‘rabbit food’ was clearly not talking about this one. Mind you, even a plain iceberg lettuce tastes good with the right dressing – so who knows what they were talking about and it doesn’t matter anyway. For those of you living in the Northern hemmisphere – enjoy the magic that Autumn brings, the falling leaves and golden colours, and try this salad if you get the chance.

Ingredients
3/4 cup walnuts
2 medium red onions, each cut into 6 wedges through the root ends
1/4 cup extra-virgin olive oil, plus more for drizzling
Sea salt
4 medium beetroot
2 teaspoons balsamic vinegar
1 teaspoon dark brown sugar
1 large firm pear such as Bosc—quartered, cored lengthwise and cut into 16 slices
2 tablespoons fresh lemon juice
1 large head of radicchio (around 1 pound), leaves torn into bite-size pieces
1 endive, cored and leaves halved crosswise
Freshly ground pepper
1 cup of Roquefort cheese, crumbled

Preheat the oven to 350°. Spread the walnuts in a pie plate and toast for 8 minutes, until fragrant. Let the walnuts cool, then coarsely chop them.

Increase the oven temperature to 450°. On a rimmed baking sheet, toss the onion wedges with 1 tablespoon of the olive oil and season with salt. Roast the onions for about 25 minutes, turning once, until tender and browned in spots. Let the onion wedges cool to room temperature.

Meanwhile, in a large saucepan, cover the beets with water and bring to a boil. Simmer the beets over moderately high heat until almost tender, about 25 minutes; drain and let cool slightly. Peel the beets and cut each one into 6 wedges. Transfer the beets to a small baking dish and toss them with 1 tablespoon of the olive oil and the balsamic vinegar and brown sugar; season with salt. Roast the beets for about 15 minutes, turning once, until tender. Let the beets cool to room temperature.

In a small bowl, toss the sliced pear with 1 tablespoon of the lemon juice. In a large bowl, toss the radicchio and endive with the remaining 2 tablespoons of olive oil and 1 tablespoon of lemon juice; season with salt and pepper. Mound the salad onto a platter and top with the walnuts, onions, beets, pears and Roquefort. Drizzle with olive oil and serve.

Source: Neil Perry

Posted in Salads, Starters, Vegetarian | Leave a comment