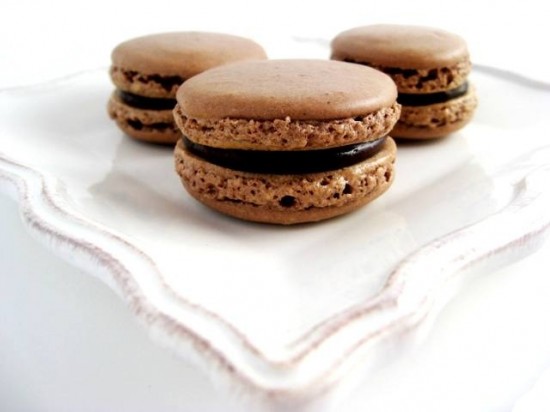
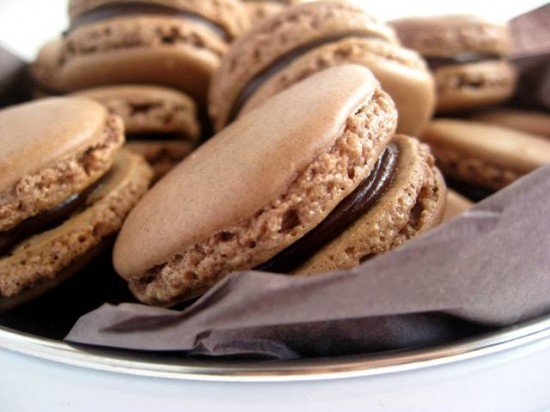
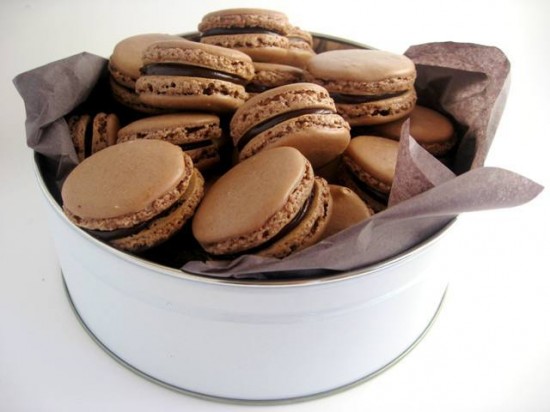
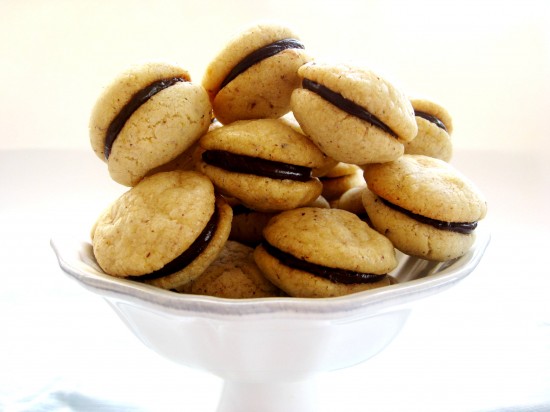
Chocolate Macarons with Chocolate Caramel GanachePrint Recipe

Making macarons is a tiny bit like making icecream, once you do it for the first time you become addicted. Since my initial batch (Rose Macarons with Raspberry Ganache), macarons have been on my mind constantly. I am trying to move on, to try new recipes and break new boundaries but all I do is think about the different macaron combinations I could concoct. Macarons have become an obsession – as has ice cream, but that’s a story for another day.

I know that chocolate macarons don’t seem that ground breaking or creative but I thought they would work very well with a chocolate caramel ganache – and they do. This intensely flavoured ganache brings out the chocolate in the lightly flavoured biscuit and really does make for a sensational sweet something.

This flavour macaron can be a little hard to work with being that the cocoa powder is not really macaron friendly and too much of it will result in cracked biscuits. Apparently some people use food colouring to get depth of colour and as far as the taste goes, it is up to the ganache to really bring the flavour home.

Whether you have ‘been there, done that’ or not, the chocolate caramel ganache is something I urge you to try, it’s a nice little spin on the traditional chocolate on chocolate macaron.

Macarons
270 grams/9.5 ounces pure icing (confectioners) sugar
180 grams/6.3 ounces almond meal
150 grams/5.3 ounces egg white (aged about 4 days and left out overnight)
100 grams/3.5 ounces caster (superfine) sugar
10 grams/.35 ounces dark cocoa

Chocolate Caramel Ganache
65 grams/2.3 ounces caster sugar
½ teaspoon lemon juice
150 ml pouring cream
200 grams/7 ounces milk chocolate, finely chopped

Line 3 baking sheets with parchment paper and set aside.

Whisk egg whites till soft peaks form, add the caster sugar gradually and beat until glossy firm peaks form. Add food colouring and whisk till incorporated.

Sift the ground almonds with the icing sugar and cocoa using a medium sieve. Discard and large pieces of almond and mix well to incorporate.

Incorporate the beaten eggs whites into the dry ingredients using a large spatula, then works on the mixture using a large scraper. Press down with the scraper, going backwards and forwards along the bottom of you bowl, to press out any oxygen from the whites. Do this for no more than 5 minutes, the result should form a smooth and brilliant mixture that forms a ‘ribbon’ on the scraper. It can also be described as ‘magma like’.

Transfer the mixture to a piping bag with a plain nozzle (1cm round the tip). Twist or clip the bag above the nozzle to stop the mixture from escaping.  Pipe out the desired size of rounds (3cm for your standard medium sized macaron). Leave a good space between each round as they do spread slightly.

Leave for 30 minutes – 1 hour to set. This helps produce the feet that define a macaron. They are ready to go into the oven when they are hard to touch and no mixture sticks to your fingertips.

While they are setting, preheat your oven to 160c/320f. Bake in the centre of the oven, 1 tray at a time for about 10 – 12 minutes. (test after 8 minutes – touch the top of the macaron and gently move your finger side to side), if there is a wobble, cook for 2 – 3 minutes longer till firm.

When ready, leave on the baking tray until cool and then scrape them off carefully with a palette knife.

Meanwhile, for the Chocolate Caramel Ganache, combine sugar, lemon juice and 40ml water in a saucepan and stir to combine. Stir over medium-high heat until sugar dissolves, then cook without stirring until dark caramel in colour (3-4 minutes). Remove from heat, add cream and stir to combine. Add chocolate, return to heat and stir continuously until smooth and combined. Cool completely, whisking occasionally until cooled to room temperature (around an hour), then transfer to the refrigerator for another 20 mins to firm up (whisking every 5 minutes). Place in a piping bag fitted with a 1/4″ plain nozzle.

Match up the discs in pairs on the greaseproof paper, one row flatside up and one row flat side down. Pipe the filling  onto each upturned shell. Place its partner on top, using a circular motion to squash the shell down on the filling.  Do not use too much filling but use enough so you can see a hint of it between the macarons.

Notes: It is very important to to leave your macarons in the fridge for 24 hours prior to eating to let the filling infuse into the shell. Also, leave them at room temperature for 30 minutes before serving – this will give the macarons their soft inside and crisp exterior.

Source: Macaron recipe – Mad About Macarons

Posted in Chocolate, Desserts, Morning Teas/High Teas, Picnic Food | 4 Comments

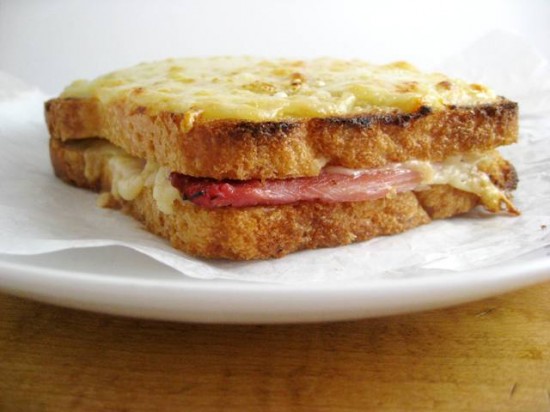
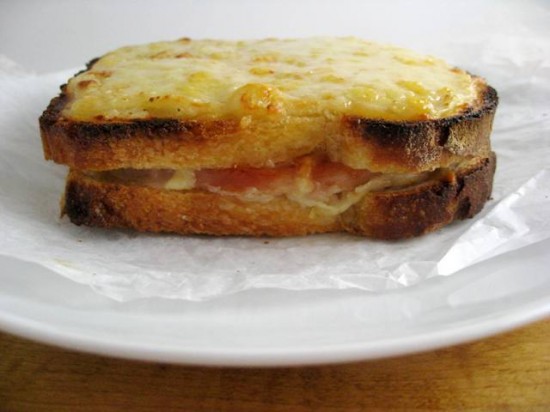
Croque MonsieurPrint Recipe

Many years ago (before Mr Man and children), occasionally my friend Lizzie and I would take off to Melbourne for a couple of days to take in the sites. This involved walking the streets, shopping and more importantly eating and drinking. We always stayed at a little hotel in St Kilda that had a bakery underneath called Il Fornaio, and each morning (usually feeling a little worse for wear) we would go there to read the papers, drink coffee and eat their Croque Monsieurs. Although we went to some great bars and restaurants the night before, this part of our trip was our favourite ritual – it was relaxing, the coffee was great and the croques were sensational, providing the very much needed sustenance we needed to do it all again.

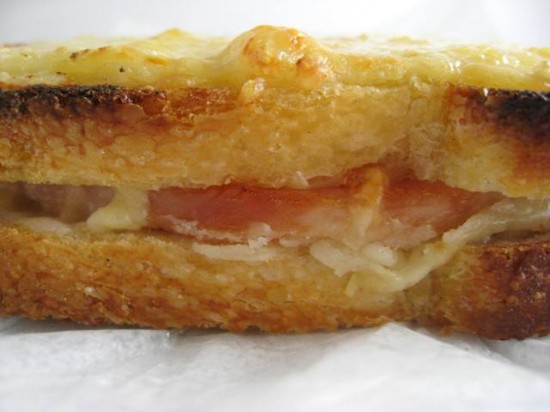
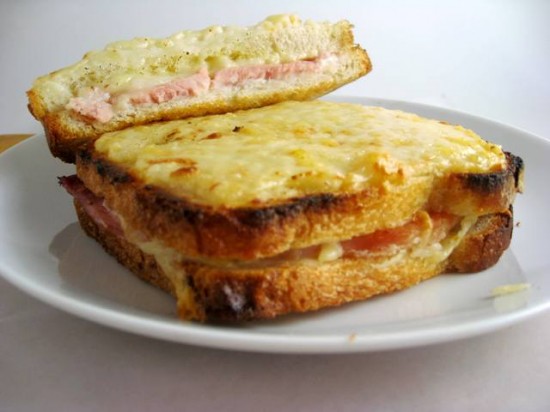
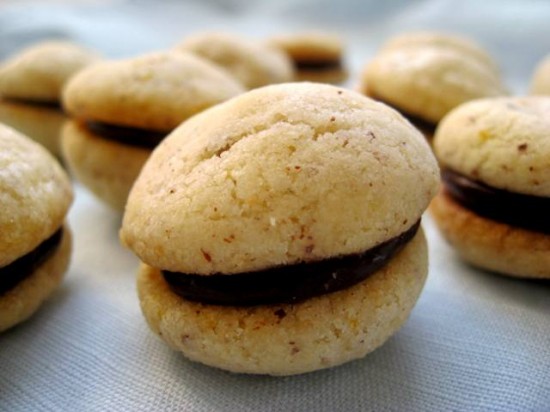
The Croque Monsieur originated in France in 1910 as a fast-food snack served in cafés and bars, it is basically a grilled ham and cheese sandwich with a topping of béchamel sauce. Roughly translated it means ‘Mister Crunchy’ however they are known colloquially as ‘croques’.

There are many variations out there, you can throw on a fried egg and it becomes a Croque Madame, which is also very good. Whether it is for breakfast or late night snacking, these super French sandwiches will really hit the spot – Francophile or not!
Ingredients
8 slices crusty white bread, cut 1cm (approx 1/3 inch) thick
95 grams/3.4 ounces (1/3 cup) Dijon mustard
4 thick slices leg ham
300 grams/10.6 ounces Gruyère, coarsely grated
113 grams/4 ounces butter, coarsely chopped

Béchamel
90 grams/3.2 ounces butter, coarsely chopped
90 grams/3.2 ounces plain flour, sieved
375 mls (1 1/2 cups) milk
30 grams/1 ounce finely grated parmesan
Pinch finely grated nutmeg
salt and pepper to taste

To make the béchamel sauce, melt the butter in a saucepan over medium heat, stir in flour, cook until light golden (a couple of minutes) and remove from the heat. Meanwhile, heat the milk in a separate saucepan over medium-high heat until simmering, then gradually add milk to the butter mixture, whisking continuously. Return to heat, stir until mixture just returns to the boil (around 3 minutes), stir in the parmesan and nutmeg and season to taste. Place plastic wrap directly on the surface of the sauce to prevent a skin from forming and set aside until cooled to room temperature.

Preheat your oven to 400 degrees. Line a sheet pan with parchment paper and brush with 1/2 of the melted butter. On a work surface, place 4 slices of bread in a single layer, spread with a thin layer of mustard, followed by a thick layer of béchamel, the ham (equally divided) and then half of the grated gruyere (divided equally). Cover with the remaining 4 slices of bread and brush with the remaining melted butter. Transfer to the sheet pan and bake in the oven until bread looks lightly toasted (5 – 10 minutes).

Remove from oven and cover the top of each sandwich with another thick layer of béchamel and more grated gruyere. Grill on high for 3 – 5 minutes, until topping is melted and golden brown. Serve immediately.

Notes: I had a cocktail party many moons ago and served mini versions of these made with sliced baguettes – they went down a treat.

Posted in Breakfast, Sandwiches | 1 Comment

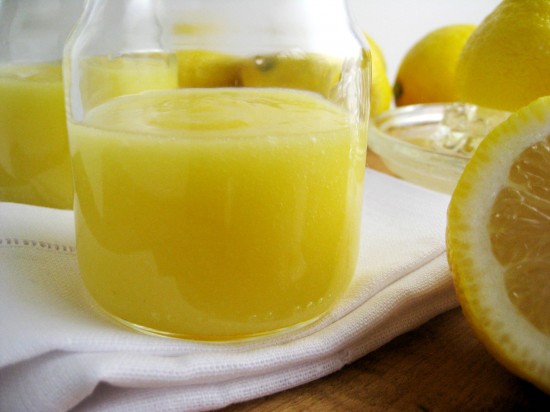
Lemon CurdPrint Recipe

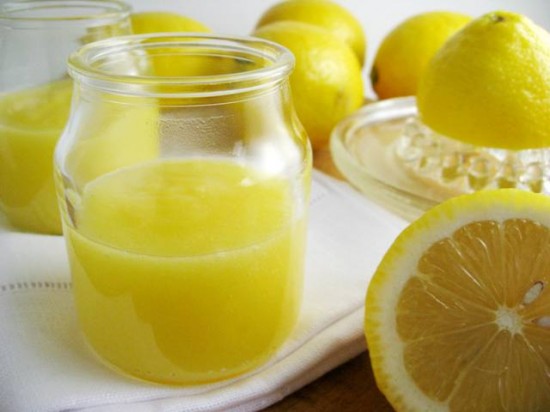
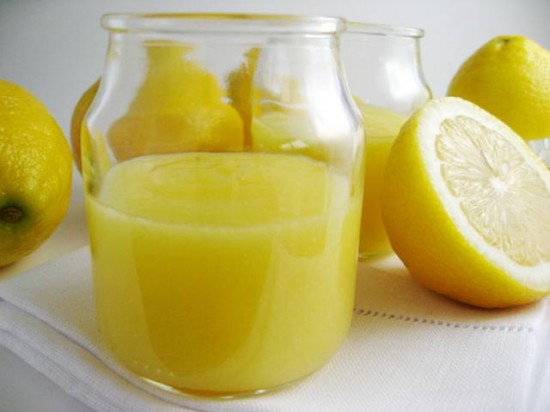
When I sat down to write this post I originally started by saying that I made this lemon curd for a greater purpose – but that made me think, ‘isn’t the greatest purpose for a lemon curd to be eaten and enjoyed on its own?‘ A question that I cannot honestly answer because both on its own and as a filling or a spread, it is a wonderful thing.

I use lemon curd for a myriad of reasons, in cupcakes and pancakes, on scones, as a topping for cheesecakes and more recently I have been playing around with it and my ice cream machine. This recipe does not contain any additives, such as corn starch or gelatine (I shudder at the thought), it has a handful of old fashioned ingredients like eggs, butter, sugar and lemons, which is probably why it is so good.

The result is a sweet, tart and addictive curd that will have you eating most of it before you actually get it to its intended purpose – unless of course you are making it to eat with a spoon and if that is the case then all is well and good. Anyway, here it is, the best and the easiest lemon curd recipe by far.

Ingredients
¾ cup (200 mls) of fresh lemon juice (approx 5 lemons)
1 tablespoon of freshly grated lemon rind
¾ cup (185 grams) of sugar
3 eggs
125 grams of unsalted butter, cut into cubes

Place all ingredients in a medium sized saucepan. Cook over a medium low heat, whisking until thick enough to hold marks from the whisk and first bubbles appear on the surface, about 6 minutes. Remove from heat immediately and strain through a fine mesh sieve to seperate any egg particles. Cool to room temperature and refrigerate.

Notes: Some people swear by cooking their lemon curd over a double boiler, I have tried this a couple of time but do not see any difference to cooking it directly in the pot.

Posted in Lemons, Morning Teas/High Teas, Sauces/Dressings/Condiments | Leave a comment

Chocolate Pots De CremePrint Recipe

Here is something I bet you didn’t know about me – every so often I cartwheel just to make sure I still have ‘it’. In fact there are a couple of things that I do with the similar regularity for the same reason, climbing trees, hanging off monkey bars, eating cake for breakfast and the list goes on. There are also a couple of things I cook with the same motivation and Chocolate Pots De Creme fall into this category.

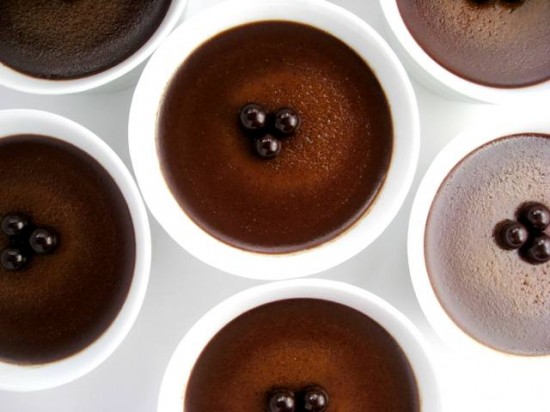
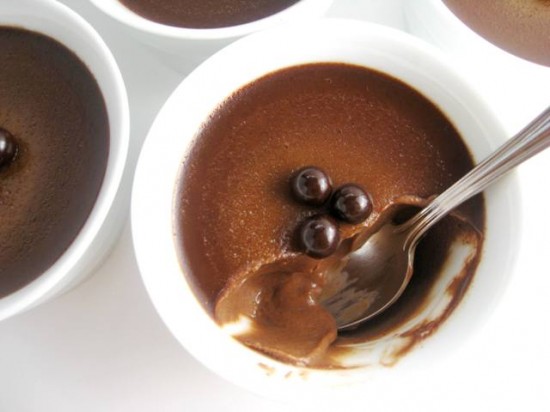
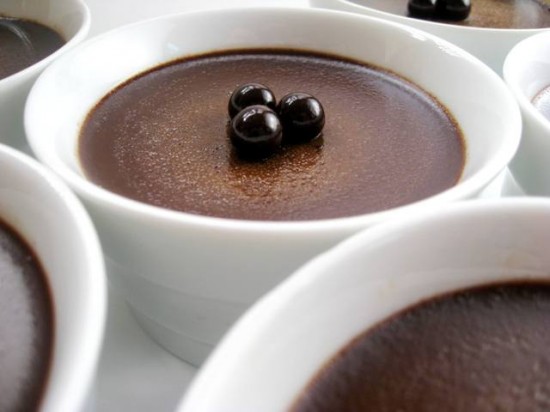
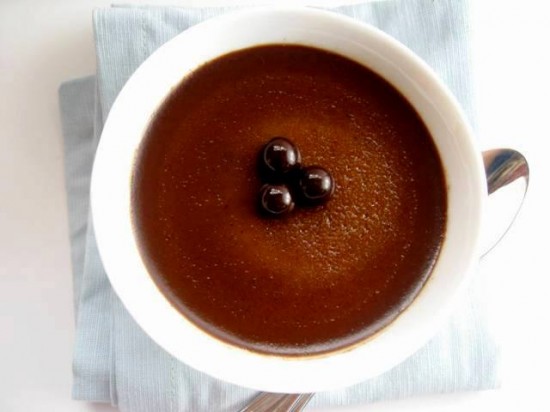
Over the years this recipe has changed, I have added other flavours (and taken them out), I have tried them with adornments on top – cream, berries, coffee grains and chili, I even even tried the stovetop/non-bake version. At any rate all these tried and tested ways have led me to develop this recipe, which I consider to be the perfect Chocolate Pot De Creme formula. No flavourings other than chocolate, no accompaniment other than a couple of chocolate pearls and they are so very easy.

They are everything they are meant to be, silky, smooth, dense and most importantly – chocolatey. I am certain Mr Man will make his usual beeline for the kitchen when he gets home tonight and be very happy. And me, well I am sure that will be making and eating these alot longer than I am doing cartwheels but if I can get through the next decade doing both I will be very happy too.

Ingredients
2 cups heavy/whipping cream
1/2 cup full cream/whole milk
142 grams/5 ounces bittersweet or semisweet chocolate, chopped
6 egg yolks
1/3 cup sugar

Preheat your oven to 325f. Bring cream and milk to a simmer in a heavy based saucepan over a medium heat. Remove from heat and add the chocolate, whisk until melted and smooth. Whisk yolks and sugar in large bowl to blend and gradually whisk in hot chocolate mixture. Strain mixture into another bowl and cool for 10 minutes, skimming any foam from the surface.

Divide the mixture amongst six 3/4-cup oven proof dishes and gently tap on your counter to bring any air bubbles to the surface. Cover each dish loosely with foil and place in a large baking pan. Add enough hot water into the pan to come halfway up sides of dishes. Bake until pots de creme are set but the centres still move slightly when jiggled (gently), for about 55 minutes. Take dishes out of the baking pan and remove the foil. Allow to cool to room temperature and then chill custards until cold, for about 2 hours.

Notes: Can be made a day in advance, cover and keep chilled.

Posted in Chocolate, Desserts | 18 Comments

Bigoli Con RadicchioPrint Recipe

The creator of this pasta is the very charismatic chef and restaurant owner, Guy Grossi from The Merchant (amongst many others) in Melbourne. He is a chef, restaurant owner, media personality and very involved in many of the food industry events. I had the pleasure of being introduced to him (actually, I introduced myself) at the Australia Day Ball in New York. It was brief but very nice to meet a man with so much passion and vibrancy.

Mr Grossi’s recipes are inspired by his Italian heritage, his love for extracting the flavours from exceptional produce and his desire to share his philosophy on food and the culture that comes with it.

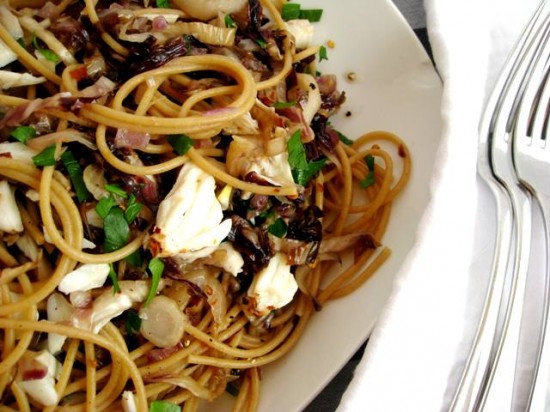
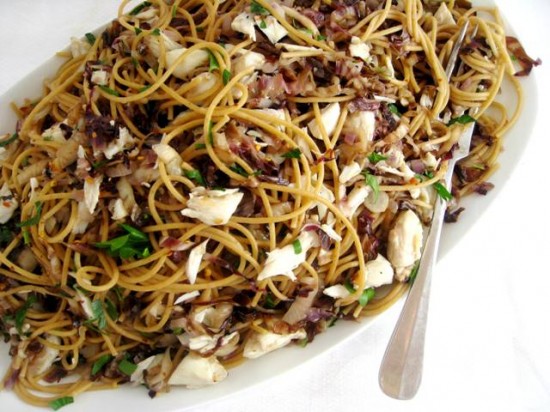
This pasta is a little taste of the Grossi experience. He has taken Venetian Bigoli and mixed it with radicchio and crab. It is a fairly simple dish with the bright and bitter flavours of the radicchio being mellowed in the cooking process. The sweet crab meat is its perfect pairing and together they create a beautiful synergy. Mr Grossi never fails to impress and in his pursuit of gastronimic excellence, has created another earthy taste sensation.

Ingredients
40 grams/1.4 ounces butter
1 tablespoon olive oil
1 Spanish onion, finely chopped
1 garlic clove, finely chopped
230 grams/8 ounces radicchio, thinly sliced
1 long red chilli, seeds removed, finely chopped
100 grams/3.5 ounces uncooked crabmeat
600 grams/1.3 pounds dried Venetian bigoli (see note)
¼ cup coarsely chopped flat-leaf parsley
 
Heat butter and oil in a saucepan over low heat. Add onion and garlic and sauté until tender (4 minutes). Increase heat to medium, add radicchio and chilli and sauté, tossing to cook evenly, until wilted (5 minutes). Partially cover pan and continue to cook, tossing frequently and replacing lid, until tender (5-10 minutes). Toss through crab, cover and set aside.

Meanwhile, cook pasta in a large saucepan of boiling salted water until al dente (2-3 minutes). Drain, reserving 60ml pasta water, then return pasta and reserved water to pan with radicchio mixture and parsley, toss well, season to taste and serve hot.

Notes: Dried Venetian bigoli is made from semolina or wholemeal flour and butter as well as eggs, if unavailable substitute another long pasta.

Source: Guy Grossi, The Merchant, Melbourne

Here are a few pictures from Chef Grossi’s web site (www.grossi.com.au), in addition to his food, I also love the fact that he is slightly mad so funny.

Posted in Pasta/Noodles, Seafood, Vegetarian | Leave a comment

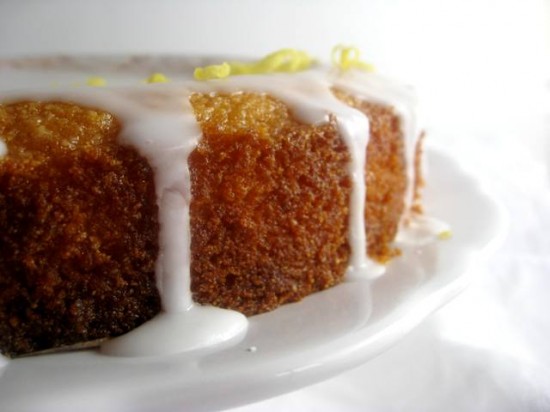
Lemon Polenta CakePrint Recipe


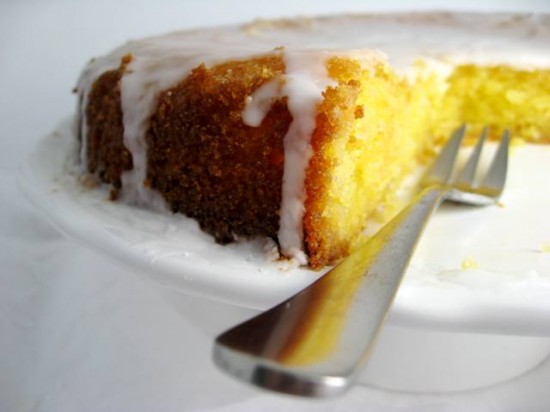
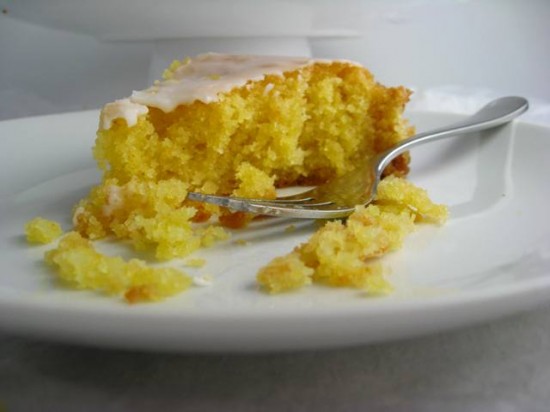
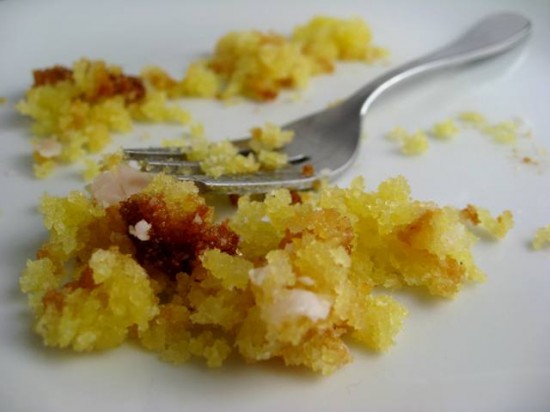
I lost myself to this cake earlier today. I was fiddling around with it in attempt to get some good shots (it can be very hard to take a good photo of a fairly plain cake) and I thought I might try the ‘half eaten’ shot. So I cut myself a piece and ate a few forkfulls, got distracted with a thought and after a quiet moment realised I had eaten the entire piece. Yes, it was that good.

Aside from the standard butter and sugar (and of course lemon), its key ingredients are polenta and almond flour. They make the cake incredibly tender and give it an almost gritty texture, it is then saturated in a lemon syrup which further enhances the lemon flavour and makes it even more buttery, rich and dense.

I am a huge fan of lemons so liking this cake is very easy for me but there is more to it than that, it’s hard to describe and the only word I can think of is ‘lush’ – so I will leave it at that.

Ingredients
200 grams/14 tablespoons soft unsalted butter, plus extra for greasing
1 cup caster (superfine) sugar
2 cups almond meal/flour
3/4 cup fine polenta/cornmeal
1 1/2 teaspoons baking powder
3 eggs
Zest 2 lemons (save the juice for the syrup)

Syrup
Juice from 2 lemons
Heaping 1 cup icing (powdered) sugar

Line the base of a 9″ cake pan with parchment paper and grease its sides lightly with butter. Preheat the oven to 350f/175c.

Beat the butter and sugar till pale and whipped using a mixer.

Mix together the almond meal, polenta and baking powder, and beat some of this into the butter-sugar mixture, followed by 1 egg, then alternate dry ingredients and eggs, beating all the while.

Finally, beat in the lemon zest and pour, spoon the mixture into your prepared pan and bake in the oven for about 40 minutes. When tested, a skewer should come out cleanish and the edges of the cake will have begun to shrink away from the sides of the pan. Remove from the oven to a wire cooling rack, but leave in the pan.

Make the syrup by boiling together the lemon juice and confectioners’ sugar in a smallish saucepan. Once the confectioners’ sugar has dissolved into the juice, it is ready. Prick the top of the cake all over with a toothpick and pour the warm syrup over the cake. Leave it to cool before taking it out of its pan.

Notes:  As you can see, I chose to drizzle a little lemon glaze over the top –  more for visual affect than anything else. I made this by mixing a squeeze of lemon juice with a little icing sugar.

Source: Nigella Lawson

Posted in Cakes, Desserts, Lemons, Morning Teas/High Teas | 1 Comment

Baby Peppers Stuffed with Goats CheesePrint Recipe

These are something I used to make when I had barbeques (and an outdoor area – boo hoo!). I must admit they look a little on the disheveled side but piled high on a platter they look really amazing – the reds, oranges and yellows of the peppers, scattered with herbs and drizzled with a good balsamic vinegar.

I certainly didn’t intend to make them today but I was at the farmers markets this morning and saw these darling little peppers (as sweet to taste as they are to look at), so my lemon and polenta cake was quickly put on hold. Such is the way with my blog, I have a very organised list of what I am cooking for the next two months and every week an item (or two, or even three) gets bumped because I get inspiration from something that crosses my path. And I am more than happy to change tact when it comes to spotting produce in its prime or an amazing sounding recipe – a little spontenaity is a great thing.

These will certainly be on the menu when I next barbeque for my friends (like I used too, like I used to have cocktail parties too), not only for their colours but for their simple fresh and wholesome flavours.

Ingredients
20 baby peppers (capsicums)
3 tablespoons olive oil
Sea Salt
Freshly ground pepper
311 grams/11 ounces fresh goat cheese
2 tablespoons marjoram, leaves only
2 tablespoons chives, slices into .5″ pieces
4 tablespoons good quality aged balsamic vinegar

Preheat oven to 232c/450f and brush a baking pan lightly with olive oil.

Cut a small slit lengthways down each pepper and remove a thin wedge (to allow you to insert stuffing). Wash and clean peppers inside and out, removing any seeds.

Break the fresh goat cheese up with a fork into tiny peices, place in a bowl with herbs and the salt and pepper to taste. Mix until combined.

Stuff each pepper with the goats cheese mixture. Place into the baking tray and drizzle with olive oil. Roast in the oven about 15-20 minutes until the cheese is melted and the peppers are soft and just starting to blister.

Remove from oven, place on a platter and lightly drizzle with the balsamic vinegar.

Serve warm.

Notes: You can cook these on your barbeque – they are likely to blister in the process but they taste and look even better. Also, if you are running short of time it is alot quicker to cut the peppers in half and stuff them, cooking time remains the same.

Posted in Barbeques/Grilling, Sides, Vegetables, Vegetarian | 4 Comments

Chilled Leek Soup with Lemon Dill YogurtPrint Recipe


I was flicking through my most recent copy of Bon Appetit the other day and was happy to notice an article written by OUR (Australia’s) Jill Dupleix. Jill is prettier half of the dynamic food duo that seemed to dominate the food scene in Australia during the 90’s and early into the noughties. Everything food related in Australia seemed to be either judged, written about, run or scorned (very wittingly) by Terry Durack and Jill Dupleix. They even bought out a couple of cook books which were very well recieved as they both had a knack (Terry in particular) for describing food and ingredients in the most seductive and wiliest of ways.

They eventually moved to the UK to broaden their reportoire, Terry realised his career was killing him (he was a dumpling away from a heart attack) so they went healthy and that was that – or so I thought. They are now more renowned and respected than ever before, Jill has written another very successful book called ‘Lighten Up’ and Terry recently published ‘1001 Foods: The Greatest Gastronomic Sensations on Earth’ – a must have for lovers of food.

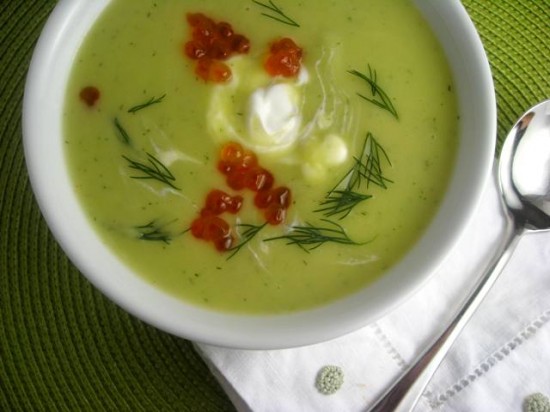
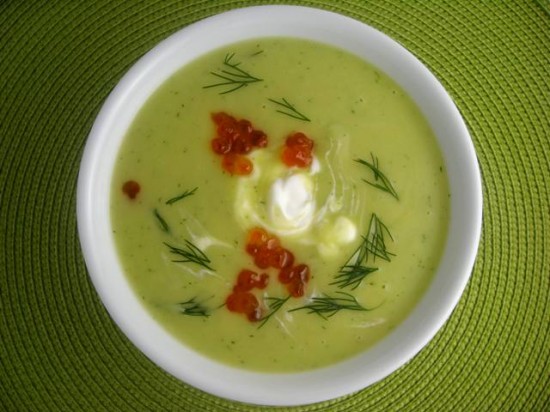
And so Jill brings us this soup – it is wholesome and delicious and in keeping with her current mantra, it is healthy and light. It is labelled a ‘chilled’ soup but we ate it hot because in New York it is still freezing. Either way it has great flavours and is the perfect shade of green – what more could you ask for from a queen of cuisine?

Ingredients
2 tablespoons olive oil
6 1/2 cups thinly sliced leeks (white and pale green parts only; about 5 large)
1 large russet potato, peeled, cut into 1/2-inch cubes
4 cups (or more) low-salt chicken broth or vegetable broth
3 tablespoons coarsely chopped fresh dill, divided
1/4 teaspoon (or more) freshly grated nutmeg
Fine sea salt
1/4 cup plain nonfat yogurt
1 tablespoon very thinly sliced lemon peel (yellow part only)
Small fresh dill sprigs (for garnish)
Salmon caviar (optional)

Heat olive oil in heavy large pot over medium heat. Add leeks and cook until softened and wilted, stirring often, 5 to 6 minutes (do not brown). Add potato; stir to coat. Add broth, increase heat to high, and bring to boil. Reduce heat to medium and simmer until vegetables are very tender, about 15 minutes.

Working in batches, puree soup with 2 tablespoons dill and nutmeg in blender until very smooth. Transfer to large bowl. Season to taste with sea salt and freshly ground black pepper. Cover and chill.

Whisk yogurt, lemon peel, and remaining 1 tablespoon dill in small bowl. Season to taste with sea salt and pepper.

Divide soup among bowls. Spoon dollop of yogurt-dill sauce on the top, sprinkle with dill sprigs and salmon caviar, if desired.

Notes: Whilst I found the salmon cavier a really nice touch , it certainly is not an essential addition – this soup is superb without it.

Source: Jill Dupleix

Posted in Soups, Starters, Vegetables, Vegetarian | Leave a comment

Grand Marnier Souffle with Creme AnglaisePrint Recipe


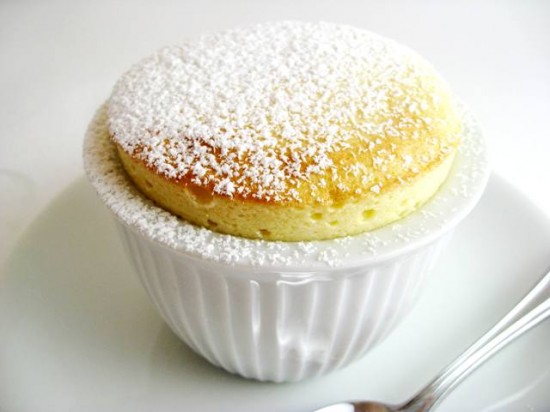
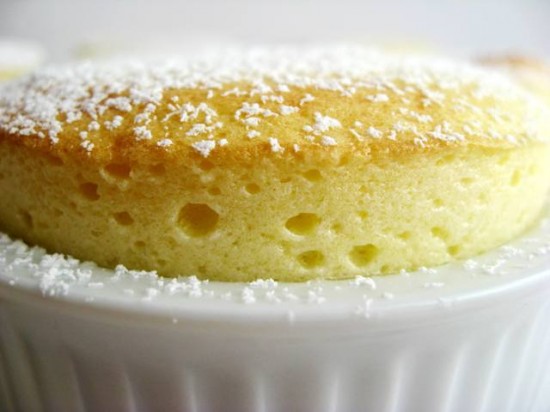
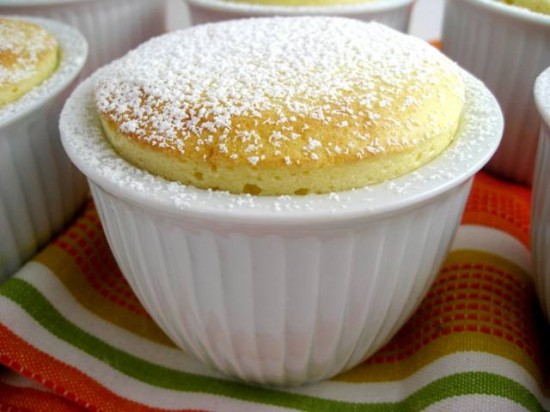
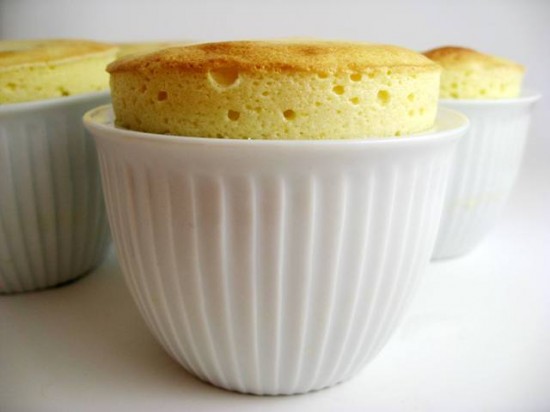
These souffles are so good I made them twice, well actually that is a little white lie. The first time I made them I wasn’t organised with my camera and by the time I was ready to take the pictures, my little golden and puffed souffles had gone souther than South. Now, this wasn’t such a bad thing because it presented me with the opportunity to make a few changes and make them even better.

The soufflé, whose name is derived from the French verb “to blow,” is an airy dessert leavened with beaten egg whites and oven heat. Whilst many people say that souffles are tempremental, I find if you follow the recipe carefully they are relatively straight forward. A few simple tips also ensure a perfect souffle, and they are; ensure your egg whites contain no egg yolk (even the smallest scrap will ruin the whipping of your whites), use clean and dry utensils (small particles of oil and water will also create problems) and finally, serve your souffles straight from the oven – as the saying goes, ‘a souffle can be waited for but can never wait’.

These souffles are delicately flavoured with Grand Marnier, this ‘boozy orangey’ taste is enhanced further with a little orange oil and grated zest. I have eaten many a souffle in my time and I would say that this flavour has to be my favourite, it seems to suit the light and airy dessert perfectly.

If you have never made a souffle before then here is your chance. They are not the fickle little creatures we have been led to believe, but merely light and fluffy concoctions that are crying out to be devoured as soon as they leave the oven – and let me assure you, this won’t be a problem at all.

Ingredients
1 cup milk
6 eggs, separated, at room temperature
2/3 cup sugar
3 tablespoons all-purpose flour
2 teaspoons finely grated orange zest
Pinch of salt
1/4 cup Grand Marnier
1/2 teaspoon orange oil

Optional – Crème Anglaise for serving (recipe below)

To make the pastry cream, in a saucepan over medium heat, warm the milk until small bubbles appear along the edge of the pan. Remove from the heat.

In a bowl, whisk together the egg yolks, 1/3 cup of the sugar, the flour, orange zest and salt until pale and well blended. While whisking, slowly add the hot milk.

Pour the mixture back into the saucepan and place over medium-low heat. Cook, whisking constantly, until the mixture just comes to a boil. Lower the heat and continue to cook, whisking constantly, for 1 minute. Remove from the heat and whisk in the liqueur and orange oil.

Pour the pastry cream into a large bowl and gently press a piece of plastic wrap directly onto the surface to prevent a skin from forming. Let cool to room temperature or refrigerate until ready to bake (even overnight is fine).

Preheat an oven to 375f. Lightly butter 6 x 2/3 cup soufflé dishes and dust with sugar (this will help the batter climb the sides of the dish).

Remove the plastic wrap from the pastry cream and whisk until smooth. In a deep, spotlessly clean bowl, using an electric mixer, beat the egg whites on medium-high speed until they are foamy and soft peaks form when the beaters are lifted. While beating, gradually add the remaining 1/3 cup sugar and continue to beat until stiff peaks form.

Scoop about one third of the egg whites onto the pastry cream and, using a rubber spatula, fold in gently to lighten the mixture. Then fold in the remaining whites just until no white streaks remain. Scoop into the prepared dishes. Run a thumb around the inside rim of the dishes to keep the batter from sticking and help the soufflé rise.

Bake until the soufflés are puffed and the top are browned, but the soufflés still jiggle slightly when gently shaken, about 30 minutes. Serve immediately with the Crème Anglaise on the side (if you wish).

my little souffles – straight out of the oven and puffed to perfection…

Creme Anglaise

Ingredients
2 cups milk
2 eggs plus 1 egg yolk
1⁄4 cup sugar
2 teaspoons vanilla extract

Rinse the inside of a non aluminum saucepan with water and shake out the excess water. Pour in the milk, place over medium-low heat and cook until small bubbles form around the edges of the pan, about 5 minutes.

In a small bowl, combine the eggs, egg yolk and sugar and whisk just until blended. Gradually whisk in half of the hot milk, then pour the egg mixture into the pan. Set over low heat and cook, stirring constantly, until the mixture is thick enough to coat the back of a spoon and leaves a clear trail when a finger is drawn through it, 6 to 8 minutes. Do not allow it to boil.

Strain the mixture through a fine-mesh sieve into a bowl. Stir in the vanilla. Cover with plastic wrap, pressing it directly on the surface to prevent a skin from forming, and let cool. Refrigerate for at least 2 hours or for up to 2 days. This recipe will makes about 2 cups.

Source: Souffle recipe adapted from Epicurious, Julia Child and Grenouille, Creme Anglaise from Epicurious

Posted in Desserts | Leave a comment

Baci Di Dama (Lady Kisses)Print Recipe

I just couldn’t resist baking these little biscuits with such a lovely name and they are just as nice as they sound. The combination of chocolate and hazelnuts is typical of Italian treats and if you travel to Italy you will find biscuits like these in coffee bars everywhere. In fact, when I was in Italy several years ago almost every street corner either had a coffee bar, a gelato bar or a wine bar, I was constantly in one of the three – and in heaven.

The secret to getting these biscuits perfect (and mine actually aren’t) is to not over mix the dough. If this is top of mind, then you will be ensured of a nice little raised biscuit rather than a flat one which is a problem that many people encounter when baking them.

They are an obvious choice for a gift (I made them for a new neighbour) but I think they would make a very sweet treat for someone special.

Ingredients
1 cup hazelnuts, roasted and peeled
1 cup pure icing sugar
1 cup (226 grams/8 ounces) softened butter
1 orange, finely grated, rind only
1/2 teaspoon baking powder
1 cup plain flour
a pinch of salt

Chocolate filling
150 grams/5.3 ounces dark chocolate (60% cocoa solids), coarsely chopped
25 grams/.9 ounces butter
25 mls pouring cream

Preheat oven to 160c/320. Using a food processor, process hazelnuts and icing sugar until nuts are finely ground. Then using an electric mixer fitted with a paddle, beat butter, rind, hazelnut mixture and a pinch of salt until creamy. Whisk flour and baking powder together and add to the mixture, stir carefully until just combined – it is important that you do not over mix this.

Roll half-teaspoon of dough into balls and arrange about 6cm apart on baking paper-lined oven trays. Place in the freezer for 1/2 hour to chill and then bake one tray at a time in centre of oven until golden (10 – 12 minutes). Cool on trays over a wire rack and repeat with remaining biscuits.

For chocolate filling, combine chocolate, butter and cream in a heatproof bowl over a saucepan of simmering water, stirring occasionally, until melted. Stir until glossy and smooth, then cool to room temperature.

Spread half-teaspoon of chocolate filling onto the flat side of half the biscuits (you may have a little filling left over), then sandwich with remaining biscuits, pressing lightly together to seal. (I find it easier to pipe chocolate so I put it in a ziplock bag and then cut a small hole in the corner).

The biscuits will keep in refrigerator in an airtight container for up to 1 week.

Notes: You should get around 40 – 50 filled biscuits.

Posted in Recipes | Leave a comment