Dip Fromage Frais Coriandre (Fresh Cheese & Cilantro Dip)Print Recipe

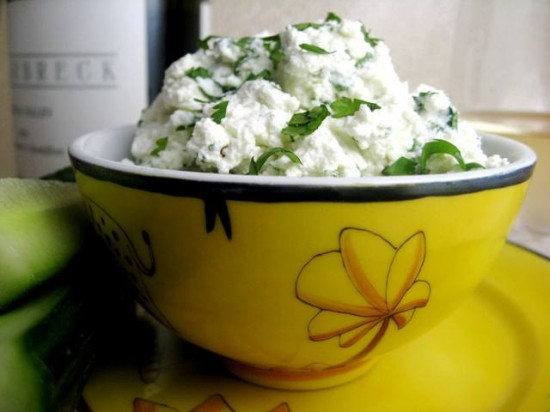
This little appetizer is so easy you could almost call it a suggestion rather than a recipe, and it comes from one of my most loved sites – Chocolate & Zucchini. This blog has a wonderful array of recipes, in fact, it’s where I found one of my most favourite chicken dishes – Chicken Marbella (Caramelized Chicken with Olives & Prunes). Chocolate and Zucchini is written by a delightful French girl so it only seemed fitting that I make this dip for my charming friend, Jean Nicolas who was visiting from Paris.

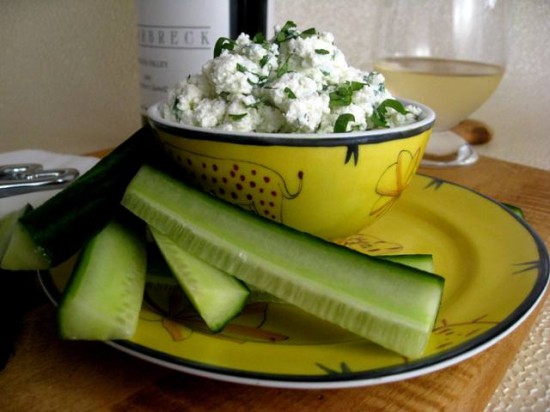
Jean Nicolas, popped in late yesterday afternoon – he was on his way to see Kylie (Minogue) perform and we thought a few glasses of bubbly would be a fine way to start his evening. This light and herby dip served with cucumber was perfect with the champagne and aside from the fact that it takes 10 minutes in total to make, it is also deliciously fresh.

Jean Nicolas happily went on his way (getting ready to dance in the aisles no doubt) while I stayed at home and read my babies their bedtime stories. Years ago I would have been a little disgruntled, but now I wouldn’t have it any other way.

Ingredients
1/2 cup fresh cheese (I used Bens Fresh Farm Cheese which is local cheese but any fresh cheese will do)
a small bunch of cilantro (coriander), about 25 stems
a dash of olive oil
freshly-ground pepper, to taste
salt (may not be necessary if the cheese is already salted)
2 small cucumbers or one large

Rinse and dry the cilantro. Pluck the leaves and chop them roughly. In a small mixing-bowl, combine the fresh cheese, cilantro, olive oil and pepper, and mix with a fork until thoroughly blended. Taste and adjust the seasoning, adding a little more oil if necessary to reach the desired smoothness.

Rinse, dry, quarter the cucumbers and cut into sticks.

Serve the fresh cheese and cilantro dip with the cucumber sticks. It is also really good with fingers of crusty bread or olive corn chips.

Notes: If you are not a fan of cilantro then feel free to substitute it with chives or flat leaf parsley. Also, if you have trouble finding a fresh cheese then a cream cheese can be used.

Source: www.chocolateandzucchini.com

Posted in Nibbles & hors d'oeuvres, Picnic Food | Leave a comment

Pineapple Upside Down CakePrint Recipe

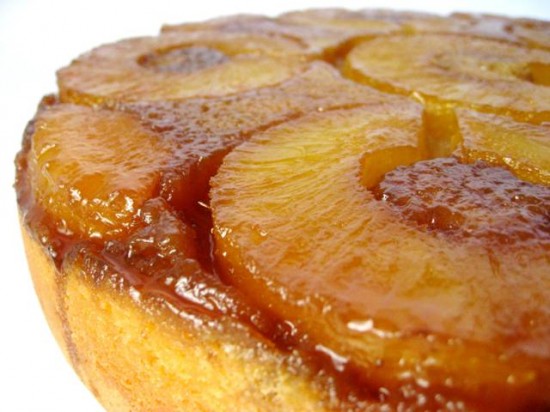
The desire to make this cake came last Sunday night whilst I was watching one of my favourite TV shows – Desperate Housewives. For those of you that know the character Bree, she is a phenomonal cook and made a Pineapple Upside Down Cake that looked amazing. It’s also one of those cakes that has been around forever and I have always wondered if I might do it justice – well, today I had to try.

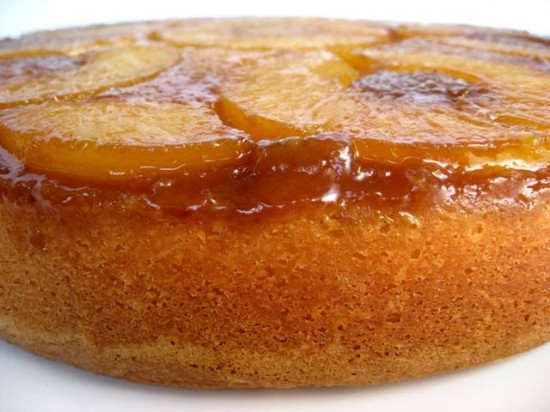
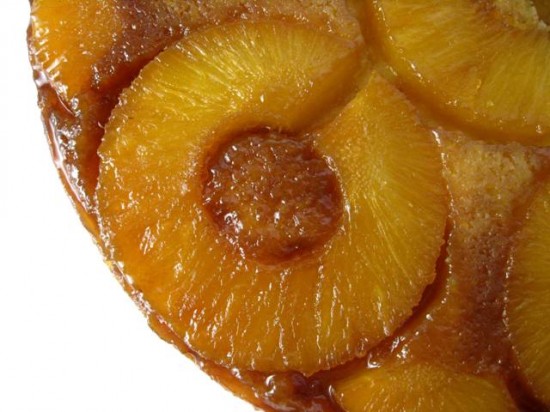
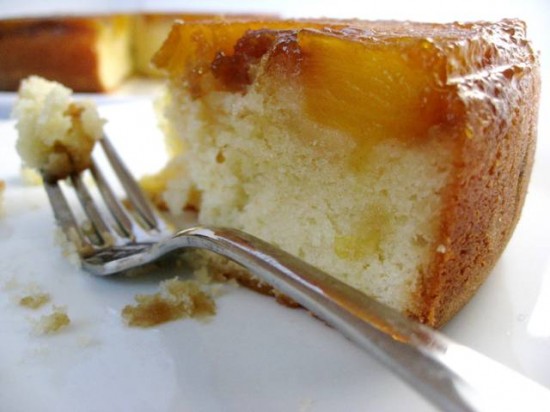
The cake itself is best described as a tea cake – it is fairly dense but with a light and tender crumb. The pineapple, sitting pretty in the caramel, is just delicious and caramelised perfectly. I chose not to go down the path of placing a glace cherry in the middle of each pineapple slice, I am happy to have them on my icecream sundaes but not on my cakes.

I used fresh pineapple which I cored with some new fandangle contraption I purchased specifically for this occasion – it cored the fruit and at the same time cut the rings in one big spiral. The only downfall in doing this was that my pineapple rings had cuts in them, but I prefer fresh over tinned any day and this particular pineapple was very sweet with an intense flavour and vibrant yellow colour – as opposed to my back up tin which was watery in comparison. I also used a little dark rum in my recipe which I think made it extra special – of course it’s not mandatory and it would be nice to switch fresh pineapple juice if you decided a booze-free tea cake was the way to go.

Desperate housewife or not – if you have a hankering for a tropical tea cake, this one will make you happy. I am happy, I am eating a slice right now and wondering what I can do with the empty pineapple shell and left over rum. I have some little razzle dazzle umbrella’s, so I am thinking a Hawaiian Punch may be in order.

Topping
1 cup of firmly packed dark brown sugar
1/2 cup unsalted butter
1 fresh pinapple cored and sliced into rounds or 1 can (20 oz) of pineapple slices

Cake
1 1/2 cups all purpose flour
6 tablespoons cake flour
6 tablespoons of ground almonds/almond meal
3/4 teaspoon baking powder
1/2 teaspoon salt
1 3/4 cups of sugar
1 cup (227 grams/8 ounces) unsalted butter at room temperature
4 large eggs
7 tablespoons dark rum or fresh pinapple juice
3/4 cup sour cream

Grease a 10″ cake pan and set aside. To make the caramel topping, place the brown sugar and butter in a saucepan and melt on a medium heat until sugar dissolves and the mixture is bubbly. Pour this mixture into the prepared cake tin and arrange the pineapple slices in a single layer on top of the caramel mixture.

Preheat your oven to 325f. Whisk the flours, almonds, baking powder, and salt in a large mixing bowl. In a separate bowl, use an electric mixer to beat the sugar and butter together until light and fluffy. Add eggs one at a time, beating well after each addition. Beat in 4 tablespoons of rum (or pinapple juice). Add dry ingredients alternately with sour cream in 2 additions each, beating well after each addition. Pour this mixture over the caramel and pineapple.

Bake the cake until tester inserted into the center comes out clean, 1 hour and 15 minutes – but check every 5 minutes after an hour. Cool cake in pan on a rack for 10 minutes and then brush the top (which will become the base) with the remaining 3 tablespoons of rum (or pinapple juice). Turn out onto a platter and serve warm or at room temperature.

Posted in Cakes, Fruit, Morning Teas/High Teas | 5 Comments

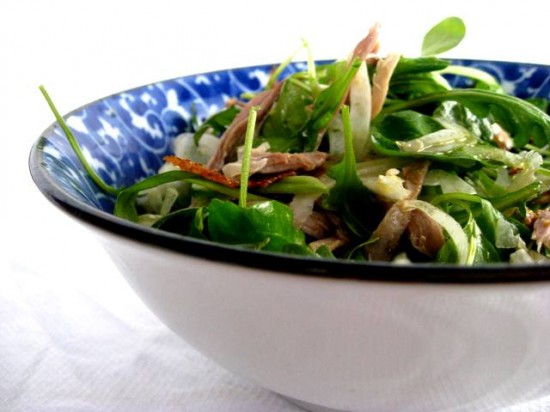
Salad of Duck, Fennel & WatercressPrint Recipe


Almost anything with duck is a favourite dish of mine, Peking Duck, Duck Confit, Duck on Pork Belly with Lentils (an old Bayswater Brasserie favourite) – even a duck terrine. Having said that I don’t actually cook with it alot, because the very few times I have tried to, I have been very disappointed. This recipe is an exception to the rule being that the duck is already cooked so it is impossible to get wrong.

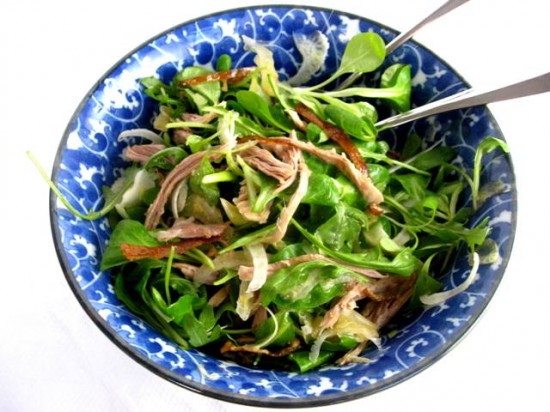
This salad was well suited to a Friday night dinner being quick and easy after an afternoon of picking blossoms and chasing butterflys in the park. Once you get your hands on a succulent Chinese roasted duck, it’s a only a matter of mixing up the dressing and throwing all the ingredients together.

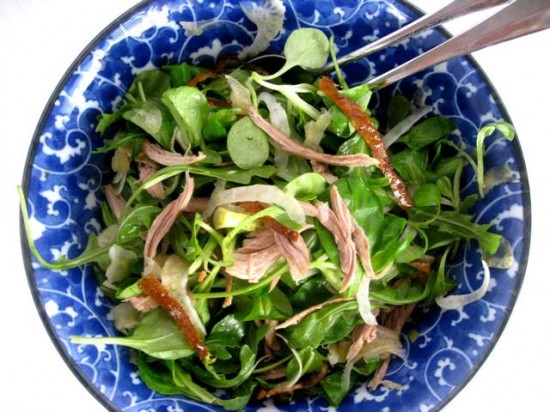
The fresh and distinctly asian flavours in the dressing really bring the other ingredients to life beautifully and although duck is quite a rich meat, this dish in its entirety remains very light. Scattered with some capers (that you cannot see because they went in after the photo’s – pooh!) to add a slightly salty touch and a little shaved fennel that contrasts nicely with the peppery watercress, this salad is designed to please with a medley of flavours and textures.

It’s Friday night and I am kicking up my heels, I’ve savoured my salad and my glass of wine, watched the Royal Wedding, the girls are in bed – as is Mr Man…now what?

Ingredients
1 Whole Chinese Roasted Duck
1 large fennel bulb, shaved
4 handfuls picked watercress sprigs
3 tablespoons dry sherry
1/3 cup freshly squeezed orange juice (1 juicy orange should do the trick)
1 tablespoon soy sauce
1 teaspoon sesame oil
1 teaspoon sugar
1 heaped tablespoon small salted capers, rinsed and drained

Preheat your oven 160c/315f. remove the skin from the duck and, usinga pair of kitchen scissors, cut the skin into thin strips. Put the strips on a baking tray and into the hot oven for 10 minutes or until the skin starts to become crisp. Remove and place onto paper towels.

Pull the flesh from the duck and roughly shred it. Place the duck flesh and crispy pieces of skin into a large bowl and add the shaved fennel and half the watercress.

In a small bowl combine the sherry, orange juice, soy sauce, sesame oil and sugar. Stir until the sugar has dissolved, then drizzle over the salad. Arrange the remaining watercress on a serving platter or in a bowl and top with the duck salad. Toss lightly then sprinkle with capers and serve.

Notes: You may have noticed that I have not used watercress, the only bunch I could find looked like it had been run over by the delivery truck – so I substituted it with a mixture of mache and arugula. Also, if you do not have a shaving devise for your fennel then a vegetable peeler will do the trick.

Source: Michele Cranston

Posted in Game, Salads, Sides, Starters | Leave a comment

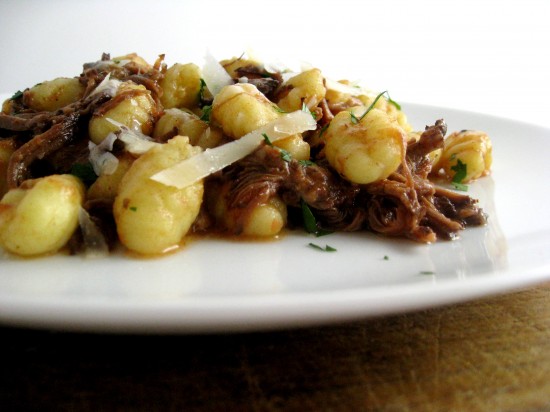
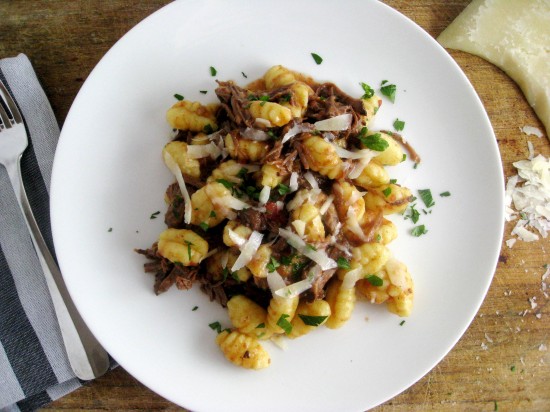
Gnocchi with Short Rib RaguPrint Recipe

I know this is hardly a Spring dish but I just thought I would get in one last cool weather comfort meal before we are suffocated in the insane heat and humidity that Summer (and Spring) can bring to a big city. Or should I say has already bought – because when I made this yesterday, my kitchen was like a sauna – but I guess that’s what 6 hours of braising will do to a small confined space.

Anyhoo, today being slightly cooler we did actually enjoy this very comforting and robustly flavoured dish. The meat was as tender as can be and perfectly matched with the wonderfully plain potato gnocchi – which unfortunately wasn’t handmade but next time it will be.

As with any marinated and slow braised dish – the flavours intensify over time, so I chose to settle the dish in the fridge after it was cooked for another night before removing the meat from the bone. This also made it easier to degrease the sauce.

So if you are planning a night in and the weather is on the cool side then you might wish to start this sooner rather than later. Before you know it, the weekend will be upon us and with all that running around that can eventuate it would be nice to have something on hand. Then it would simply be a matter of cooking your gnocchi, opening a gutsy bottle of red and sitting back to enjoy.

*this recipe will need to be started at least a day in advance*

Ingredients
4 beef short ribs (about 400 grams/14 ounces each)
500 mls red wine
2 tablespoons olive oil
2 onions, finely chopped
4 garlic cloves, coarsely chopped
1 each carrot and celery stalk, coarsely chopped
2 tablespoons tomato paste
2 litres (8 cups) beef stock
800 grams/1.76 pounds canned whole tomatoes
4 rosemary sprigs
1 fresh bay leaf
To serve: grated pecorino or parmesan and finely chopped parsley
To serve: 2 pounds fresh gnocchi

Place beef ribs in a single layer in a non-reactive container that fits ribs snugly, add wine, cover and refrigerate overnight.

Preheat oven to 150c/300f. Heat oil in a casserole over medium heat, remove ribs from wine (reserve 250mls), pat dry on absorbent paper and cook, turning occasionally, until browned (5-7 minutes). Remove ribs and set aside, reduce heat to low, add vegetables and tomato paste and stir occasionally until tender (12-15 minutes). Add reserved red wine and cook until reduced by half, scraping residue as you go, then add half the stock, one cup at a time, reducing by half after each addition. Add tomato, rosemary, bay leaf, remaining stock and ribs, cover and roast in the oven, turning ribs occasionally, until meat is falling from the bone (4-6 hours).

Remove the dish from the oven and allow to cool. Remove the meat from the liquid and coarsely shred with a fork (discard bones and rosemary stalks).

Remove as much fat as you can from the top of the liquid and set aside 3 cups (discarding the remainder). Strain the reserved liquid and then simmer over a medium heat till reduced by half. Add the pulled meat, season to taste and serve tossed with gnocchi and scattered with shaved or grated pecorino or parmesan and a little chopped parsley.

Notes
: If you do have the time (once the dish is removed from the oven and bought to room temperature) place it in the fridge overnight. This will allow the flavours to intensify further and also make it easy to degrease the liquid.

Source: adapted from Alice Storey for Australian Gourmet Traveller who adapted it from Paul Bertoli in Cooking by Hand

Posted in Mains, Meat, Pasta/Noodles | 2 Comments

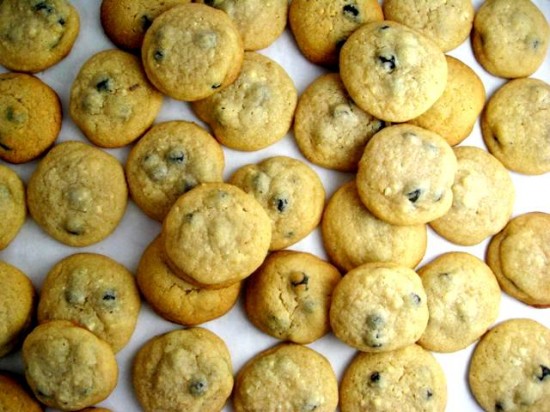
Momofuku Blueberry & Cream CookiesPrint Recipe

I had a few kitchen mishaps today which resulted in a quick flick through my must-cook-cookie-compendium to find something to bake for this afternoons post. It wasn’t a difficult choice, I have made two things created by Christina Tosi and they have both been outstanding so it only felt right to choose another.

These super sweet little cookies are exactly that. The ‘cream’ flavour comes from one of Tosi’s favourite ingredients and inventions, milk crumbs – a crumb made from dried milk powder and in this instance, white chocolate. Together with the dried blueberries they create a delicious fruit and cream combination that set them apart from your standard day-to-day cookie.

You may not have a must-cook-cookie-compendium like me but that is okay because you now have this recipe – you lucky thing, you! There is a good chance they may become your favourite cookie, or at least one of your favourites – I know Martha Stewart is a huge fan…

Milk Crumbs Ingredients
1/4 cup plus 1 tablespoon nonfat milk powder
2 tablespoons all-purpose flour
1 tablespoon cornstarch
1 1/2 teaspoons sugar
1/8 teaspoon salt
1 1/2 tablespoons unsalted butter, melted
1/4 cup white chocolate, melted

Preheat oven to 225f. Line a baking sheet with parchment paper and set aside.

In a medium bowl, whisk together 2 tablespoons plus 1 1/2 teaspoons milk powder, flour, cornstarch, sugar, and salt. Stir in melted butter until well combined. Spread mixture on prepared baking sheet and transfer to oven. Bake until dried and crumbly, 8 to 10 minutes. Remove milk crumble from oven and let cool completely.

Transfer milk crumble to a large bowl and fold in remaining 2 tablespoons plus 1 1/2 teaspoons milk powder and white chocolate. Use immediately or transfer to an airtight container and keep refrigerated until ready to use.

Cookie Ingredients
2 1/2 cups all-purpose flour
1/4 teaspoon baking powder
1/8 teaspoon baking soda
1/2 teaspoon salt
1 cup (8 ounces) unsalted butter
1/2 cup plus 2 tablespoons granulated sugar
1/2 cup plus 2 tablespoons light-brown sugar
1/4 cup glucose
1 large egg
3/4 cup dried blueberries
1/2 cup plus 1/3 cup Milk Crumbs

Line two baking sheets with parchment paper and set aside.

In a large bowl, mix together flour, baking powder, baking soda, and salt; set aside. Cream butter, sugars, and glucose until well combined. Add egg and mix again.

Add flour mixture, slowly combine, then add blueberries and milk crumbs and until just combined. Cover the bowl with plastic wrap and place in the refrigerator to chill for 1/2 hour. Scoop or form dough into 1 inch balls and place about 2 inches apart on prepared baking sheets. Place in your refrigerator again for 1/2 hour (or longer, even overnight is fine) to chill before baking in the oven.

Heat your oven to 375f. Transfer baking sheets to oven and bake, rotating pans halfway through baking, until cookies are golden brown and tops begin to crackle, about 15 minutes. Transfer cookies to a wire rack to cool.

Store in an air tight container.

Notes: You can substitute the glucose for light corn syrup if you have trouble finding it.

Source: Christina Tosi, Momofuku Milk Bar

Posted in Biscuits/Cookies/Slices/Bars, Childrens Parties, Morning Teas/High Teas, Picnic Food | 3 Comments

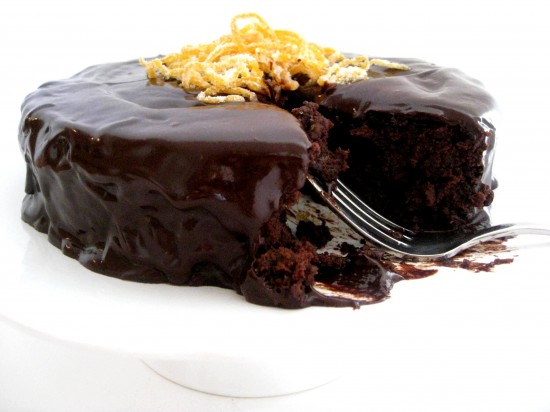
Chocolate Marmalade Dessert CakePrint Recipe

For me, this cake has Easter written all over it – and not because it contains chocolate but because it was served to me one Easter as part of what has to be the best Easter brunch I have ever attended. An enormous amount of effort had gone into the food and the setting – which was very aptly Easter with painted eggs, flowers and all things pretty.

The host was my aunt, Patrica, who lived in a distant city in Australia. I had always known she was a good cook but until this day never realised how ‘good’ good really was. So off I trotted to this brunch knowing I was going to be well fed but not knowing I would leave so full I could barely talk. Now, I am not in the habit of over-eating but when presented with an abundance of fine food – what could I do?

I cannot quite remember the extact details of this spectacular morning but I know it began with mini egg & bacon tarts and hot cross buns and finished with a lemon tart and this Chocolate Marmalade Cake. Of course I ate the lemon tart (being the lemon fiend that I am) and just when I thought enough was enough, I found myself eating a piece if this lusciously rich and dense cake.

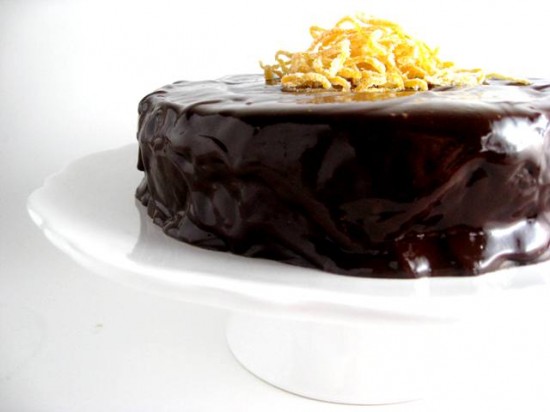
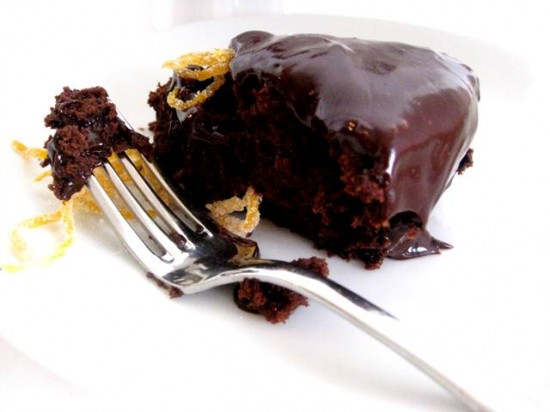
The marmalade flavour is very subtle and adds depth to the chocolate rather than bringing an obvious orange taste. The texture is incredibly soft which can be attributed to the use of fresh bread crumbs – and the ganache does what a good ganache should do; taste chocolatey and add that final glossy, decadent touch.

I had to unbutton my jeans and I felt like a tubby troll for my flight back home but it was worth it. Easter in New York City without family to celebrate with isn’t quite the same but at least we have this cake and some fond memories.

Ingredients
100 grams/3.5 ounces plain (all purpose) flour
25 grams/.88 ounces dutch process cocoa
1 teaspoon baking powder
a large pinch of salt
100 grams/3.5 ounces soft white breadcrumbs
150 grams/5.3 ounces dark couverture chocolate (70% cocoa solids), chopped
200 grams/7 ounces unsalted butter, chopped plus extra for greasing
175 grams/6.2 ounces orange marmalade
50 grams/1.8 ounces glace orange peel, finely chopped
4 eggs, seperated
200 grams/7 ounces caster sugar

Chocolate Glaze
1/2 cup pouring cream
150 grams/5.3 ounces dark couverture chocolate (70% cocoa solids), chopped
20 grams/.7 ounces unsalted butter, chopped
1 tablespoon liquid glucose or light corn syrup

Grease and line a 9 inch round cake tin and preheat your oven to 170c/340f. Sift flour, cocoa and baking powder into a bowl, then stir in the breadcrumbs and set aside.

Place chocolate, butter, marmalade, orange peel, a large pinch of salt and 180 mls of water in a saucepan and whisk over a medium heat until melted and smooth, then cooled slightly.

Using an electric mixer, whisk egg yolks and sugar until pale and thick, add the chocolate mixture and stir gently until combined, then stir in flour mixture until just incorporated. Using an electric mixer, whisk egg whites until stiff peaks form and, using a large large metal spoon, gently fold whites into chocolate mixture, then spoon batter into the prepared cake tin. Place cake tin into a roasting pan and pour enough boiling water to come 1/3 of the way up the side of the cake tin. Bake for one hour or until a cake tester withdraws clean.

Remove cake from the water bath and cool for 20 minutes before removing from the cake tin. Turn out onto a wire rack to cool completely – the base of the cake with become the top.

Glaze
Place all ingredients in a saucepan and stir over a medium level heat until smooth. Cool glaze slightly until thickened, then spoon over the top of the cake and allow to drip down the sides, smooth with a spatula to cover any gaps.

Stand cake at room temperature for 2 – 3 hours until set (this will depend on room temperature). This cake will keep refrigerated for 3 days.

Notes: I decorated the top of the cake with some candied orange peel – I used a zester to get really find strands.

Source: Australian Gourmet Traveller, April 2004

Posted in Cakes, Chocolate, Desserts, Morning Teas/High Teas, Picnic Food | 2 Comments

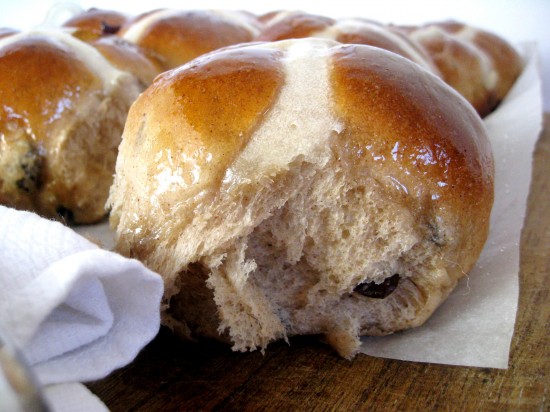
Hot Cross BunsPrint Recipe

Up until now every Easter has been the same. Me, getting up at the crack of dawn to make Hot Cross Buns – pummelling my way through a truckload of dough, making awkward looking crosses, ceremoniously taking them out of the oven and calling to everyone ‘eat them while their hot’. But – you know how it is at Easter, everyone is pretty laid back, enjoying the few days off and relaxing. By the time they get to the table, let alone my buns – they are cold and hard and I have taken on their supposed persona being a hot cross lady. Let’s just say my rock hard Easter buns have been as ritualistic as Easter itself.

This year I knew things had to change. And I have spent the last couple of weeks baking buns from different recipes to get the perfect ‘one’. I am very happy to say the recipe that achieved this status was actually the easiest by far and comes from Donna Hay. I must admit the one thing I did do that made a significant difference was to substitute plain (all purpose) flour for bread flour (bread flour has higher gluten levels and also contains small amounts of malted barley flour that gives the yeast a little boost).

These buns are softly scented little rolls that retain their texture long enough to enjoy a couple of hours (if not a day or two) after being baked. The spices are not over powering, the fruit content is subtle and they really are quite delightful.

Now that I have perfected the Hot Cross Bun, I can retain my cool and calm demeanour in the kitchen this Easter. I am looking forward to joining my family at the table unflustered, grazing with a seemingly endless appetite and catching up with friends. Happy Easter!

Ingredients
1 tablespoon dry yeast
½ cup caster sugar
1½ cups lukewarm milk
4¼ cups bread (or plain/all purpose) flour, sifted
2 teaspoons mixed spice
2 teaspoons ground cinnamon
50 grams/1.8 ounces melted butter
1 egg
1 1/3 cups sultanas
1/2 cup mixed peel

Crosses
6 tablespoons plain (all purpose) flour
5 tablespoons water

Glaze
4 tablespoons sugar
2 tablespoons water

Place the yeast, 2 teaspoons of the caster sugar and all of the milk in a bowl and let it sit for 5 minutes to allow the yeast to activate (bubbles should appear on the surface and it should almost look like it’s foaming).

Sift the flour with the mixed spice and cinnamon. Add this to the yeast mixture along with the butter, remaining sugar, egg and sultanas and mixed peel – using the dough hook of the mixer and a low speed, mix until a sticky amalgamated dough forms.

Take it out and place on a very lightly flour dusted bench and knead for about 8 minutes or until the dough is elastic and smooth.

Place the dough in an oiled bowl, cover with a towel and let it sit in a warm place for an hour or until it’s doubled in size.

When doubled in size, place the dough onto the bench and divide into 12 portions. Roll each portion into a ball and place in a rectangular ovenproof tray, lined with baking paper (mine was 9 x 12 inches).

Cover with a towel and put in a warm place to rise again around 30 minutes to an hour. Once risen you can pipe the crosses over the top.

Crosses
Mix flour and water together to form a thick paste. Place in a piping bag fitted with a small nozzle (or a zip lock bag with a corner cut out) and starting from the edge of one bun, pipe a straight line along the centre of each bun till you reach the end of the tray. Repeat this until all buns have a vertical and horizontal line across them (a cross).

Once piped, this is placed in a preheated 200c/400f oven for 25-35 minutes (depending on your oven type) and bake until golden brown and well risen.

Glaze
Place sugar and water in a small pan and cook over a low heat until the sugar dissolves and the liquid thickens. Brush this hot syrup generously over the tops of the hot buns as soon as they have been removed from the oven.

Enjoy warm or toasted with butter.

Source: adapted from Donna Hay

Posted in Breads, Breakfast, Morning Teas/High Teas | 6 Comments

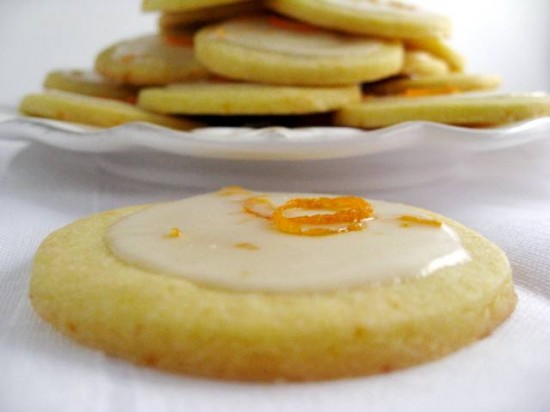
Orange Butter Biscuits with Cointreau GlazePrint Recipe


These biscuits (cookies) came to be when I tried to re-create a favourite of mine from my childhood (circa 1970’s).  They were an Arnotts biscuit in the shape of a flower with a hole in the middle and orange sprinkles. My grandmother always had them for our visits and for the life of me I cannot remember what they were called. I have the distinct feeling they were meant to have an orange flavour but if my memory serves me correctly they were very sweet with a teensy bit of tart/very manufactured orange taste – and I loved them.

At any rate, my attempts to re-create these favourites went slightly awry and I ended up with the adult version – a light and buttery biscuit with quite a strong Cointreau glaze – totally scrumptious and perfect for your afternoon cup of tea.

You know, I once met a man at a party who told me he was a biscuit designer for Arnotts – he was no more a biscuit designer than I was a truck driver, but (aside from thinking he was a lunatic) it made me think what a fun  job it might be.

Ingredients
311 grams/11 ounces (2 1/3 cups + 2 tablespoons) plain (all-purpose) flour, and more for dusting
1/2 teaspoon fine salt
1/4 teaspoon baking powder
227 grams/8 ounces (1 cup) unsalted butter, softened
1 cup granulated sugar
2 tablespoons finely grated orange zest
3 large egg yolks
1 teaspoon pure vanilla extract

Cointreau Glaze
113 grams/4 ounces (1 cup) confectioners’ sugar
2 tablespoons Cointreau
2 tablespoons + 1/2 teaspoon heavy cream
1 teaspoon finely grated orange zest

Biscuits
Whisk the flour, baking powder, and salt in a bowl and set aside. With a stand mixer and paddle attachment, beat the butter, sugar, and zest until well blended, for around 2 minutes. Add the egg yolks one at a time, mixing until blended after each addition. Add the vanilla extract and mix for a further minute. Add the flour mixture and mix on low speed until combined, about 1 minute.

Turn your dough out onto a lightly floured work surface and divide into 2 equal mounds on sheets of plastic wrap. Work the dough until smooth and form into two slightly flattened disks. Wrap in the plastic and place in your freezer for 30 – 40 minutes. (or your dough can be refrigerated for up to 2 days).

Position a rack in the center of the oven and heat the oven to 350f. Line 2 or more cookie sheets with parchment paper.

Working with one disk at a time, roll the dough on a floured surface to about 1/4 inch thick. Dust with additional flour as needed. Using a 3 inch round cookie cutter, cut out shapes. Arrange them about 1 inch apart on the cookie sheets. Gather, re-freeze, re-roll and cut the dough scraps as many times as you need. Place into your freezer again for a further 30 minutes before baking.

Bake, one sheet at a time, until the edges are lightly golden, for around 9 to 11 minutes. Let the biscuits cool on the sheet about 5 minutes and then transfer them to a rack to cool completely.

Glazing
In a medium bowl, combine the icing sugar, Cointreau, cream and zest. Mix until well blended and smooth. The glaze should be slightly runny in consistency, add a little more cream if you need to.

Place around 1/2 teaspoon of the glaze on each biscuit and spread with a spoon and decorate with a little orange zest if you wish.

Let sit at room temperature for 2 hours or until the glaze is set. They can be stored in an airtight container for 2 days.

Notes: This dough is very buttery and requires alot of freezer time in between cutting out.

Posted in Biscuits/Cookies/Slices/Bars, Morning Teas/High Teas, Picnic Food | 3 Comments

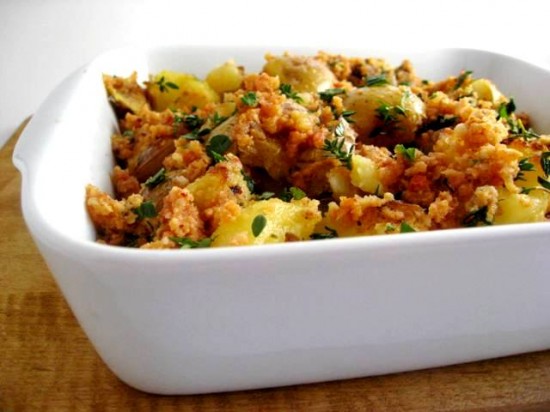
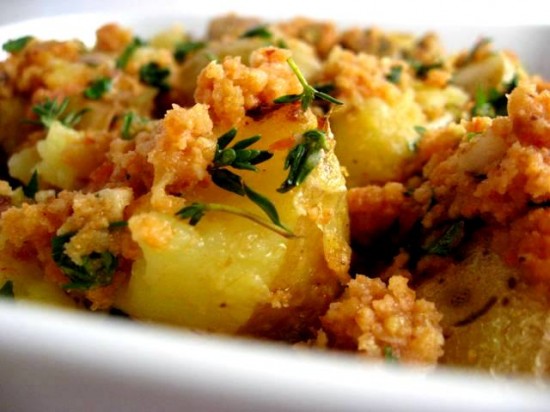
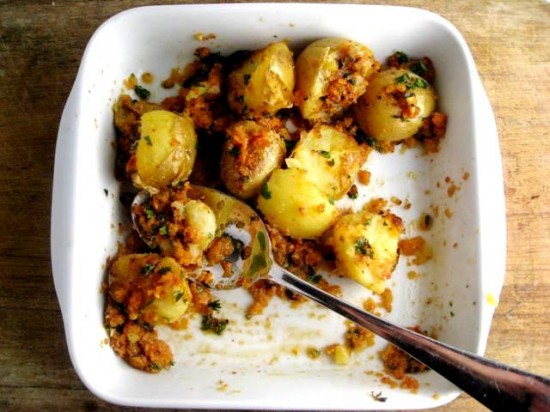
Romesco PotatoesPrint Recipe

This recipe comes from one of my favourite cook books, Sunday Suppers at Lucques. Its author Suzanne Goin never fails to please with her gift of producing recipes that can only be described as spectacular (the Hazelnut Brown Butter Cake being my favourite). In her usual style, she has matched a gorgeous, rich and bold sauce with your humble creamy potato to create a dish, that even someone so unmoved by potatoes, will swoon over.

The Romesco is a sauce that originates from Spain and is generally a blend of nuts, garlic, olive oil, mild peppers and tomato. It is incredibly aromatic and flavoursome but at the same time it’s actually quite hard to put your finger on what kind of flavour it is, being slightly sweet, slightly salty and slightly spicy at the same time. Generally this sauce gets served with seafood or poultry but in this case it is perfect for the plain potato.

This splendid dish has tapas written all over it, I can even imagine it would be good for a late breakfast with bacon and eggs. We ate it with a salad for lazy Sunday lunch – but seriously, anytime would be a good time!

Romesco
5 ancho chiles
2 tablespoons raw almonds
2 tablespoons blanched hazelnuts
1 1/4 cups extra-virgin olive oil
1 slice country bread, about 1-inch thick
1/3 cup crushed canned tomatoes
1 clove garlic, chopped
1 tablespoon chopped flat-leaf parsley
1/2 lemon, for juicing
A splash of sherry vinegar
Sea salt

Potatoes
1 1/2 pounds Yukon Gold potatoes (any size will work)
1/4 cup extra virgin olive oil
5 cloves garlic, unpeeled
2 bay leaves
6 springs thyme, plus 2 teaspoons thyme leaves
1 cup Romesco sauce (from above)
2 tablespoons chopped flat-leaf parsley
Sea salt and freshly ground black pepper

Romesco Sauce
Preheat the oven to 375f. Remove and discard the seeds and stems from the chiles, then soak them in warm water for 15 minutes to soften. Strain the chiles, and pat dry with paper towels. Meanwhile, spread the nuts on a baking sheet and toast for 8 to 10 minutes, until they smell nutty and are golden brown.

Heat a large sauté pan over high heat for 2 minutes. Add 2 tablespoon olive oil, when hot fry the slice of bread on both sides until golden brown. Remove the bread from the pan and cool. Cut it into 1-inch cubes and set aside.

Return the pan to the stove over high heat. Add 2 tablespoon olive oil and the chiles and sauté for a minute or two. Add the tomatoes. Season with 1/2 teaspoon salt and cook for 2 to 3 minutes, stirring often until the tomato juices have evaporated. Turn off the heat and leave the mixture in the pan.

In a food processor, pulse together the toasted nuts, garlic and fried bread until the bread and nuts are coarsely ground. Add the chile-tomato mixture and process for 1 minute more. With the machine running, slowly pour in the remaining 1 cup of olive oil and process until you have a smooth purée. Don’t worry, the romesco will “break” (separate into solids and oil); this is normal. Add the parsley, season to taste with lemon juice, sherry vinegar and more salt, if you feel it needs it.

Potatoes
Place the potatoes in a roasting pan and toss well with 2 tablespoons olive oil, garlic cloves, bay leaves, thyme sprigs and a heaping teaspoon of salt. Cover tightly with aluminum foil and roast the potatoes until tender when pierced (around 1 hour for larger potatoes and 30 minutes for the really small potatoes). Discard the bay leaf and the thyme and squeeze the garlic out of its skin and set aside. When the potatoes have cooled crumble them into chunky pieces with your hands (if you are using really small potatoes them leave them whole).

Heat a large saute pan over a high heat for a couple of minutes. (you may need to use 2 pans to avaoid over crowding) Pour in the remaining 2 tablespoons oil turn the heat to medium-high and wait 1 minute more. Add the potatoes, season with thyme leaves, salt and pepper and sauté them for 6 to 8 minutes until they are crispy on one side. (If they are stuck to the pan, don’t try to move them, they will eventually release themselves). After they’ve browned nicely on the first side, turn them until they color on all sides. Spoon the romesco sauce and reserved garlic over the potatoes and stir. Toss in the parsley and garnish with a little extra thyme of you wish.

Notes:
The Romesco sauce can be made two weeks ahead and kept in the fridge. You can also make the dish a little ahead of serving it – just leave the potatoes in the pan with the heat turned off and just before serving reheat for a few minutes and add the parsley at the last minute.

Source: Suzanne Goin

Posted in Sides, Vegetables, Vegetarian | 3 Comments

Blini with Smoked Salmon & RoePrint Recipe

I have had more unappealing blinis in my cocktailing years than I would like to admit and I have often wondered how something so simple can go so horribly wrong but I think some of it has to do with personal taste and alot to do with freshness and quality – particularly that of the salmon.

All of this bad blini eating I have done over the decades has had a good outcome – it has prompted me to devise my own perfect blini. And I stress that this is MY perfect blini, it may not suit the taste buds of you all, but seeing as it contains most of the basic blini ingredients, if you are a blini loving person, I am certain you will love these.

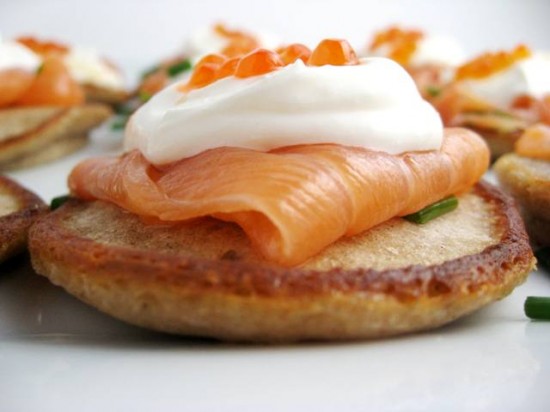
The blini’s themselves are light and nicely textured with the buckwheat flour, they are scattered with some chopped spanish onion and chives that bring out the flavour in the salmon beautifully, they are then topped with some torn salmon, a dollop of crème fraîche and finally salmon roe. So basic and so very delicious.

Of course blinis are not only for the cocktailing hour, they make a wonderful addition to a breakfast or a brunch and are very well suited to a high tea. Whatever the occasion, they are impressive, easy and very nice with a glass of your finest champagne.

Ingredients
1 teaspoon dried yeast
¾ cup plain (all purpose) flour
¾ cup buckwheat flour
1 egg, separated
80 grams (4 tablespoons) unsalted butter, melted
1/2 teaspoon white sugar
1/2 teaspoon salt
¾ cup lukewarm milk

To Serve
1/2 small red onion, finely chopped
175 grams/6.2 ounces salmon roe
10 chives, chopped into 1/2 inch pieces
226 grams/8 ounces crème fraîche or sour cream
226 grams/8 ounces smoked salmon

Combine yeast and 190 mls warm water in a large bowl and stir to dissolve, then stand in a warm place for 10 minutes or until foamy. Slowly whisk in plain flour, then cover with a clean tea towel and stand in a warm place for 1 hour or until doubled in size.

Meanwhile, in a separate bowl combine buckwheat flour, raw egg yolk, 1½ tablespoons melted butter, sugar, milk and ½ teaspoon sea salt and whisk to combine, then gently fold into yeast mixture. Cover and stand in a warm place for 1 hour or until risen by half.

Whisk raw eggwhite until soft peaks form and fold through batter. Heat a heavy-based frying pan over medium heat, brush with remaining butter and cook tablespoonfuls of batter, in batches, for 1-2 minutes or until bubbles appear, then turn and cook for another minute or until cooked through. Keep warm.

Scatter a little of the chopped spanish onion and chives on the blini, top with a torn piece of smoked salmon, a dollop of crème fraîche and some salmon roe. Serve immediately

This recipe should get you around 28 medium sized blini.

Notes: You may wish to substitute the onion and chives for dill if you want a slightly different taste, it would also look quite pretty to have some torn dill scattered over the top of the blini.

Posted in Breakfast, Morning Teas/High Teas, Nibbles & hors d'oeuvres, Picnic Food, Seafood, Starters | 1 Comment