Hasselback PotatoesPrint Recipe

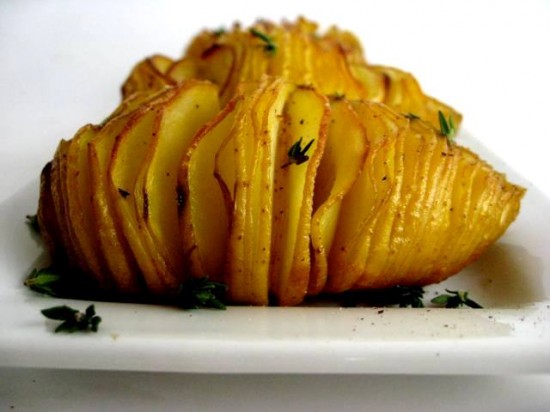
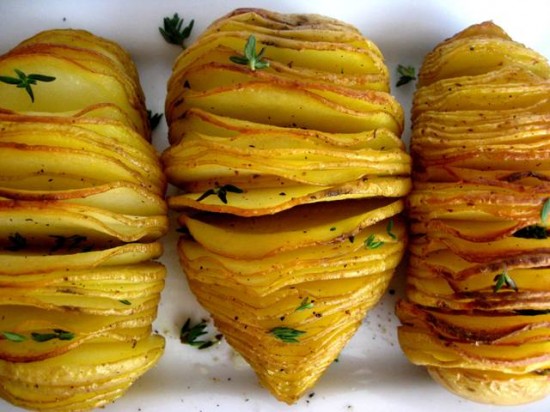
Hasselback Potatoes are one of those wonderfully easy and visually impressive vegetable dishes that most people love. And I have been making them for years, but today I made them with a purpose in mind and that was to try out my new set of knives – ceramic knives. For those of you that are old hands at hasselback potatoes you would know that a sharp knife is tantemount to their success – you need to be able to cut the potatoes in very thin and precise slices in order to get the fanning out effect that will give you a crispy exterior and a soft fleshy inside.

My new knives were sent to me by a lovely lady from Ceramichef who thought that I might like to try them. For those of you that are new to ceramic knives let me just say that they are quite amazing. I think I have chopped, sliced and diced anything I could get my hands on and after a day of wielding them around the kitchen, decided that the Santoku Knife was my favourite. To say they are sharp is an understatement, they are also precise and incredibly lightweight.
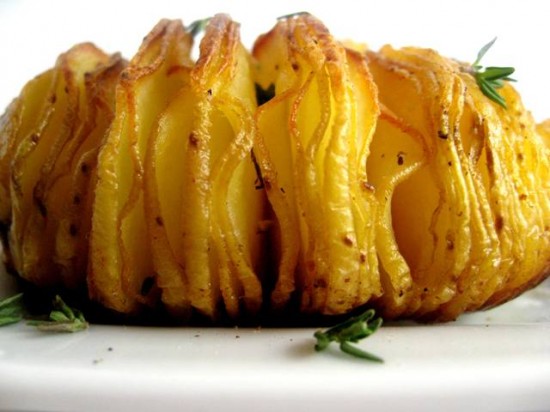
And so back to the potatoes – if you are a fan of the traditional roast potato then you will most certainly love this Swedish version – delightfully golden and crispy and quite beautiful in presentation.

Ingredients
9 medium oval-shaped potatoes, about 125 grams/4.4 ounces each, or 18 new potatoes, approximately 60 grams/2.1 ounces each
30 grams/1 ounce butter
4 tablespoons olive oil
Sea salt

For larger potatoes, preheat oven to 210c/425f. For roasting new potatoes, preheat to 200c/400f.

Put each potato in the bowl of a wooden spoon, like you would carry an egg in an egg-spoon race, and cut across at about 3mm/1/8 inch intervals.

Put cut potatoes on the baking pan on the stove with the butter and oil and heat till sizzling.

Turn potatoes well, putting them in upside down (i.e., cut-side down) first, then right side up, and spoon the fat over them.

Sprinkle each potato well with salt and put in oven. Cook large potatoes for about an hour and 10 minutes, testing to see whether the flesh is soft. (Forty minutes for the new potatoes.)

Transfer to warmed plate and serve.

Notes: You can also add garlic to this recipe – finely slice a couple of cloves of garlic and place a slice in between each slice of potato prior to baking.

Source: Adapted from Nigella Lawson

Posted in Sides, Vegetables, Vegetarian | 3 Comments

Raspberry Crumble Breakfast BarsPrint Recipe

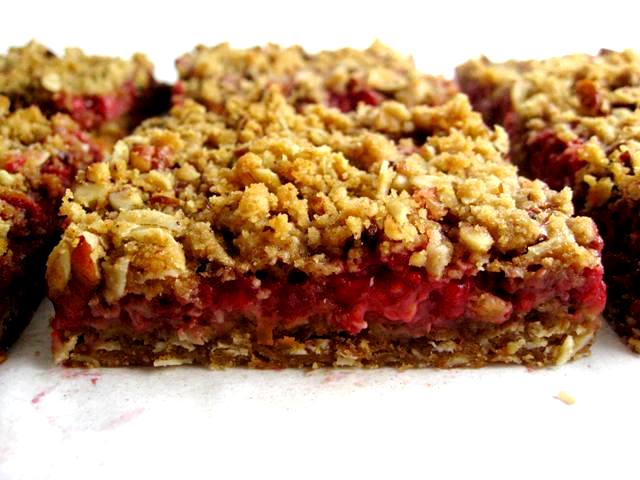
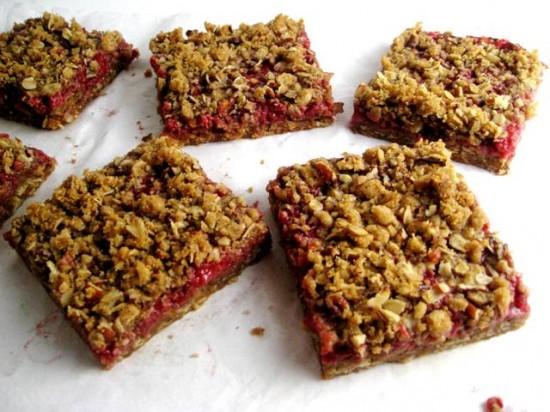
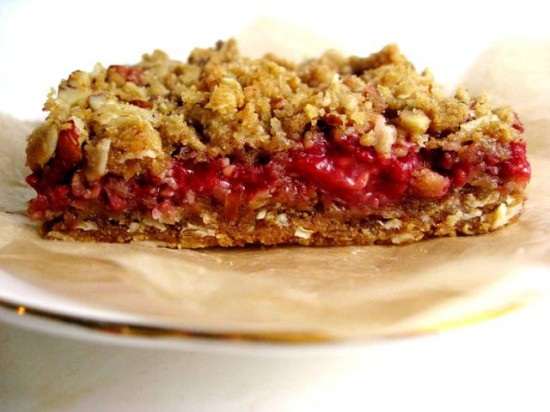
I am wondering why these bars are called breakfast bars because aside from a handful of oats and fresh raspberries there is not much else that says ‘breakfast’ to me. But no matter because they are very good and there is nothing stopping you from eating them at any time of the day – particularly after dinner with a scoop of your best vanilla ice cream.

In my mind they are a structured form of a crumble, which is why I changed their name from a ‘crumb’ bar to a ‘crumble’ bar. The flavours are the same, the golden brown colouring and caramelized taste that comes from combining butter and brown sugar – throw in some oats and pecans and you get a whole lot of wholesome looking texture (and the excuse to eat them for breakfast). Of course this wonderfully oaty base and crumb compliments the slightly tart raspberry mixture perfectly.

These won’t be breakfast for my family but that shouldn’t stop anyone else (remember the oats!). Personally, I think they might be a nice mid-afternoon snack with a strong cup of tea.

Base and Crumble Ingredients
1 1/2 cups all-purpose flour
1 cup firmly packed dark brown sugar
1 1/4 cups rolled oats
3/4 teaspoon salt
3/4 teaspoon baking powder
1/2 teaspoon baking soda
1/2 teaspoon cinnamon
170 grams/6 ounces unsalted butter, cut into 1-inch pieces
1/2 cup chopped pecans

Raspberry Filling
1/4 cup firmly packed dark brown sugar
1 tablespoon grated lemon zest
1/2 teaspoon cinnamon
2 tablespoons all-purpose flour
500 grams/1 pound raspberries, fresh or frozen
1/4 cup fresh lemon juice
2 tablespoons unsalted butter, melted and cooled

Preheat the oven to 175c/350f. Butter the bottom and sides of a 9 x 13 inch baking pan. Put a long piece of parchment paper in the bottom of the pan, letting the parchment extend up the two short sides of the pan and overhang slightly on both ends. Butter the parchment.

Put the flour, brown sugar, oats, salt, baking powder, baking soda, and cinnamon in a food processor. Pulse in short bursts until combined. Add the butter and pulse until loose crumbs form (I actually did all of this with my hands and it was fine).

Reserve 1 1/2 cups of the mixture, mix through the pecans and set aside. Pour the rest of the mixture into the prepared pan and use your hands or the back of a large spoon to push the base into an even layer at the bottom of the pan. Bake until golden brown, 12 to 15 minutes. Transfer to a wire rack and let the crust cool. Keep the oven on while you make the raspberry filling.

To make the raspberry filling, whisk the sugar, lemon zest, cinnamon and flour together in a bowl. Add the raspberries, lemon juice and butter and use your hands to toss gently until the raspberries are evenly coated.

Spread the raspberry filling evenly on top of the cooled crust. Sprinkle the reserved mixture evenly on top of the filling. Bake for 35 to 40 minutes, rotating the pan every 15 minutes, until the top is golden brown and the filling starts to bubble around the edges.

Transfer to a wire rack to cool completely, then cut into squares and serve. The bars can be stored in the refrigerator in an airtight container for up to two days.

Source:an adapted version of the Raspberry Crumb Breakfast Bars from Baked: New Frontiers in Baking

Posted in Biscuits/Cookies/Slices/Bars, Breakfast, Fruit, Morning Teas/High Teas, Picnic Food | 3 Comments

Sticky Date Pudding with Butterscotch SaucePrint Recipe

We have had a good week of gloom in NYC, dreary days and thunderous pelting rain – the kind that makes you want to cancel all your appointments and crawl back into bed with a book, let your children watch a little more TV than usual, clean out cupboards and rearrange furniture. Of course we have been spending alot of quality time in the kitchen and today we made these.

Sticky Date Puddings have been a favourite of mine since I lived in Darlinghurst (Sydney, Australia). Darlinghurst back then was very rock and roll  – and I wasn’t, but that was okay. I had my little one bedroom apartment with barely any furniture, a miniscule kitchen with my heart shaped Le Creuset pot, a table setting for one and no table and a bar fridge whose contents boasted a whole bottle of champagne and the occasional piece of fruit. Life was pretty peachy – I was on an adventure of some sort.

I had lots of little rituals – some of them good for me and some probably not so good, but one of the more wholesome ones was that on Monday nights I would go to a little bistro called Morgans with a good book and order a latte with a sticky date pudding. It was a heavenly little habit of mine and one I relished in because that sticky date pudding was almost the sweetest thing in my week.

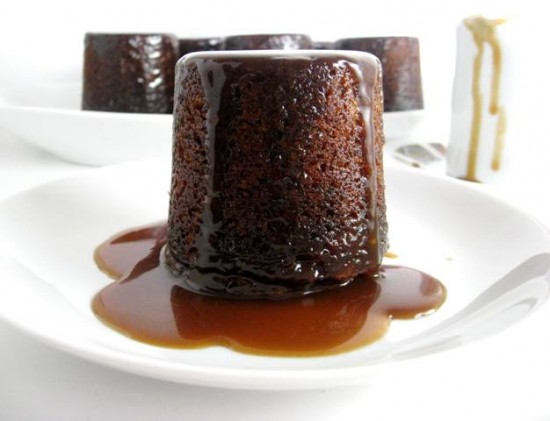
I eventually moved out of Darlinghurst and in attempts to recreate my Monday night delight, I spent a good couple of years trying out different recipes. I wanted a pudding that was sweet but not overly sweet, had enough dates to warrant its name with a texture that was almost damp rather than dry. Perfecting the sauce was crucial because we all know a successful sticky date pudding is dependant on a good sauce.

So I did all of that and here you have it. I certainly don’t get any time alone to indulge in a coffee and a book these days but I do get some silence whilst my daughters are devouring these (with serious intent) and that is gold.

Ingredients
230 grams/8.1 ounces fresh dates, pitted and chopped (around 12 dates)
250 ml water
1 teaspoon baking soda
100 grams/3.5 ounces unsalted butter, softened
175 grams/6.2 ounces caster sugar
2 eggs
1 teaspoon natural vanilla extract
150 grams/5.3 ounces plain (all purpose) flour, sifted
1 1/2 teaspoons baking powder
1/4 teaspoon salt
to serve: thick (double/heavy) cream

Butterscotch Sauce
4 tablespoons unsalted butter
1 cup of tightly packed dark brown sugar
¾ cup heavy whipping cream (not ultra-pasteurized)
1 tablespoon vanilla extract
1/2 teaspoon sea salt (or more if you wish)

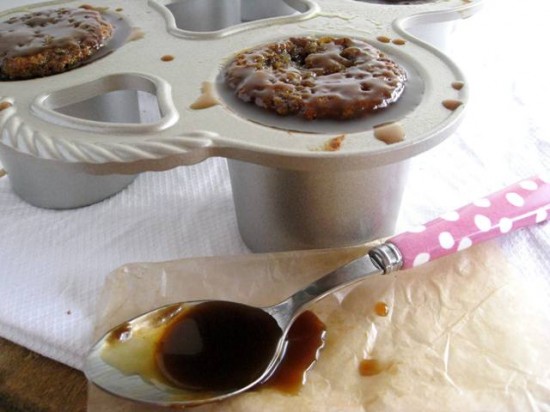
Preheat oven to 180c/360f and grease six x 1-cup capacity dariole moulds (I used pop over moulds) with butter .

Place the dates and 250ml water into a pan and bring to the boil over medium heat. Remove the pan from the heat and add the baking soda – the mixture will begin to bubble up. Place in a blender, pulse a few times to break up the mixture and set aside to cool.

To make sauce, melt the butter in a heavy based saucepan over a moderate heat and add brown sugar all at once, cook over a low heat for 3 minutes stirring occasionally with a wooden spoon. Bring the heat right down and stir in the cream, mixing until the cream and sugar mixture are uniform, then bring heat back up and simmer sauce for 10 minutes, whisking occasionally. Cool and add vanilla and salt to taste. Set aside.

Meanwhile, use an electric mixer to cream the butter and sugar together until light and fluffy. Add the eggs, one at a time, beating after each addition. Add the vanilla and beat until combined. Fold the flour, salt, baking powder and the date mixture alternatively into the butter mixture. Pour pudding mixture into dariole moulds and bake for 25 minutes until cooked through. Remove from the oven and let sit for 2 minutes, then prick the top of the puddings (still in the moulds) with a skewer. Pour a little sauce in the top of each mould and sit for 5 minutes to allow the sauce to seep into the puddings. Keep in mind that the more sauce the pudding absorbs, the sweeter and stickier it will become.

To serve, turn the warm puddings out onto a platter and drizzle with some more of the sauce. Serve with thick cream on the side.

If the pudding needs to be reheated, cover it with foil and place it in a 150°C oven for 30 minutes, or until heated through.

Notes: The butterscotch sauce is so fantastic that I usually make double the quantity and save the remaining sauce (some times only a little) to spoon over ice cream.

Source: adapted and referenced from Neil Perry, All Recipes, Epicurious, Australian Treats, Stephanie Alexander and Shuna Lyndon

Posted in Desserts, Fruit | Leave a comment

ShakshukaPrint Recipe

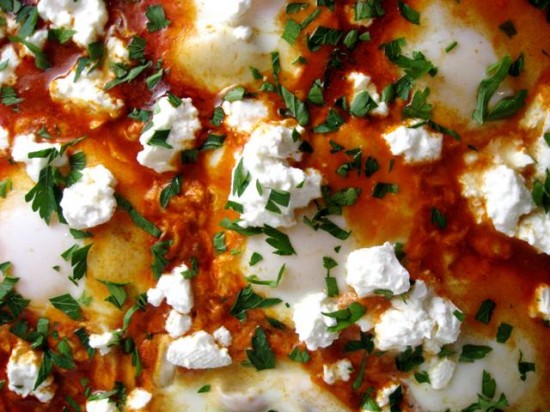
My mum arrived last night – all the way from Australia and in much need of a rest after a gruelling 24 hour plane flight. Her body clock is all over the place and as we were planning to have dinner tonight, her stomach was telling her it was time for breakfast. I used this as an excuse to cook something I have wanted to try for a long time – Shakshuka.

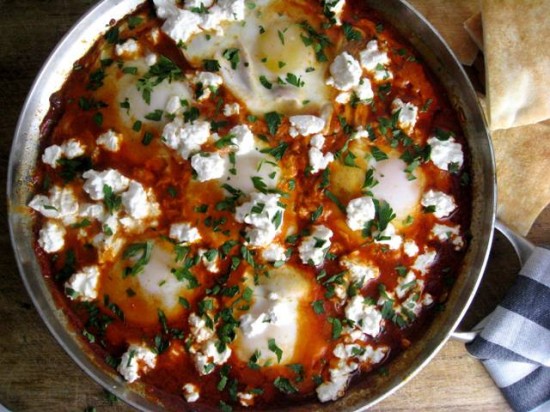
I know it sounds like the latest dance craze but it isn’t, it’s a delicious dish of eggs cooked in a tomato based sauce. Most people would tend to eat this for breakfast but considering it’s ingredients, it is perfect for any meal – in particular a light supper which is what my mother needs right now.

I am not going to go into the provenance of Shakshuka as it is one of those dishes that has multiple origins and has been tossed around (and adapted by) a variety of countries and claimed by a whole lot more. Some say it shouldn’t include onions, some say that bell peppers are not appropriate and others say any form of cheese is totally out of order. Well, for the sake of a great recipe, those ingredients have all been included in this one and boy! they taste good together.

Now back to my mother, I had many New York adventures planned for her but I think most of her time may be occupied by two little girls who don’t get to see her that often. She has already been scheduled in for a scoot through Central Park tomorrow morning followed by a visit to their favourite playground. So she will be doing some sightseeing I guess, just through the eyes of small children – a unique way to see the city.

Ingredients
1/4 cup olive oil
3 Anaheim chiles or 2 jalapeños, stemmed, seeded, and finely chopped
1 small yellow onion, finely chopped
1 red, yellow or green capsicum (bell pepper), finely chopped
6 cloves garlic, crushed then sliced
1 teaspoon ground cumin
1 tablespoon Hungarian paprika
1 28-ounce can whole peeled tomatoes, undrained
Sea salt, to taste
6 eggs
1/2 cup feta cheese, crumbled or Haloumi, grated
1 tablespoon chopped flat-leaf parsley
Warm pitas, for serving

Heat oil in a 12-inch skillet over medium-high heat. Add chiles, capsicum (pepper) and onions and cook, stirring occasionally, until soft and golden brown – for about 6 minutes. Add garlic, cumin, and paprika, and cook, stirring frequently for about 2 more minutes or until the garlic is soft.

Put tomatoes and their liquid into a medium bowl and crush with your hands. Add crushed tomatoes and their liquid to skillet along with 1/2 cup water, reduce heat to medium, and simmer, stirring occasionally, until thickened slightly, about 15 minutes. Season sauce with salt.

Crack eggs over sauce so that eggs are evenly distributed across sauce’s surface. Cover skillet and cook until yolks are just set, about 5 minutes. Sprinkle Shakshuka with feta and parsley and serve with warm pitas for dipping.

You should get enough for 4 – 6 people.

Notes: Shakshuka is a staple in Tunisia, Algeria and Moroccan cuisines, it is also very popular in Israel, where it was introduced by the Tunisian Jews. 

Source: adapted from Saveur and Jewilicious

Posted in Breakfast, Vegetarian | 3 Comments

BriochePrint Recipe

When I posted my recipe for Apple & Prune Brioche a while ago, I wrote of my love for the sweet bread from France. It is true that I do not eat it as much as I used too, but can I just re-iterate how wonderful it is? yes, it is wonderful.

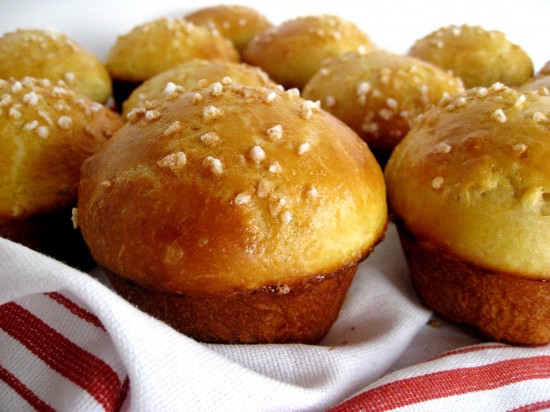
In New York there is a little food market called ‘Graces’, that sells bags of tiny brioche that are perfect for my daughters little hands and tummys. It is quite an expensive store so the other day after spending another small fortune on these baby brioche I decided it was time I make my own.

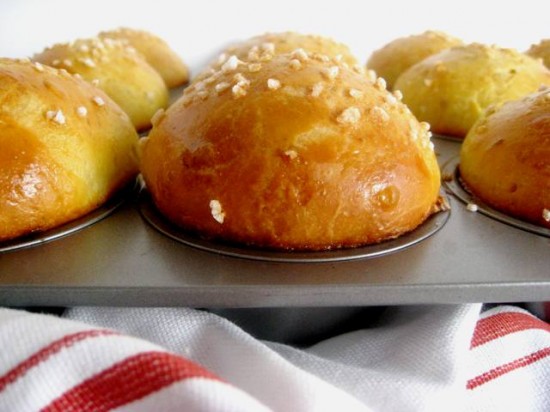
There are a plethera of brioche recipes out there that vary greatly in technique and after a little research I opted to merge two recipes with very pleasing results. Featherlight and rich – these buttery little buns have a texture that is almost a cross between a cake and a croissant, with the dough seperating into delicate strands when gently pulled apart.

And so my love affair with brioche continues but this time by my own hand and in my own kitchen. Isn’t there a saying ‘a brioche a day keeps the doctor away?

Ingredients
1/4 cup warm water (43c/110f to 46c/115f)
1/4 cup warm whole milk (43c/110f to 46c/115f)
3 teaspoons regular active dry yeast
2 3/4 cups all purpose flour
1 1/2 teaspoons salt
3 large eggs, room temperature
3 tablespoons sugar
170 grams/6 ounces unsalted butter, softened at room temperature but not mushy
1 large egg beaten to blend with 1 teaspoon water (for glaze)
1/4 cup Pearl Sugar (for decoration – optional)

Combine 1/4 cup warm water and warm milk in bowl of heavy-duty mixer fitted with paddle attachment. Sprinkle yeast over and stir to moisten evenly. Let stand until yeast dissolves, stirring occasionally, about 8 minutes.

Add flour and salt to yeast mixture. Blend at medium-low speed until shaggy lumps form, scraping down sides of bowl occasionally, 1 to 2 minutes. Add eggs, 1 at a time, beating until blended after each addition. Beat in sugar and increase mixer speed to medium; beat until dough is smooth, about 4 minutes.

Reduce speed to low. Add butter, 1 tablespoon at a time, beating until blended after each addition, about 4 minutes (dough will be soft and silky). Increase speed to medium-high and beat until dough pulls away from sides of bowl and climbs paddle, 8 to 9 minutes.

Lightly butter large bowl. Scrape dough into bowl. Cover bowl with plastic wrap. Let dough rise in warm draft-free area until almost doubled in volume, about 1 hour 15 minutes to 1 hour 30 minutes.

Gently deflate dough by lifting around edges, then letting dough fall back into bowl, turning bowl and repeating as needed. Cover bowl tightly with plastic wrap and chill, deflating dough in same way every 30 minutes until dough stops rising, about 2 hours. Chill overnight.

Butter a 12 standard (1/3-cup each) muffin tin. Divide dough into 12 equal pieces and roll each piece into a ball with the palms of your hands, place in the muffin cup.

Place muffin pan in warm draft-free area; lay sheet of waxed paper over. Let dough rise until light and almost doubled (dough will rise 1/2 inch to 1 inch above top rim of muffin cups), 50 to 60 minutes.

Position rack in center of oven and preheat to 400°F. Place muffin pan on rimmed baking sheet. Gently brush egg glaze over risen dough, sprinkle with pearl sugar and place in the oven.

Bake brioches until golden brown, covering with foil if browning too quickly, about 20 minutes. Transfer pan to rack and cool for 15 minutes. Remove brioches from pan and serve warm or at room temperature.

Notes: This recipe can also be used to make 1 large brioche loaf or any shape you so desire – time for you to get creative.

<Source: adapted from Dorie Greenspan and Chocolate & Zucchini

Posted in Breads, Breakfast | 1 Comment

Blueberry Vanilla TartPrint Recipe

This recipe comes from Serge Dansereau of Bathers Pavillion at Balmoral Beach in Sydney. I made Mr Man take me there one Mothers Day – I wasn’t yet a mother but I was over halfway there and in my mind had every right and reason to celebrate this occasion. I also wanted an excuse to go out and eat, and I did just that – in fact I think I ate my way into my third trimester.

The Blueberry Pancakes with Canadian Maple Syrup hit the spot and were remembered fondly last weekend (on Mothers Day) when we were recounting our Mothers Day adventures. I wanted to make them for you but I found this recipe, also from Serge, and changed my mind.

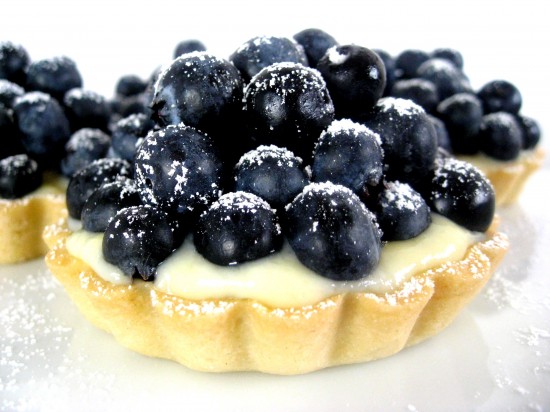
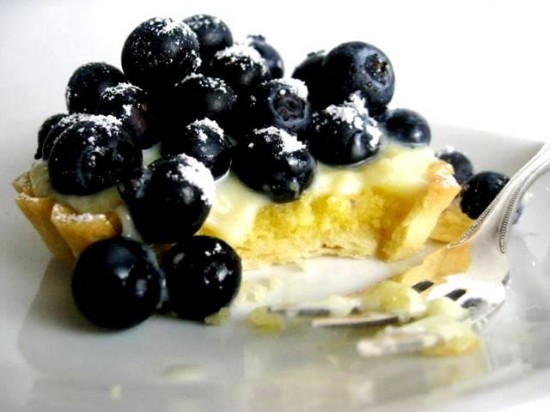
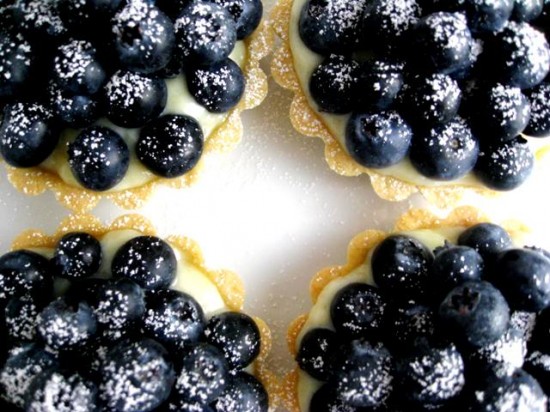
They are very similar to a crostata (a sweet Italian tart), being that they have a layer of frangipane followed by a layer of custard for the blueberries to sit on top off – very prettily too, I might add. Charming, winsome and perfect for any occasion – these little tarts have everything going for them, in the sweetest of ways.

*you will need to begin this recipe the day ahead*

Tart
225 grams/8 ounces unsalted butter
100 grams/3.5 ounces caster sugar
1 egg, beaten
350 grams/12 ounces plain flour
3 cups of ripe blueberries, rinsed and towel dried
Icing sugar to dust

Frangipane
66 grams/2.3 ounces unsalted butter at room temperature
66 grams/2.3 ounces caster sugar
2 eggs
27 grams/.9 ounces plain flour
85 grams/3 ounces ground almonds

Vanilla custard
2 cups milk
1 vanilla bean, split
125 grams/4 ounces white sugar
3 egg yolks
20 grams/.7 ounces plain flour
20 grams/.7 ounces corn flour
 
For the frangipane filling, in an electric mixer beat the butter and caster sugar for 2 minutes, then add the eggs, slowly, beating until well combined. Stop the mixer. Sift the flour and ground almonds and add to the butter mixture. Beat for 1 minute, transfer to a bowl and refrigerate overnight covered with plastic wrap.

Cream the butter and sugar together in a bowl until very pale, then beat in the egg. Gradually add the flour and mix to a smooth paste. Refrigerate for 2 hours (or freeze for an hour). On on floured surface, roll out the pastry to 3mm thickness and use to line 8 individual 3 inch diameter tartlet tins. Chill in the refrigerator for 30 minutes. Preheat oven to 180c/360f and blind bake for 10 minutes or until golden brown. Remove from oven, add 1 1/2 tablespoons of frangipane filling to each tart and bake for a further 10 minutes or until golden brown.

For the vanilla custard, bring the milk, vanilla beans and sugar to the boil, slowly. Cream egg yolks and flours together and pour the slowly boiled liquid into this egg mixture once the vanilla beans have infused well. Mix well. Return the entire mixture to the heat, and cook on medium heat, stirring until thickening occurs. Continue to mix on low heat and ‘cook out’ the flour taste for a further 5 minutes. Pass through a sieve and place into a bowl with some baking paper on top to stop a skin from forming. When the mixture has cooled to room temperature, spoon a level amount of the custard into each cooked pastry tart.

While the vanilla custard is still at room temperature in the tart shells, place the blueberries tightly packed on top of the custard, dust with icing sugar and serve.

Notes: The tart pastry breaks up very easily so use a heavily floured surface. Also, as you can see I used fluted tins but straight edged tins work just as well.

Source: adapted from Serge Dansereau, Bathers Pavillion

Posted in Desserts, Fruit, Morning Teas/High Teas, Picnic Food | 3 Comments

Gai Yang & Yum Tang Gwa (Thai Style Grilled Chicken & Cucumber Salad)Print Recipe

When I was growing up in Australia, almost every major city had a Chinatown and every large country town had a Chinese restaurant. When you went out for dinner it was for Chinese (more specifically Cantonese) and not much else. The food scene back then was a little limiting which was strange considering Australia was such a melting pot of nationalities. It wasn’t until the mid 80’s that Thai fever took over and now the number of Thai restaurants in Australia is quite extraordinary.

If you have been luckily enough to get to some of the really good ones in Sydney; Longrain, Sailors Thai or Spice Market, (to name a few of my favourites), you would have encountered dishes that are as authentic as they are innovative with flavours that are fresh and distinct.

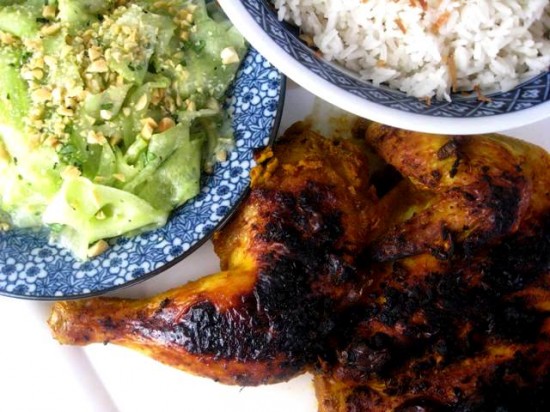
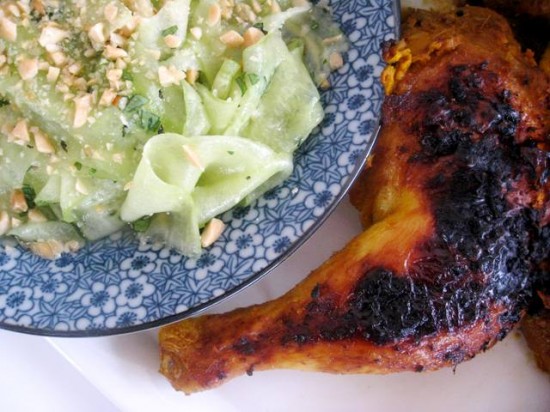
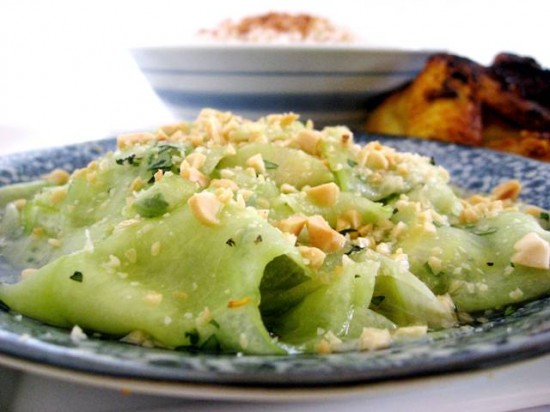
This Thai Style Grilled Chicken comes from Sailors Thai, it is traditionally served with a Green Papaya Salad but I couldn’t get my hands on half the ingredients (namely the green papaya) so I created a little cucumber salad with some Thai flavours that I love (and it was easy to put together from ingredients I already owned).

I will eventually get my act together and search this big city for some decent Thai ingredients, and when I find them you will be treated to many more sensational recipes. Australian’s seem to have a knack for amazing Thai dishes and it is only fair that I share some of those recipes with you.

Ingredients
¼ cup lemongrass, thinly sliced
2 tablespoons turmeric
5 cloves garlic, finely chopped
2 tablespoons fish sauce
1 tablespoon soy sauce
1 tablespoon oyster sauce
1 teaspoon sugar
pinch white pepper
2 tablespoons coriander root, finely chopped
1 whole chicken butterflied

Using a mortar and pestle, pound garlic, turmeric, lemongrass and coriander root into a paste. Add fish sauce, oyster and soy sauces, sugar and pepper and set aside. (blending this mixture can also be done in a food processor)

Wash and dry the chicken, rub in the marinade ensuring that you get it in every possible crevise, place in a bowl and cover with plastic wrap to marinate for at least two hours.

Place your grill on high and grill chicken until the chicken is cooked, you may need to cover with foil halfway through the process so the chicken doesn’t get overly burnt. (You can also cook the chicken on your barbeque – it is perfect cooked over charcoal.)

Serve with sweet chilli sauce, cucumber salad and coconut rice.

Thai Cucumber Salad

Ingredients
3 large cucumbers, about 3 cups (I use Lebanese Cucumbers)
1/4 cup Vietnamese Mint, roughly chopped
1/4 cup coriander (cilantro) leaves, roughly chopped

Dressing
1/4 cup fish sauce
3 tablespoons lime juice
2 tablespoons rice vinegar
2 tablespoons of palm sugar (or substitute with white sugar)
1 small chili, finely chopped (or a sprinkle of red pepper flakes)
to serve: chopped peanuts

To make the dressing, place all ingredients in a saucepan and heat gently, stirring until the sugar dissolves. Remove from heat, set aside and bring to room temperature.

Peel the cucumbers and shave them lengthways with a vegetable peeler to create ribbon like strands. Place them in a bowl with the mint and coriander, pour over the dressing and toss gently with a fork to combine. Scatter with chopped peanuts and serve.

Notes: The cucumber salad is best made directly before serving.

Source: Thai Style Grilled Chicken from Peter Bower, Sailors Thai via Julia Enders

Posted in Barbeques/Grilling, Mains, Poultry | 2 Comments

Dark Chocolate Chunk and Dried Cherry CookiesPrint Recipe

I am wondering if there is something that Gwyneth Paltrow cannot do. As if being an acclaimed actress, wife and mother of two beautiful children and a singing sensation on ‘Glee’ was not enough – she is an avid home cook and has just released her first cook book ‘My Father’s Daughter’. And by all reputes it appears she really knows her stuff – I am very impressed.

I ordered my copy of this book the other day and got a little impatient waiting for it to arrive, so I did some googling and came across her newsletter ‘Goop‘. Goop is full of information on lots of stuff and had just what I was after – a couple of cookie recipes. I chose to make the Dark Chocolate Chunk and Dried Cherry Cookies, which were actually developed by Katie Lee Joel (who has her own cook book – The Comfort Table) and tweaked slightly by Gwyneth.

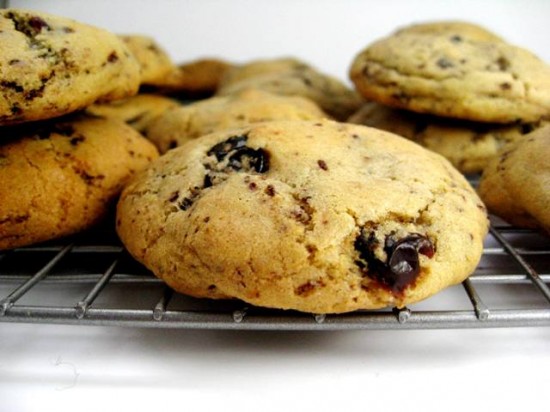
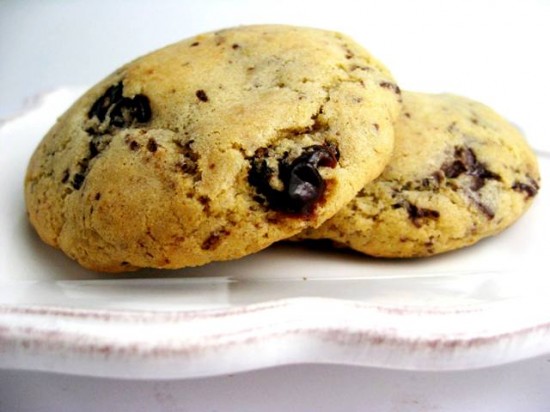
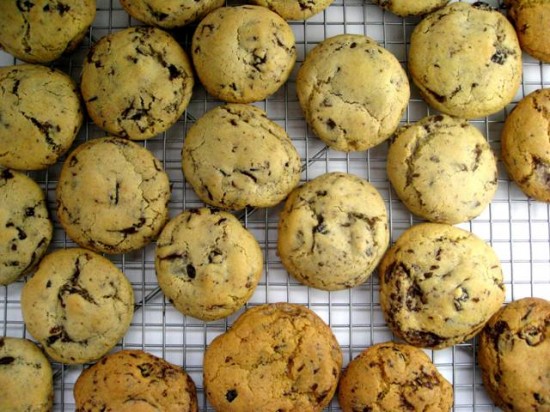
These cookies have everything you would hope for in a great snack time treat – they are buttery and sweet, with chunks of chocolate that contrast nicely with the almost (but not quite) tart dried cherries and are perfectly textured being slightly chewy with a lightly crisped exterior.

They are doing a good job of tiding me over till My Father’s Daughter arrives. I ate quite a few and then packed up the rest for my daughter’s school picnic in Central Park – as testament to a good cookie, they were gone in a matter of minutes. As for Gwyneth, I am looking forward to more of her recipes and seeing what she will conquer next.

Ingredients
2 1/4 cups unbleached, all-purpose flour
3/4 teaspoon baking soda
1 teaspoon baking powder
1 teaspoon salt
1/2 cup (113 grams/4 ounces) unsalted butter, at room temperature
2/3 cup dark brown sugar, firmly packed
2/3 cup granulated sugar
2 large eggs
1 teaspoon pure vanilla extract
226 grams/ 8 ounces dark chocolate, coarsely chopped (be sure to use a high-quality chocolate with more than 60% cacao)
1 cup dried cherries (about 170 grams/6 ounces), coarsely chopped
1 cup pecans, coarsely chopped (optional)

Preheat the oven to 185c/375f.

Sift the flour, baking soda, baking powder and salt together into a bowl.

In the bowl of an electric mixer (or in a bowl using a handmixer), beat the butter with the sugars until light and fluffy, about three minutes. Add the eggs, one at a time, beating until incorporated. Beat in the vanilla. On low speed, add the flour mixture. With a wooden spoon, fold in the chocolate, cherries and pecans (if you’re using them).

Scoop by heaping tablespoonful onto two nonstick or greased cookie sheets. Bake until golden and chewy, about 12 minutes, rotating the sheets after six minutes. Transfer the cookies to a rack to cool and repeat the process with the remaining dough.

Yeild: 2 dozen cookies

Notes: I actually chilled my cookie dough for 1/2 hour prior to forming the cookies and then another 1/2 hour prior to baking – it made the dough easier to handle and the cookie shape held a little better.

Source:Gywneth Paltrow adapted from Katie Lee Joel

Posted in Biscuits/Cookies/Slices/Bars, Chocolate, Morning Teas/High Teas | 2 Comments

BaklavaPrint Recipe

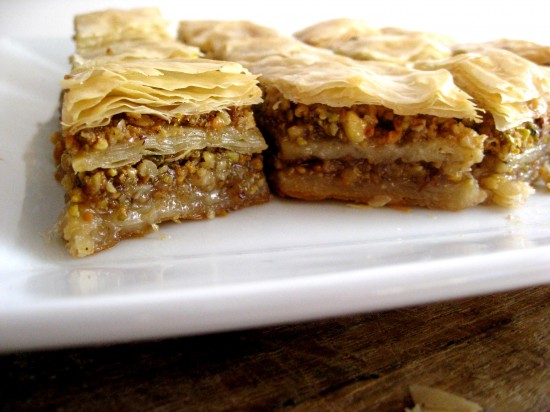
Many years ago, Mr Man and I took a trip to Turkey to take in the sites. It is a fascinating country, so rich in culture and resplendent in breathtakingly beautiful architecture. One of the highlights was the food, which differs slightly throughout the regions of Turkey but is largely the heritage of Ottoman Cuisine. And one of my most favourite little things to nibble whilst we were out and about, was baklava.

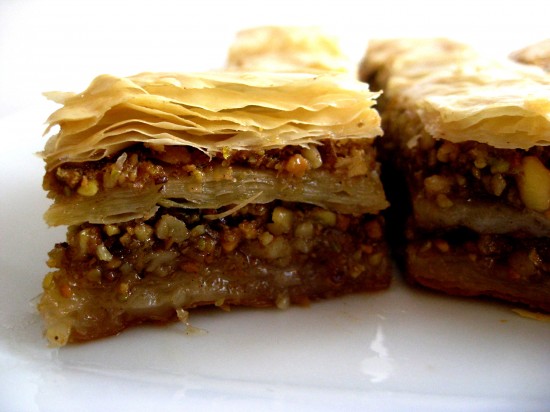
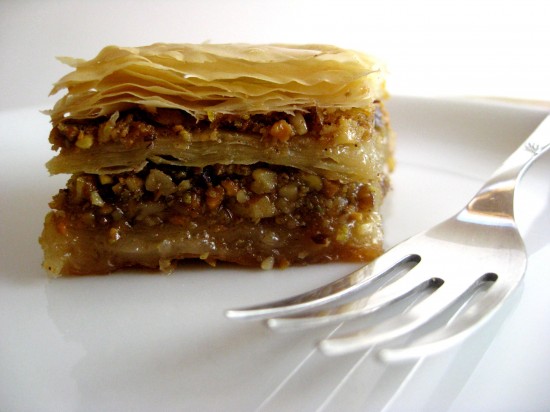
Baklava is a sweet pastry made from layers of filo pastry spread with chopped nuts and spices, and soaked in a cinnamon scented honey syrup. Its recipe varies somewhat from region to region as it does from country to country – Armenia, Greece, Egypt and Georgia also include it as part of their traditional cuisine.

As historic as baklava is, the more modern day versions can include some shamefully unorthodox ingredients like cooking spray instead of butter and a syrup made with a sugar-free sugar substitute. I have stuck to the customary ingredients and believe me, the result is perfect and pretty much on par with the baklava I sampled throughout Turkey.

It is easy to see why baklava is known as one of the Middle East’s grandest sweets. With its layers of delicate pastry, butter, honey and nuts I can certainly guarantee love at first bite.

Honey Syrup Ingredients
300 grams caster sugar
125 grams honey
2 tablespoons of lemon juice
1 cinnamon quill
2 drops rosewater

300 grams natural, raw and unsalted pistachios
300 grams walnuts
120 grams sugar
3 teaspoons ground cinnamon
2 teaspoons finely grated lemon peel
300 grams butter, coarsely chopped
454 grams filo/phyllo pastry, approximately 40 sheets (fresh is best but frozen and thawed is fine)

For honey syrup, combine sugar, honey, cinnamon and 300ml water in a saucepan over medium heat, stirring to dissolve sugar. Reduce heat to low, simmer for 20 minutes to allow the ingredients to infuse. Remove from heat, strain through a fine sieve, stir through lemon juice and rosewater and set aside (can be made 1 day ahead, cover and chill).

Preheat your oven to 160c/350f. Spread the nuts on a baking sheet and toast for 5 minutes and allow to cool. Transfer the nuts to a chopping board and chop them to a medium/fine texture. This can also be done using a food processor – using the on/off button to ensure they are not too finely ground.

Combine nuts, sugar, lemon peel and cinnamon in a bowl and set aside. Melt butter in a saucepan over low heat, set aside and keep warm. Brush a 13 x 9 x 2 inch baking tray with melted butter. If you need to, cut the sheets of filo to fit tray snugly and cover with a sheet of plastic wrap and then a damp tea towel.

Layer half of the filo pastry in your baking tray, brushing butter between each layer. Scatter evenly with half the nut mixture, then top with half of the remaining pastry, brushing butter between each layer. Scatter over remaining nut mixture and top with remaining filo, brushing between each layer with butter. Brush the top lightly with butter and refrigerate until firm (15 minutes). Cut through the top two filo layers (do not cut through to the bottom of the pan) lengthwise with a very sharp knife. Repeat this crosswise to make 16 rectangles. Bake until golden and cooked through (around 45 minutes to an hour depending on your oven).

Spoon cold syrup over the hot baklava evenly and set aside to cool completely (overnight if possible, covered and standing at room temperature), cut each square diagonally in half for a total of 32 pieces. Transfer to a platter and serve.

Notes: you can also cut the Baklava into a diamond shape.

Source: adapted from Turkey on a Plate, Bon Appetit, Turkey to Go & Australian Gourmet Traveller

Posted in Biscuits/Cookies/Slices/Bars, Desserts | Leave a comment

Blood Orange & Campari SorbetPrint Recipe

I couldn’t resist purchasing a crate of blood oranges from my local markets. I stumbled upon them last weekend and seeing them packaged in such a quaint way bought back memories of my childhood – back in the days when milk was delivered to our doorstep in glass bottles, 5 cents would buy me a weeks supply of Black Cat bubble gum and Sea Monkeys were at the top of my Christmas wish list (and I swear they really did grow).

Anyway, enough nostaligia! I have been putting these lovely coloured fruits to good use, I have made jam, played around with a compote and a citrus tart (quite unsuccessfully), I have also made another blood orange sorbet – this time with a good dash of Campari.

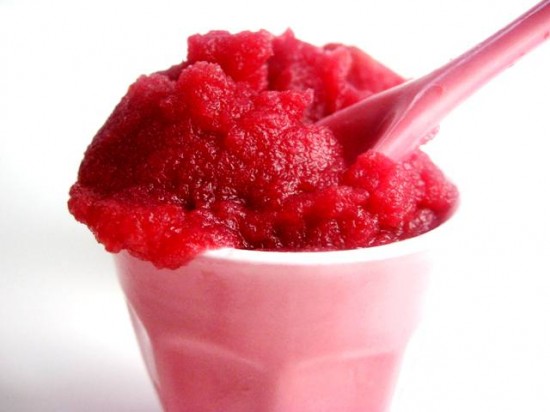
I am a huge fan of sorbets, and I have made this particular one consistently since the purchase of my icecream maker. It is incredibly light and refreshing with a slightly bitter aftertaste that comes from the Campari, consequently I would describe it as having a very ‘grown up’ flavour.

Luckily we are having some grown ups over for dinner tonight, I am going to serve this sorbet in between our main course and dessert (a hazelnut and brown butter cake and lemon curd macarons), my intention is for it to be palette cleansing more than anything and I believe it should do the trick.

Ingredients
3 cups freshly squeezed blood orange juice (strained or unstrained, it’s up to you)
3/4 cup sugar
6 tablespoons Campari

Place your sugar in a small saucepan. Add 1/2 a cup of the blood orange juice and heat, stirring constantly until the sugar is completely dissolved. Remove from heat and whisk into the remaining blood orange juice.

Set aside for 1/2 hour until the juice is at room temperature, then cover and place in your fridge to chill for at least 2 hours (or up to a day should you so desire).

Place in your icecream machine and follow the instructions, pouring the Campari through the mixture 2 minutes before the freezing process is complete (any earlier may impede the freezing process).

Once complete pour into an airtight container and freeze for a further 4 hours before serving. Or if you would like a firm sorbet rather than a soft sorbet, then freezing overnight is preferable.

Notes: You will get more juice from your blood oranges if they are at room temperature. Also, the colour of blood oranges varies greatly so do not be concerned if you get quite a light colour.

Posted in Desserts, Frozen Treats, Fruit | 1 Comment