PissaladierePrint Recipe

Pissaladiere is my number one picnic food. And aside from the fact that it is a great traveller it also has a couple of my favourite ingredients, anchovies being my most favourite of all.

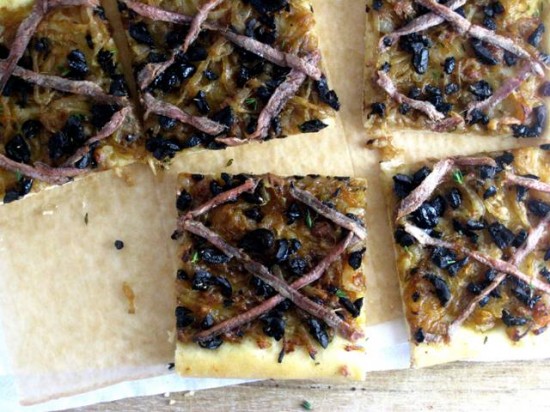
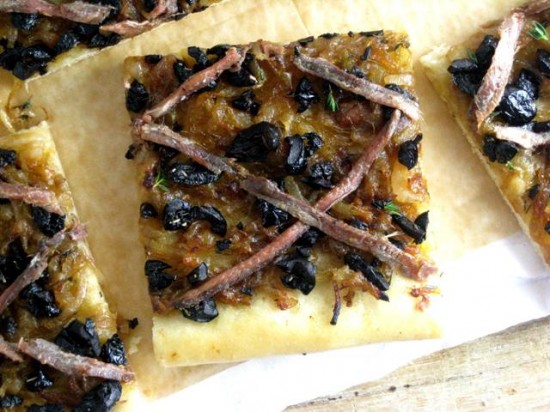
Hailing from the Cote d’Azur, it is idyllic in its flavours as it is in origin. I would almost go to say it’s the French version of a pizza, although it has no cheese or tomatoes and it’s traditional topping is a harmonious blend of sweet sweated onions, anchovies, herbs and olives.

Anyway, I know I promised a Cherry Pie, but I am too distracted to concentrate on pie. The Food & Wine photo competition is closing tomorrow and I am a hopeful finalist. Have a peak.

And if that doesn’t interest you, hot foot it too your kitchen, grab a pastisi and enjoy this lovely provincial treat from the South of France.

Dough:
1 teaspoon active dry yeast
1/2 cup warm water
1 tablespoons olive oil + 1/2 teaspoon
1 1/2 cups plain (all purpose) flour
1/2 teaspoon salt

Topping:
1/4 cup olive oil
500 grams/17 ounces onions peeled and very thinly sliced (about 3 medium or 2 large onions)
Salt and pepper to taste
3 sprigs of thyme
1 sprig of rosemary
1/3 cup Italian oil cured olives, pitted
24 anchovy fillets

Dough:
Place the yeast in the warm water in a small bowl and let stand for 8 minutes. Add 2 tablespoons of the olive oil to the yeast mixture and set aside. Fit your stand mixer with the dough attachment and add flour and salt to the mixer bowl forming a well in the centre. Start mixing on low speed until the dough starts to pull away from the sides of the bowl and look elastic – add a little water if you think the dough is on the dry side. Place the dough on a lightly floured work surface and knead for around 5 – 7 minutes until smooth. Place in a lightly oiled bowl, drizzle with the 1/2 teaspoon of olive oil and cover with plastic wrap, allow dough to rise in a warm spot for about 1 hour.

Topping:
Heat the olive oil in a large pan over medium-low heat. Add onions and season with salt and pepper. Add the herbs and let the onions cook and caramelize for around 50 minutes, uncovered and stirring occasionally. Add the anchovy fillets and cook for an extra couple of minutes until the anchovy fillets have melted into the onions, remove the herbs and set aside.

Preheat to 375f. Roll the dough on a floured surface into a very thin 9 x 12 inch rectangle. Transfer the dough to an oiled baking sheet (9″ x 12″), let the sides of the dough ride up slightly onto the sides of the baking sheet. Cover dough with plastic wrap and let rest for 5 – 10 minutes.

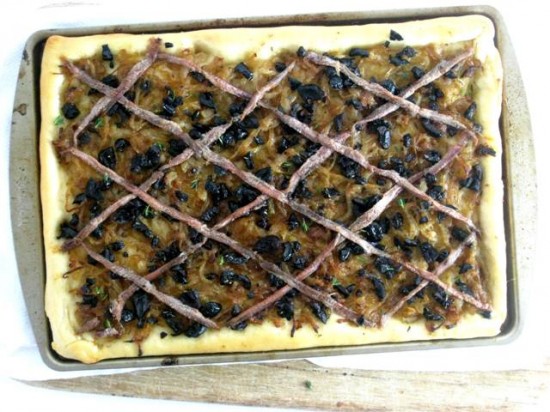
Spread the onion mixture across the top of the dough. Slice the additional anchovies down the centre and scatter these and the olives over the onions (you can form a lattice pattern with the anchovies if you desire). Bake for 15-20 minutes and serve warm or at room temperature.

Notes: If you are not fond of a strong anchovy taste it is best that you half the amount of anchovies that you scatter across the top.

Source: Adapted from Liete’s Culinaria

Posted in Breads, Nibbles & hors d'oeuvres, Picnic Food, Tarts/Flans/Quiches/Pies | 1 Comment

Baked Apricots with LimoncelloPrint Recipe

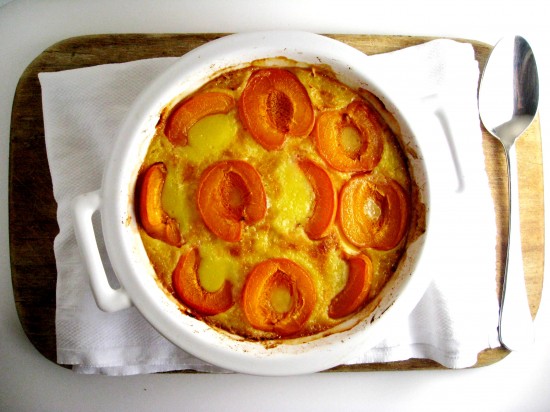
As you can see I am going through a little stone fruit frenzy but with the abundance of ripe peaches, apricots and nectarines weighing down the market shelves, it is very hard to avoid.

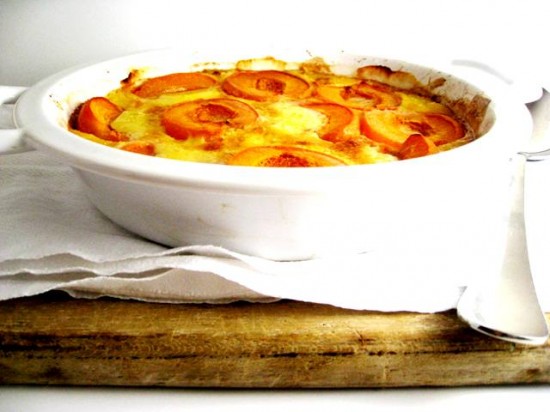
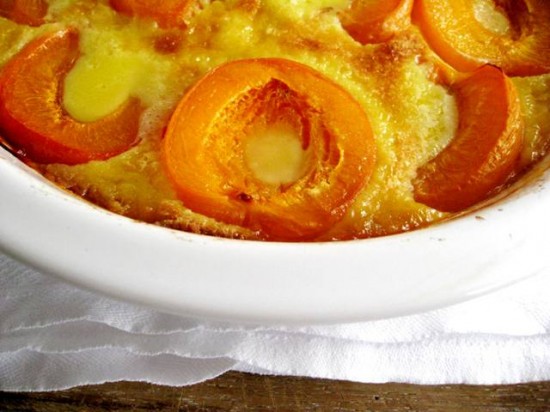
Todays post is a rustic, Italian style summer pudding with apricot halves roasted in a Limoncello infused custard. The roasting of the apricots intensifies their flavour  whilst the addition of the Limoncello gives the custard a mildly sweet and lemony taste. Despite the eggs and cream, it is not a heavy dessert and is perfect for someone like me who craves puddings year round.

Next stop at the market is the cherry stand, I have avoided baking a cherry pie for far too long and the time has come…

Ingredients
5 large fresh apricots (or 6 – 7 small)
1/2 cup caster sugar + 1 teaspoon
2 eggs
2/3 cup pouring cream
2 tablespoons Limoncello

Preheat your oven to 230c/450f.

Place pitted and halved apricots cut side facing up in a baking dish (a round 9″ or a small square/rectangular dish with the same capacity)

Add the sugar (1/2 a cup), eggs, cream and Limoncello to a bowl and whisk together until well combined. Pour over the apricots and sprinkle with the additional teaspoon of caster sugar and place into the oven for 20 minutes. Reduce your oven temp to 180c/350f and bake for a further 20 minutes or until the custard in cooked.

Serve warm or at room temperature.

Notes: I drizzled a little Limoncello over each serving just before we ate it – even more delicious!

Source: adapted from Katie Ate

Posted in Desserts, Fruit | 1 Comment

Peach, Prosciutto and Mozzarella SaladPrint Recipe

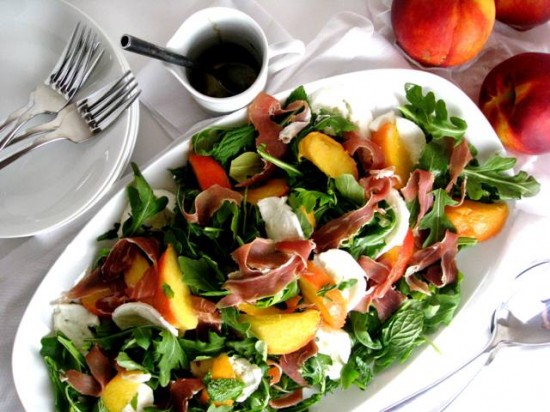
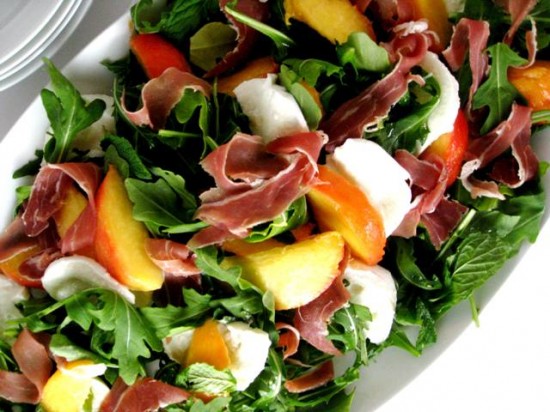
This is a salad I have lived on every Summer since I discovered it. The flavours are simple, fresh and beautiful, and with its milky orbs of buffalo mozzarella and segments of drippy golden peaches, it is quite possibly the sexiest Summer salad I have ever eaten.

It comes from Matt Moran’s cook book ‘When I get home’. I met Matt once, many years ago when I was given the task of delivering some King Island honey to him for a dinner he was preparing to showcase King Island produce. One of the jars dropped on the road and Matt found me staring at the large puddle of precious honey that was forming amongst the shattered glass. He was wondering how I was going to apologise and I was wondering what kind of honey I (and he) could use as a substitute. Anyway, Matt outdid himself, the dinner was sensational (including the honey component) and I have been a fan every since.

With temperatures outside soaring to above 100 degrees it can be hard to find any kind of food appealing, aside from this salad that is – pair it with a glass of chilled chablis and it is about as refreshing as Summer dining is going to get.

Ingredients
20ml extra virgin olive oil
20ml balsamic vinegar
Salt and pepper
2 ripe yellow peaches
1 handful rocket
¼ bunch mint, leaves picked
2 buffalo mozzarella balls, cut into 12 pieces
4 slices prosciutto, torn into pieces

Whisk together the olive oil and balsamic vinegar and season with salt and pepper. Blanch the peaches in a pan of boiling water for 10 seconds, then remove. When cool enough to handle, peel off the skin and cut each peach into eight slices.

Dress the rocket and mint with the balsamic dressing and arrange on a plate. Place the peaches and mozzarella on top, then lay the prosciutto over the salad and serve.

Yeild: Serves 4 as a side or a starter.

Notes: In order to get the best flavours from this salad it is essential that you use really ripe peaches.

Source: Matt Moran

Posted in Fruit, Salads, Sides, Starters | 5 Comments

Tate’s Chocolate Chip CookiesPrint Recipe

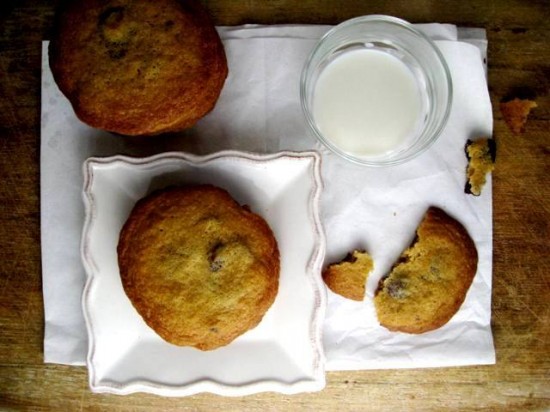
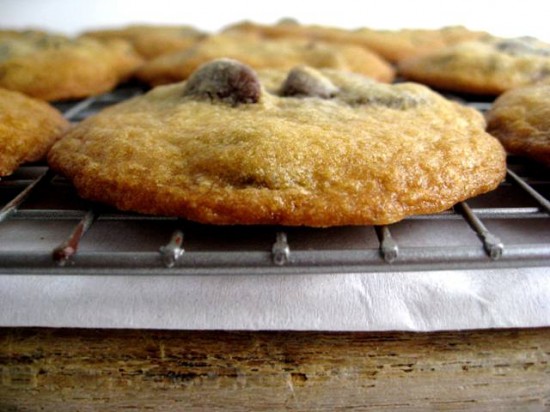
You will find Tate’s Chocolate Chip Cookies through out New York and quite possibly all over the US. I have seen them sold in so many place that when I came across this recipe I thought I should add it to my chocolate chip cookie (CCC) reportoire.

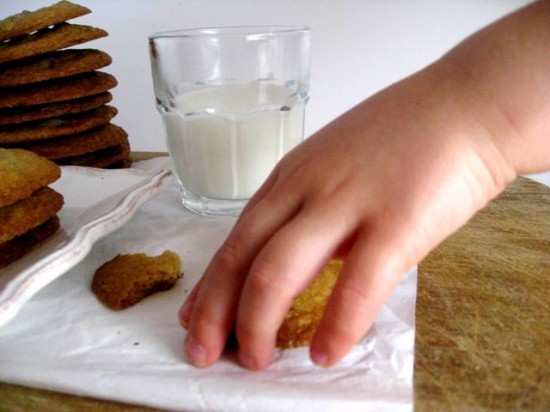
What makes them different to my usual CCC recipe (s) is that they are thin and crisp as opposed to being thick and somewhat dense. They do retain the qualities of my other chocolate cookies though, being buttery, moorish and delicious with a glass of ice cold milk.

Consider them a chocolate chip cookie redux.

2 cups unbleached, all-purpose flour
1 teaspoon baking soda
1 teaspoon salt
1 cup (226 grams/8 ounces) lightly salted butter, at room temperature
3/4 cup granulated sugar
3/4 cup dark brown sugar, firmly packed
1 teaspoon water
1 teaspoon pure vanilla extract
2 large eggs, beaten
2 cups semisweet chocolate chips

Preheat your oven to 180c/350f.

Whisk the flour, soda and salt together in a bowl. In another large bowl, mix the butter with a wooden spoon till blended and smooth, then mix in the sugars. Add the water, vanilla and eggs to the butter mixture. Stir in the flour mixture until just combined and then fold in the chocolate chips. Using two soup spoons, drop the cookies 2″ apart onto two nonstick or greased cookie sheets. Bake for 8 – 10 minutes, rotating the sheets after four minutes. Remove the cookies to a wire rack to cool, and repeat the process with the rest of the batter.

Yeild: Around 30 cookies.

Notes: It is not necessary to chill this dough at all.

Source: Tates

Posted in Biscuits/Cookies/Slices/Bars, Chocolate, Morning Teas/High Teas, Picnic Food | Leave a comment

Brown Butter Peach BarsPrint Recipe

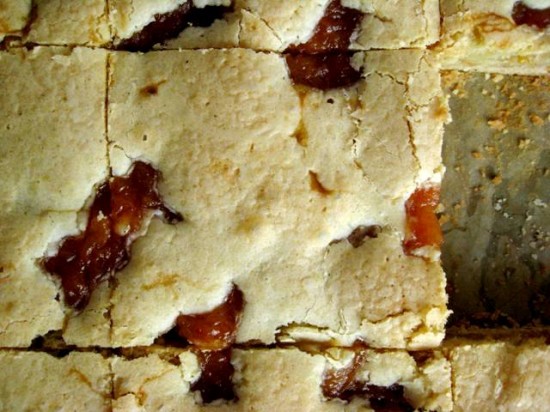
Over the last couple of months I have gathered together a nice little pile of peach recipes. It’s not like I have been sitting around tapping my fingers on my kitchen counter, waiting for peaches to come into season but you could say I have been getting a little impatient. So anyway, stone fruit has hit the shelves of the local stores and finally I can get on with it.

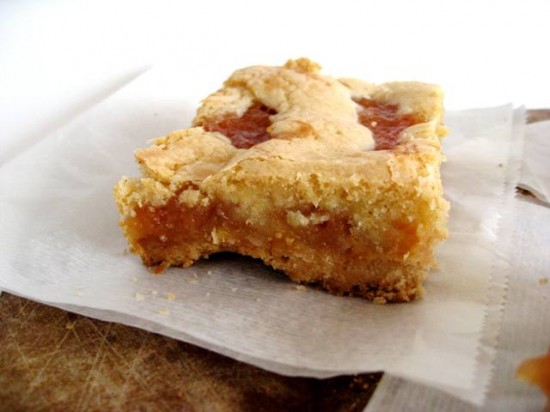
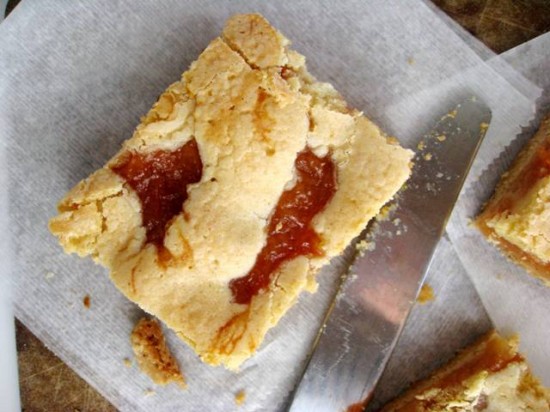
This is one of those bars that is a little more involved than others but I had some spare time over a couple of days so it worked fine for me. The result is a fruity baked bar that is well worth the time it takes to brown butter (twice), scrape vanilla seeds and make a jam. It is the quintessential bakery treat that screams ‘old fashioned goodness’ and has the ‘home baked taste’ written all over it.

So I ask you – why have plain melted butter when you can have a gorgeous nutty browned butter infused with vanilla and why buy jam when you can concoct your own peachy version? If this all makes sense to you then I think you may be ready for these bars…for they are certainly worth the effort.

Peach Jam
1 cup sugar
Zest 1 orange
Juice of two oranges (around 1 cup)
½ vanilla bean, halved and seeds scraped
4 cups peaches (about 2 pounds whole), diced to 1/2 inch & unpeeled

Base
1 cup (225 grams/8 ounces) unsalted butter
½ cup confectioner’s sugar, sifted
1 ½ cups flour

Filling
3 large eggs
1 cup sugar
Zest of 2 oranges
¾ cup plus 2 tablespoons flour
½ vanilla bean, halved and seeds scraped
10 tablespoons (141 grams/5 ounces) unsalted butter

Jam
Mix together the sugar, orange zest and juice, and vanilla bean and seeds in a heavy based saucepan with a wooden spoon. Place a candy thermometer in the pot and set over medium heat. Bring to a boil and cook for a few minutes, until it reaches 220 degrees. Add the peaches and boil, stirring occasionally, until the peaches turn into a thick jam and the thermometer returns to 220 degrees, 35 to 45 minutes. Wear long oven mitts as the jam can splatter. (When the jam begins to stick to the bottom of the pan, it’s nearly there). Transfer the jam to a wide pan to cool. Remove the vanilla bean. You should have around 1 1/2 cups of jam.

Base
Melt the butter in a saucepan over medium-high heat, stirring frequently. Cook until the white milk solids start to brown and smell nutty, 5 to 10 minutes. Strain through a fine sieve set over a heatproof container. Freeze until solid.

In a large bowl, mix together the confectioner’s sugar and flour. Scoop the chilled brown butter into the flour mixture and, using a pastry cutter, blend until crumbly. Transfer the crumb mixture to a 9-by-13-inch baking pan and firmly pat it evenly across the bottom of the pan. Refrigerate for 30 minutes. Meanwhile, adjust the oven rack to the middle position and preheat the oven to 375 degrees. Bake the crust until golden, 18 to 20 minutes. Let cool.

Filling
Whisk together the eggs, sugar, zest and flour in a large bowl. Place the vanilla bean and seeds and the butter in a small saucepan over medium-high heat. Cook until the white milk solids start to brown and smell nutty, and then strain through a fine sieve. Carefully add the brown butter to the egg and flour mixture, whisking until the butter is incorporated. Remove the vanilla bean.

Assembly
Spread half of the filling over the baked crust. Spoon large dollops of the peach jam over the filling, reserving a quarter of the jam. Pour the remaining brown butter filling over the peach jam, and finish by spooning smaller dollops of the reserved jam over the top. Bake until the filling is golden brown, 25 to 30 minutes. Cool completely.

Yeild: Makes 12 bars.

Notes: To make these less laborious I made the burnt butter for the base and jam on the first day and then did the rest of the following day, it is straight forward – just has a few more steps than usual.

Source: Adapted from Big Sur Bakery in Big Sur, California

Posted in Biscuits/Cookies/Slices/Bars, Fruit, Morning Teas/High Teas, Picnic Food | Leave a comment

GazpachoPrint Recipe

Since moving to NYC I have been fortunate enough to make some really nice friends. Tana is one of them and more recent than others, at our first coffee a couple of weeks ago she told me that she was moving back to Spain. I was a little sad but I know we will keep in contact. She is a very talented artist amongst other things, her blog www.tanukidrawings.com keeps me amused for hours. Her work is funny, smart, poignant and beautifully creative.

Anyway, aside from the visual entertainment she provides, she gave me this recipe for Gazpacho, the Spanish kind that originates from the region of Andalusia. Gazpacho is a raw tomato based soup that is served chilled and is consequently best eaten in the heat of a Summers day.

There are not so many ingredients and being raw, once you prep the vegetables, it takes two minutes to liquidise in your blender or food processor – easy peasy, fast and fresh!

So it is bon voyage to my new friend – it has been short and sweet but real. xx

PS. This gazpacho really is the best!

Ingredients
1 Kilo/2 pounds tomatoes (preferable plum tomatoes)
1/2 small onion (60 grams)
1 small green pepper
1 small cucumber (the small chubby Spanish type)
1 small cup of olive oil
2 tablespoons of red wine vinegar
200 grams of day old baguette
Small portions of diced tomatoes, red and green peppers, cucumber, onion and bread or croutons to sprinkle on top.

Place tomatoes in a pot of simmering water and cook until skins start to split, remove immediately and allow to cool before peeling off skin and roughly dicing.

Tear the baguette into a couple of pieces and place in a bowl of water for 5 minutes. Drain and squeeze out as much liquid as you can.

Put the tomatoes, onion, pepper, cucumber, vinegar, oil, baguette and half a cup of water into a blender or liquidizer and blend for a good couple of minutes till completely smooth.

Put the mixture into a bowl, add salt and pepper and leave the gazpacho to chill for at least an hour or even longer – the colder the better. Serve the gazpacho in bowls, with the portions of diced tomatoes, pepper, cucumber, onion and croutons on the side.

Source: Tana (a new New York friend)

Posted in Soups, Starters, Vegetables, Vegetarian | Leave a comment

Roasted Aparagus with Proscuitto & TomatoPrint Recipe

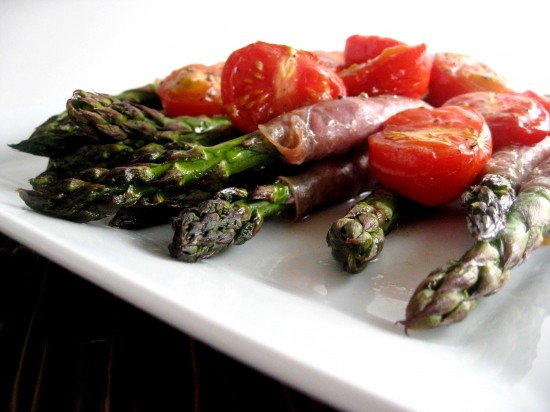
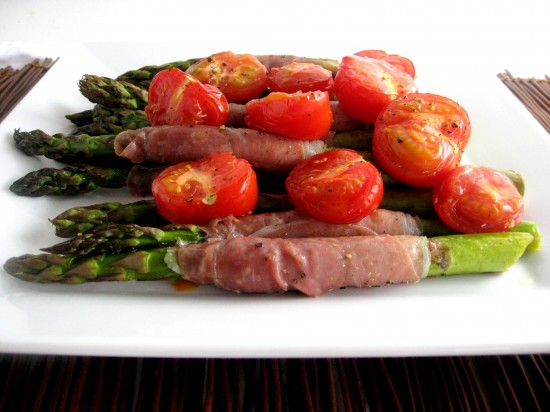
I don’t know about you but when the heat kicks in I find it very hard to eat alot for dinner. So it’s little meals like this that keep me going through those sweltering evenings. And on top of being light and tasty, this dish is also quick which makes it perfect for people on the go – or people like me who are park-bound till the bitter end of almost every day.

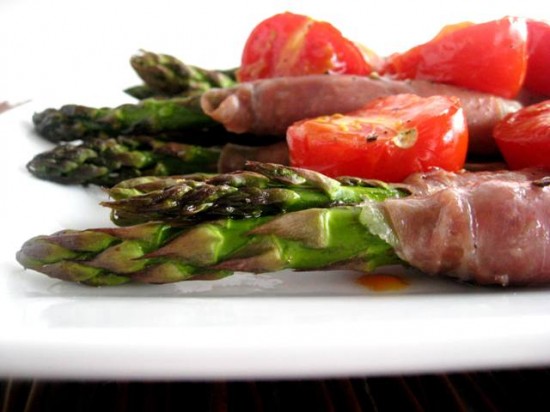
The roasting process brings out the full flavours of the tomato and asparagus, whilst the proscuitto lends a nice salty touch to the light seasoning of olive oil and freshly ground black pepper. It is simplistic in taste, as it is in process – with a wonderfully flavourful result.

And guess what? aside from all of that, this dish is rich in vitamins and antioxidants (ie. healthy) – what more can I say!

Ingredients
12 stalks asparagus, trimmed
12 paper-thin slices prosciutto
6 Campari tomatoes, sliced in half
2 tablespoons olive oil
Freshly ground black pepper

Preheat the oven to 200c/400f. Line a baking pan with foil and brush with a tablespoon of the olive oil.

Trim the fibrous ends off each asparagus and wash carefully to remove any dirt particles that may be lodged in the tips, leave to dry on a paper towel. When dry, wrap each asparagus stalk tightly in a slice of proscuitto ensuring the tips are exposed. Place in the baking pan with the cut tomatoes scattered around and drizzle with the remaining olive oil and freshly ground black pepper. Roast until the asparagus is tender, about 15 – 20 minutes.

Arrange on a platter and serve.

Notes: I often serve this scattered with shavings of parmesan or crumbs of goats cheese and then a few chopped herbs, like flat leaf parsley.

Posted in Salads, Sides, Starters, Vegetables | Leave a comment

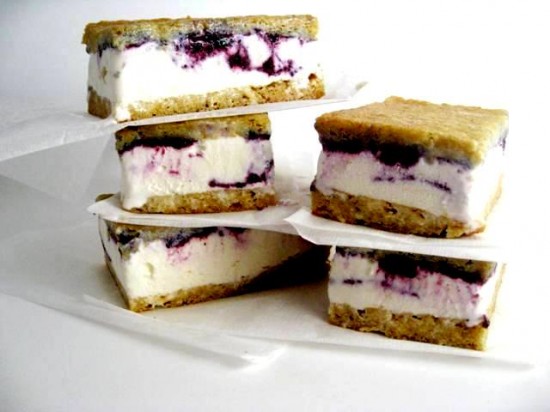
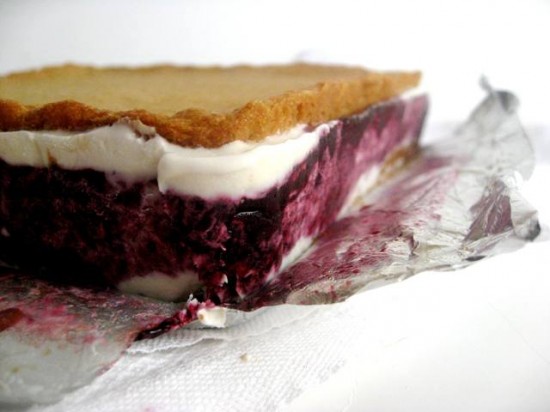
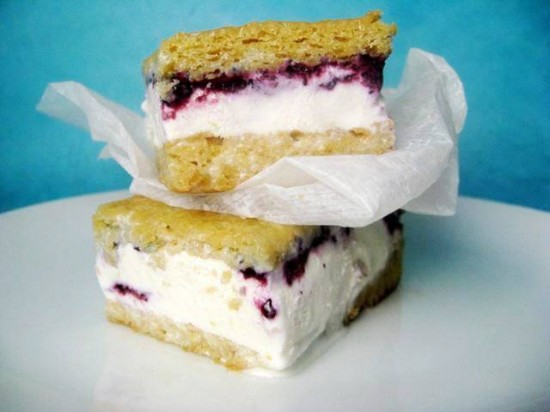
Lemon & Blueberry Ice Cream SandwichesPrint Recipe

Let’s fast forward into Summer with some ice cream sandwiches. I can’t really say I am an expert because I have never made them before and can count the number of times I have eaten them on one hand. However, I do know that these are good (actually fantastic) and I will certainly make them and variations of them again.

Striking the perfect balance between cookie, fruit and cream – these old fashioned favourites will certainly cool you at the end of a hot Summers day. There is harmony in the blend of lemon scented ice cream and swirls of blueberry compote whilst the almost chewy cookie provides the perfect sandwich for this icy treat.

As much as I hate drippy fingers when I eat, I am more than happy to forgoe this little neurosis when it comes to a good ice cream sandwich – I cannot believe it has taken me so long to discover them. YUM!

Lemon Ice Cream
2 pints premium vanilla ice cream
1 tablespoon grated lemon zest
2 tablespoons fresh lemon juice

Blueberry Compote
2 cups blueberries (283 grams/10 ounces)
1/4 cup sugar
2 (3- by 21/2-inch) strips lemon zest
1 tablespoon fresh lemon juice

Sandwich Layers
1 cup all-purpose flour
1/2 teaspoon baking powder
1/4 teaspoon baking soda
1/4 teaspoon salt
113 grams/4 ounces unsalted butter, softened
3/4 cup packed light brown sugar
1 large egg
1/2 teaspoon pure vanilla extract

Lemon Ice Cream
Leave icecream out of the freezer for 10 minutes to soften. Using a spoon break it into brig chunks, place it ino a bowl and mix until you get the consistency of soft-serve ice cream. Stir in lemon zest and juice and spread in a 13 x 9 inch baking dish to freeze while making compote and sandwich layers.

Blueberry Compote
Cook blueberries, sugar, and zest in a 12-inch heavy skillet over medium-high heat, thoroughly crushing blueberries with a potato masher, until juices are released and sugar has dissolved, about 2 minutes.

Stir together lemon juice and bring to boil – reduce to a slow simmer and allow to cook for a further 5 – 7 minutes, stirring occasionally until the mixture is thick (almost jam-like).

Remove from heat and transfer to a bowl, bring to room temperature and discard lemon zest. Place in a blender and pulse several times to break the blueberries down further. Cover and place into refrigerater until needed.

Sandwich Layers
Preheat oven to 375°F with rack in middle. Butter two 8″ baking pans and line with foil, leaving a 1-inch overhang on each side, then butter foil.

Whisk together flour, baking powder, baking soda, and salt in a small bowl. Beat together butter and brown sugar in another bowl with an electric mixer at medium-high speed until pale and fluffy, about 3 minutes. Beat in egg and vanilla. At low speed, add flour mixture in 2 batches, mixing until just combined.

Divide batter between baking pans and spread into thin, even layers with offset spatula. Bake until golden-brown but still tender, 10 to 12 minutes. Cool completely in pans, about 30 minutes and place in freezer for at least 15 minutes prior to assembly.

Assembly
Spoon half of ice cream over 1 sandwich layer (in the pan) and spread evenly using clean offset spatula. Dollop tablespoons fulls of the blueberry compote and gently swirl into the ice cream. Spoon over the remainder of the ice cream and more of the compote. Invert the second sandwich layer over ice cream, pressing gently to form an even sandwich. Wrap baking pan in plastic wrap and freeze until firm, at least 3 hours.

Transfer sandwich to a cutting board using overhang. Trim edges if desired and cut into 6 – 8 pieces.

Notes: Ice cream sandwich (before cutting) can be made 1 week ahead and frozen in pan, wrapped in plastic wrap and then in foil.

Source: adapted from Gourmet August, 2009

Posted in Desserts, Frozen Treats, Fruit, Lemons, Sandwiches | 1 Comment

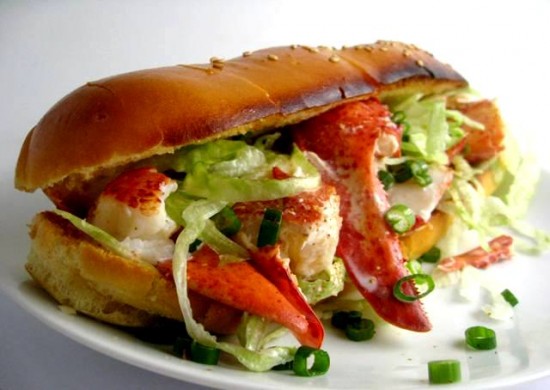
Lobster RollsPrint Recipe

I have always loved the idea of lobster rolls and today I found the perfect recipe – it is quite amazing what a few well chosen ingredients can produce. These splendid rolls are simple in flavour (without the chaos too many ingredients can bring) and they taste sensational.

Getting the right ingredients is very important – the rolls must be soft so they absorb the butter, the mayonnaise should be lightly flavoured so it doesn’t smother the taste of the lobster meat and lobsters, of course, should be fresh. As you can see I couldn’t get my hands on any New England style hot dog buns but I did find some rolls called ‘specialty brioche lobster roll buns’ – not ideal but they are what I had to work with.

Whether you live in Maine or not, Lobster Rolls are quintessential Summer fare. I can picture myself eating these at some sort of beach shack – my toes would be in the sand and I might even have an ice cold beer to wash them down with, I would be feeling sunned up and totally relaxed after spending a day by the ocean…

Mayonnaise
2 large egg yolks
2 tablespoons fresh lemon juice
1 cup olive oil (not extra virgin)
1/4 teaspoon Dijon mustard

Lobster Rolls
1 cup dry white wine
1 large onion, halved
2 celery stalks
6 fresh thyme sprigs
2 tablespoons coarse sea salt
3 x 1.5 pound live lobster (Maine lobsters are the best)
4 New England style hot dog buns (top split if possible) or regular hot dog buns
3 ounces unsalted butter, melted & divided
1 1/3 cups very thinly sliced iceberg lettuce
2 shallots (scallions) thinly sliced
Hungarian paprika for dusting

Mayonnaise
Place egg yolks in a small metal bowl. Whisk in lemon juice and 1 tablespoon of water. Place the bowl over a small saucepan of simmering water (do not allow the simmering water to tough the bottom of the bowl); whisk constantly until the yolk mixture is very thick, 2 – 3 minutes. Remove bowl from over the water and very gradually mix in the oil and then the mustard. Season mayonnaise with salt and freshly ground black pepper. Cover and chill.

Lobster Rolls
Fill and very large pot with 12 quarts of water. Add wine, onion, celery and thyme. Bring to boil over a high heat and mix in 2 tablespoons of coarse sea salt. Add lobsters head first, cover and cook until water returns to the boil, checking occasionally – this should take 8 – 9 minutes. Uncover the pot and cook until the lobsters are cooked through, 1 – 2 minutes longer.

Using tongs, transfer the lobsters to a large rimmed baking sheet. Let stand until cool enough to handle, around 20 minutes. Twist the tails off the bodies and using kitchen shears, cut along each side of the ridged membrane on the underside of the tails, lift the membrane and pull out the lobster tail meat. Cut tails in half lengthways and then crosswise into 1 inch chunks. Place tail meat into a bowl.

Twist claws and knuckles off the lobster bodies. Using a hammer or a mallet, crack claws and pull the meat out and add to bowl with tail meat. Repeat with the knuckles, cutting the shell lengthways in half and dicing the meat. Add to the bowl, cover and chill.

Add 1/4 cup of mayonnaise (or more to taste) to the lobster meat, stir to coat. Season lobster salad with salt and pepper. Brush the sides of the buns with the melted butter (if you are using regular hot dogs buns, open gently, leaving attached and brush insides with melted butter). Place them in a grill and toast until golden brown and crisp.

Arrange buns on a plate and line each with lettuce (evenly divided), top each with lobster salad, a sprinkle of the shallots and a dash of paprika.

Eat immediately.

Notes: The original recipe called for the buns to be brushed with melted butter and lightly fried on a skillet – I chose to grill mine because I feel like I have more control over the process.

Source: Adapted from Red Hook Lobster Pound Truck via Bon Appetit

Posted in Barbeques/Grilling, Nibbles & hors d'oeuvres, Picnic Food, Sandwiches, Seafood | 3 Comments

Mocha EclairsPrint Recipe

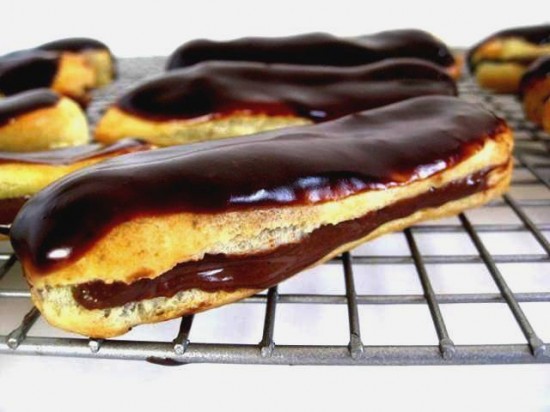
It became glaringly obvious to me today that I should not attempt pastries such as these unless I am in the right frame of mind. And as you can see by my photo’s – I was not.  I am not too sure what happened but my usual patience and finesse went out the window of my hot-as-a-hothouse kitchen.

It began with the misshapen pastries, then the Mocha Creme Patisserie that seemed to be going everywhere aside from inside the éclairs, and finally the chocolate glaze that was proving to be a total pain in the bottom (because of the heat). Still, I persevered with a steely determination – I had been planning to make these for a long time and I was not going to let a few kitchen mishaps stop me from delivering the results of my carefully researched recipe.
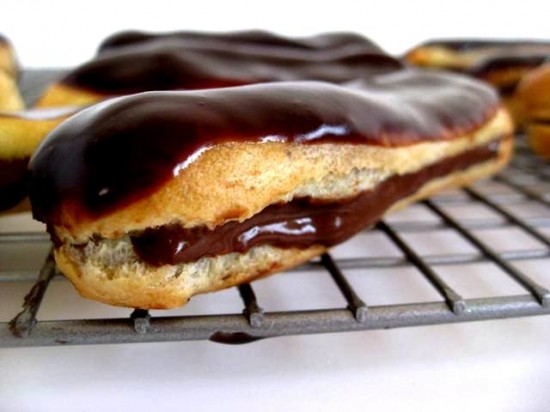
Despite their physical flaws, these little (not so beautiful) beauties are gorgeous, the mocha creme patisserie is dense and velvety and works wonderfully in the pastry, finished with the chocolate glaze.

So I will go to bed tonight, tormented by the éclair – at least it’s a pastry that is worth my anguish. But I am wondering, aside from my family who have a whole plateful to get through, why the popularity of the éclair seems to have declined?

Mocha Creme Patisserie
50 mls espresso coffee
2 cups (500 grams/1 pound) whole milk
4 large egg yolks
6 tablespoons (75 grams/2.6 ounces) sugar
3 tablespoons cornstarch, sifted
200 grams/7 ounces good quality bittersweet chocolate, finely chopped
2½ tablespoons (1¼ ounces/40 grams) unsalted butter, at room temperature

Pâte à Choux
1/2 cup (125 grams/4.4 ounces) whole milk
½ cup (125 grams/4.4 ounces) water
115 grams/4 ounces unsalted butter, cut into 8 pieces
¼ teaspoon sugar
¼ teaspoon salt
1 cup (140 grams/4.9 ounces) all-purpose flour
5 large eggs, at room temperature

Chocolate Glaze
226 grams/8 ounces bittersweet or semisweet chocolate, finely chopped
170 grams/6 ounces unsalted butter
1 tablespoon light corn syrup
5 teaspoons water

Mocha Creme Patisserie
Prepare an ice bath. Combine the yolks, sugar and cornstarch in a medium bowl and whisk together – set aside.

Heat the milk and espresso to boiling point. Once the milk has reached a boil, whisk a couple spoonfuls of the hot milk into the yolk mixture. Continue whisking and slowly pour the rest of the milk into the yolk mixture.

Strain the mixture back into the saucepan to remove any egg that may have scrambled. Place the pan over medium heat and whisk vigorously and continuously until the mixture returns to a boil. Keep whisking vigorously for 1 to 2 more minutes (still over medium heat). Stir in the melted chocolate and then remove the pan from the heat.

Scrape this mixture into a small bowl and set it in the ice-water bath to stop the cooking process. Make sure to continue stirring the mixture at this point so it remains smooth.

Once the cream has cooled slightly, remove from the ice-water bath and stir in the butter in three or four installments. Return the cream to the ice-water bath to continue cooling, stirring occasionally, until it has completely cooled. The cream is now ready to use or store in the fridge. In order to avoid a skin forming on the pastry cream, cover with plastic wrap pressed onto the cream.

The pastry cream can be made 2-3 days in advance and stored in the refrigerator.

Eclairs
Line two baking sheets with parchment paper or silicone mats and set aside.

Place an oven rack in the lower part of the oven. Preheat your oven to 200c/400f. Place a pan with hot tap water onto the bottom of your oven (Pyrex pie pan works well).

In a heavy bottomed medium saucepan, bring the milk, water, butter, sugar and salt to a boil.

Once the mixture is at a rolling boil, add all of the flour at once, reduce the heat to medium and start to stir the mixture vigorously with a wooden spoon. The dough comes together very quickly. Do not worry if a slight crust forms at the bottom of the pan, it’s supposed to. You need to carry on stirring for a further 2-3 minutes to dry the dough. After this time the dough will be very soft and smooth.

Transfer the dough into a bowl of a mixer fitted with the paddle attachment. Mix the dough on medium speed for a minute to cool the dough slightly. Break the eggs into a liquid measuring cup or a bowl, lightly whisk with a fork. Add the eggs gradually, in 4-5 additions beating well after each portion has been added to incorporate it into the dough. You will notice that after you have added the first portion, the dough will separate, once again- do not worry. As you keep working the dough, it will come back all together. In the end the dough should be thick and shiny and when lifted it should fall back into the bowl in a ribbon. The dough should be still warm. It is now ready to be used. Once the dough is made you need to shape it immediately.

Fill a large pastry bag fitted with a 1 ½ cm plain tip nozzle with the warm cream puff dough. Pipe the dough onto the baking sheets in 10 cm (4 inches) long fingers. Leave a 5 cm (2 inch) space in between each dough strip to let them room to puff. The dough should give you enough to pipe 20-24 éclairs.

Put one baking sheet into another to isolate the pastry bottoms from strong heat and slide the baking sheet into the oven; place another baking sheet with piped éclairs immediately into the freezer (if your oven is not big enough to accommodate both baking sheets at once). Bake for about 18 to 20 minutes, until the éclairs are well puffed and golden brown. Reduce the oven temperature to 190c/375f. Open the oven door and take the water-filled pan out of the oven. Rotate the sheet from front to back. Poke every pastry with a wooden skewer or a knife tip to allow the moisture to escape and leave the baking sheet in the oven for another 5 minutes, until the éclairs are well browned, firm and crisp to the touch. Turn the oven off, slip the handle of a wooden spoon into the door to keep it ajar. Let the éclairs stay in the oven for 5 more minutes.

Cool completely on a rack. The unfilled éclairs can be kept in a cool, dry place for several hours before filling.

Assembly
To fill the éclairs, slice them down the middle lengthways, keeping them intact at one side. Place the Mocha Creme Patisserie in a piping bag with a small tip and squeeze out enough to fill the éclair. Repeat with the rest of the éclairs.

Chocolate Glaze
Place all the ingredients in a small heatproof bowl set in a wide skillet of barely simmering water and stir frequently until the chocolate is almost completely melted; do not overheat. Remove the glaze from the water bath and set aside to finish melting, stirring once or twice until perfectly smooth. Place a sheet of parchment paper or foil under the rack. Dip the top of each éclair into the glaze and place the glazed éclair onto the rack for the glaze to set.

The éclairs are best served soon after they have been filled.

Source: adapted from Pierre Hermes
Posted in Chocolate, Desserts, Morning Teas/High Teas, Pastries | 4 Comments