Balsamic Strawberries with BasilPrint Recipe


Here is one of the easiest desserts I have ever made, and with the stream of visitors we have at the moment that is a good thing – it is also perfect for these sultry Summer evenings without even the merest whisper of a breeze to cool us down.

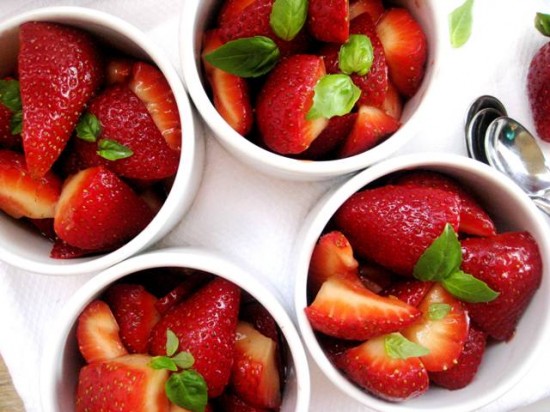
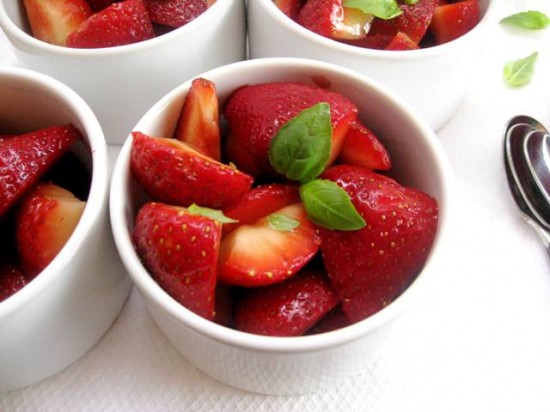
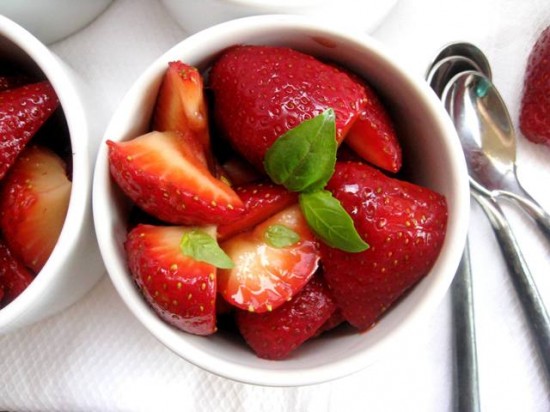
The balsamic vinegar enhances the flavour of the strawberries and brings out their colour beautifully. And after they have macerated for a mere 30 minutes, their juices combine with the vinegar to produce a delicious, syrupy liquid that is so good you could drink it. 

As for the baby basil leaves – they impart a fresh minty/anise taste that I love, and if basil is not your herb of choice them substitute it with another – mint would be great or even finely diced rosemary. Some people also swear by freshly ground pepper.

I think that most Summer fruits taste pretty good in their natural state but these strawberries are a sensational alternative for the burstingly ripe punnets you can find at the markets now. We picked ours in a farm upstate – on one of our many Summer holiday adventures.

Ingredients
900 grams/2 pounds fresh strawberries (around 4 cups), rinsed, hulled and sliced quartered
2 tablespoons granulated sugar
2 teaspoons balsamic vinegar
a handful fresh baby basil leaves

Gently toss the strawberries with the sugar and vinegar in a large bowl. Let sit at room temperature covered in plastic wrap for 30 minutes (and not much longer) to allow the strawberries to release their juices.

Place into serving bowls and scatter with a few basil leaves for garnish or…(see notes)

Notes: In addition to eating these on their own you can also have them with a dollop of vanilla ice cream or marscapone, on top of waffles or pancakes, to the side of the plain old pound cake or in between layers of a fluffy sponge with layers of whipped cream…

Posted in Desserts, Fruit | 1 Comment

Chocolate Toblerone MuffinsPrint Recipe


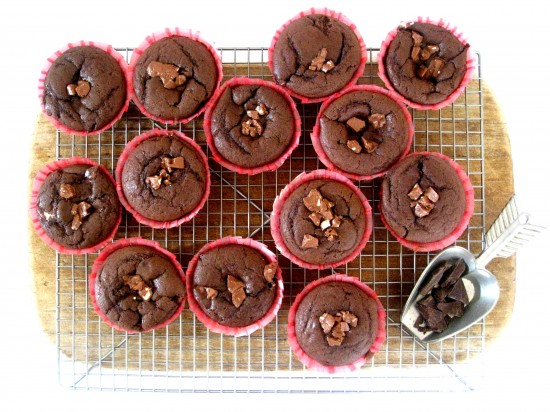
I have to admit that once Summer comes I tend to steer clear of chocolate – for no reason other than I associate it with the cooler months and comforts found in open fires, grilled cheese sandwiches and full bodied reds. On the other hand Mr Man, who does not suffer from the same associations (or pecularities) as me, continues eating chocolate like there is no tomorrow – no matter how warm it gets. And hence these Chocolate Toblerone Muffins – because it would be heartless of me to deprive him of his most favourite ingredient.

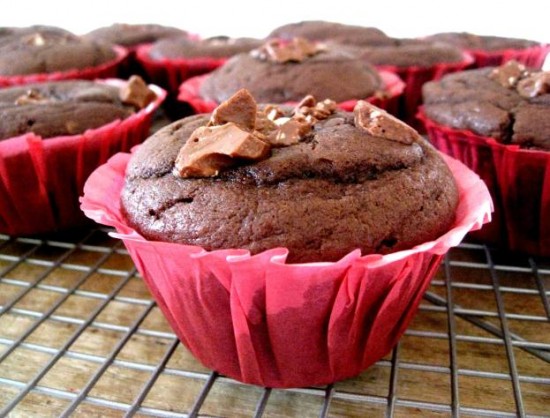
The Toblerone chunks bring a distinct honey/nougat taste to the muffins and a slightly different texture than your standard chocolate chip. Other than that, they can basically be described as your standard and scrumptious chocolate muffins.

In addition to Mr Man, I also have dad of Mr Man coming for dinner tonight. There is a saying that goes ‘the apple does not fall far from the tree’ and this is the case their mutual chocolate obsession. I am going to serve these with some vanilla ice cream which will make everyone very happy, including me – watching people enjoy their food is a wonderful thing.

Ingredients
3 cups plain flour
3 tablespoons Dutch cocoa powder
1 tablespoon baking powder
1 1/2 cups brown sugar
125 grams/4.4 ounces melted unsalted butter
2 eggs
1 1/2 cups full cream (whole) milk
1 1/4 cups Toblerone chocolate chopped

Preheat the oven to 160c/320f.

In a bowl, sift flour, cocoa powder and baking powder, combine well and stir in sugar.

Melt butter and allow to cool slightly. Lightly whisk eggs and combine with butter and milk. Combine wet mixture with dry ingredients along with 1 cup of the chopped chocolate and mix well.

Transfer into paper muffin cases, filling each one three quarters full and bake in oven for approximately 20 minutes. Sprinkle the top of the muffins evenly with the remaining 1/4 cup of chocolate and place back in the oven for another 2 minutes then remove and serve warm with a spoonful of vanilla ice-cream (optional).

Source: adapted from Donna Hay

Posted in Biscuits/Cookies/Slices/Bars, Cakes, Chocolate, Desserts, Morning Teas/High Teas, Picnic Food | Leave a comment

Cucumber and Yogurt Soup with Lobster Tail SaladPrint Recipe


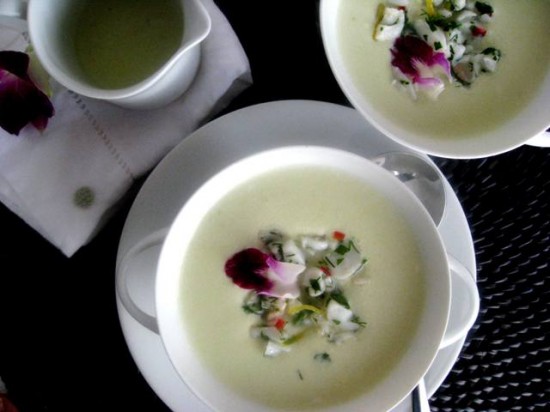
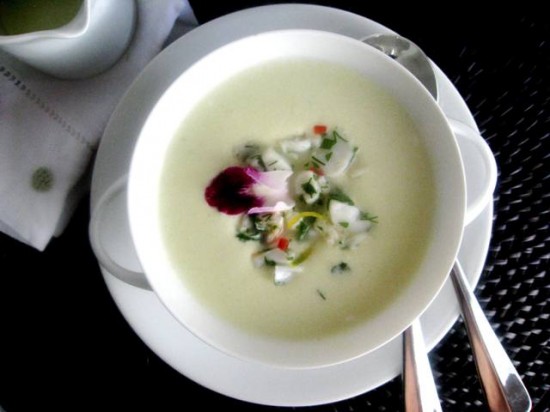
When soup and salad gets packaged together it usually isn’t in such an elegant way. But this soup & salad combo has it all – a delightfully refreshing base that allows the equally refreshing and lightly herbed lobster tail salad to really shine, not to mention a synergy of flavours that can only be described as very cool with a little seafood kick.

A soup that would suit a romantic late night supper or perhaps be a nice starter to a more formal occasion. I can even see it served in shot glasses for a cocktail party…

Ingredients
50 grams/1.7 ounces butter, coarsely chopped
600 grams/1.3 pounds of de-seeded continental cucumbers, coarsely chopped (around 4 – 5 cucumbers)
300 grams/10 ounces greek style yogurt
edible flowers to serve (optional)

Lobster Salad 
4 cooked lobster tails, removed from shell, coarsely chopped
25 mls olive oil
1 tablespoon lemon juice, or to taste
1 teaspoon lemon rind, thinly sliced
1 tablespoon each dill and flat-leaf parsley, coarsely torn
½ long red chilli, seeds removed, cut into julienne

Melt butter in a large saucepan over medium heat, add cucumber, cover with a lid and sauté until tender (8-10 minutes), stirring occasionally. Remove from heat and allow to cool slightly then process in a food processor until smooth and refrigerate until cold. Add yoghurt, season to taste, then pass through a fine sieve and refrigerate until required.

For lobster tail salad, combine ingredients in a bowl, season to taste and toss lightly to combine. Serve with chilled cucumber and yogurt soup, scattered with edible flowers.

Yeild: Serves 4 small portions

Notes: The lobster tails in the original recipe were Morton Bay Bugs – they are smaller than your standard lobster tails so if you are using these then use 8 in the salad rather than 4.

Source: adapted from Matt Wilkinson, Circa, the Prince

Posted in Seafood, Soups, Vegetarian | Leave a comment

Burnt Fig Semi FreddoPrint Recipe


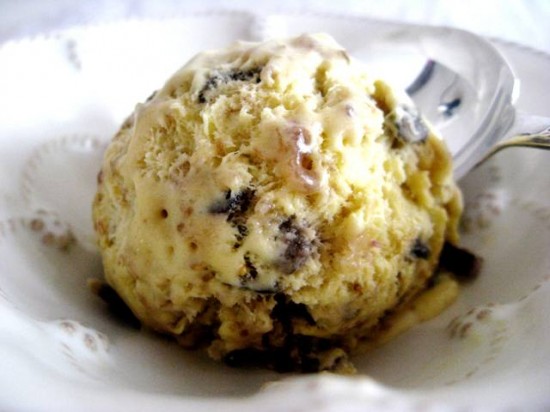
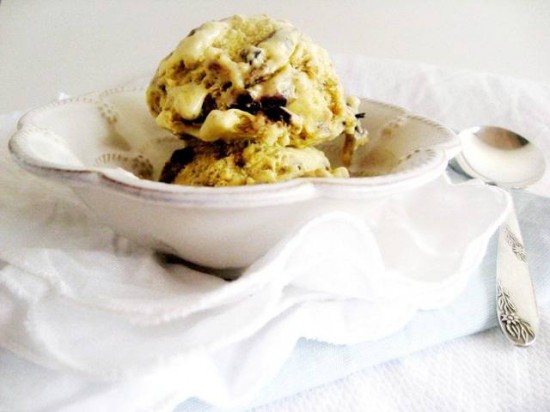
Lately I have had a hankering for my most favourite icecream – the Maggie Beer Burnt Fig, Caramel and Honeycomb Ice Cream. It was in my search for a US supplier of this sweet confection that I stumbled upon this recipe from Maggie herself – and whilst it is not the famed said ice cream it is still really, really good.

Being that black figs have just hit the markets I am in a fig frenzy – having already made my Fig & Goats Cheese Salad twice in the last week. So it didn’t take much to convince me that I should make this newly discovered semi freddo.

I find that most semi freddos are incredibly creamy and rich – the caramelized figs add yet another dimension to this, creating a new level of decadence. I can imagine that this recipe was probably the catalyst for Maggies most famous ice cream which I hope will one day find its way to the US – until then, it will remain one of the first things I buy as soon as I hit Australian soil.

Ingredients
300 grams/ 10.5 ounces fresh figs, finely diced with stems removed
150 grams/5.3 ounces brown sugar
7 egg yolks
100 grams/3.5 ounces caster (superfine) sugar
250 mls cream, whipped to soft peaks
50 mls cream, unwhipped
2 teaspoons fresh lemon juice

Place on non-stick pan on a high heat and plcce in the diced figs. After about five minutes, when the edges of the pan begin to stick with the natural sugars and juices, add the brown sugar. Reduce the heat to a low simmer and allow the figs and brown sugar to caramelise for around 20 minutes. You should have a syrupy,jam-like consistency.

Stir in the lemon juice and remove the pan from the heat to cool to room temperature (this is essential). Add the 50ml of cream and gently work it into the jam.

In a mixing bowl, whip the egg yolks on high until they nearly triple in volume. The mixture should form a thick ribbon-like texture. You will need to beat the eggs for at good 15 minutes to get the necessary volume and texture. Add the castor sugar a teaspoon at a time, ensuring it is well mixed by continuing to whip the mixture on high.

Next, fold the whipped cream into the egg mixture, taking care not to lose the volume. Finally, gently fold the fig mixture through and pour it into a plastic (freezer proof) container. Place it in the freezer to set over night – or least for 12 hours.

Enjoy!

Notes: If you are prone to overbeating cream you can beat to soft peak consistency using a hand whisk – it won’t take long.

Source: Maggie Beer

Posted in Desserts, Frozen Treats, Fruit | 5 Comments

Roast Tomatoes with Raisins and FetaPrint Recipe

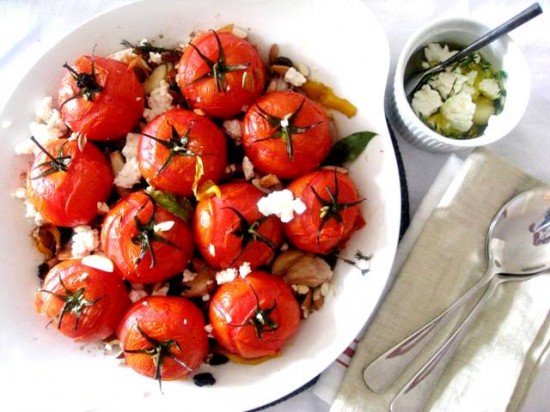
It was many years ago that I used to entertain regularly (and I mean almost every weekend), so no matter how big or how small the occasion was, whether it was breakfast, lunch, brunch or dinner – I found myself making a few standard things in preperation. Roasting tomatoes was one of those items and aside from the wonderful flavour they have, they are also very adaptable, from a side through to an ingredient in a salad, pizza topping or a pasta – they have multiple uses and are consequently great to have on hand.

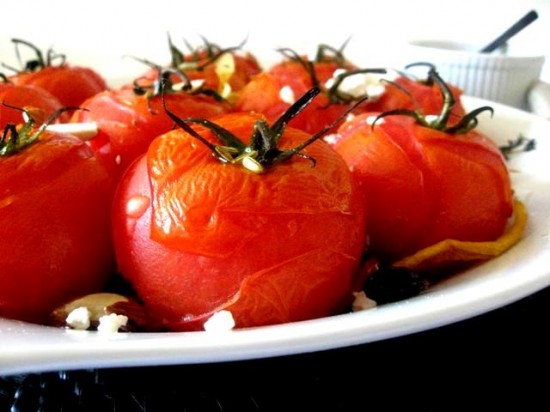
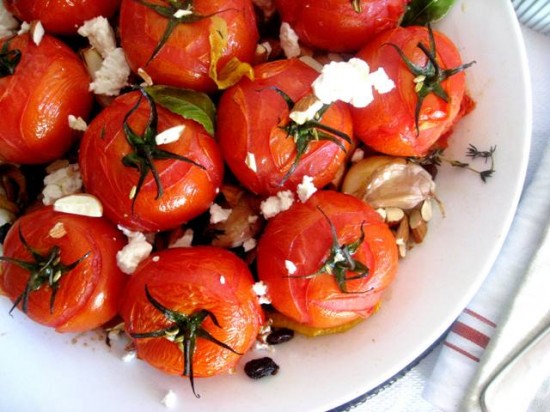
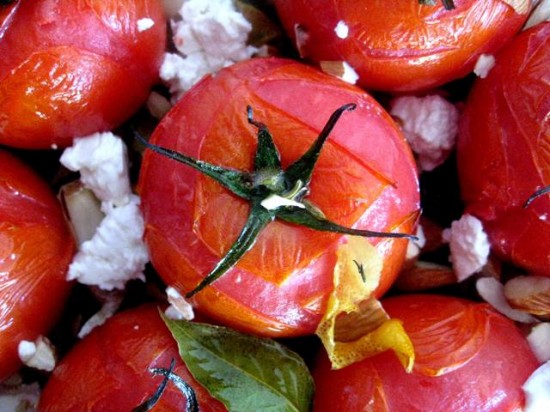
Of course when I encountered a variation on my standard roast tomatoes I was intrigued and quite happily so – for these burstingly ripe tomatoes, lying blistered and bleeding in their reduced juices are truely sensational. The addition of some herbs and spices, not to mention the marinated feta and raisins only serve to enhance their bold tomato flavour.

You may think the combination of tomatoes and raisins an odd one (like I did) but it works. Somehow the saltiness of the feta brings these two ingredients together whilst the syrupy sweetness from the raisins compliments the tomato perfectly.

You may be expecting guests – or you may not, either way if you pop these in the oven for your weekend dining, you (and your guests) will have something wonderful to nibble on – at whatever time you choose.

Ingredients
80 grams, 2.8 ounces(¼ cup) natural almonds
12 perfectly ripe, juicy vine-ripened tomatoes
2 tablespoons olive oil, plus extra to serve
105 grams/3.7 ounces (¾ cup) large golden raisins
6 garlic cloves, unpeeled, bruised
6 pieces lemon peel, removed with a peeler, pith removed
2 long red chillies, seeds removed, thinly sliced
8 marjoram sprigs
2 fresh bay leaves
1 teaspoon fennel seeds, lightly crushed in a mortar and pestle
150 grams/5.3 ounces Persian feta, coarsely broken

Preheat oven to 220C. Spread almonds on an oven tray and roast until golden (4-5 minutes). Set aside to cool, then coarsely chop or coarsely crush in a mortar and pestle.

Meanwhile, place tomatoes in a roasting pan in a snug single layer. Drizzle with olive oil and scatter with raisins, garlic, lemon peel, chilli, marjoram, bay and fennel seeds, season to taste and roast until tomatoes blister and bleed their juices (15-20 minutes).

Remove from oven, pour pan juices into a small saucepan, reduce over high heat until thick and syrupy (3-5 minutes), then pour over tomatoes to glaze.

Scatter tomatoes with feta and almonds, drizzle with extra olive oil, then season with freshly ground black pepper and serve hot.

Notes: Persian Feta is a marinated feta made by Yarra Valley Dairy in Australia. Any marinated feta will work as a good substitute.

Source: Jordan Theodoros, Aquacaf

Posted in Salads, Sides, Starters, Vegetables, Vegetarian | 1 Comment

Honey & Lemon Glazed Roast ChickenPrint Recipe

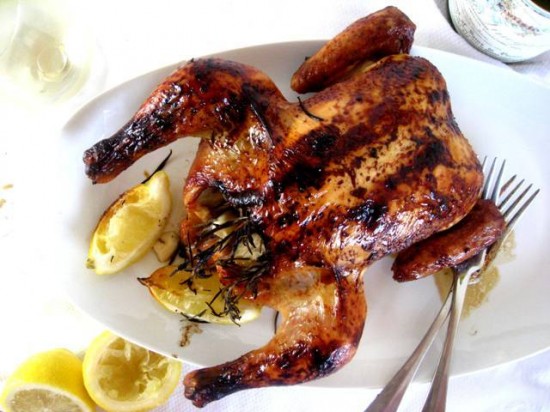
There is something quite special about a home cooked roast chicken and being so simple and tasty, it one of my all time favourite dishes. It is also a very romantic meal, being found on many a Valentines Day menu and in many a dimly lit restaurant – in fact here in the US, there is a recipe for a roasted chicken that is said to encourage a marriage proposal.

This particular recipe is not the ‘engagement chicken’ although it does contain some similar ingredients. The skin is made dark and crispy with a blend of honey, soy and lemon which also infuses the meat and with the addition of some garlic and herbs, will give you one of the most succulent birds you will have ever tried.

I am not promising an engagement but I will promise happy diners and in my mind that is just as nice.

Ingredients
1/4 cup honey
2 tablespoons fresh lemon juice
2 tablespoons soy sauce
1 x 1.5 kilo/3-pound chicken
Salt
3 large rosemary sprigs
3 garlic cloves, quartered
1 lemon, cut into 4 wedges

Preheat the oven to 425°. In a small bowl, combine the honey, lemon juice and soy sauce. Set the chicken on a large rimmed baking sheet and tuck the wing tips underneath. Season the cavity with salt and stuff with the rosemary sprigs, garlic cloves and lemon wedges. Brush two-thirds of the honey glaze over the chicken and season lightly with salt. Roast in the middle of the oven for 30 minutes.

Reduce the oven temperature to 325°. Rotate the chicken in the pan and brush with the remaining glaze. Roast the chicken for about 45 minutes longer, until the juices run clear when the thighs are pierced; turn the pan halfway through roasting. Transfer the chickens to a carving board and let rest for 15 minutes. Carve the chickens and serve.

Source: adapted from Mauricio Couly and Piero Incisa della Rocchetta via Food & Wine

Posted in Mains, Poultry | 7 Comments

Almond, Elderflower & Lime Travel CakesPrint Recipe

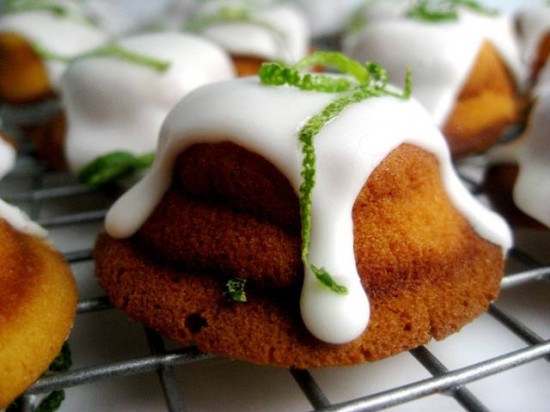
These little travel cakes are just the sweetest things and perfect for your Summer (or Winter) picnics. Aside from the strong almond flavour, the elderflower liquor gives them a nice fruity and almost floral taste, not to be outdone by a nicely tart dash of lime.

St Germain Elderflower Liquor is not as readily available as most spirits and you can understand why – it is made from fragile elderflower blossoms that are hand picked in the French Alps, carefully placed into sacks and taken to market by bicycle. A painstakingly slow and careful process that provides the quantity required for each years batch of liquor. The blossoms lose their fragrance and flavour after a couple of days so the process has to be well orchestrated for the best results.

It’s the beautiful fruity tones of the elderflower liquor that give these cakes that ‘je ne sais quoi’ (a certain something).  They are that perfect ‘small and sweet something’ you can finish your meal off with – being delightfully different and that much more enticing.

Cakes
283 grams/10 ounces almond paste, broken into 1-inch pieces (1 cup)
3 large eggs
2 1/2 tablespoons cornstarch
Pinch of salt
4 1/2 tablespoons unsalted butter, melted and cooled
1 tablespoon St-Germain or other elderflower liqueur

Icing
2 cups icing (powdered/confectioners’) sugar
2 1/2 tablespoons heavy cream
2 1/2 tablespoons St-Germain or other elderflower liqueur
1 1/2 teaspoons fresh lime juice
1/2 teaspoon finely grated lime zest, plus zest strips for decorating

Cakes
Preheat the oven to 350° and spray 2 mini-muffin pans with vegetable oil spray.

In a food processor, pulse the almond paste several times until broken into small pieces; don’t overprocess or the paste will become oily. Add the eggs and pulse until smooth. Add the cornstarch and salt and pulse until smooth. Add the butter and St-Germain and pulse until incorporated.

Scrape the batter into a small pitcher and pour it into the muffin cups, filling them about two-thirds full. Bake for about 22 minutes, until the cakes are golden, puffed and firm to the touch. Transfer the pans to a rack and cool for 20 minutes, then invert the cakes onto the rack to cool completely.

Icing
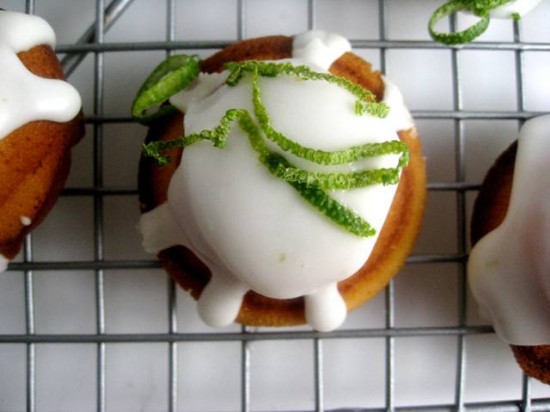
In a bowl, mix the icing sugar, cream, St-Germain and lime juice. Using a handheld mixer, beat at low speed until smooth. Beat in the 1/2 teaspoon of grated lime zest. Spoon the icing over the cakes, allowing it to drip down the sides. Garnish with lime zest before serving.

Notes: Elderflower liquor is also great in cocktails.

Source: William Werner via Food & Wine Magazine

Posted in Cakes, Desserts, Morning Teas/High Teas, Picnic Food | Leave a comment

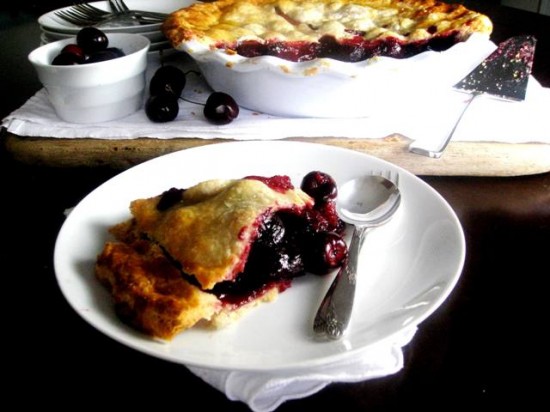
Cherry PiePrint Recipe

There is something very charming about a Cherry Pie, the mere mention of one has me conjuering up images of a pie cooling on a windowsill in some idyllic country setting with a couple of swallows or bluebirds flying around outside.

Here in the US, the Cherry Pie is a classic Summer dessert, it is as customary now as it was way back when and alot earlier than that too. Americans even have an official Cherry Pie Day, which being February 20, does not make sense because it is Winter and very hard to come by fresh cherrys…
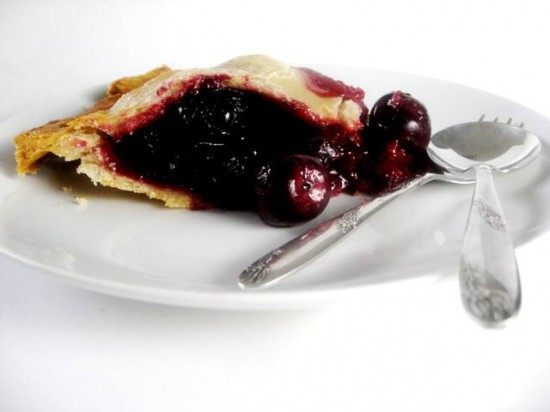
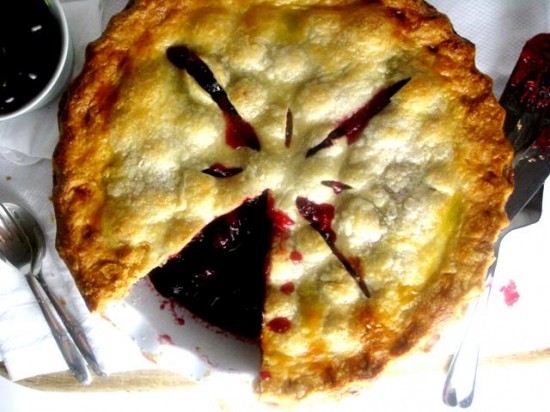
At any rate, I don’t think it matters what season we are in, most of us love a good pie – and with its buttery pastry and fruit-packed jammy filling, this particular cherry pie is just the best.

I adapted a recipe from Cooks Illustrated, the addition of the plums serve to balance out the sweet cherries perfectly and the ground tapioca creates a jam-like filling with juices of the fruit. The pastry is my tried and tested ‘best’ pie crust recipe ever and as much as I dislike working with pastry it always works well.

With the July 4 celebrations just around the corner you might consider this pie for your dessert, and for everyone else – it might be nice to make for the fun of it.

Pastry Ingredients
2 1/2 cups flour
1 tablespoon sugar
1 teaspoon salt
226 grams/8 ounces unsalted butter, very cold

Cherry Filling
2 blood plums (red plums), halved and pitted
6 cups pitted fresh cherries
2 tablespoons instant tapioca, ground
1/2 cup sugar
a pinch of salt
1 tablespoon of freshly squeezed lemon juice
a pinch of cinnamon
2 tablespoons cold unsalted butter, cut into 1/4 inch pieces

Topping
1 egg, beaten with 2 tablespoons water
Coarse sugar, for decoration

Pastry
Set aside 1 cup of ice cold water. Whisk together flour, 1 tablespoon of sugar and a teaspoon of salt in a large bowl and cut the butter into 1/2-inch pieces.

Sprinkle the butter cubes over the flour and begin working them in with your pastry blender or a fork (or knife), working all parts evenly. Stop when the mixture has a crumb the size of peas.

Pour half the water over the butter and flour mixture and using a spatula, gather the dough together. Gradually add more water, a tablespoon at a time until you have large clumps of dough. Then use your hands to bring the dough together and form it into a ball.

Divide the dough in half, and place each half on a large piece of plastic wrap, wrap and chill for at least two hours.

Filling
To make the filling, process the plums and 1 cup of the cherries in a food processor or blender until smooth, about 1 minute. Strain the the puree through a fine mesh strainer into a large bowl, pressing on the solids to extract as much liquid as possible; discard the solids. Add the remaining cherries, sugar, salt, lemon juice, tapioca and cinnamon to the bowl. Mix well to combine; let stand for 15 minutes.

Assembly
Preheat oven to 400f.

Heavily flour your work surface and place your one disk of the chilled dough in the centre. Flour the top of your dough and the rolling pin and roll the dough from the centre out, rotating in a circular motion so you get an even (ish) round of dough forming. Cut to a 13″ round.

Gently place it in 9-inch pie pan, either by rolling it around the rolling pin and unrolling it over the pan or by folding it into quarters and unfolding it in the pan. Trim edges to a half-inch overhang.

Spoon filling into pie crust and dot the filling with the bits of cold butter.

Roll out the remaining dough into a 12-inch round on a lightly floured surface, drape it over the filling, and trim it, leaving a 1-inch overhang. Fold the overhang under the bottom crust, pressing the edge to seal it, and crimp the edge decoratively. Brush the egg wash over over pie crust, then sprinkle with coarse sugar.

Cut slits in the crust with a sharp knife to allow steam to escape and place in your freezer for 20 minutes to chill. Bake the pie in the middle of the oven for 25 minutes. Reduce the temperature to 350f and bake for 25 to 30 minutes more, or until the crust is golden. Let the pie cool on a rack.

Notes: To grind the tapioca I used my blender, a food processer or coffee grinder would work well too.

Source: adapted from Cook’s Illustrated, July & August 2010

Now for some good news, I won the Food and Wine “Favorite Food Moments ” photo competition and I have been doing a happy dance since it was official. I was up against some stiff competition, a black and white shot in particular – it was my favourite by a long shot. At any rate, I am the winner and feeling very chuffed – a good excuse to eat some pie!
Posted in Breakfast, Desserts, Fruit, Tarts/Flans/Quiches/Pies | 2 Comments

Zucchini & Dill FrittersPrint Recipe

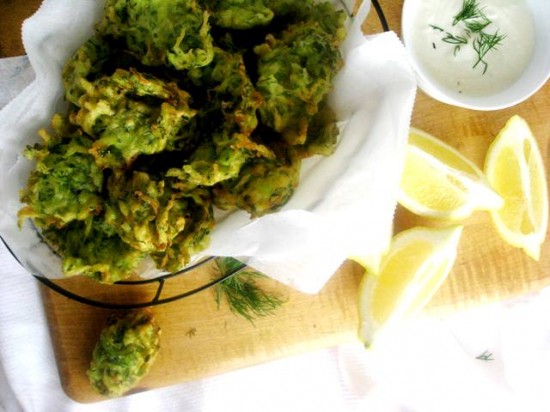
Here is something I bet you didn’t know about your humble and earthy zucchini – it is actually an immature fruit, being the swollen ovary of the zucchini flower. And I thought I knew everything there was to know about this sweet Summer squash.

I have always liked the mild and ‘spring-like’ flavour of the zucchini, not to mention the texture, which is almost crisp when raw and very soft when cooked. They are what I would call a ‘gentle’ vegetable.

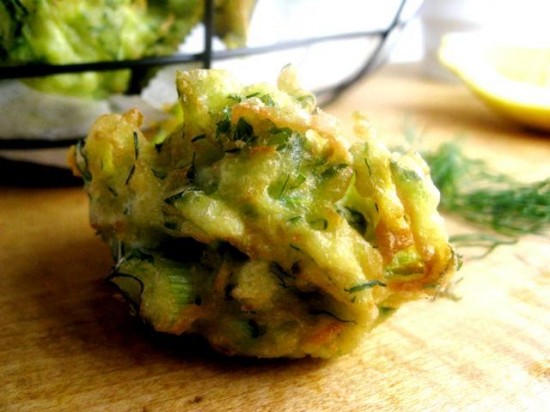
Here they are, in snack size pieces served with a whipped feta – their quiet simplicility complimenting the flavours of the dill and mint. They are deep fryed to perfection, giving you crispy bundles that you might want to enjoy in the late Summer sun with the cocktail of your choice, I am thinking a beer would be just perfect!

Ingredients

vegetable oil for deep frying
60 mls (¼ cup) buttermilk
2 eggs
150 grams/5 ounces plain (all purpose) flour
500 grams/17 ounces coarsely grated zucchini (3-4 zucchini)
2 spring onions, thinly sliced
½ cup each coarsely chopped dill and mint
finely grated rind of 2 lemons,
1 lemon cut into wedges, to serve

Whipped feta
200 grams/7 ounces Greek feta
30 mls lemon juice
1 garlic clove, finely chopped
50 mls extra-virgin olive oil

For whipped feta, process feta, lemon juice and garlic in a food processor until very smooth. With motor running, add oil in a thin steady stream and process until emulsified, then season to taste and set aside.

Preheat vegetable oil in a deep-fryer or large deep saucepan to 180C. Meanwhile, whisk buttermilk and eggs in a bowl to combine, then add flour and stir until smooth. Stir in zucchini, spring onion, herbs and lemon rind, season to taste. Deep-fry tablespoons of zucchini mixture in batches, turning occasionally, until golden (around 2 – 3 minutes). Remove with a slotted spoon, drain on absorbent paper, season to taste and serve hot with whipped feta and lemon wedges.

Source: adapted from Australian Gourmet Travel, February 2011

Posted in Nibbles & hors d'oeuvres, Picnic Food, Starters, Vegetables, Vegetarian | 4 Comments

Sugar CookiesPrint Recipe

My youngest daughter turned 3 the other day and I spent quite a bit of time in the kitchen making treats she would love. Sugar cookies always go down well with children and she is going through a ‘butterfly’ phase so these were very well recieved.

I have only made them a handful of times and I find that every time I do I get marginally better. The cookies are finer in shape and cut, the icing is neater and the designs are a little more creative. I don’t think I could ever compete with the ‘sugar cookie afficionado’s’ out there (and mark my words, there are some VERY serious ones), but I am happy getting a little better with each batch.

So my little Elouise is now 3 and I am a little wiser when it comes to sugar cookie tips and tricks. I think the most important skill to have is patience (which I do not), followed closely by perseverance. They are a challenge but the madness of it all was worth it for a very happy birthday girl.

Cookie Ingredients
1 cup butter
1 cup icing (powdered/confectioners) sugar, sifted
1 egg, beaten
2 tablespoons vanilla
1/2 teaspoon salt
2 ½ cups sifted plain (all purpose flour)

Using an electric mixer cream butter until whipped, add in the icing (powdered/confectioners) sugar and combined. Then mix in the egg, vanilla, salt and flour until combined. Turn dough out onto a sheet of plastic wrap, wrap and chill until firm (around 1 – 2 hours).

Roll to ¼” thickness on well-floured surface. Cut with cookie cutters and place on lined cookie sheets. Chill for a further 30 minutes and bake at 375° for 8-10 min. Do not allow cookies to brown. Cookies should not brown.

Royal Icing
4 cups icing (powdered/confectioners) sugar, sifted
2 tablespoons meringue powder
5 tablespoons water

Combine all ingredients in the bowl of a stand mixer fitted with the paddle attachment.  Mix on low speed until the sheen has disappeared and the icing has a matte appearance (about 7-10 minutes).  Transfer the contents of the mixing bowl to an air-tight container.  (this will be the stiffest consistency of the icing, and at this point it is still too stiff to use for decorating)

Add water a very small amount at a time and stir by hand until fully incorporated.  Continue until the icing has reached a consistency appropriate for piping.  Add colouring should you so desire and place into pastry bags fitted with piping tips.

Pipe around the edges of each cookie.  Let stand so the icing will set.  (ensure your icing is covered at all times when not in use so that it does not begin to harden)

Once all the cookies have been edged, transfer some of the remaining icing to a separate air-tight container.  Thin out a little more with water, until the icing drips off the spoon in ribbons.  If you go too far and the icing is too thin, add more sifted powdered sugar to thicken it again.  Using a piping bag and tips (or a squeeze bottle), flood the area surrounded by the piping on each cookie.  If it does not completely spread to the edges, use a toothpick to help it along.  Allow to set.

You can continue to decorate using the remainder of the icing and edible decorations.

Notes: Gosh, where do I begin…

*In my opinion, the most important thing is time – make sure you have lots of it and are not rushed. I actually find that making the cookies and icing them in the same day is too draining/annoying, so I make them the day before and store them in an airtight container until the following day when I tackle the icing.

*the cookie dough has a tendancy to rapidly warm after you cut out the first batch so you may need to chill it again before re-rolling it for the second cut – this process can double the time it takes to make your cookies but chilling the dough in the freezer will speed things up a little.

*Do not miss the final chilling of the cookies before you place them in the oven – this process will ensure the cookies hold their shape.

*If you are new to using icing tips and icing bags, don’t get your knickers in a knot when things do not turn out as you had planned – it’s all about practice and often I find that it’s my very last cookies that look good because it has taken that long for me to get used to handling the icing bag. (I don’t make them that often)

*My current bain with sugar cookies is air bubbles. After I mix the colours through the icing I bang the container on the counter top several times (actually about 20) until I can see no more air bubbles rising to the surface. (as you can see by my pictures, I haven’t yet mastered this but hopefully next time)

*The iced cookies should be left out for around 12 hours to properly harden, then pack then in an air tight container, layered between parchment paper to protect them. Do NOT refrigerate them.

*Sugar cookies are also a fun project for children. My advice is to make the cookies beforehand and have them ready to decorate with several bags of coloured icing and edible decorations. I have done with with my daughters before – the mess was incredible but they had fun and that is the main thing.

Posted in Biscuits/Cookies/Slices/Bars, Childrens Parties, Morning Teas/High Teas | 2 Comments